11
6

Delete article

Deleted articles cannot be recovered.

Draft of this article would be also deleted.

Are you sure you want to delete this article?

More than 5 years have passed since last update.

Elastic Beanstalkのサーバーにお名前.comで取得した独自ドメインを割り当てる

Posted at

Route 53

Elastic BeanstalkはEBと略します。

  • サービスからRoute 53を選択
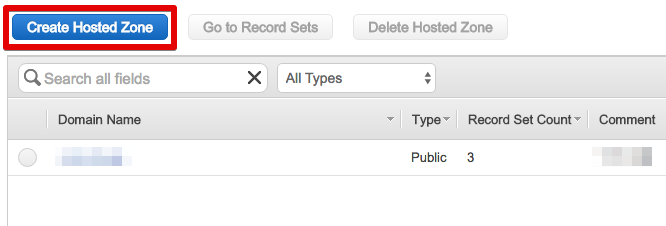
  • Create Hosted Zoneボタンを押す

01.png

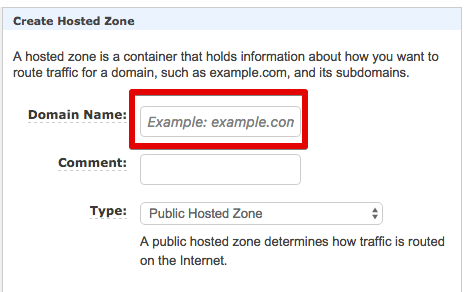
  • 以下の表示がされるので、Domain Nameに、example.jpなど独自ドメインを入れて、Createを押す

02.png

  • NS(ネームサーバー)のアドレス4つをテキストエディタなどにコピペしておく

03.png

  • Create Record Setボタンを押す
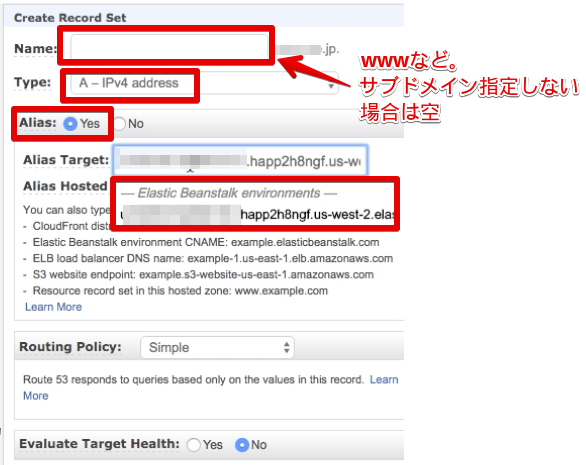
  • 以下の表示がされるので、必要な情報を入れてCreateを押す
    • Type: A - IPv4 address もしくは iPV6 address
    • Alias: Yes
    • Alias Hostedを選択するとプルダウン表示されるので、そこからEBのデフォルトのホスト名を選択

04.png

お名前.com

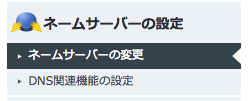
  • ドメイン設定のネームサーバー変更を選択

05.png

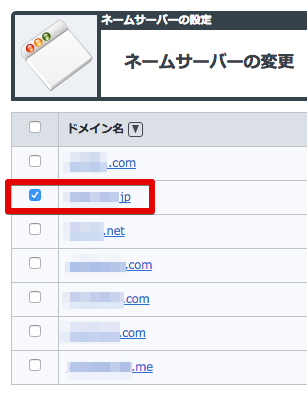
  • EBに割り当てたいドメインにチェックを入れる。

06.png

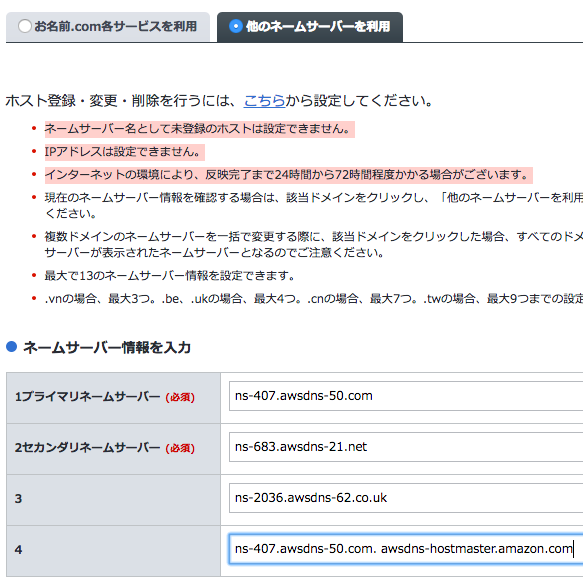
  • 他のネームサーバーの利用を選択して、Route 53で控えたネームサーバーのアドレス4つを入れて確認画面へ進むを押して保存する

07.png

あとは

果報は寝て待て。数時間後には独自ドメインでアクセスできるようになるはずです。
11
6
0

Register as a new user and use Qiita more conveniently

  1. You get articles that match your needs
  2. You can efficiently read back useful information
  3. You can use dark theme
What you can do with signing up
11
6

Delete article

Deleted articles cannot be recovered.

Draft of this article would be also deleted.

Are you sure you want to delete this article?