はじめに
IBM API Connectはエンタープライズ向けAPI管理製品です。
Instanaはシステムの可観測性のための自動化された可観測性基盤製品です。
API ConnectをInstanaで監視するための基本的な構成を行います。
前提・環境
- Red Hat OpenShift Kubernetes Service 4.10(IBM CloudのROKSを利用)
- API Connect v10.0.5.0 (Cloud Pak for Integrationを利用)
- SaaS版のInstana(社内用なので、もしかすると一般向けと画面が異なるところなどあるかもしれません)
今回は、IBM TechZoneからIBM Cloudに検証環境を払い出しています。TechZoneはIBM Solutionのトライアル環境で、利用方法は参考リンクをご参照ください。
API ConnectはCloud Pak for Integration(CP4I)に含まれるため、該当環境を払い出しますが、払い出し方法詳細は本記事の主旨ではないため割愛します(また別途書くかもしれません)。
TL;DR
- ROKSクラスターにInstanaのAgentを導入
- API Connect用にAutoTrace Webhookを導入
- 開発者ポータル用にDrupalのInstanaモジュールを有効化
- Instanaのダッシュボードを構成
詳細手順
-
ROKSクラスターにInstanaのAgentを導入します。Operatorも利用可能ですが、今回はHelm使用してみました。Operatorの場合は参考リンクをご参照ください。
1-1. OpenShiftクラスターにログインしておきます。tokenとserverはお使いの環境に合わせて指定します。oc login --token=sha256~xxxx --server=https://xxx:yyy1-2. Instana Agent用のProjectを作成します。
oc new-project instana-agent
Now using project "instana-agent" on server xxx
(省略)
1-3. Security Context Constraintの設定でinstana-agentのサービスアカウントにpriviledged権限を付与します。
$ oc adm policy add-scc-to-user privileged -z instana-agent -n instana-agent
clusterrole.rbac.authorization.k8s.io/system:openshift:scc:privileged added: "instana-agent"
1-4. Instana Agentを導入します。keyとendpointHostとcluster.nameはお使いの環境に合わせて指定します。InstanaダッシュボードのInstalling Instana AgentsでOpenShiftを選択するとコマンド引数及びkeyなどの情報が入手できるので基本的にこちらからコピーします。

$ helm install instana-agent --namespace instana-agent --repo https://agents.instana.io/helm --set openshift=true --set agent.key=xxxx --set agent.endpointHost=xxxx-saas.instana.io --set cluster.name=xxxx instana-agent
NAME: instana-agent
LAST DEPLOYED: Wed Nov 16 11:44:22 2022
NAMESPACE: instana-agent
STATUS: deployed
REVISION: 1
TEST SUITE: None
(省略)
1-5. Instana Agentが起動していることを確認します。
$ oc get all -n instana-agent NAME READY STATUS RESTARTS AGE pod/instana-agent-mj9mf 2/2 Running 0 4h14m pod/instana-agent-w8wxm 2/2 Running 0 4h14m pod/instana-agent-wb7jz 2/2 Running 0 4h14m pod/instana-agent-wbdkc 2/2 Running 0 4h14m pod/instana-agent-wq2w4 2/2 Running 0 4h14m NAME DESIRED CURRENT READY UP-TO-DATE AVAILABLE NODE SELECTOR AGE daemonset.apps/instana-agent 5 5 5 5 5 <none> 4h14m -
AutoTrace Webhookを導入
2-1. 同様にHelmで導入。passwordはお使いの環境に合わせて、上述のダッシュボードに記載されているdownloadKeyを指定します。$ helm install --create-namespace --namespace instana-autotrace-webhook instana-autotrace-webhook --repo https://agents.instana.io/helm instana-autotrace-webhook --set webhook.imagePullCredentials.password=xxx --set openshift.enabled=true NAME: instana-autotrace-webhook LAST DEPLOYED: Wed Nov 16 18:38:46 2022 NAMESPACE: instana-autotrace-webhook STATUS: deployed REVISION: 1 TEST SUITE: None NOTES: The Instana AutoTrace WebHook is installed. (省略)2-2. AutoTrace Webhookが導入されたことを確認します。
$ oc get pods -n instana-autotrace-webhook NAME READY STATUS RESTARTS AGE instana-autotrace-webhook-859fb8fb57-nh9wp 1/1 Running 0 64s -
API Connect関連のDeploymentをリスタート
3-1.以下のDeploymentをリスタートします。$ oc rollout restart deployment/apic-insta-11cf53f-analytics-proxy -n cp4i deployment.apps/apic-insta-11cf53f-analytics-proxy restarted $ oc rollout restart deployment/apic-insta-11cf53f-apim -n cp4i deployment.apps/apic-insta-11cf53f-apim restarted $ oc rollout restart deployment/apic-insta-11cf53f-juhu -n cp4i deployment.apps/apic-insta-11cf53f-juhu restarted $ oc rollout restart deployment/apic-insta-11cf53f-ldap -n cp4i deployment.apps/apic-insta-11cf53f-ldap restarted $ oc rollout restart deployment/apic-insta-11cf53f-lur -n cp4i deployment.apps/apic-insta-11cf53f-lur restarted $ oc rollout restart deployment/apic-insta-11cf53f-portal-proxy -n cp4i deployment.apps/apic-insta-11cf53f-portal-proxy restarted $ oc rollout restart deployment/apic-insta-11cf53f-taskmanager -n cp4i deployment.apps/apic-insta-11cf53f-taskmanager restarted $ oc rollout restart deployment/apic-insta-11cf53f-ui -n cp4i deployment.apps/apic-insta-11cf53f-ui restarted3-2. APIC関連PodにAutoTrace Webhookが反映されTrueが返ることを確認します。
$ oc get pods apic-instana-mgmt-apim-77b9f74dbd-5tfpr -n cp4i -o jsonpath='{.metadata.labels.instana-autotrace-applied}' true -
Instanaのダッシュボードを構成(Application)
4-1. Applicationから「New Application Perspective」をクリックします。

4-2. 今回はOpenShift環境なので、Kubernetes or Containerを選択します。
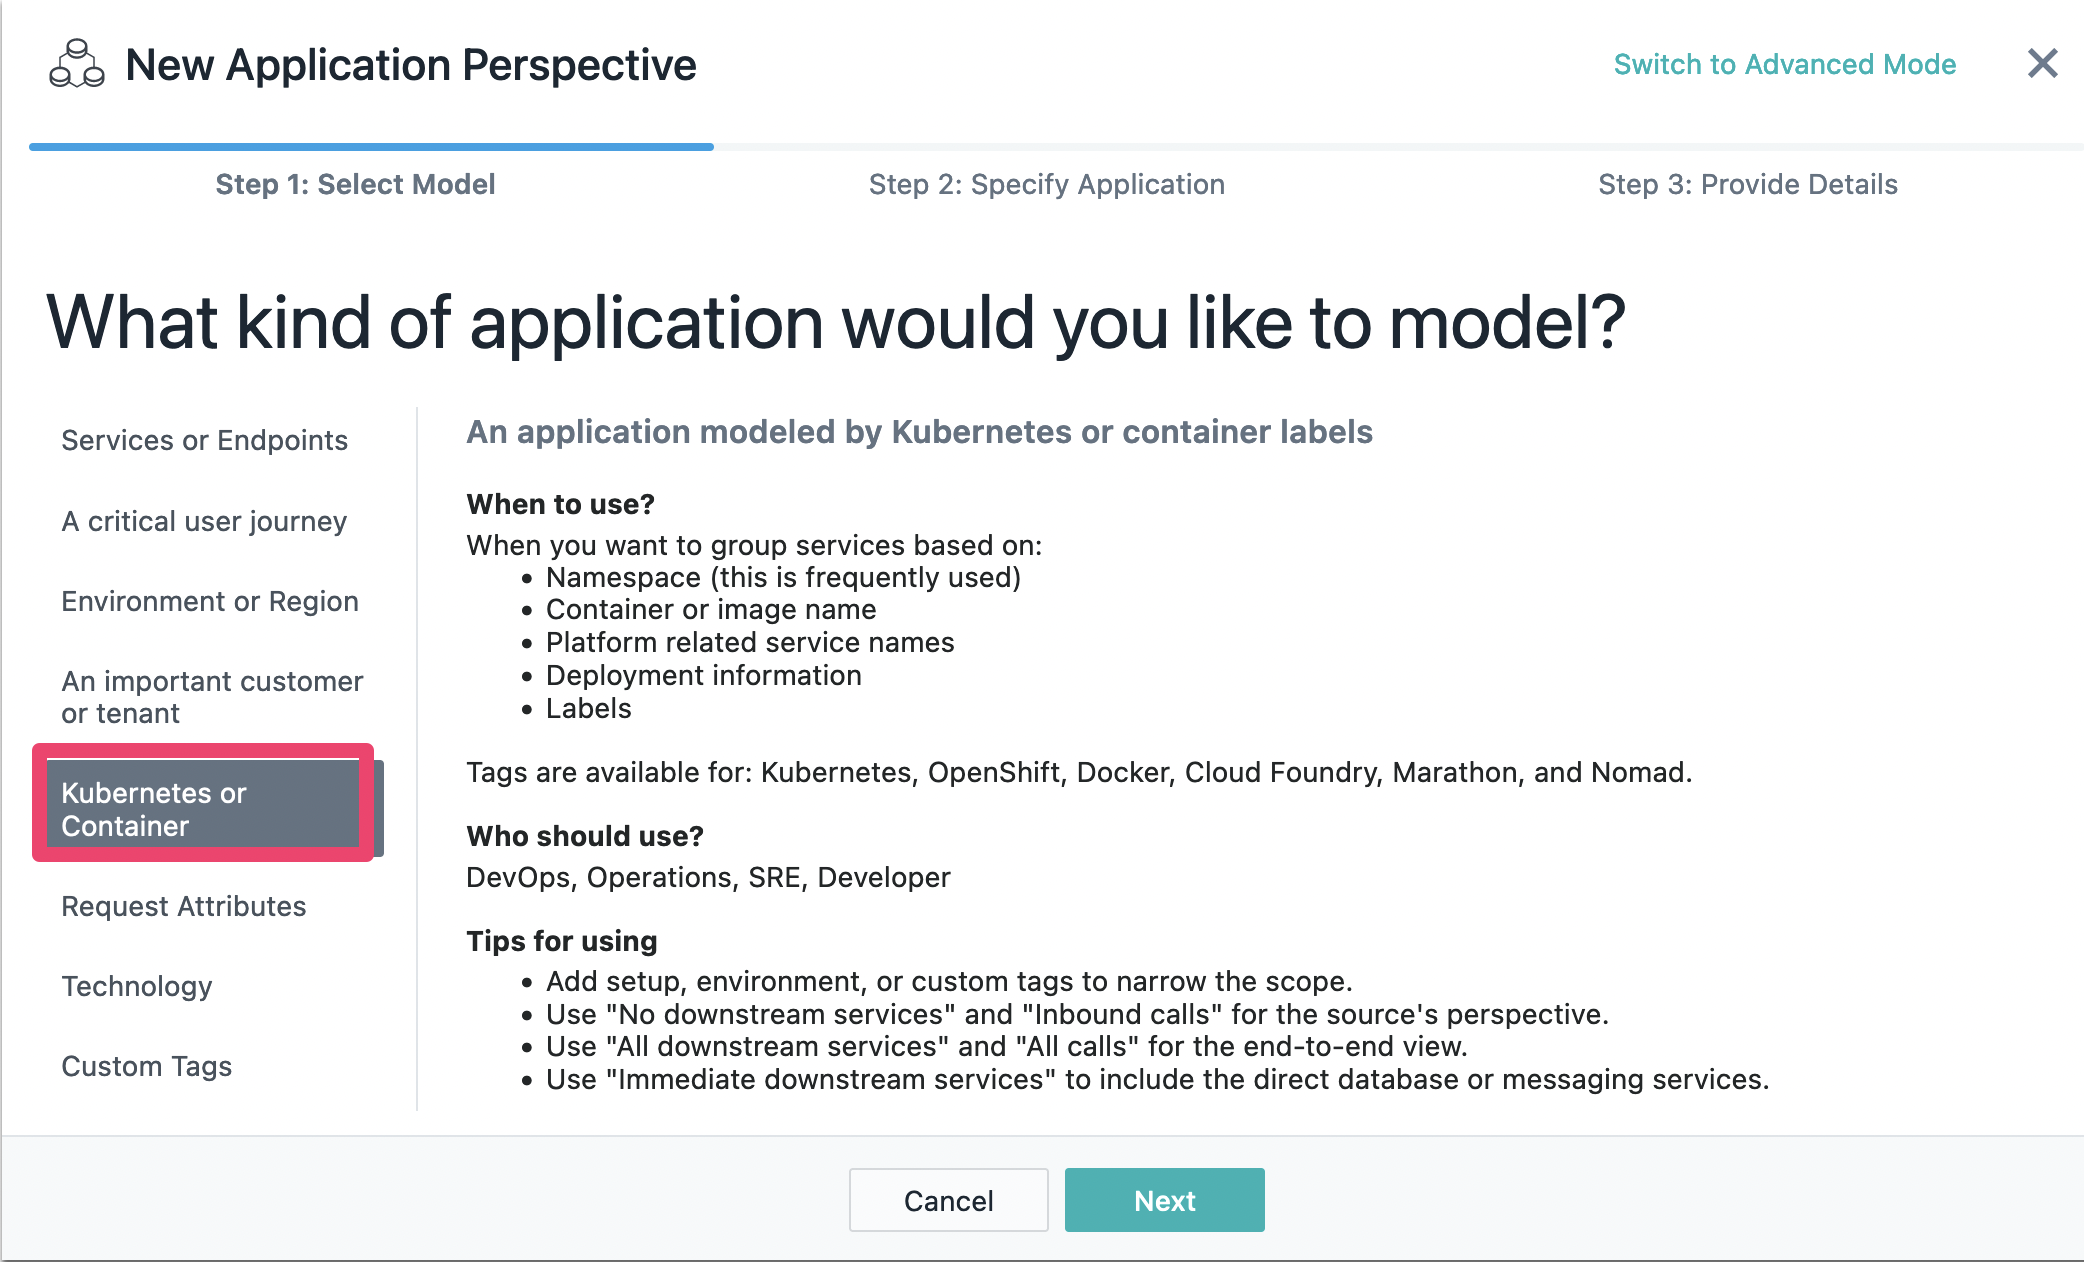
4-3. クラスター名などでフィルターします。

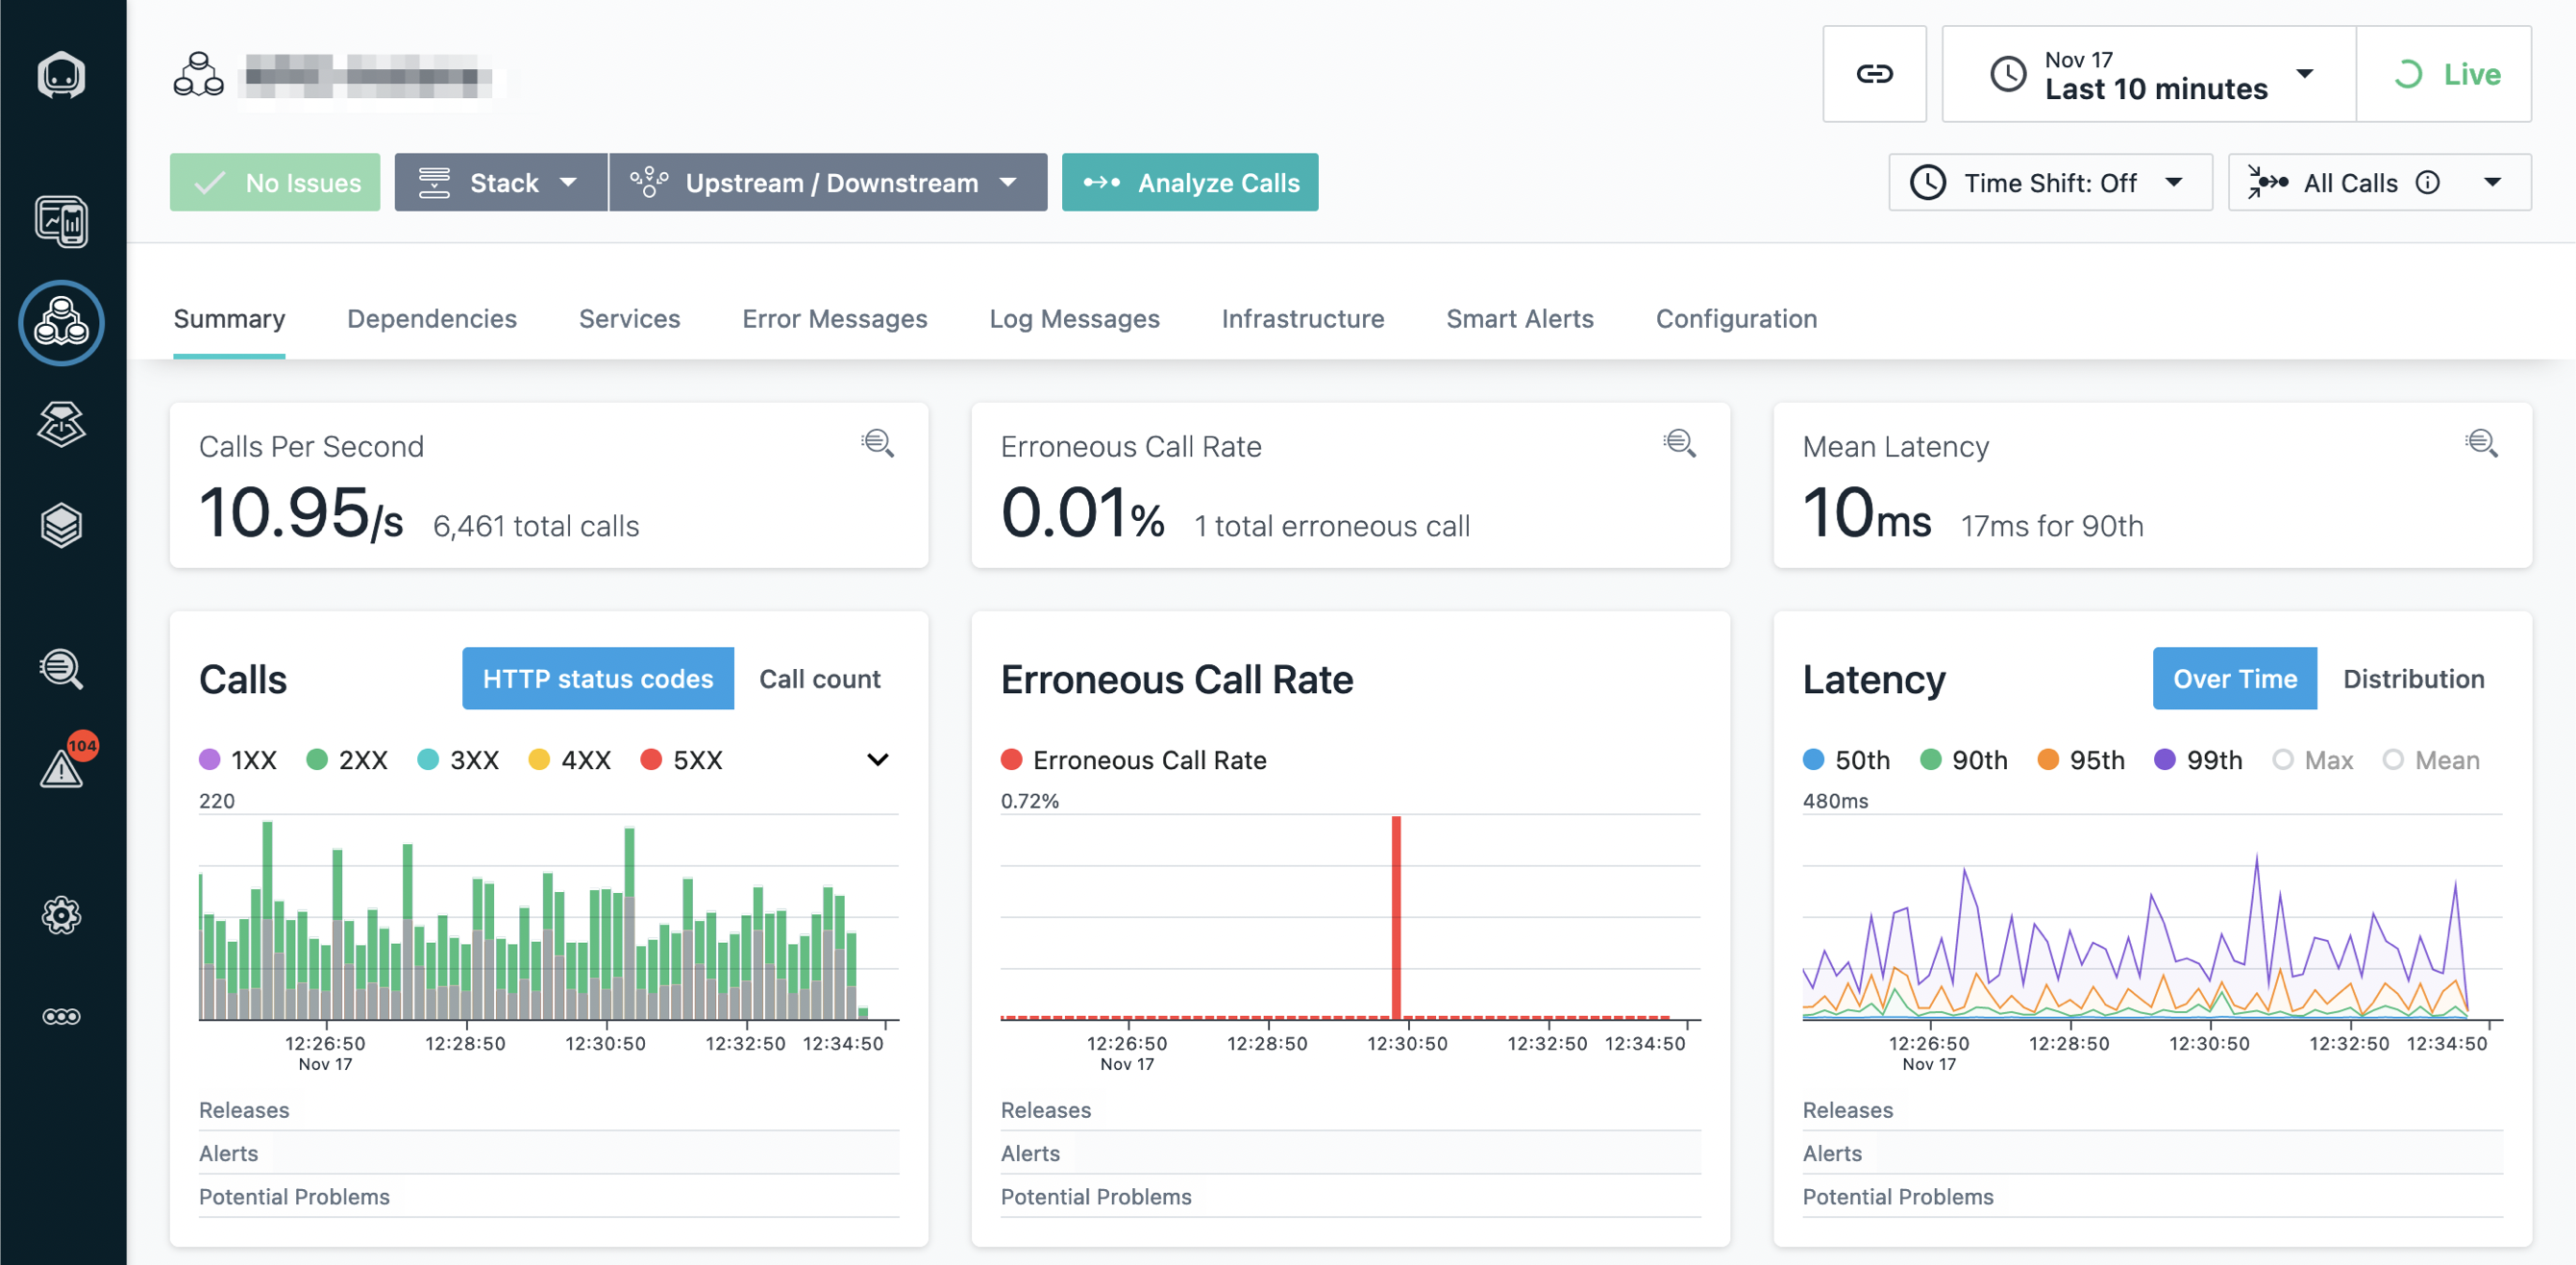
4-4. Perspective名をつけ、今回はAll Callsを選択して内部間通信も監視対象にして、Createします。

4-5.ダッシュボードが完成です。
-
次にAPI Connect提供の開発者ポータルサイトも監視対象にします。開発者ポータルはDrupalベースで、Instanaモジュールが提供されているので有効化します。
5-1. 開発者ポータルにadminでログインしておきます。
5-2. ExtendメニューからモジュールのListを出すと、以下のようにInstana EUMモジュールが見つかるので、チェックを入れて下にあるEnableボタンをクリックします。


5-3.しばらく時間がかかりますが、以下のように成功メッセージが出ます。


5-4. InstanaからWebsiteを追加して接続情報のreportingUrlとkeyを入手します。


5-5. モジュールにInstanaの接続設定を入れて保存します。


-
開発者ポータルサイト監視用のInstanaのダッシュボードが完成です。
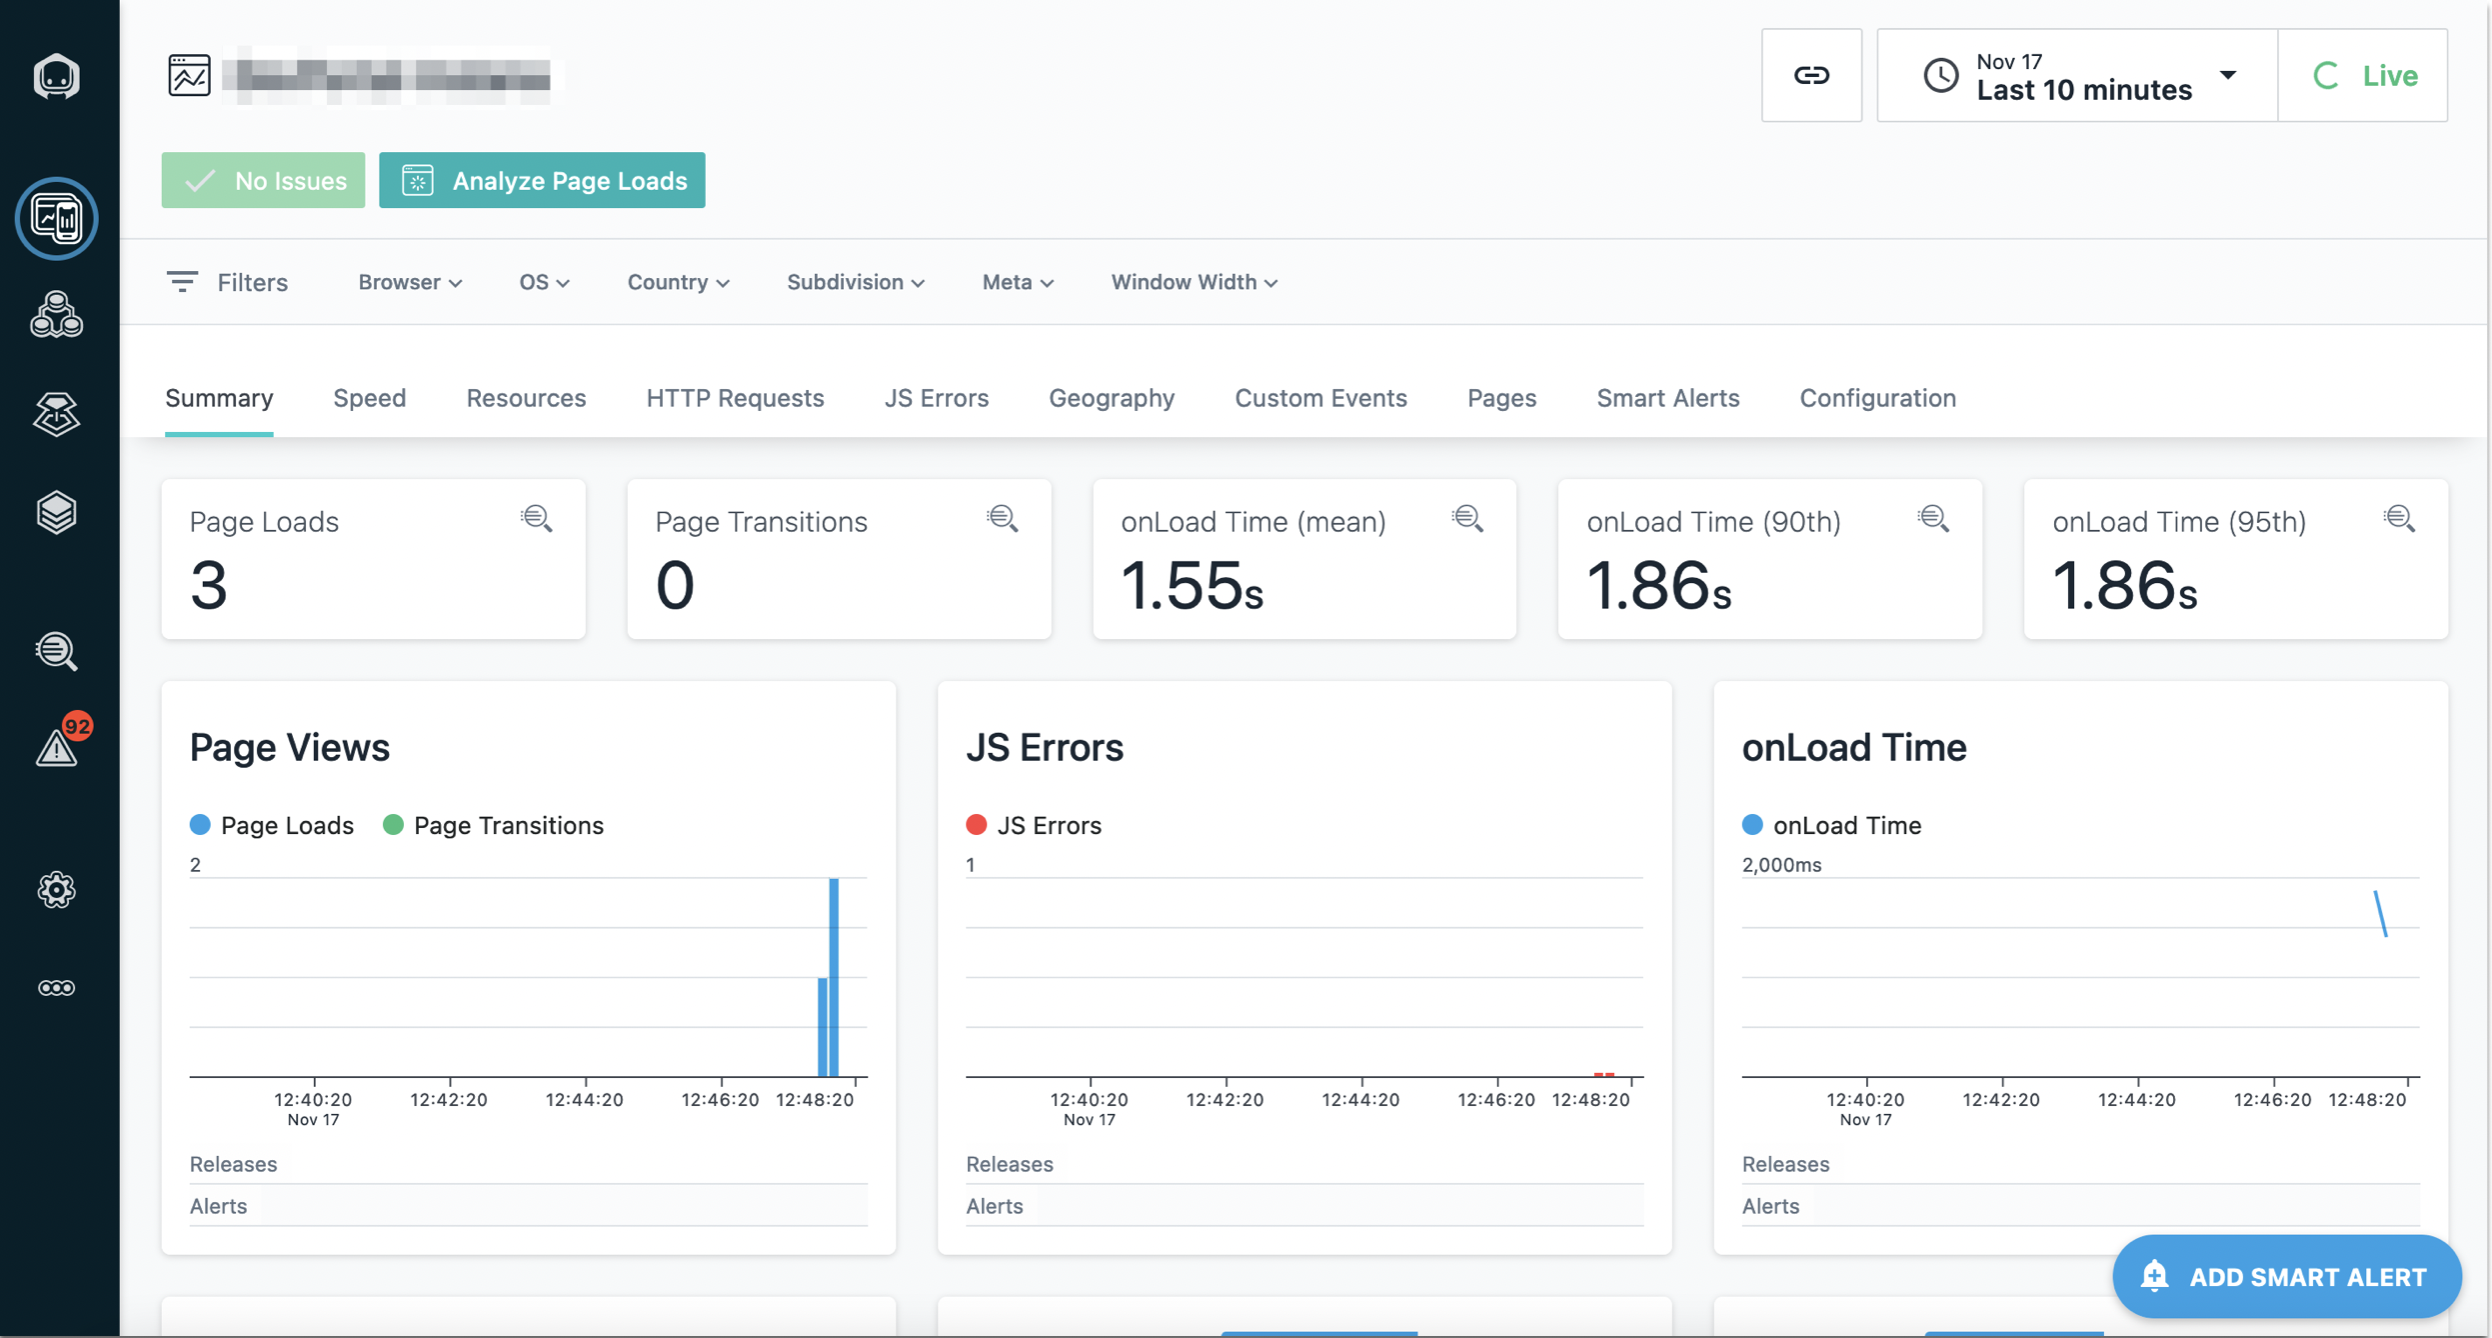
以上でAPI Connect環境をInstanaで監視するための基本設定を行いました。
参考
- https://qiita.com/norikokt/items/c02b0a5f5591acb88092
- https://qiita.com/norikokt/items/a41447befe48e51d6ba6
- https://qiita.com/M_Beach/items/37eb0eec0f9e2ab81ca8
- https://github.com/ibm-apiconnect/devportal/tree/master/instana_eum
- https://community.ibm.com/community/user/integration/blogs/chris-dudley1/2021/10/20/monitor-your-developer-portal-with-instana
- https://www.ibm.com/docs/en/instana-observability/current?topic=technologies-monitoring-api-connect
- https://www.ibm.com/docs/en/instana-observability/current?topic=requirements-installing-host-agent-kubernetes#install-by-using-the-helm-chart