Cocos Creatorからサーバーに接続する
Socket.ioを導入しスクリプトを準備する
- VS CodeのターミナルでNewProjectへ移動する
- socket.io-clientをインストールする
npm install socket.io-client - assets/scriptsディレクトリに
NetworkManager.tsを作る
NetworkManager.ts
import { _decorator, Component, log } from 'cc';
import io from 'socket.io-client/dist/socket.io.js';

const { ccclass, property } = _decorator;

@ccclass('NetworkManager')
export class NetworkManager extends Component {
    private static _instance: NetworkManager = null;
    private socket: any = null;

    public static get instance() {
        return this._instance;
    }

    onLoad() {
        NetworkManager._instance = this;
        log("NetworkManagerが起動しました");

        try {
            this.socket = io('http://localhost:3000');
            this.socket.on('connect', () => {
                log('ID:', this.socket.id);
            });
        } catch (e) {
            log("接続エラー:", e);
        }
    }

    public sendLoginRequest(username: string) {
        if (this.socket) {
            this.socket.emit('login_request', { username: username });
        } else {
            log("エラー: サーバーと接続できていません");
        }
    }
}
ボタンとスクリプトを紐づける
- assets/scriptsディレクトリに
LoginUI.tsを作る
LoginUI.ts
import { _decorator, Component, EditBox, log } from 'cc';
import { NetworkManager } from './NetworkManager';

const { ccclass, property } = _decorator;

@ccclass('LoginUI')
export class LoginUI extends Component {
    @property(EditBox)
    usernameEditBox: EditBox = null;

    public onLoginButtonClick() {
        const username = this.usernameEditBox.string;

        if (username.length > 0) {
            log("サーバーへ送信します:", username);
            // NetworkManagerを通じてサーバーに名前を飛ばす!
            NetworkManager.instance.sendLoginRequest(username);
        } else {
            log("名前を入力してください");
        }
    }
}
- Cocos CreatorのMenuSceneを選択する
- ヒエラルキーパネルのSceneRootを右クリック→Create→Empty Nodeを選択する
- NetworkManagerにリネームする
- NetworkManager.tsをドラッグ&ドロップする
- AuthPopupを選択し、インスペクターの空き部分にLoginUI.tsをドラッグ&ドロップする

- ヒエラルキーパネルのEditBoxをインスペクターのLoginUI内のEditBoxにドラッグ&ドロップする
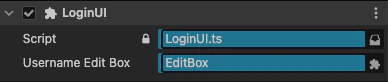
※スクリプトとノードの紐づけが行われる - LoginButtonのインスペクターのClick Eventsを1にする
- AuthPanelをドラッグ&ドロップするし、LoginUI、onLoginButtonClickを指定する

動作確認をする
- VS Codeのターミナルでgame-serverに移動する
- サーバーを起動する
node index.js - CocosCreatorでMenuSceneを起動する
- 任意の名前を入力して、ログインボタンを押す
- ターミナルに
新規ユーザー登録: てすとと表示されればOK
まとめ
サーバーに情報を送るところまでができました。
あとは、サーバーから受け取るところとエラーハンドリングを作れば通信周りは完了です。
追々、username以外もおくるようになるので、PacketTypeだったりを設定して切り分けていきます。