タイトルからログインまでの遷移を整える
ポップアップを初回は非表示にする
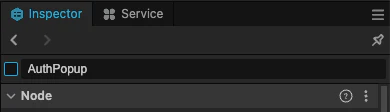
- MenuSceneを選択する
- ヒエラルキーパネルの
AuthPopupを選択する - インスペクターの上部の
AuthPopupと書かれたチェックボックスを外す
MenuSceneにログインボタンを配置する
- MenuSceneを選択する
- ヒエラルキーパネルの
StartButtonを右クリック→Duplicateで複製する -
LoginButtonにリネームする - 子ノードのLabelを選択
- インスペクターのstringを
LOGINに置き換える - 位置を
GAME STARTの上に調整する

MenuSceneにログイン中のユーザー名を表示する
- MenuSceneを選択する
- Canvasを右クリック→Create→Labelを選択する
-
LoginUserLabelにリネームする - 文字色を黒に変更する
- LoginButtonの上に位置を調整する

- stringを空に置き換える
ログインボタンでポップアップを開く
- assets/scriptに
MenuManager.tsを作成する - コードを記載する
MenuManager.ts
import { _decorator, Component, Node } from 'cc'; const { ccclass, property } = _decorator; @ccclass('MenuManager') export class MenuManager extends Component { @property(Node) authPopup: Node = null; public openAuthPopup() { if (this.authPopup) { this.authPopup.active = true; } } public closeAuthPopup() { if (this.authPopup) { this.authPopup.active = false; } } } - CanvasにMenuManager.tsをアタッチする
- インスペクタの
Auth PopupとLogin User Labelにヒエラルキーパネルからドラッグ&ドロップする

- LoiginButtonを選択する
- Click Eventsを1にする
- Canvasをドラッグ&ドロップし、各項目を画像のように指定する

ログインが完了したポップアップを閉じるようにする
- LoginUI.tsに追記する
LoginUI.ts
import { _decorator, Component, EditBox, Label, log, Color } from 'cc'; import { NetworkManager } from './NetworkManager'; import { MenuManager } from './MenuManager'; // 追記 // ... @property(Label) loginUserLabel: Label = null; // 追記 -ここから- @property(MenuManager) menuManager: MenuManager = null; // 追記 -ここまで- // ... if (data.success) { this.statusLabel.string = data.message; this.statusLabel.color = Color.GREEN; this.loginUserLabel.string = `ユーザー名: ${data.userData.username}`; this.usernameEditBox.string = ""; // 追記 -ここから- if (this.menuManager) { this.menuManager.updateLoginStatus(data.userData.username); } this.scheduleOnce(() => { this.node.active = false; }, 0.5); // 追記 -ここまで- - AuthPopupを選択する
- インスペクターの
Menu ManagerにCanvasをドラッグ&ドロップする
まとめ
TitleSceneから実行して、ログインを試してみてポップアップが閉じた後にユーザー名が表示されていたら完了です。