はじめに
前回記事↓の続きです。
WebVRで、選択すると★エフェクトが出るオブジェクトを配置する A-Frame連載(3)
A-Frameを使い3D空間に選択できるオブジェクトを配置し★エフェクトを出したので、音を出してみましょう。
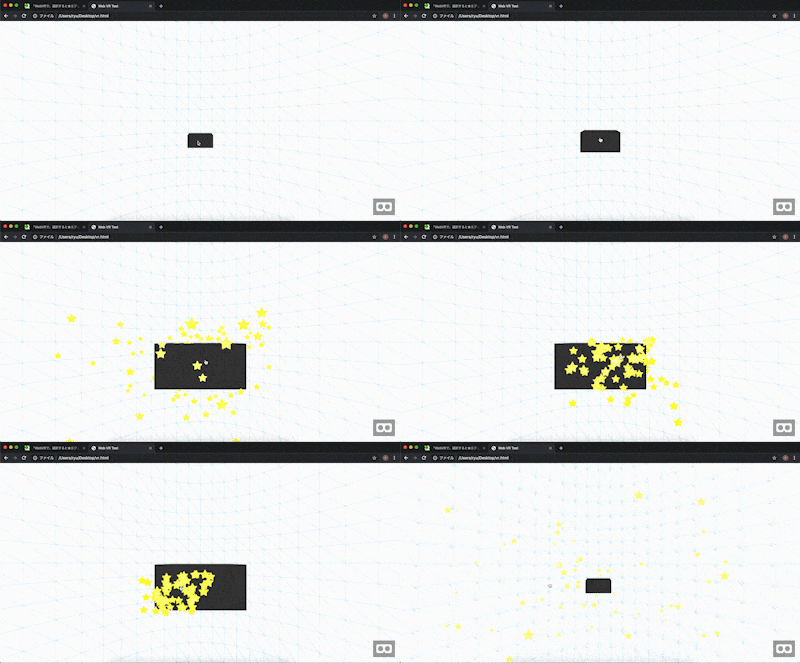
完成図
※前回と同じ動画です。
※上の完成図はアニメーションGIFなので音は出ません。
※A-Frameの仕様上、ローカルだと画像や音を読み込めないです。そのため、ローカルで動かしている完成図は実際音は出ていないです。
ソースコード全文
<html>
  <head>
    <meta name="viewport" content="width=device-width,initial-scale=1">
    <title>Web VR Test</title>
    <script src="https://aframe.io/releases/0.9.2/aframe.min.js"></script>
    <script src="https://unpkg.com/aframe-particle-system-component@1.0.x/dist/aframe-particle-system-component.min.js"></script>
    <script>
      AFRAME.registerComponent('collide', {
        init: function() {
          this.interactiveAnimations();
          this.el.addEventListener('click', this.onClick);
        },
        interactiveAnimations: function() {
          this.el.setAttribute('animation__mouseenter', 'property: scale; to: 1.5 1.5 1.5; startEvents: mouseenter; dur: 200');
          this.el.setAttribute('animation__mouseleave', 'property: scale; to: 1 1 1; startEvents: mouseleave; dur: 200');
          this.el.setAttribute('animation__click', 'property: scale; to: 3 3 3; startEvents: click; dur:200');
        },
        onClick: function(e) {
          var createEffect = function(point, particleAge) {
            var pointStr = point.x + ' ' + point.y + ' ' + point.z;
            var effect = document.createElement('a-entity');
            effect.setAttribute('position', pointStr);
            effect.setAttribute('raycaster', 'enabled: false');
            effect.setAttribute('particle-system', 'color: #ff0, #ff9;maxParticleCount: 100;maxAge: ' + (particleAge / 1000) + ';velocityValue:0 -1 0; accelerationValue: 0 0.5 0; duration: 1;');
            effect.setAttribute('sound', 'src: #decision; autoplay: true');
            return effect;
          };
          var point = e.detail.intersection.point;
          var particleAge = 1500;
          var effect = createEffect(point, particleAge);
          var scene = document.querySelector('a-scene');
          scene.appendChild(effect);
          setTimeout(function() {
            scene.removeChild(effect);
          }, particleAge);
        }
      });
    </script>
  </head>
  <body>
    <a-scene>
      <a-assets>
        <audio src="./decision.mp3" id="decision"></audio>
      </a-assets>

      <a-sky color="#a0d8ef" wireframe="true"></a-sky>
      <a-entity cursor="rayOrigin: mouse"></a-entity>
      <a-entity laser-controls="hand: right" raycaster="far: 50;"></a-entity>

      <a-box position="0 0 -10" width="2" height="1" depth="1.5" color="#333" collide></a-box>
    </a-scene>
  </body>
</html>
解説
        onClick: function(e) {
...
            effect.setAttribute('sound', 'src: #decision; autoplay: true');
...
          };
sound属性を入れてエフェクトを生成しているので、エフェクトと同座標から音が出ています。
A-Frameの凄いところは、こんな感じにオブジェクトにsound属性を入れると座標を考慮した音が出るところでしょうか。
      <a-assets>
        <audio src="./decision.mp3" id="decision"></audio>
      </a-assets>
a-assetsの中にimgやaudioタグを入れておくことで、ページ内で使うリソースを先行して読み込み(プリロード)します。するとページ内でそれらリソースを使う際にリクエストが走らず、即テクスチャや音が反映されます。
(audioのid"decision"と、js内の"src: #decision"がリンクをしています)
以上です。
A-Frame何度か連載続けてきましたが、当初書きたかったところはほぼ書けたので一旦終わります。
来週からはバックエンドをネタに定期投稿していく予定です。
