はじめに
Ajax通信の練習として、Fetch APIを使用し、OpenWeather APIへ緯度・経度をリクエストして温度と天気を取得するコードを実装しました。
備忘録としてコードの実装から考え方までまとめています。
現在学習中の方にとっても参考になると幸いです。
前提
- JavaScript(DOM操作 / try-catch / async/await)
- Open Weather API
- Postman
実装したコード
フォームの「緯度」「経度」の中に数字を入れて「天気情報を取得する」ボタンを押すと、「天気」と「気温」が表示されるように実装しています。
const apiKey = "取得したAPIキーを入力";
const apiUrl = "https://api.openweathermap.org/data/2.5/weather?";

async function openWeather(latitude, longitude) {
  const url = `${apiUrl}lat=${latitude}&lon=${longitude}&appid=${apiKey}&units=metric&lang=ja`;

  const response = await fetch(url);
  if (!response.ok) {
    throw new Error("取得失敗");
  }

  const data = await response.json();
  return data;
}

// フォームから緯度経度をイベントで取得
async function getLatitudeLongitude(event) {
  event.preventDefault();

  // 要素の取得
  const latitudeInput = document.getElementById("latitude");
  const longitudeInput = document.getElementById("longitude");
  const weatherResult = document.getElementById("weatherResult");

  weatherResult.innerHTML = ""

  // 要素の作成
  const tmpP = document.createElement("p");
  const weatherP = document.createElement("p");

  try {
    const data = await openWeather(
      latitudeInput.value,
      longitudeInput.value
    );

    weatherP.innerHTML = `天気: ${data.weather[0].description}`
    tmpP.innerHTML = `気温: ${data.main.temp}℃`;

  } catch (error) {
    weatherP.innerHTML = `天気情報の取得に失敗しました。`
    tmpP.innerHTML = "気温情報の取得に失敗しました。";
  }

  weatherResult.append(tmpP, weatherP)

  // 緯度経度の値を空にする
  latitudeInput.value = ''
  longitudeInput.value = ''
}

// weatherForm取得
const weatherForm = document.getElementById('weatherForm');
// submitイベント実行
weatherForm.addEventListener('submit', getLatitudeLongitude)
HTML
<!DOCTYPE html>
<html lang="ja">

<head>
<meta charset="UTF-8">
<meta name="viewport" content="width=device-width, initial-scale=1">
<title>天気予報アプリ</title>
<link rel="stylesheet" type="text/css" href="style.css">
</head>

<body>
<h1>天気予報</h1>
<form id="weatherForm">
  <label for="latitude">緯度:</label>
  <input type="text" id="latitude" name="latitude" required>
  <label for="longitude">経度:</label>
  <input type="text" id="longitude" name="longitude" required>
  <button type="submit">天気情報を取得する</button>
</form>
<div id="weatherResult"></div>
<script src="weather.js"></script>
</body>

</html>
CSS
body {
  max-width: 500px;
  margin: auto;
  padding: 20px;
}

form {
  margin-bottom: 20px;
}

label,
input {
  display: block;
  margin-bottom: 10px;
}

#weatherResult {
  padding: 10px;
}
実装の流れ
試行錯誤しましたが、次の通りに実装すると良いと感じました。
1. OpenWeather APIの登録
2. Postmanで確認
3. URL設計
4. fetch
5. responseチェック
6. DOM作成
7. 抽象化
8. try/catch
1. OpenWeather APIの登録
フリープランで問題ないので登録します。
その後、自身の「APIキー」を取得します。
OpenWeather APIとは
世界中の天気予報を取得できるAPIで、現在の天気、予報、過去の気象データなど取得可能です。他にも情報を取得できるので気になる方は調べてみてください。
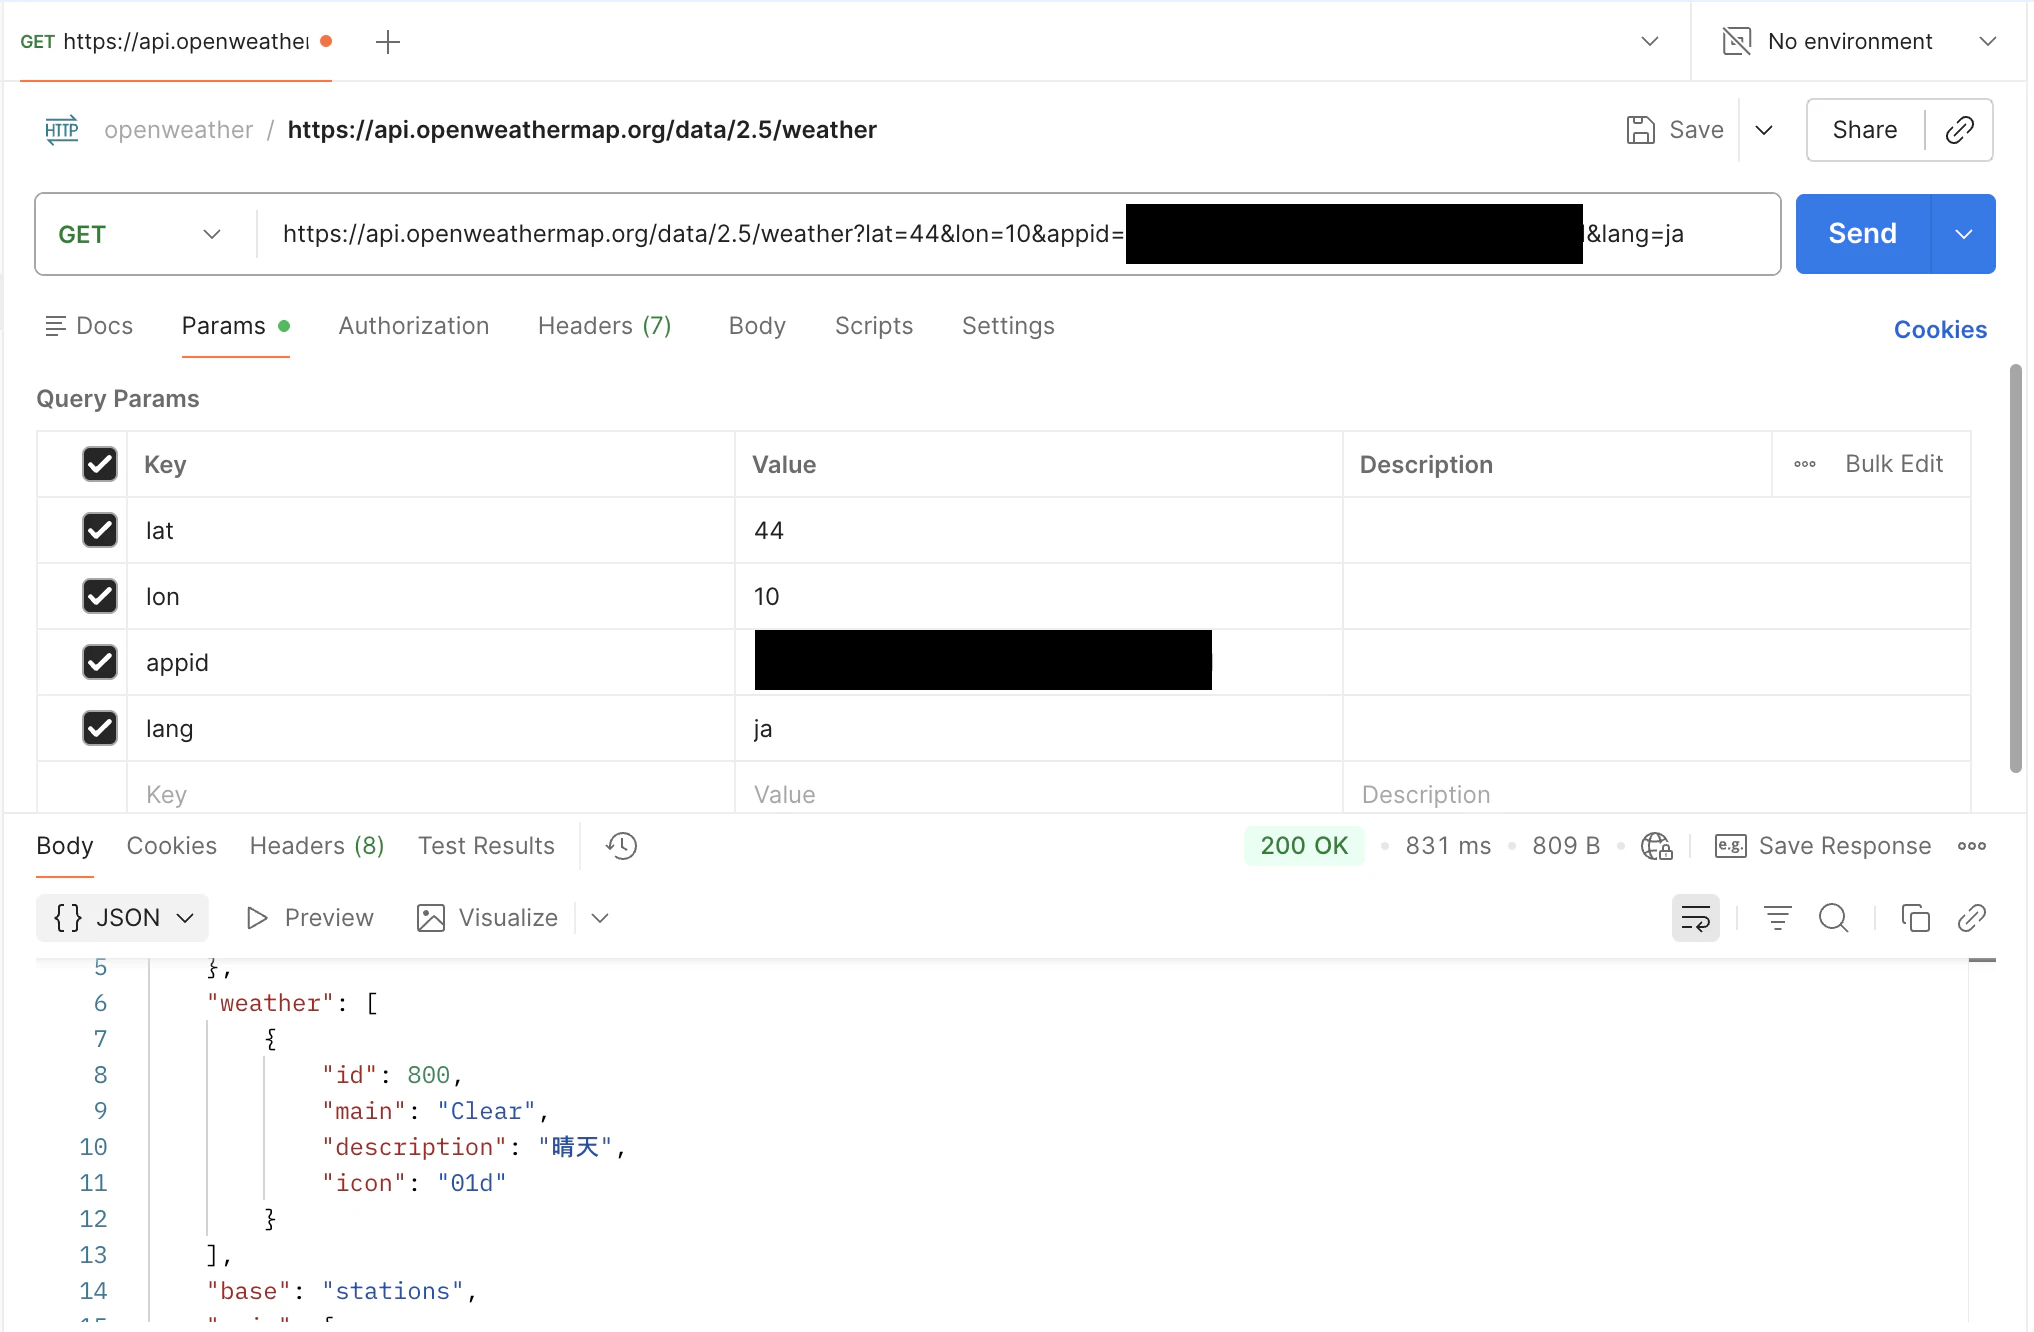
2. Postmanで確認
PostmanでOpenWeather APIへのリクエストを行い、情報が取得できるか確認します。
Postmanとは
API のリクエスト送信やレスポンス確認などを行うことができる「API 開発支援ツール」です。
私は下記のようなリクエストを送信しました。
https://api.openweathermap.org/data/2.5/weather?lat=44&lon=10&appid=`APIキー`&lang=ja
Postmanにてデータが取得できていることを確認します。
3. URL設計
リクエストするURLの設計をします。
const apiKey = "APIキー";
const apiUrl = "https://api.openweathermap.org/data/2.5/weather?";

const url = `${apiUrl}lat=${latitude}&lon=${longitude}&appid=${apiKey}&units=metric&lang=ja`;

// 確認用
console.log(url);
APIキーとURLは固定で置いておき、urlでテンプレートリテラルにて組み合わせて、リクエストするのに必要なコードをまとめています。
4. fetch
実装したurlで、fetchにてHTTPリクエストを発行します。
const url = `${apiUrl}lat=${latitude}&lon=${longitude}&appid=${apiKey}&units=metric&lang=ja`;

const response = await fetch(url);
const data = await response.json();
fetchで取得したレスポンスを、response.json()を使ってJSON形式に変換します。
※ fetchは非同期処理のため、async/awaitを使用してレスポンスを待っています。
5. responseチェック
jsonで返されるデータから必要な情報取得します。またそのデータが取得できているかチェックします。
console.log(data.weather[0].description);
console.log(data.main.temp);
欲しいデータは下記です。weather[0].descriptionとmain.tempで取得します。
"weather": [
    {
        "id": 800,
        "main": "Clear",
        "description": "晴天",
        "icon": "01d"
    }
],

"main": {
    "temp": 285.2,
    "feels_like": 284.6,
    "temp_min": 285.2,
    "temp_max": 285.2,
    "pressure": 1019,
    "humidity": 82,
    "sea_level": 1019,
    "grnd_level": 1011
},
配列操作とオブジェクト操作を理解してると必要なデータを取得できそうです。
6. DOM作成
クリックイベントを使用して画面に取得した天気情報を表示します。
const apiKey = "APIキー";
const apiUrl = "https://api.openweathermap.org/data/2.5/weather?";

// フォームから緯度経度をイベントで取得
async function getLatitudeLongitude(event) {
  event.preventDefault();

  // 要素の取得
  const latitudeInput = document.getElementById("latitude");
  const longitudeInput = document.getElementById("longitude");
  const weatherResult = document.getElementById("weatherResult");

  // 中身をリセット
  weatherResult.innerHTML = ""

  // 要素の作成
  const tmpP = document.createElement("p");
  const weatherP = document.createElement("p");

  // APIリクエスト
  const url = `${apiUrl}lat=${latitudeInput.value}&lon=${longitudeInput.value}&appid=${apiKey}&units=metric&lang=ja`;

  const response = await fetch(url);
  if (!response.ok) {
    throw new Error("取得失敗");
  }

  const data = await response.json();

  // 中身を取得した天気情報にする
  weatherP.innerHTML = `天気: ${data.weather[0].description}`
  tmpP.innerHTML = `気温: ${data.main.temp}℃`;

  weatherResult.append(tmpP, weatherP)

  // 緯度経度の値を空にする
  latitudeInput.value = ''
  longitudeInput.value = ''
}

// weatherForm取得
const weatherForm = document.getElementById('weatherForm');
// submitイベント実行
weatherForm.addEventListener('submit', getLatitudeLongitude)
7. 抽象化
処理を全てまとめているので、関数ごとに処理を分けます(抽象化)。
async function openWeather(latitude, longitude) {
  const url = `${apiUrl}lat=${latitude}&lon=${longitude}&appid=${apiKey}&units=metric&lang=ja`;

  const response = await fetch(url);
  if (!response.ok) {
    throw new Error("取得失敗");
  }

  const data = await response.json();
  return data;
}

async function getLatitudeLongitude(event) {
  event.preventDefault();

  const latitudeInput = document.getElementById("latitude");
  const longitudeInput = document.getElementById("longitude");
  const weatherResult = document.getElementById("weatherResult");

  weatherResult.innerHTML = ""

  const tmpP = document.createElement("p");
  const weatherP = document.createElement("p");

  const data = await openWeather(
    latitudeInput.value,
    longitudeInput.value
  );

  weatherP.innerHTML = `天気: ${data.weather[0].description}`
  tmpP.innerHTML = `気温: ${data.main.temp}℃`;

  weatherResult.append(tmpP, weatherP)

  latitudeInput.value = ''
  longitudeInput.value = ''
}
8. try/catch
天気情報を緯度経度から取得できなかったときに、例外としてエラーを出すようにします。
async function openWeather(latitude, longitude) {
  const url = `${apiUrl}lat=${latitude}&lon=${longitude}&appid=${apiKey}&units=metric&lang=ja`;

  const response = await fetch(url);
  if (!response.ok) {
    throw new Error("取得失敗");
  }

  const data = await response.json();
  return data;
}

// フォームから緯度経度をイベントで取得
async function getLatitudeLongitude(event) {
  event.preventDefault();

  // 要素の取得
  const latitudeInput = document.getElementById("latitude");
  const longitudeInput = document.getElementById("longitude");
  const weatherResult = document.getElementById("weatherResult");

  weatherResult.innerHTML = ""

  // 要素の作成
  const tmpP = document.createElement("p");
  const weatherP = document.createElement("p");

  try {
    const data = await openWeather(
      latitudeInput.value,
      longitudeInput.value
    );

    weatherP.innerHTML = `天気: ${data.weather[0].description}`
    tmpP.innerHTML = `気温: ${data.main.temp}℃`;

  } catch (error) {
    weatherP.innerHTML = `天気情報の取得に失敗しました。`
    tmpP.innerHTML = "気温情報の取得に失敗しました。";
  }

  weatherResult.append(tmpP, weatherP)

  // 緯度経度の値を空にする
  latitudeInput.value = ''
  longitudeInput.value = ''
}
おわりに
APIとのやりとりを実装するコードって中身がわからずブラックボックスに感じていました。ですが、一つずつ手順を分解して実装していったところ処理や手順を理解できたことで、コードの中身も徐々に理解できるようになりました。
いきなり全て実装しようとするとわからなくなるため、やるべきことをメモ書きでもいいから分解して一つずつ理解しながら実装していくことが大切だと感じました。
コード自体はまだ考慮すべきところや改善点などまだまだあると思いますが、Ajax処理を学ぶ上で非常に良い経験になりました。
参考