概要
Google Sheets APIとEmbulkを使って毎日スプレッドシートのデータをTreasureDataにアップロードすることがあったので調べた内容をメモしておく。
Google Api Credentials
Google Sheets API v4を使うので、下記の認証情報が必要となります。
・ client_id
・ client_secret
・ refresh_token
プロジェクトと認証情報(client_id, client_secret)の作成
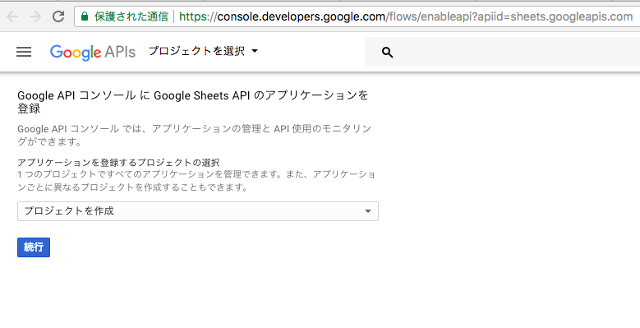
Google Sheets Api Wizard で、プロジェクトと認証情報を作成する。
「続行」をクリックする。
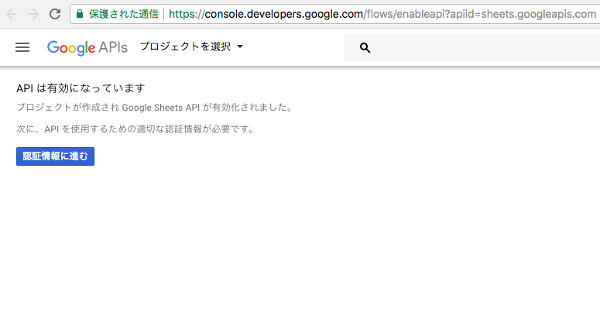
「認証情報に進む」をクリックする。
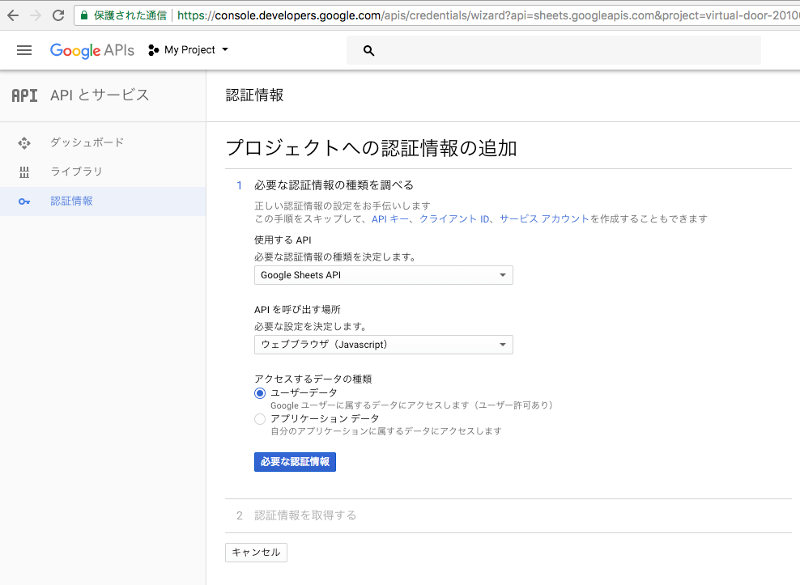
ウェブブラウザを選択して、「必要な認証情報」をクリックする。
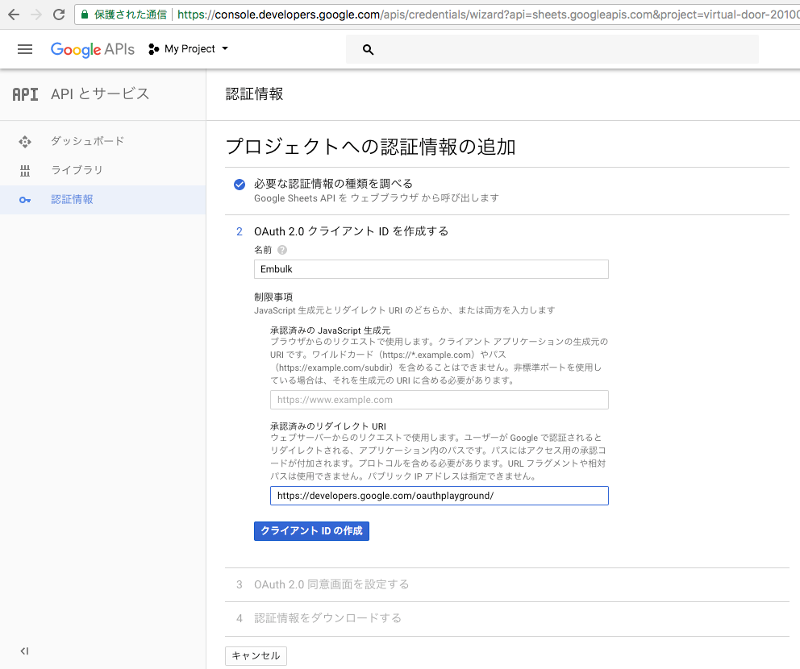
名前に「Embulk」と入力し、リダイレクトURIに下記URLを入力する。
https://developers.google.com/oauthplayground
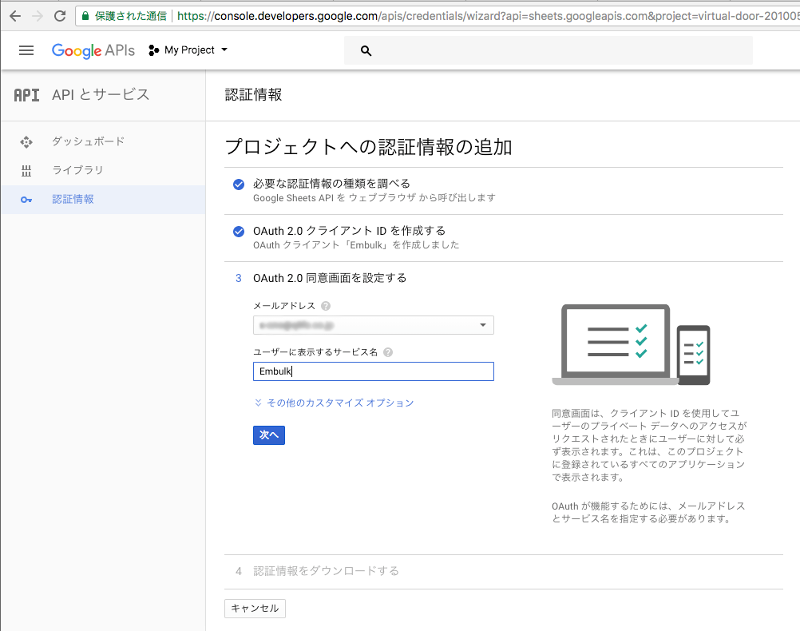
サービス名に「Embulk」と入力して「次へ」をクリックする。
「ダウンロード」ボタンから「client_id.json」をダウンロードする。

下記のようなjsonファイルがダウンロードされる。
{
    "web":{
        "client_id":"*****************.apps.googleusercontent.com",
        "project_id":"hoge-201005","auth_uri":"https://accounts.google.com/o/oauth2/auth",
        "token_uri":"https://accounts.google.com/o/oauth2/token",
        "auth_provider_x509_cert_url":"https://www.googleapis.com/oauth2/v1/certs",
        "client_secret":"*****************",
        "redirect_uris":["https://developers.google.com/oauthplayground"]
    }
}
リフレッシュトークン(refresh_token)発行
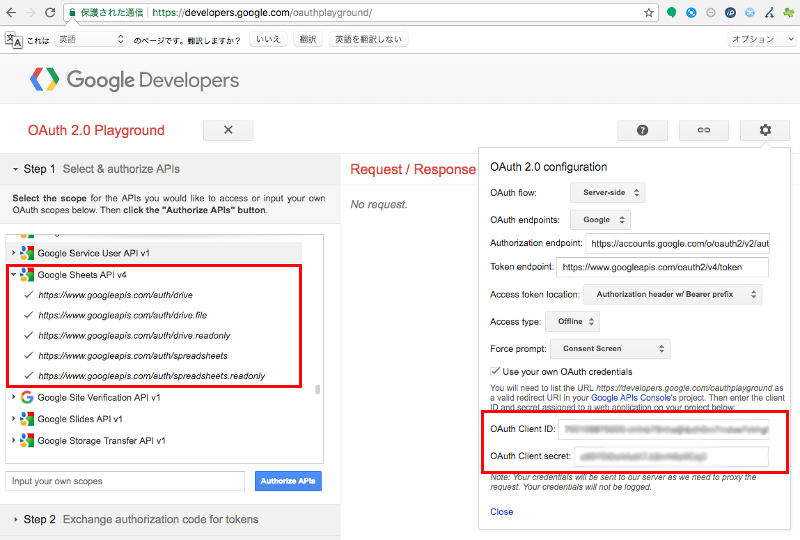
OAuth 2.0 Playground (Google Developers)でトークンを発行します。
「Client ID」と「Client Secret」を入力する。
左のメニューから「Google Sheets API v4」を選択して、「Authorize APIs」ボタンを押す。
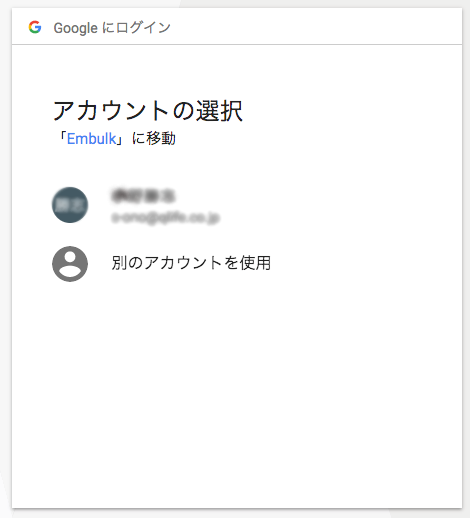
アカウントを選択して、Googleにログインする。
Googleスプレッドシートにアクセスできるよう認可を与える。
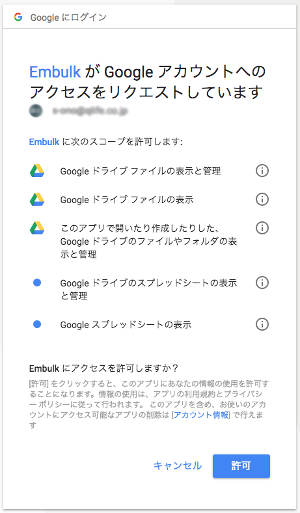
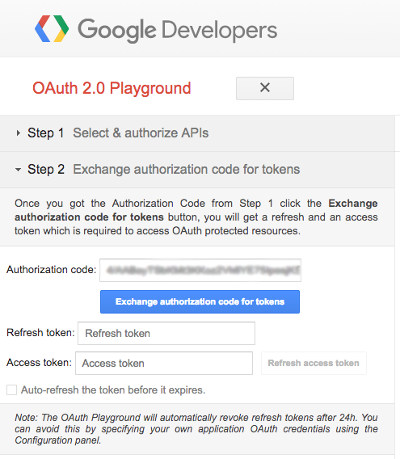
認可コードが発行されるのでそのまま「Exchange authorization code for tokens」ボタンを押す。
リフレッシュトークンが発行されます。
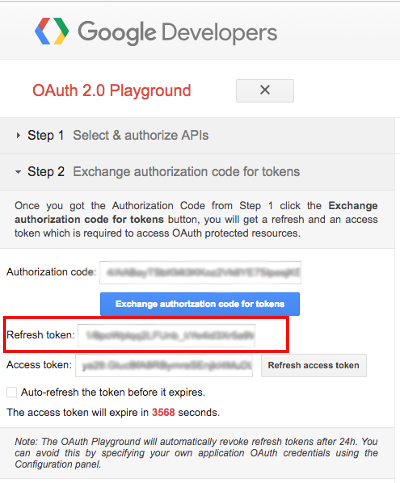
コピーして保管します。
{
  "access_token": "*****************",
  "token_type": "Bearer",
  "expires_in": 3600,
  "refresh_token": "1/8******************************"
}
これで必要となる3つの認証情報が揃いました。
プラグインをインストール(Embulk)
Embulkで必要となるプラグインをbundleで管理します。
/root/opt/
  └ bundle
     ├ .gitignore
     ├ Gemfile
     └ Gemfile.lock  ※ 「bundle install」コマンドで作成される
*
!.gitignore
!Gemfile
!Gemfile.lock
source 'https://rubygems.org/'
gem 'embulk', '~> 0.8.0'
gem 'embulk-output-td'
gem 'embulk-input-google_spreadsheets'
下記コマンドでプラグインをインストールする。
$ cd /root/opt/bundle
$ embulk bundle install --path=vendor/bundle
※「/root/opt/bundle/vendor/bundle/...」にインストールされます。
Embulkの処理を作成する
下記のように「googlesheet」フォルダを作り、配置します。
/root/opt/
  ├ bundle
  ├ googlesheet
  │  └ export_daily_hoge.yml.liguid
  │
  ├ secrets.sh
  └ secrets.sh.sample
認証情報を別ファイルに分離する。
# !/bin/bash

# TreasureData API Key Settings
export EMBULK_TD_API_KEY='0001/******************************'

# QLife (out TreasureData)
export EMBULK_TD_OUT_DB="hoge"

# Google API Credentials
export EMBULK_GOOGLE_API_CLIENT_ID='**********.apps.googleusercontent.com'
export EMBULK_GOOGLE_API_CLIENT_SECRET='********************'
export EMBULK_GOOGLE_API_REFRESH_TOKEN='1/*******************************'
処理ないようをyamlファイルに作成します。
in:
    type: google_spreadsheets
    auth_method: authorized_user
    json_keyfile:
        content: |
            {
                "client_id": '{{ env.EMBULK_GOOGLE_API_CLIENT_ID }}',
                "client_secret": '{{ env.EMBULK_GOOGLE_API_CLIENT_SECRET }}',,
                "refresh_token": '{{ env.EMBULK_GOOGLE_API_REFRESH_TOKEN }}',
            }
    spreadsheets_url: https://docs.google.com/spreadsheets/d/************/edit#gid=0
    worksheet_title: daily
    start_row: 2
    default_timezone: 'Asia/Tokyo'
    null_string: '\N'
    default_typecast: strict
    columns:
        - {name: date, type: timestamp, format: '%Y/%m/%d', timezone: 'Asia/Tokyo'}
        - {name: id, type: long}
        - {name: count, type: long}
        - {name: revenue, type: long}
out:
    type: td
    apikey: '{{ env.EMBULK_TD_API_KEY }}'
    endpoint: api.treasuredata.com
    database: '{{ env.EMBULK_TD_OUT_DB }}'
    table: daily_hoge
    time_column: date
    mode: replace
    default_timezone: 'Asia/Tokyo'
    default_timestamp_format: '%Y/%m/%d'
実行する
取り込みを実行してみます。
$ cd /root/opt/
$ source ./secrets.sh; embulk run -b ./bundle ./googlesheet/export_daily_hoge.yml.liquid
[追記] Googeleのサービスアカウントでの接続
サービスアカウントでもできるみたい...
リフレッシュトークンとかの発行なしで、設置が簡単そうです。
■ G Suite 管理者 ヘルプ - サービス アカウントを作成する
https://support.google.com/a/answer/7378726?hl=ja
{
  "type": "service_account",
  "project_id": "td-202003",
  "private_key_id": "**************",
  "private_key": "-----BEGIN PRIVATE KEY-----***************-----END PRIVATE KEY-----\n",
  "client_email": "hoge@treasuredata-202003.iam.gserviceaccount.com",
  "client_id": "****************",
  "auth_uri": "https://accounts.google.com/o/oauth2/auth",
  "token_uri": "https://accounts.google.com/o/oauth2/token",
  "auth_provider_x509_cert_url": "https://www.googleapis.com/oauth2/v1/certs",
  "client_x509_cert_url": "https://www.googleapis.com/robot/v1/metadata/x509/*****.iam.gserviceaccount.com"
}
in:
    type: google_spreadsheets
    auth_method: service_account
    json_keyfile: credentials/td_service_account.json
    spreadsheets_url: https://docs.google.com/spreadsheets/d/************/edit#gid=0
    worksheet_title: daily
    start_row: 2
    default_timezone: 'Asia/Tokyo'
    null_string: '\N'
    default_typecast: strict
    columns:
        - {name: date, type: timestamp, format: '%Y/%m/%d', timezone: 'Asia/Tokyo'}
        - {name: id, type: long}
        - {name: count, type: long}
        - {name: revenue, type: long}
out:
    type: td
    apikey: '{{ env.EMBULK_TD_API_KEY }}'
    endpoint: api.treasuredata.com
    database: '{{ env.EMBULK_TD_OUT_DB }}'
    table: daily_hoge
    time_column: date
    mode: replace
    default_timezone: 'Asia/Tokyo'
    default_timestamp_format: '%Y/%m/%d'
以上です。
参考サイト
- https://docs.treasuredata.com/articles/embulk-import-googlesheet
- https://github.com/medjed/embulk-input-google_spreadsheets
- https://console.developers.google.com/apis/credentials
- https://developers.google.com/youtube/v3/guides/auth/devices?hl=ja
- https://qiita.com/iwaseasahi/items/2363dc1d246bc06baeae
- http://takaya030.hatenablog.com/entry/2016/09/04/164354