はじめに
公式なインストールガイドはあるのですが、ec2-user 権限でインストールしようとした場合パーミッションエラーが多いので、sudo -su でrootになることなく、構築出来る手順をまとめました。
前提環境
この手順は以下の構成で作成しています。
| OS | AmazonLinux2 |
| DB | PostgreSQL10 |
| Redmine | 4.0 |
| Ruby | 2.5 |
| rbenv_plugins | ruby-build |
| rbenv_plugins | rbenv-sudo |
| パッケージ管理 | bundler |
| モジュール | passenger |
構築
せっかくEC2を使うので、初めの依存パッケージ導入、rbenvのダウンロードスクリプト生成などをUserDataで行います。
UserDataはroot権限で実施されるため、ec2-user権限で実施したい操作は実施せずに、実施用スクリプトを自動生成させます。
EC2インスタンス生成
Amazon Linux 2 のEC2インスタンスを作成します。
インスタンスサイズ、EBSサイズはRedmineの利用計画に合わせて選択してください。
ローンチ時に以下のUserDataを設定します。
# !/bin/bash

yum update -y
yum install gcc-c++ openssl-devel git readline-devel -y
yum groupinstall "Development Tools" -y
yum install openssl-devel readline-devel zlib-devel curl-devel libyaml-devel libffi-devel -y
yum install postgresql-server postgresql-devel mysql-server mysql-devel ncurses-compat-libs -y
yum install httpd httpd-devel -y
yum install ImageMagick ImageMagick-devel ipa-pgothic-fonts -y
sed -i "s/en_US\.UTF-8/ja_JP\.UTF-8/g" /etc/sysconfig/i18n
amazon-linux-extras install postgresql10 -y

echo '#!/bin/bash' >> /home/ec2-user/1_rbenv.sh
echo mkdir /home/ec2-user/.rbenv >> /home/ec2-user/1_rbenv.sh
echo git clone https://github.com/rbenv/rbenv.git /home/ec2-user/.rbenv >> /home/ec2-user/1_rbenv.sh
chmod +x /home/ec2-user/1_rbenv.sh

echo '#!/bin/bash' >> /home/ec2-user/2_rbenv-path.sh
echo 'echo '\''export PATH="$HOME/.rbenv/bin:$PATH"' \''>> /home/ec2-user/.bash_profile' >> /home/ec2-user/2_rbenv-path.sh
echo 'echo '\''eval "$(rbenv init -)"'\'' >> /home/ec2-user/.bash_profile'  >> /home/ec2-user/2_rbenv-path.sh
echo echo please Type source /home/ec2-user/.bash_profile >> /home/ec2-user/2_rbenv-path.sh
chmod +x /home/ec2-user/2_rbenv-path.sh

echo '#!/bin/bash' >> /home/ec2-user/3_ruby-build.sh
echo mkdir /home/ec2-user/.rbenv/plugins /home/ec2-user/.rbenv/plugins/ruby-build >> /home/ec2-user/3_ruby-build.sh
echo git clone https://github.com/rbenv/ruby-build.git /home/ec2-user/.rbenv/plugins/ruby-build >> /home/ec2-user/3_ruby-build.sh
echo git clone https://github.com/dcarley/rbenv-sudo.git /home/ec2-user/.rbenv/plugins/rbenv-sudo >>  /home/ec2-user/3_ruby-build.sh
chmod +x /home/ec2-user/3_ruby-build.sh

chown ec2-user.ec2-user /home/ec2-user/1_rbenv.sh /home/ec2-user/2_rbenv-path.sh /home/ec2-user/3_ruby-build.sh

systemctl reboot
PostgreSQL10 についてはamazon-linux-extras から導入しています。
rbenv導入
インスタンスのローンチが完了したら、ec2-userでログインします。
1_rbenv.shでrbenvのソースをクローンし、2_rbenv-path.shでpashの設定を行います。
$ ls -l
total 12
-rwxr-xr-x 1 ec2-user ec2-user 107 Oct 20 08:32 1_rbenv.sh
-rwxr-xr-x 1 ec2-user ec2-user 203 Oct 20 08:32 2_rbenv-path.sh
-rwxr-xr-x 1 ec2-user ec2-user 264 Oct 20 08:32 3_ruby-build.sh

$ ./1_rbenv.sh
Cloning into '/home/ec2-user/.rbenv'...
remote: Enumerating objects: 4, done.
remote: Counting objects: 100% (4/4), done.
remote: Compressing objects: 100% (4/4), done.
remote: Total 2763 (delta 0), reused 2 (delta 0), pack-reused 2759
Receiving objects: 100% (2763/2763), 534.99 KiB | 822.00 KiB/s, done.
Resolving deltas: 100% (1731/1731), done.

$ ./2_rbenv-path.sh
please Type source /home/ec2-user/.bash_profile
$ source /home/ec2-user/.bash_profile
$ rbenv -v
rbenv 1.1.2-4-g577f046
続いて、3_ruby-build.shを実行し、rbenvのruby-build, rbenv-sudo のプラグインを導入します。
$ ./3_ruby-build.sh
Cloning into '/home/ec2-user/.rbenv/plugins/ruby-build'...
remote: Enumerating objects: 81, done.
remote: Counting objects: 100% (81/81), done.
remote: Compressing objects: 100% (38/38), done.
remote: Total 9872 (delta 37), reused 70 (delta 31), pack-reused 9791
Receiving objects: 100% (9872/9872), 2.11 MiB | 2.29 MiB/s, done.
Resolving deltas: 100% (6402/6402), done.
Cloning into '/home/ec2-user/.rbenv/plugins/rbenv-sudo'...
remote: Enumerating objects: 40, done.
remote: Total 40 (delta 0), reused 0 (delta 0), pack-reused 40
Unpacking objects: 100% (40/40), done.
ruby インストール
利用できるruby のバージョンを確認します。
$ rbenv install -list
Redmine 4.0 でサポートされているrubyの最新バージョンは 2.5 なので、
2.5の最新バージョンをインストールします。
$ rbenv install 2.5.7
Downloading ruby-2.5.7.tar.bz2...
-> https://cache.ruby-lang.org/pub/ruby/2.5/ruby-2.5.7.tar.bz2
Installing ruby-2.5.7...
Installed ruby-2.5.7 to /home/ec2-user/.rbenv/versions/2.5.7

$ rbenv global 2.5.7
$ rbenv rehash
$ ruby -v
ruby 2.5.7p206 (2019-10-01 revision 67816) [x86_64-linux]
bundlerインストール
rubyアプリの依存パッケージをインストールするためにbundlerをインストールします。
$ gem install bundler --no-rdoc --no-ri
Fetching: bundler-2.0.2.gem (100%)
Successfully installed bundler-2.0.2
1 gem installed
PostgreSQLの設定
DBとして利用するPostgreSQLを初期化してパラメーターを設定します。
$ sudo systemctl enable postgresql.service
Created symlink from /etc/systemd/system/multi-user.target.wants/postgresql.service to /usr/lib/systemd/system/postgresql.service.
postgresユーザにスイッチし、initdb を実行してPostgreSQLの初期設定を行います。
$ sudo su - postgres
$ initdb --encoding=UTF8 --no-locale
The files belonging to this database system will be owned by user "postgres".
This user must also own the server process.

The database cluster will be initialized with locale "C".
The default text search configuration will be set to "english".

Data page checksums are disabled.

fixing permissions on existing directory /var/lib/pgsql/data ... ok
creating subdirectories ... ok
selecting default max_connections ... 100
selecting default shared_buffers ... 128MB
selecting dynamic shared memory implementation ... posix
creating configuration files ... ok
running bootstrap script ... ok
performing post-bootstrap initialization ... ok
syncing data to disk ... ok

WARNING: enabling "trust" authentication for local connections
You can change this by editing pg_hba.conf or using the option -A, or
--auth-local and --auth-host, the next time you run initdb.

Success. You can now start the database server using:

    pg_ctl -D /var/lib/pgsql/data -l logfile start
postgresユーザのまま以下のファイルのパラメーターを変更しローカルからのアクセスを許可します。
listen_addresses = '*' # what IP address(es) to listen on;
host    all             all             127.0.0.1/32            md5
host    all             all             ::1/128                 md5
一度ec2-user に戻り、PostgreSQLを起動します。
$ exit
logout
[ec2-user]$ sudo systemctl start postgresql
[ec2-user]$ sudo systemctl status postgresql
● postgresql.service - PostgreSQL database server
   Loaded: loaded (/usr/lib/systemd/system/postgresql.service; enabled; vendor preset: disabled)
   Active: active (running) since Mon 2019-10-21 13:55:37 UTC; 11s ago
  Process: 6815 ExecStartPre=/usr/libexec/postgresql-check-db-dir %N (code=exited, status=0/SUCCESS)
 Main PID: 6818 (postmaster)
   CGroup: /system.slice/postgresql.service
           tq6818 /usr/bin/postmaster -D /var/lib/pgsql/data
           tq6820 postgres: logger process
           tq6822 postgres: checkpointer process
           tq6823 postgres: writer process
           tq6824 postgres: wal writer process
           tq6825 postgres: autovacuum launcher process
           tq6826 postgres: stats collector process
           mq6827 postgres: bgworker: logical replication launcher
再度postgresユーザにスイッチし、Redmine用空DBを作成します。
$ sudo su - postgres
Last login: Mon Oct 21 13:42:06 UTC 2019 on pts/0

ここからpostgresユーザ
-bash-4.2$ psql
psql (10.4)
Type "help" for help.
postgres=# CREATE ROLE "role_name" LOGIN ENCRYPTED PASSWORD 'password' NOINHERIT VALID UNTIL 'infinity';
CREATE ROLE
postgres=# CREATE DATABASE "db_name" WITH ENCODING='UTF8' OWNER="role_name";
CREATE DATABASE
postgres=# \q
※"role_name", password, "db_name" は適宜任意の文字列を代入してください。
postgres=# CREATE ROLE redmine LOGIN ENCRYPTED PASSWORD 'redmine' NOINHERIT VALID UNTIL 'infinity';
CREATE ROLE
postgres=# CREATE DATABASE redmine WITH ENCODING='UTF8' OWNER=redmine;
CREATE DATABASE
postgres=# \q
postgresユーザからec2-userに戻ります。
-bash-4.2$ exit
logout
[ec2-user]$
Redmine4.0のインストール
Redmineの最新版を/ver/lib/redmine にチェックアウトします。
$ sudo svn co https://svn.redmine.org/redmine/branches/4.0-stable /var/lib/redmine
Error validating server certificate for 'https://svn.redmine.org:443':
 - The certificate is not issued by a trusted authority. Use the
   fingerprint to validate the certificate manually!
Certificate information:
 - Hostname: svn.redmine.org
 - Valid: from Sun, 08 Jan 2017 00:00:00 GMT until Wed, 08 Jan 2020 23:59:59 GMT
 - Issuer: Gandi, Paris, Paris, FR
 - Fingerprint: ab:f1:c8:b7:69:a6:99:bd:20:c1:59:a4:5f:60:9e:27:2d:81:82:b7
(R)eject, accept (t)emporarily or accept (p)ermanently? t
Redmineのconfigファイルを作成し、PostgreSQLへの接続設定を行います。
$ cd /var/lib/redmine/config/
$ sudo cp database.yml.example database.yml
$ sudo vi database.yml
以下の通り編集します。
database:, username:, password:は空DBを作成した際のパラメーターを入力してください。
# Default setup is given for MySQL with ruby1.9.
# Examples for PostgreSQL, SQLite3 and SQL Server can be found at the end.
# Line indentation must be 2 spaces (no tabs).

# production:
#  adapter: mysql2
#  database: redmine
#  host: localhost
#  username: root
#  password: ""
#  encoding: utf8

# development:
#  adapter: mysql2
#  database: redmine_development
#  host: localhost
#  username: root
#  password: ""
#  encoding: utf8

# Warning: The database defined as "test" will be erased and
# re-generated from your development database when you run "rake".
# Do not set this db to the same as development or production.
# test:
#  adapter: mysql2
#  database: redmine_test
#  host: localhost
#  username: root
#  password: ""
#  encoding: utf8

# PostgreSQL configuration example
production:
  adapter: postgresql
  database: redmine
  host: localhost
  username: redmine
  password: "redmine"
  encoding: utf8
  schema_search_path: public
# SQLite3 configuration example
# production:
#  adapter: sqlite3
#  database: db/redmine.sqlite3

# SQL Server configuration example
# production:
#  adapter: sqlserver
#  database: redmine
#  host: localhost
#  username: jenkins
#  password: jenkins
redmine ディレクトリ直下に移動し、bundle installを行います。
$ cd /var/lib/redmine/
$ rbenv sudo bundle install --without production
Don't run Bundler as root. Bundler can ask for sudo if it is needed, and installing your bundle as root will break this application for all non-root users on
this machine.
The dependency tzinfo-data (>= 0) will be unused by any of the platforms Bundler is installing for. Bundler is installing for ruby but the dependency is only for x86-mingw32, x64-mingw32, x86-mswin32. To add those platforms to the bundle, run `bundle lock --add-platform x86-mingw32 x64-mingw32 x86-mswin32`.
Fetching gem metadata from https://rubygems.org/.............
Fetching gem metadata from https://rubygems.org/.
Resolving dependencies....
Fetching rake 13.0.0

~以下略~
セッションストア秘密鍵の生成を行います。
$ rbenv sudo bundle exec rake generate_secret_token
Redmineデータベースの初期構築
テーブル作成
$ rbenv sudo RAILS_ENV=production bundle exec rake db:migrate
== 1 Setup: migrating =========================================================
-- create_table("attachments", {:force=>true, :id=>:integer})

~中略~
== 20180923091603 ChangeSqliteBooleansDefault: migrating ======================
== 20180923091603 ChangeSqliteBooleansDefault: migrated (0.0000s) =============

$

初期データ登録(言語選択)
$ rbenv sudo RAILS_ENV=production bundle exec rake redmine:load_default_data

Select language: ar, az, bg, bs, ca, cs, da, de, el, en, en-GB, es, es-PA, et, eu, fa, fi, fr, gl, he, hr, hu, id, it, ja, ko, lt, lv, mk, mn, nl, no, pl, pt, pt-BR, ro, ru, sk, sl, sq, sr, sr-YU, sv, th, tr, uk, vi, zh, zh-TW [en] ja
====================================
Default configuration data loaded.
passengerモジュールのインストール
passengerモジュールをインストールします。
$ rbenv sudo gem install passenger --no-rdoc --no-ri
$ sudo chmod o+x "/home/ec2-user"
$ rbenv sudo passenger-install-apache2-module
Welcome to the Phusion Passenger Apache 2 module installer, v6.0.4.

This installer will guide you through the entire installation process. It
shouldn't take more than 3 minutes in total.

Here's what you can expect from the installation process:

 1. The Apache 2 module will be installed for you.
 2. You'll learn how to configure Apache.
 3. You'll learn how to deploy a Ruby on Rails application.

Don't worry if anything goes wrong. This installer will advise you on how to
solve any problems.

Press Enter to continue, or Ctrl-C to abort.

Enter を押します。

Which languages are you interested in?

Use <space> to select.
If the menu doesn't display correctly, press '!'

 ? ?  Ruby
   ?  Python
   ?  Node.js
   ?  Meteor

--------------------------------------------

再度Enter を押します。

~中略~
--------------------------------------------
Almost there!

Please edit your Apache configuration file, and add these lines:

   LoadModule passenger_module /home/ec2-user/.rbenv/versions/2.5.7/lib/ruby/gems/2.5.0/gems/passenger-6.0.4/buildout/apache2/mod_passenger.so
   <IfModule mod_passenger.c>
     PassengerRoot /home/ec2-user/.rbenv/versions/2.5.7/lib/ruby/gems/2.5.0/gems/passenger-6.0.4
     PassengerDefaultRuby /home/ec2-user/.rbenv/versions/2.5.7/bin/ruby
   </IfModule>

After you restart Apache, you are ready to deploy any number of web
applications on Apache, with a minimum amount of configuration!

Press ENTER when you are done editing.
別セッションを開き/etc/httpd/conf.d/redmine.confを作成します。
LoadModule 以下の内容はpassengerのLoadModule ブロックの内容をコピーします。
<Directory "/var/lib/redmine/public">
  Require all granted
</Directory>

Alias /redmine /var/lib/redmine/public
<Location /redmine>
  PassengerBaseURI /redmine
  PassengerAppRoot /var/lib/redmine
</Location>

LoadModule passenger_module /home/ec2-user/.rbenv/versions/2.5.7/lib/ruby/gems/2.5.0/gems/passenger-6.0.4/buildout/apache2/mod_passenger.so
   <IfModule mod_passenger.c>
     PassengerRoot /home/ec2-user/.rbenv/versions/2.5.7/lib/ruby/gems/2.5.0/gems/passenger-6.0.4
     PassengerDefaultRuby /home/ec2-user/.rbenv/versions/2.5.7/bin/ruby
   </IfModule>
passengerのセッションに戻りEnterを2回押します。
redmineディレクトリのオーナーをapacheに変更
redmineのオーナーをapacheに変更します。
$ sudo chown -R apache:apache /var/lib/redmin
apacheの起動設定
apacheの自動起動設定を行い、apacheを起動します。
$ sudo systemctl enable httpd.service
Created symlink from /etc/systemd/system/multi-user.target.wants/httpd.service to /usr/lib/systemd/system/httpd.service.
$ sudo systemctl start httpd.service
$ sudo systemctl restart httpd.service
WEB UIへのアクセス
http://<ipアドレス>/redmine/ にアクセスすればRedmineが表示されます。

ログインID:admin
パスワード:admin
でログインします。
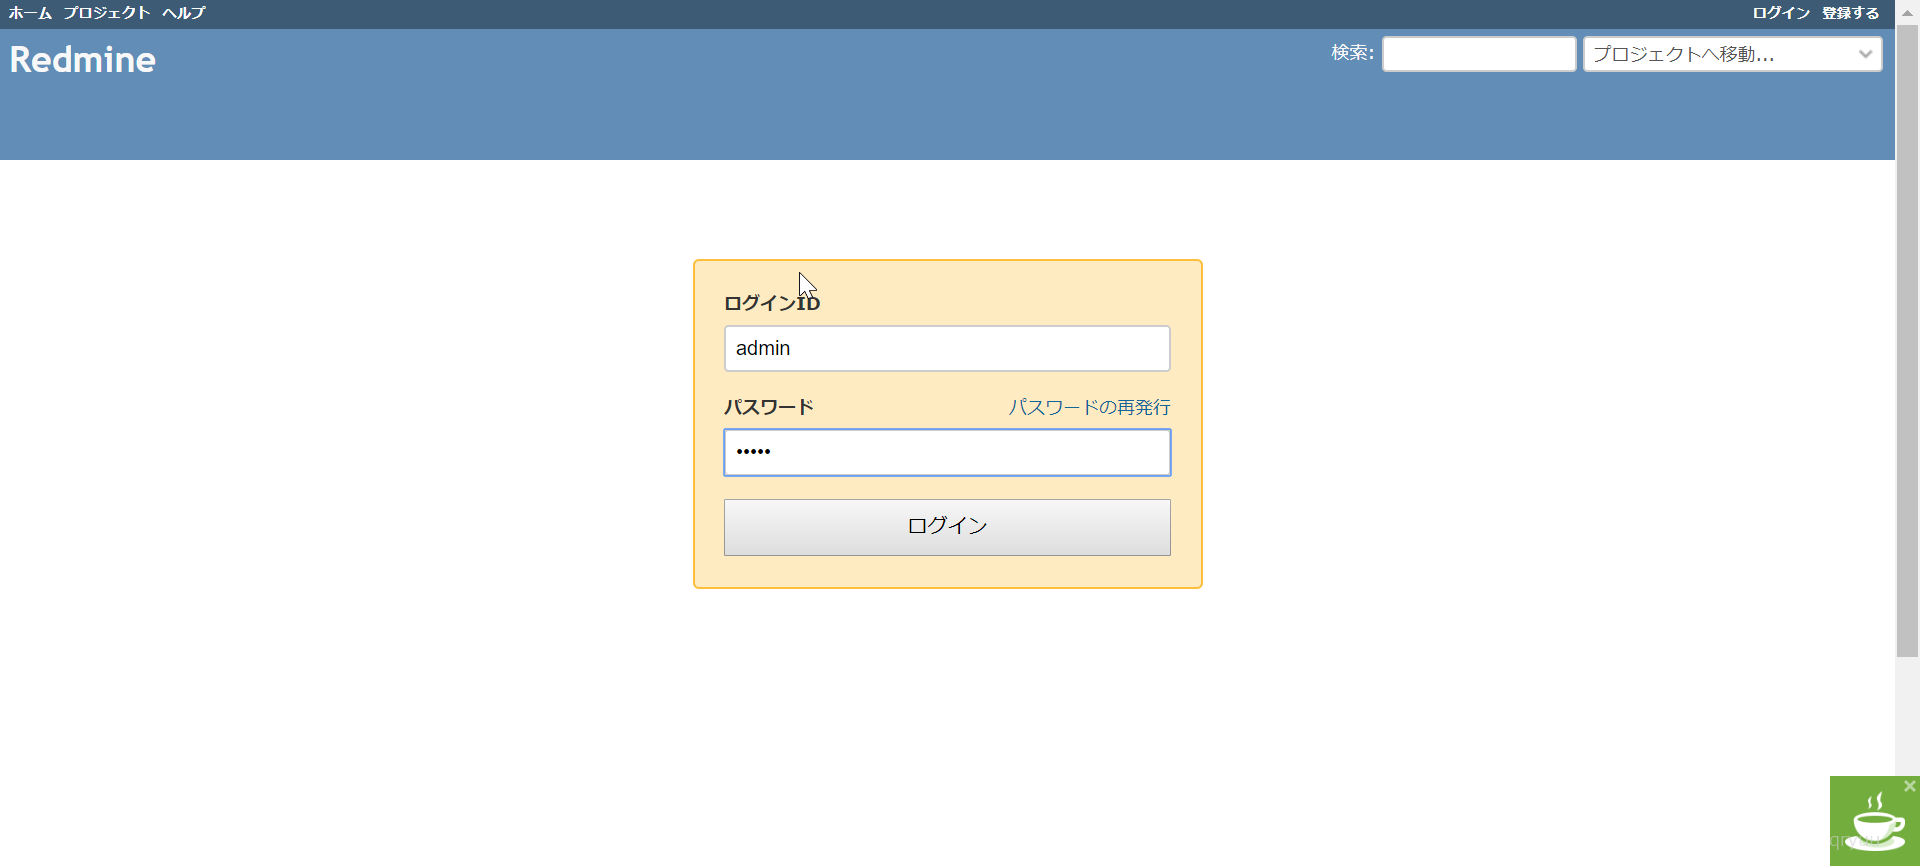
パスワードの変更が求められます。

以上!
あとは、Redmineの図書などを参考にプロジェクト管理を行ってください。