Next.jsとMicroCMSでブログサイトを作成するーPart2(基本編)の続きです。
記事を編集する
同じく以下のようなコードになります。コードは/pages/blog/[id]というディレクトリを作成してその配下に置きます。
import Link from "next/link";
import { client } from "@/libs/client";
import { useRouter } from "next/router";
import React, { useState } from "react";
export default function Update ({ blog }) {
  const router = useRouter()
  const id = blog.id;
  const [title, setTitle] = useState(blog.title);
  const [content, setContent] = useState(blog.content);
  const remove_html = text => {
    return text ? text.replace(/(<([^>]+)>)/gi, '') : null;
  }
  async function update(event) {
    event.preventDefault()
    client.update({
      endpoint: "blogs",
      content: {
        title: title,
        content: content,
      },
      contentId: id
    }).then((res) => {
      if (res.status === 401) {
        alert("編集ができませんでした。")
      } else {
        alert("編集されました。")
        router.push(`/`)
      }
    })
  }
  return (
    <>
      <div className='main'>
        <h1 className=''>編集ページ</h1>
        {/* TOPに戻るボタン */}
        <div className="top">
          <Link href="/" className="">
            <button className="">Topに戻る</button>
          </Link>
        </div>
        <div className="contents">
            <div>
                <form onSubmit={ update }>
                  <div>
                      <h2>タイトル</h2>
                      <input name="title" type="text" defaultValue={blog.title} onChange={(event) => setTitle(event.target.value)} />
                  </div>
                  <div>
                  <h2>コンテンツ</h2>
                      <textarea name="content" defaultValue={remove_html(blog.content)} onChange={(event) => setContent(event.target.value)} ></textarea>
                  </div>
                <button type="submit">
                    <p>登録する</p>
                </button>
                </form>
            </div>
        </div>
      </div>
    </>
  );
}
export const getStaticPaths = async () => {
  const data = await client.get({ endpoint: "blogs" });
  const paths = data.contents.map((content) => `/blog/${content.id}/update`);
  return { paths, fallback: false };
};
export const getStaticProps = async (context) => {
  const id = context.params.id;
  const data = await client.get({ endpoint: "blogs", contentId: id });
  return {
    props: {
      blog: data,
    },
  };
};
編集画面は新規作成記事と似た構成になりますがデータを取得(getStaticProps)してuseState でセットしているところが違いになります。また
<input name="title" type="text" defaultValue
とセットしているところにはdefaultValueが 使われているところも確認しましょう。
うまく動けば既存記事の編集が可能です。
記事を削除する
一覧から記事を削除できるようにします。
index.jsを編集してボタンを付けてみます。
import Head from "next/head";
import Link from "next/link";
import styles from "@/styles/Home.module.css";
import { client } from '@/libs/client'
import { useRouter } from "next/router";
export default function Home({ blog }) {
  const router = useRouter();
  async function deleteItem(event) {
    event.preventDefault();
    const formData = new FormData(event.currentTarget);
    const id = formData.get('id');
    client.delete({
      endpoint: 'blogs',
      contentId: id,
    })
      .then((res) => {
        alert("正常に削除されました。")
        router.push(`/`)
      })
      .catch((err) => {
        alert("削除できませんでした。"+err)
      })
  }
  return (
    <>
      <Head>
        <title>Create Next App</title>
        <meta name="description" content="Generated by create next app" />
        <meta name="viewport" content="width=device-width, initial-scale=1" />
        <link rel="icon" href="/favicon.ico" />
      </Head>
      <main className={styles.main}>
        <div id="new-blog">
          <Link href="/blog/create" className="">
            <button className="">ブログを作成</button>
          </Link>
        </div>
        <div id="blog-list">
          {blog.map((blog) => (
            <div className={styles.div}>
              <ul className={styles.ul}>
                <li className={styles.li} key={blog.id}>
                  <Link href={`/blog/${blog.id}`}>{blog.title}</Link>
                  <Link href={`/blog/${blog.id}/update`} className="">
                    <button className="">編集</button>
                  </Link>
                  <form onSubmit={ deleteItem }>
                    <input type="hidden" name="id" value={blog.id} />
                    <input type="submit" value="削除" />
                  </form>
                </li>
              </ul>
            </div>
          ))}
        </div>
      </main>
    </>
  )
}
export const getStaticProps = async () => {
  const data = await client.get({
    endpoint: 'blogs',
  })
  return {
    props: {
      blog: data.contents,
    },
  }
}
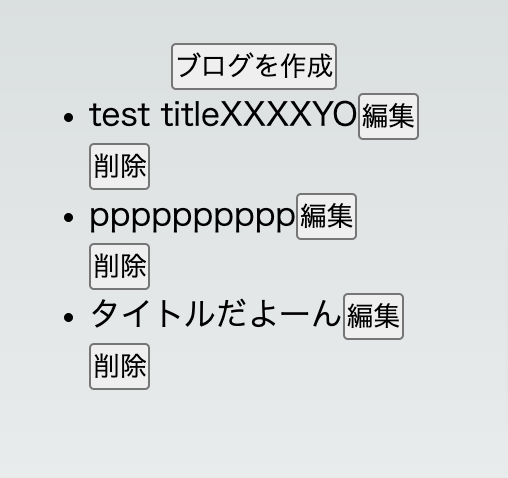
ソース上にはdeleteItem という関数をつけて削除処理を行っています。押したら記事が削除されることを確認しましょう。
コンポーネントを使ってコードの可読性を上げる
ここまで記事作成、編集、削除のコードを見てきましたが、HTMLのコードとJavascriptのコードの混在というのは時に読みにくく、ページ内に多くの情報があればあるほど可読性は下がります。
そこでコンポーネントという概念を使ってパーツ単位に分けて小分けに構成するというのがNext.js/Reactの流儀となります。イメージとしては以下のようになります。
pages/index.js
↓(コンポーネント呼び出し)
/component/List.js
index.jsはこのように記載して
import Head from "next/head";
import List from '../components/List'
import { client } from '@/libs/client'
import Link from "next/link";
import styles from "@/styles/Home.module.css";
export default function Home({ blog }) {
  return (
    <>
      <Head>
        <title>Create Next App</title>
        <meta name="description" content="Generated by create next app" />
        <meta name="viewport" content="width=device-width, initial-scale=1" />
        <link rel="icon" href="/favicon.ico" />
      </Head>
      <main className={styles.main}>
        <div id="new-blog">
        <Link href="/blog/create" className="">
            <button className="">ブログを作成</button>
        </Link>
        </div>
        <List blog={blog} />
      </main>
    </>
  )
}
export const getStaticProps = async () => {
  const data = await client.get({
    endpoint: 'blogs',
  })
  return {
    props: {
      blog: data.contents,
    },
    revalidate: 1
  }
}
List.jsはこのような形となります。
import React from 'react'
import Link from "next/link";
import styles from "@/styles/Home.module.css";
import { client } from '@/libs/client'
import { useRouter } from "next/router";
function List( {blog} ) {
    const router = useRouter();
    async function deleteItem(event) {
        event.preventDefault();
        const formData = new FormData(event.currentTarget);
        const id = formData.get('id');
        client.delete({
          endpoint: 'blogs',
          contentId: id,
        })
          .then((res) => {
            alert("正常に削除されました。")
            router.push(`/`)
          })
          .catch((err) => {
            alert("削除できませんでした。"+err)
          })
    }
    return (
        <div id="blog-list">
        {blog.map((blog) => (
            <div className={styles.div}>
            <ul className={styles.ul}>
                <li className={styles.li} key={blog.id}>
                <Link href={`/blog/${blog.id}`}>{blog.title}</Link>
                <Link href={`/blog/${blog.id}/update`} className="">
                    <button className="">編集</button>
                </Link>
                <form onSubmit={ deleteItem }>
                    <input type="hidden" name="id" value={blog.id} />
                    <input type="submit" value="削除" />
                </form>
                </li>
            </ul>
            </div>
        ))}
        </div>
    )
}
export default List;
getStaticProps で取得したPropの blog を子に当たるList.jsに引き渡しています。このようにしてパーツごとの再利用性を上げつつ可読性を上げるというのがComponentとなります。
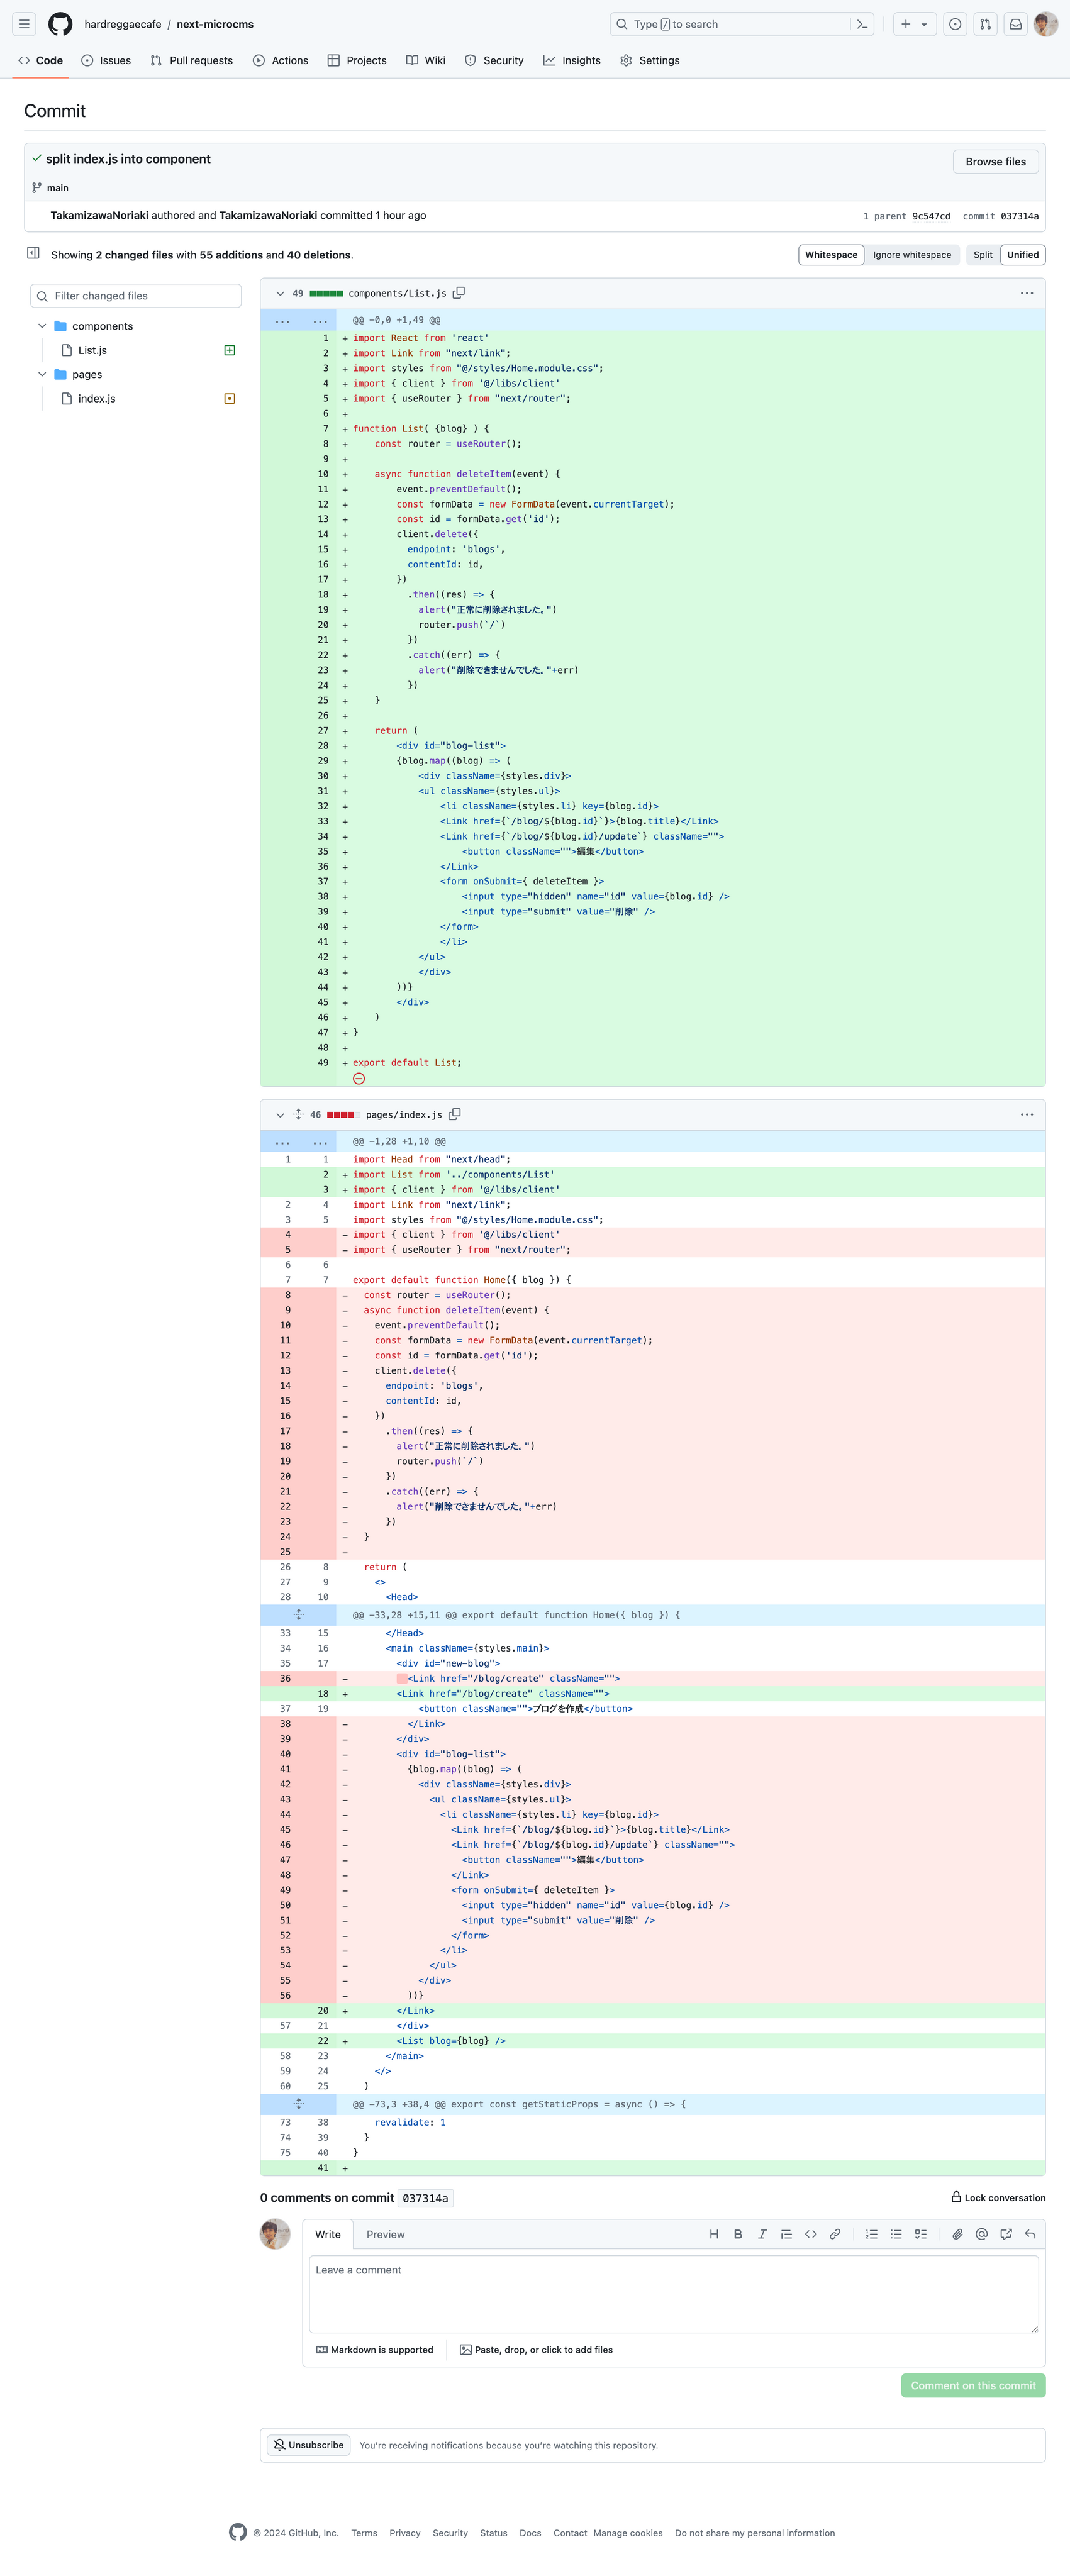
変更点を出すとこんな感じです。
Githubにソースを上げる
ここまで作成したソースをGithubにあげてみましょう。
ちなみに .env.development.local は.gitignoreに記載し、上げないようにします。
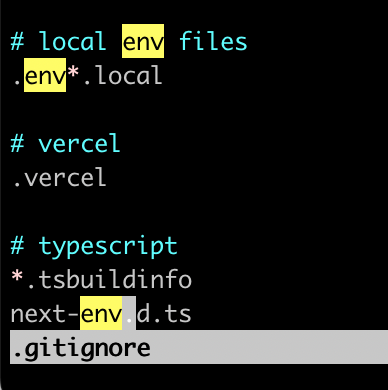
.gitigonore
Githubへのコードのアップはこちらを参考にしてみてください。
https://qiita.com/aisplay/items/5a77e259ea2feeeb48c3
Vercelでアプリケーションを公開しよう
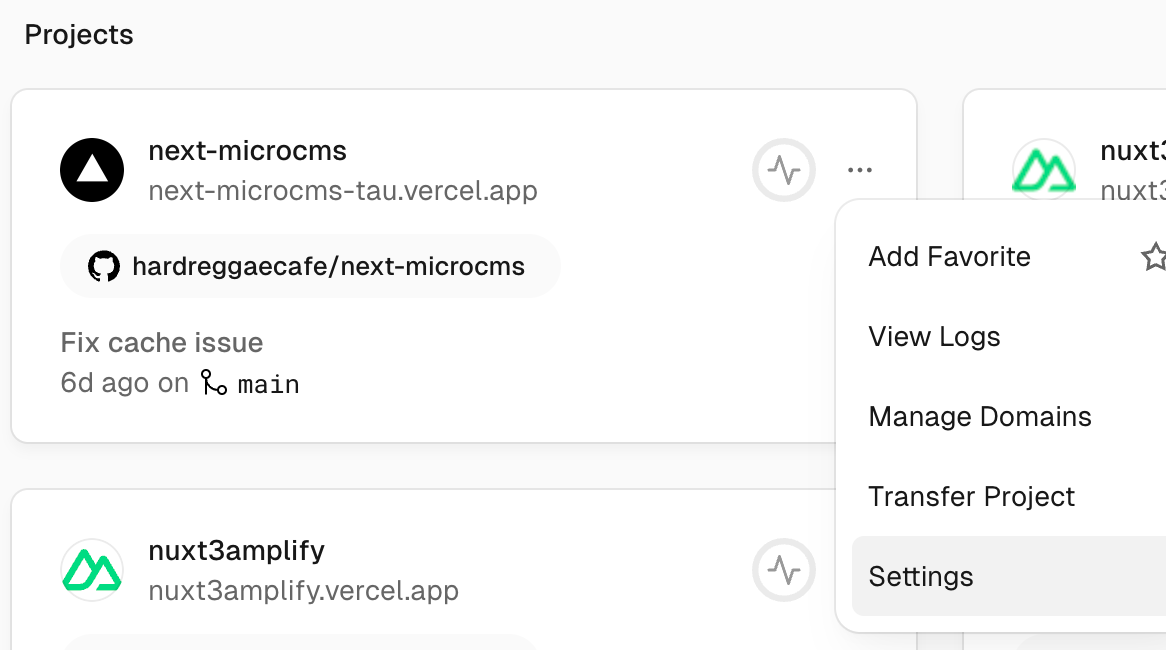
Vercelを使ってアプリケーションを公開しましょう。Githubに上げたものをVercelで選択するだけでデプロイされます。
まずはVercelにアクセスします。Hobbyでアカウント名をなにか決めて、Githubのアカウントでサインインします。
https://vercel.com/
Githubのアカウントを指定するとこちらの画面になるので、自分で作ったアプリケーションを選択します。
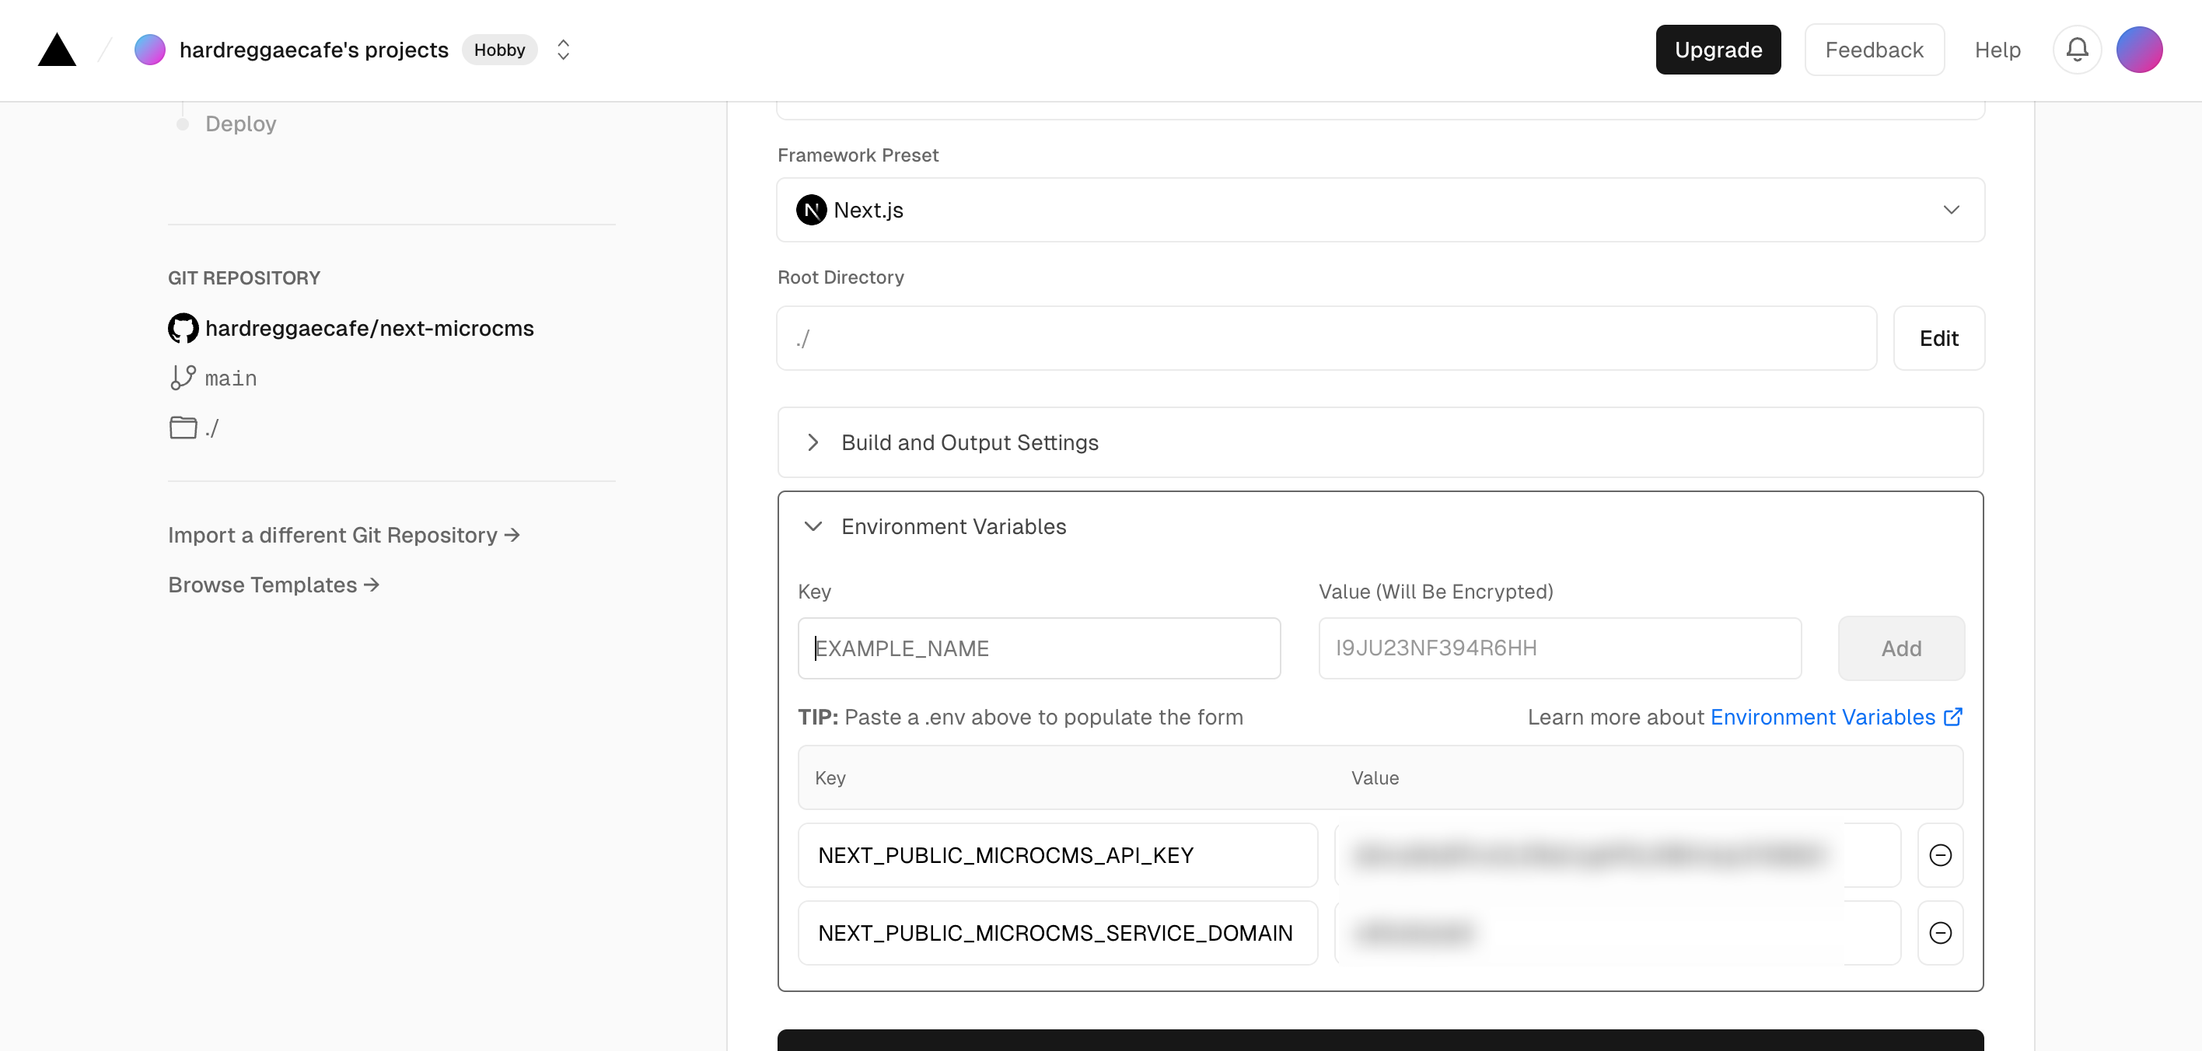
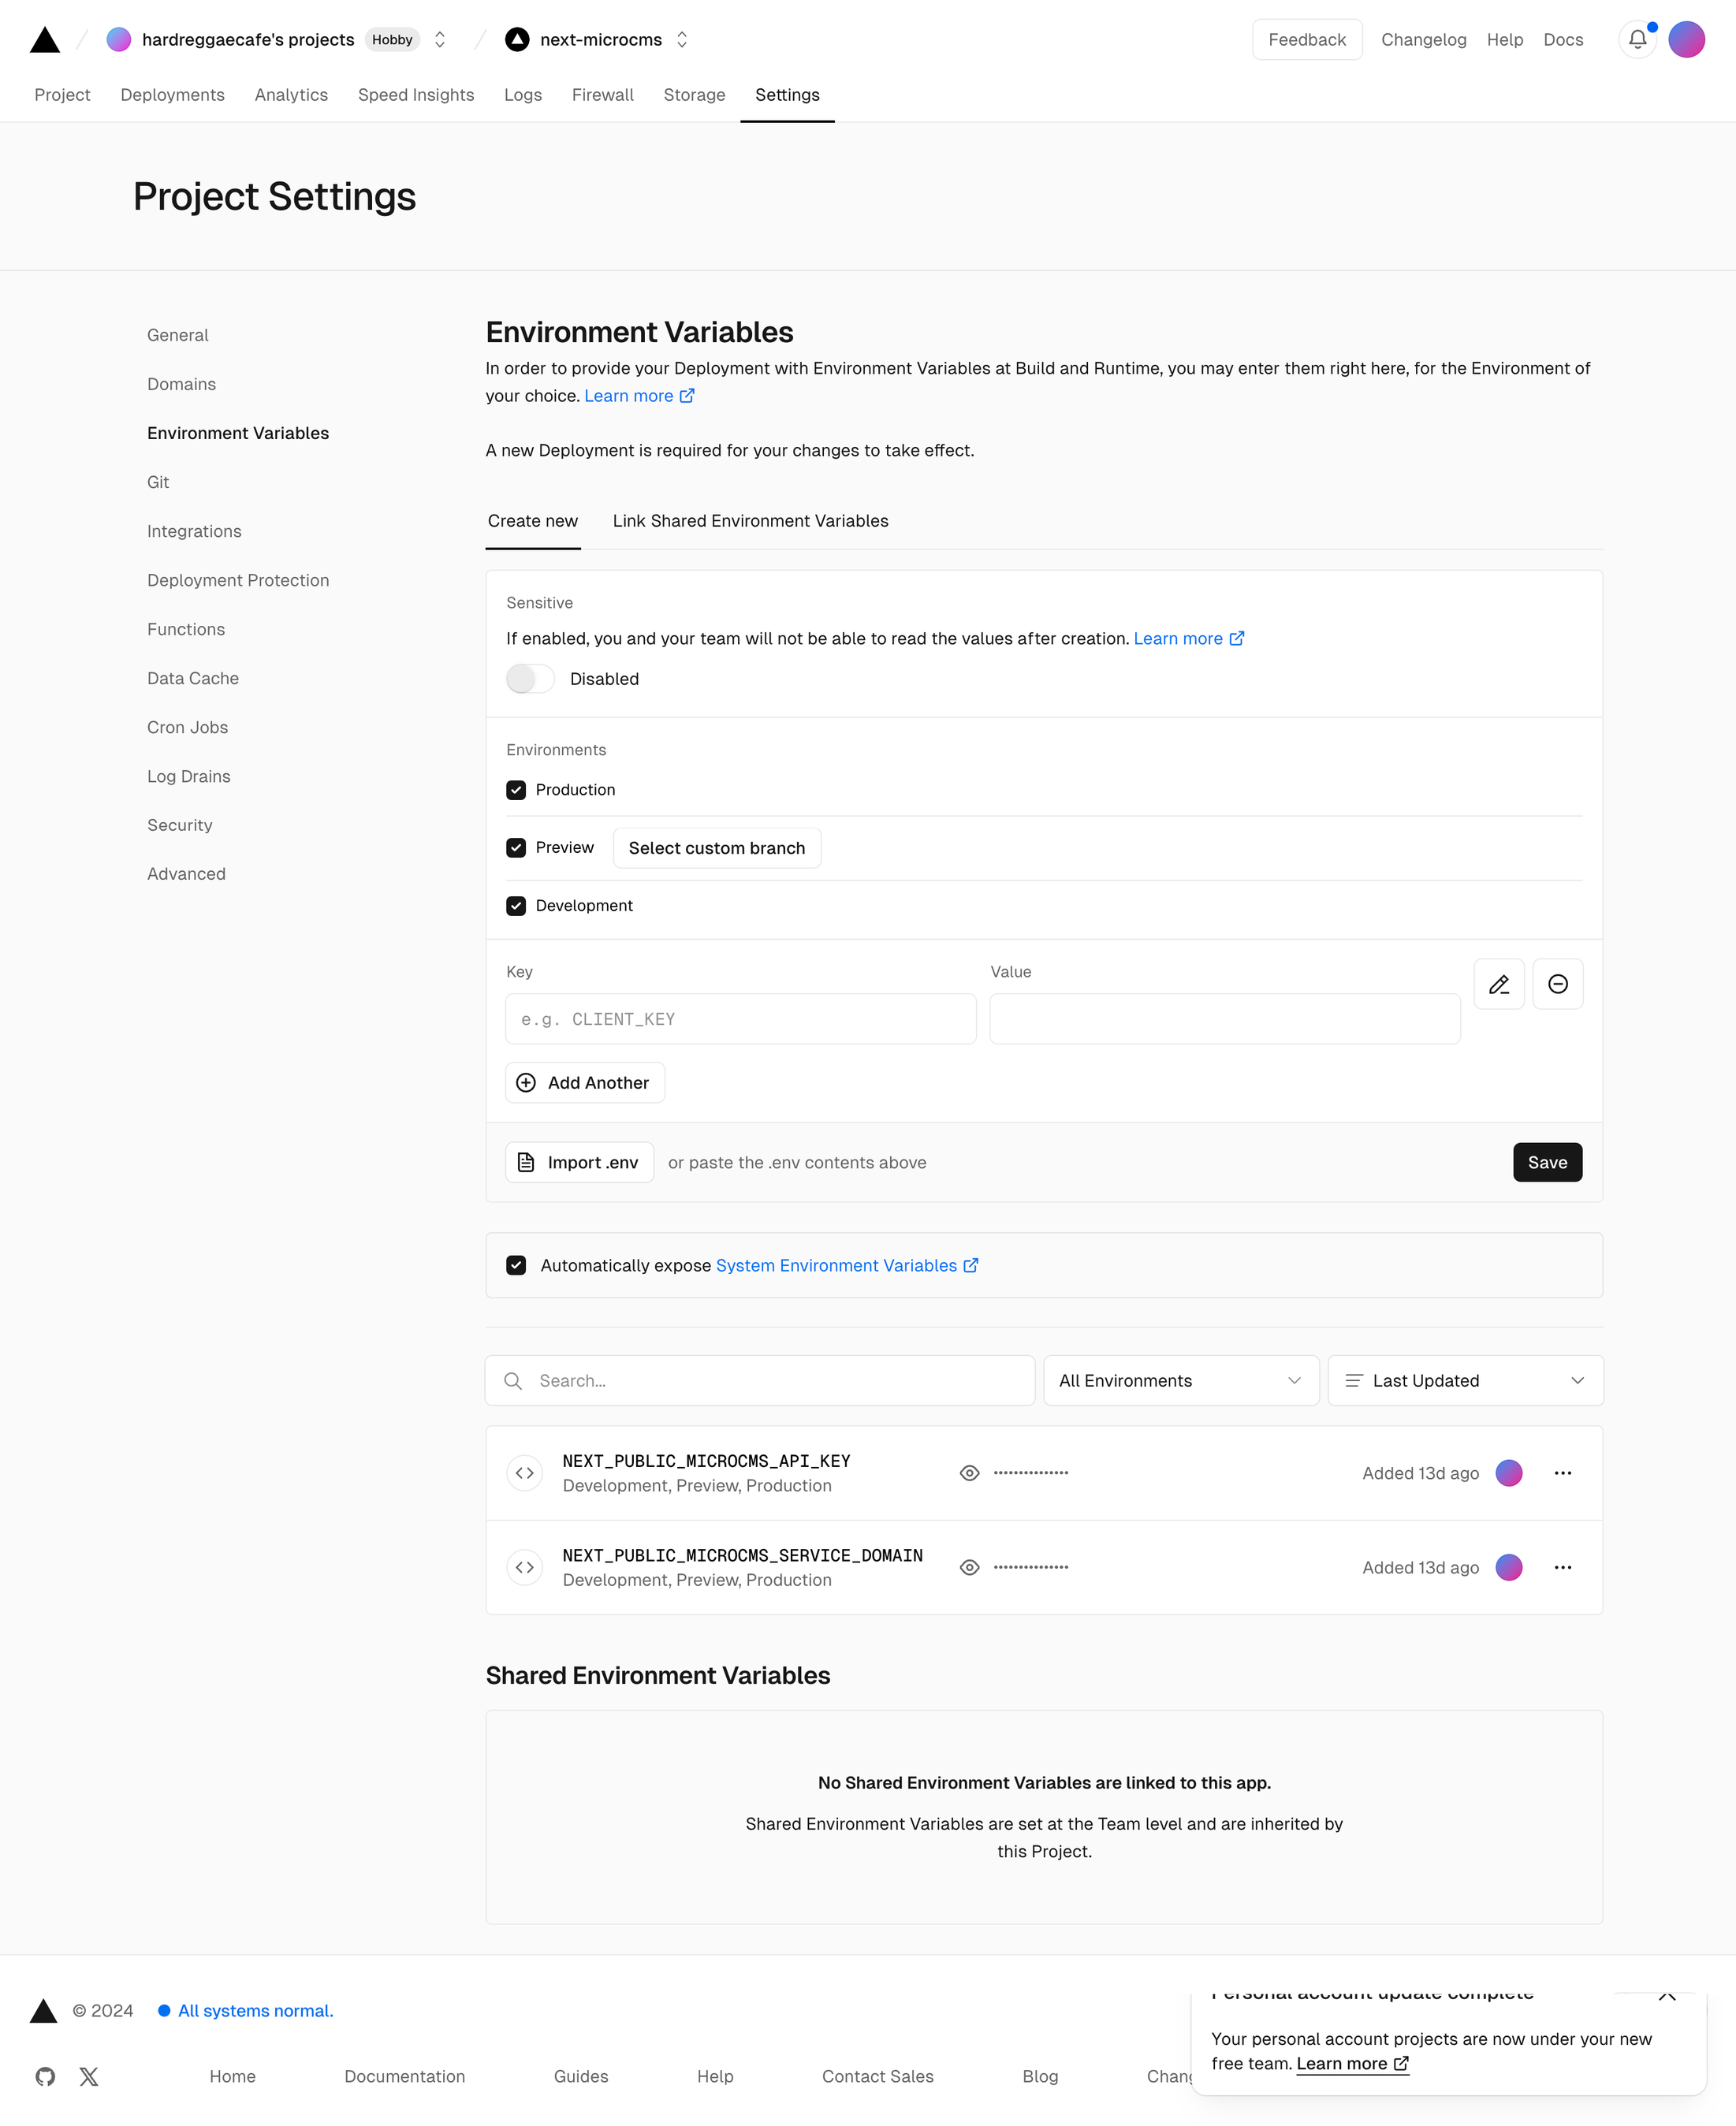
環境変数の設定を行う必要があります。これは.env.development.local に記載されているもので大丈夫です。以下の画面から行います。
ここまでできれば後は自動でデプロイされます。うまくいくとこうなります。
Visitのボタンを押すと自分が上げたアプリが動きます。ぜひ確認してみましょう。
終わりに
ここまでいかがでしょうか?作業の過程で色々エラーが出るかもしれません。調べてみて、わかったことはこちらのドキュメントにコメントいただけると幸いです。長文にもかかわらず読了いただきありがとうございました。

