約1年ぶりの投稿です。
今回はgraphvizをjupyter/windows10にインストールする方法です。
目次
1.ポイント
2.インストール
3.graphvizの場所を探す
4.パスを通す
5.確認する
1.ポイント:環境変数でパスを通す
Windowsでの機械学習/AIの環境構築は本当に大変です!本当にトラップが多く、おっさんはもう泣きそうです。GPU設定(過去記事 です。バージョン合わせに気を付けて参考にしてください)、新語に強い辞書Neologd(「subsytem for Linux」でクリア。コチラがオススメです)、そして今回のgraphvizなどなど。ホントたくさんのサイトを参考にしましたが、結局インストールするだけではダメでした。ポイントは**「しっかりパスを通す」**ことなんです!
あとでわかりましたが、公式サイトにもちゃんと書いてありました。
公式サイトより引用
Make sure that the directory containing the dot executable is on your systems’ path.
2.インストール
私はanacondaの下に入れたかったので
conda install graphviz
を使いましたが、お馴染みの
pip install graphviz
でも大丈夫だと思います。あと、dotをpipしている方もおられましたが、私の環境ではgraphvizだけでOKでした。
3.graphvizの場所を探す
エクスプローラーからgraphvizを入れたドライブ(多くはcドライブ)で検索するとどこにあるかわかります。恐らく
**「\anaconda3\Lib\site-packages」**か
「\anaconda3\Library\bin」
あたりではないかと思います。ファイルの場所(パス)をコピーしておいてください。
※cドライブ直下に入れた/フォルダ指定した方はそれぞれ適切なパスを選択してください。
4.パスを通す
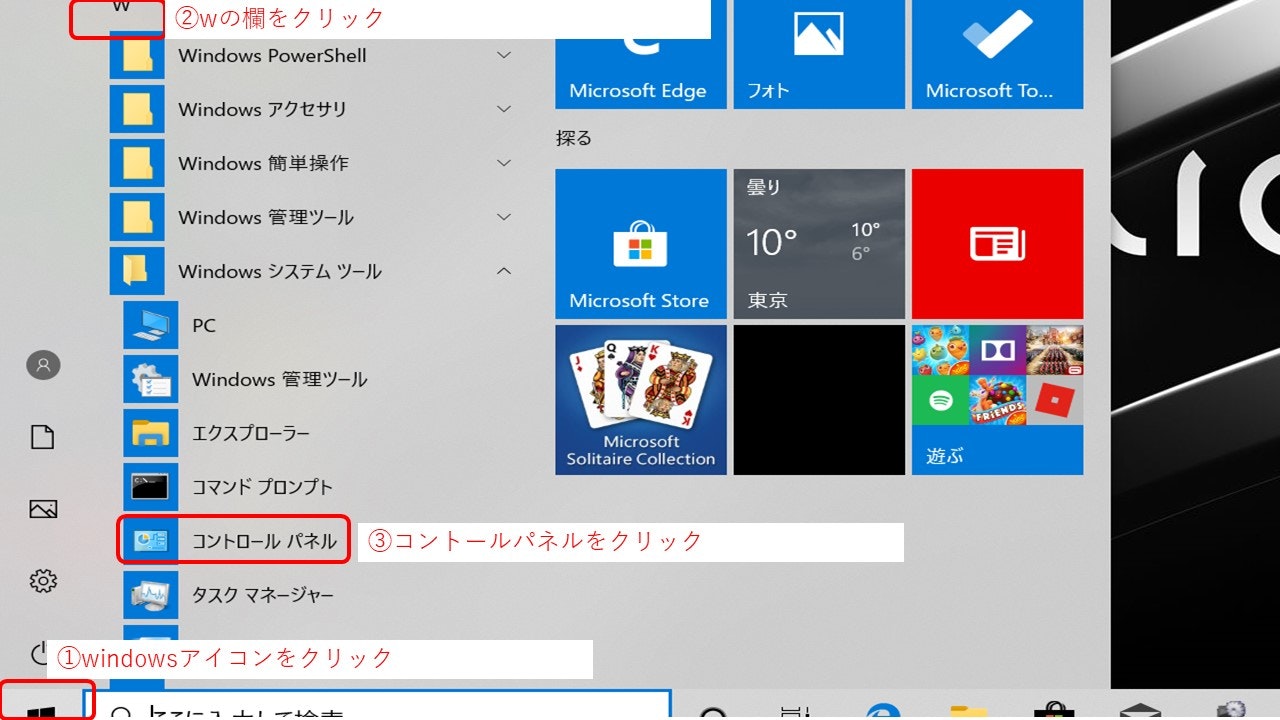
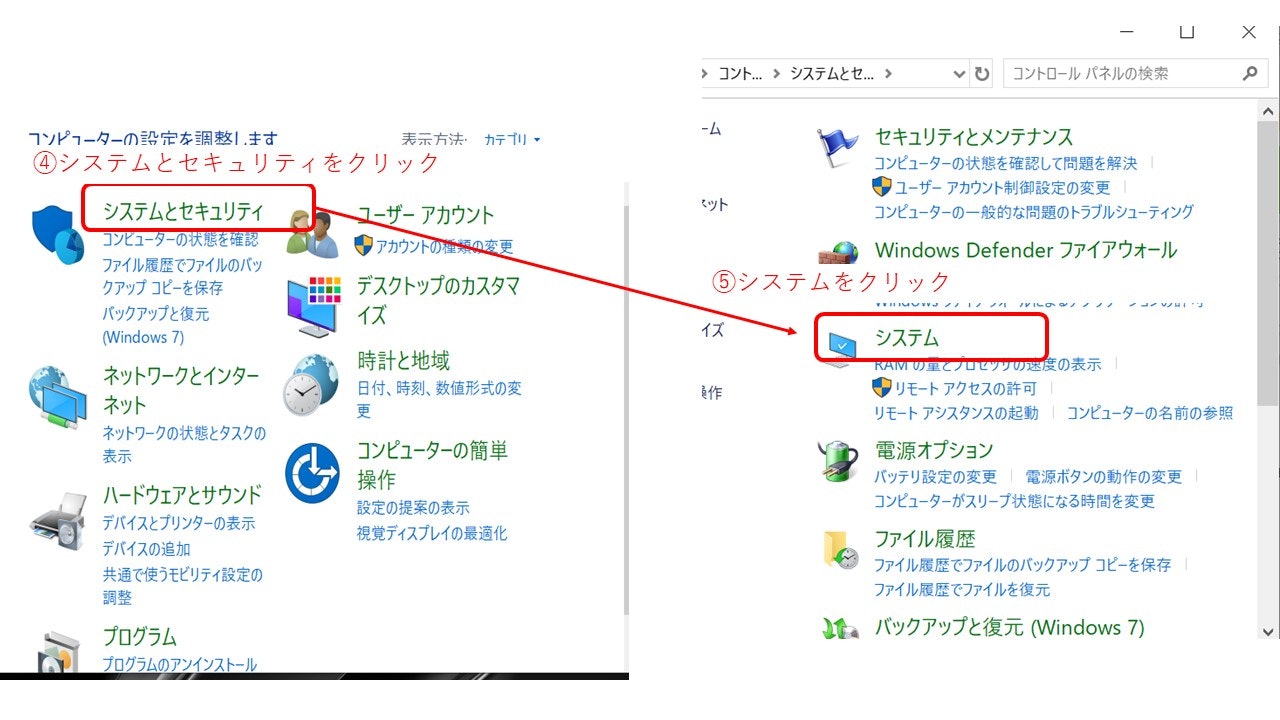
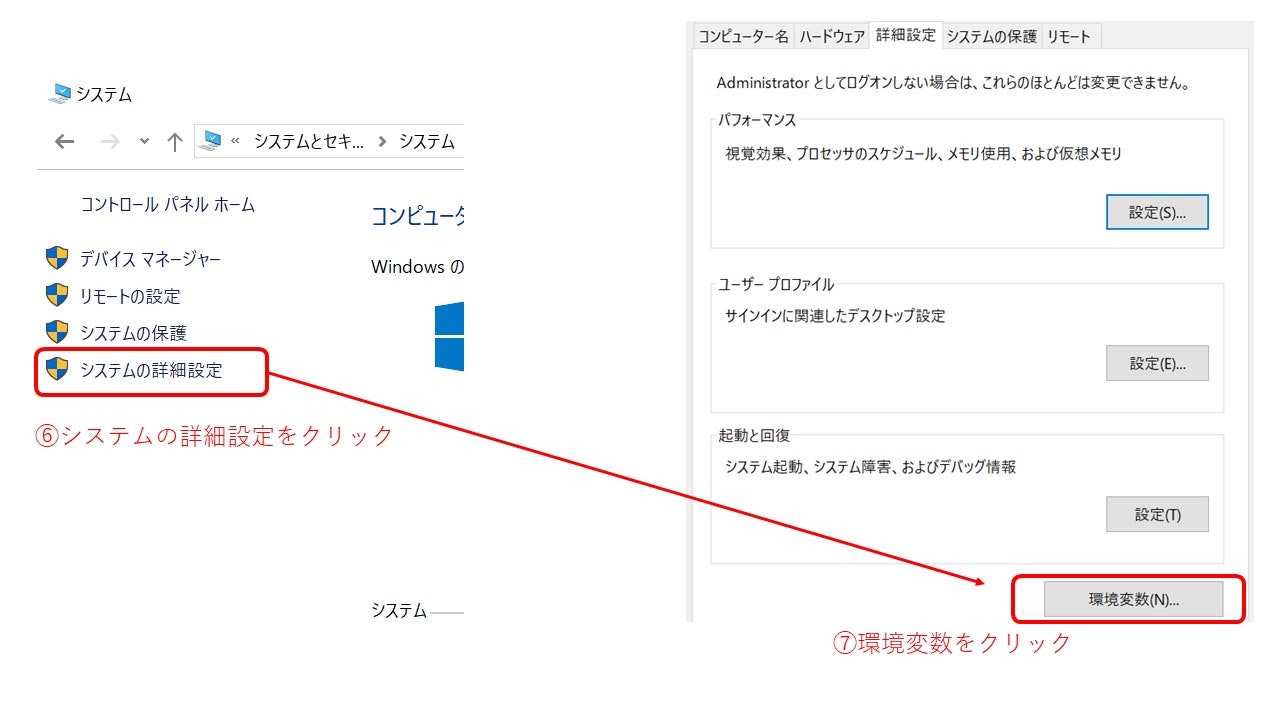
重要なので、私のような初心者の方でもわかりやすいように少し丁寧に説明しますね。
STEP4.「Pathの編集→新規→graphvizのパス設定」
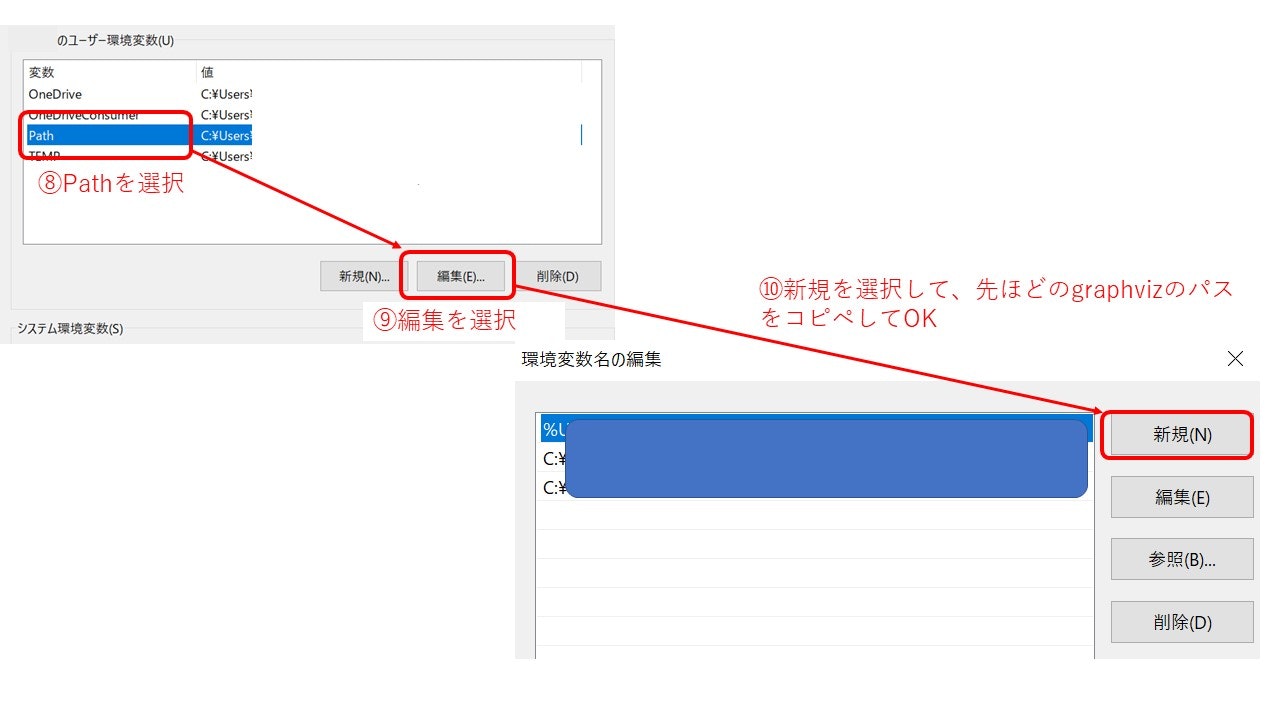
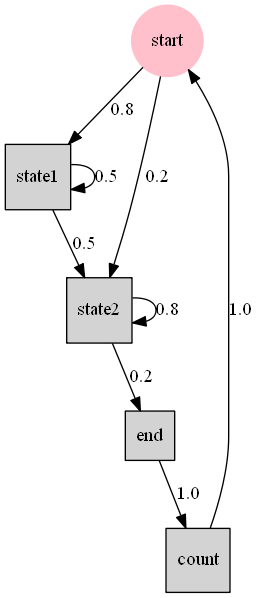
これで完了です。ちゃんと挙動するか確認してみましょう。
5.確認する
コチラを参考にさせていただきました。
(出展)http://swdrsker.hatenablog.com/entry/2017/05/19/205409
from graphviz import Digraph

G = Digraph(format="png")
G.attr("node", shape="square", style="filled")
G.edge("start","state1",label="0.8")
G.edge("start","state2",label="0.2")
G.edge("state1","state1",label="0.5")
G.edge("state2","state2", label="0.8")
G.edge("state1","state2",label="0.5")
G.edge("state2","end",label="0.2")
G.edge("end","count",label="1.0")
G.edge("count","start",label="1.0")
G.node("start", shape="circle", color="pink")
G.render("graphs") #png/直下

# 図示化
from IPython.display import Image
Image('graphs.png')
※)環境依存が大きいので私のやり方ではダメな場合もあると思います。私のできる範囲でお役に立てるなら気軽にご質問ください。
