はじめに
ユニークビジョン株式会社では、Storybook の Interaction Testing でフロントエンドの単体テストを書いています。
この記事では、備忘録も兼ねて実際によく使うテストコードをいくつか紹介していきます。
Interaction Testing
Interaction Teseting の基本的なやり方は下記を参考にしてみてください。
また、ここで使用している、@storybook/testing-library は Testing Library を Storybook 向けにラップしたものなので、下記のドキュメントを参考にすると良いです。
@storybook/jest も同様に Jest をラップしたものなので、下記のドキュメントが参考になります。
ただし、test(...) や describe(...) などの関数は Storybook では使えないことにご注意ください。
私は何度も使いたくなって代替手段を探しましたが、見つかりませんでした。対応してくれないだろうか...。
サンプル集
前提として、このサンプルでは以下の関数を import して使っています。
import { expect } from '@storybook/jest';
import { screen, userEvent, waitFor } from '@storybook/testing-library';
要素を取得する
1 つだけあるボタンを取得する
const button = await screen.findByRole('button'));
findByRole 等 find... 系の関数は自動的にリトライされるようになっています。
描画時に非同期処理を含むコンポーネントは、リトライが必要なことが多いです。
逆に、非同期処理を含まないコンポーネントでは、getByRole など get... 系のリトライをしない関数が利用できます。
それぞれの違いは下記を参考にしてください。
https://testing-library.com/docs/queries/about/#types-of-queries
条件に一致するすべての要素を取得する
const elements = await screen.findAllByText('foo'));
要素を取得してクリックする
await userEvent.click(await screen.findByTestId('sample-testid'));
文字を入力する
await userEvent.type(await screen.findByRole('textbox'), 'token');
要素が存在するかかどうかをチェックする
await expect(screen.queryByTestId('sample-testid')).toBeTruthy();
関数が呼ばれたかどうかをチェックする
argTypes の設定で、追跡したい関数を action として追加しておきます。
import { expect } from '@storybook/jest';
import { screen, userEvent, waitFor } from '@storybook/testing-library';
import { defineComponent } from 'vue';

import SampleCompornent from './SampleComponent'

export default {
  title: 'SampleComponent',
  component: SampleComponent,
  argTypes: {
    getUser: { action: true }, // 追跡したい関数を追加する
  },
};

const interaction = args => defineComponent({
  components: {
    SampleComponent,
  },
  setup() {
    return {
      getUser: args.getUser,
    };
  },
  template: `
    <!-- コンポーネントに action として定義した関数をバインドする -->
    <SampleComponent :get-user="getUser" />
  `,
});

interaction.play = async ({ args }) => {
  // args.getUser に関するテストを記述
}
呼ばれたかどうかを確認する
await waitFor(() => expect(args.getUser).toHaveBeenCalled())
特定の回数呼ばれたことを確認する
await waitFor(() => expect(args.getUser).toHaveBeenCalledTimes(1))
どんなパラメータで呼ばれたか
await waitFor(() => expect(args.getUser).toHaveBeenCalledWith('sample_user_id'));
シナリオテスト
以下は、ここまで紹介した方法を組み合わせたテストの例です。
// 最初にアカウント一覧取得リクエストが呼ばれる
await waitFor(() => expect(args.spyListAccounts).toHaveBeenCalledTimes(1));

// アカウント登録ボタンをクリック
await userEvent.click(await screen.findByTestId('save'));

// 名前を入力する
await userEvent.type(await screen.findByTestId('name_input'), 'sample_name');

// LINE アカウント作成ダイアログの保存ボタンをクリック
await userEvent.click(await screen.findByTestId(('dialog_save'));

// アカウント登録のリクエストとアカウント一覧取得リクエストが飛ぶ。
await waitFor(() => expect(args.spyPostAccount).toHaveBeenCalledTimes(1));
await waitFor(() => expect(args.spyListAccounts).toHaveBeenCalledTimes(2));
ここでは例として findByTestId を多用していますが、testing-library の思想的には、ユーザが認識する形に近い findByRole などの利用が推奨されています。
詳しくは以下をご参照ください。
https://testing-library.com/docs/queries/about/#priority
Vue.js 応用編: router.push が呼ばれたことをテストする
通常、Storybook 上で router.push が呼ばれるとエラーになります。
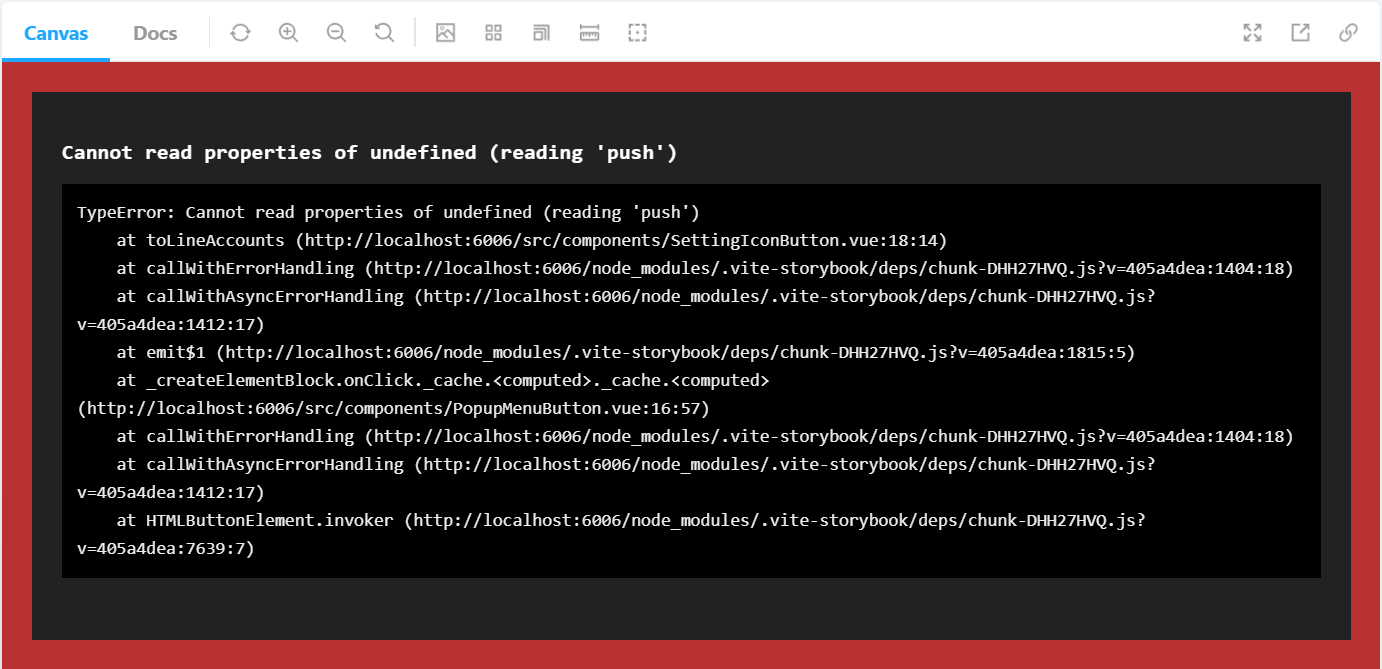
これは、Storybook 上で router が provide されていないため起こります。
routerKey というキーで Story 用の router を provide することでこの問題を解決できます。
さらに、Proxy を使って router.push をハックすることで router.push や route.replace がどのような引数で呼ばれたかテストできるようにしています。
import { expect } from '@storybook/jest';
import { waitFor } from '@storybook/testing-library';
import { defineComponent, provide } from 'vue';
import { createRouter, createWebHistory, RouteLocationRaw, routerKey } from 'vue-router';

import SampleComponent from './SampleComponent.vue';

export default {
  title: 'components/SampleComponent',
  component: SampleComponent,
  argTypes: {
    // 追跡したい関数を定義しておく
    spyPush: { action: true },
    spyReplace: { action: true },
  },
};

const story = args => defineComponent({
  components: {
    SampleComponent,
  },
  setup() {

    // Proxy で自前 router を作る
    const router = new Proxy(
      createRouter({
        history: createWebHistory(),
        routes: [],
      }),
      {
        get(_target, property) {
          switch (property.toString()) {
            case 'push':
              return (location: RouteLocationRaw) => {
                args.spyPush(location); // router.push が呼ばれたときに実行される
              };
            case 'replace':
              return (location: RouteLocationRaw) => {
                args.spyReplace(location); // router.replace が呼ばれたときに実行される
              };
            default:
              throw Error(`Story は router.${property.toString()} メソッドにまだ対応できていない!`);
          }
        },
      },
    );

    // 自前の router を provide する
    provide(routerKey, router);
  },
  template: `
    <SampleComponent />
  `,
});

story.play = async ({ args }) => {

  // クリックする
  await userEvent.click(await screen.findByTestId('sample-button'));

  // router.push が呼ばれたことを確認する
  await waitFor(() => expect(args.spyPush).toHaveBeenCalledWith({
    name: 'UserPage',
  }));
};

export { story };
router を provide する部分のコードは useStoryRouter のような hooks を作って切り出すと取り回しが良いです。
まとめ
手探りのオレオレ実装ですので、testing-library の流儀に沿っていないものもあるかもしれません。何かありましたらご指摘いただけると助かります。
Storybook で出来るテストは VRT だけにとどまらず、広がりを見せています。
本記事が皆さんのフロントエンドテストのお役に立てると嬉しいです!