今回やること
本アプリでは、「映画館」のデータ(一覧)をスプレッドシートで管理しています。
このデータ([映画館]シート)をメンテナンスする画面を作成します。
「映画館メンテナンス」の機能
- 新規追加:[映画館]シートに新しいデータ(映画館)を追加します。
-
修正 :既に[映画館]シートに登録されているデータ(映画館)を更新します。
※基本的にデータの「削除」は行わないので、機能としては省きます。
データの説明
-
[映画館]シート
[鑑賞履歴]シートの「映画館名」を入力する為のマスターとなります。-
映画館名:本アプリの表示で使用される映画館名。
但し、配信のサービス名であったり、放映時のテレビ局名であったりもします。 - 鑑賞種別:※[鑑賞種別]シートを参照してください。
-
初(初回):初めて訪問した映画館を記録。
1:初めて/0:訪問済み/9:対象外
「鑑賞種別」が《1:映画館》の場合に管理する。それ以外は《9:対象外》を記録する。 -
Google映画館名:Google Mapで使用されている映画館名を記録する。
「カレンダー登録」機能で、映画館名を変換する為に使用されます。

-
映画館名:本アプリの表示で使用される映画館名。
-
[鑑賞種別]シート
- ID:「鑑賞種別」を表す値。
-
鑑賞種別:鑑賞方法の種類。現在は以下の種類を管理しています。
1:映画館/2:DVD(Blu-ray Discも含みます)/3:配信/4:テレビ/9:その他

プログラムの修正
サーバ側処理の修正
先ずは、サーバ側の処理を作成します。
Theater.gs(新規ファイル)
スクリプトファイル( Theater.gs )を追加して、次のプログラムを入力します。
function getTheaterData(year) {
  Logger.log('*** year: ' + year);
  const data = getTheaters(year);
  const tableData = [];
  for(let i = 0; i < data.length; i++) {
    const theaterData = {};
    theaterData.row = i + 3;
    theaterData.theaterName = String(data[i][0]);
    theaterData.viewingType = data[i][1];
    theaterData.firstTime = data[i][2];
    theaterData.googleTheaterName = String(data[i][3]);

    tableData.push(theaterData);
  }
  return tableData;
}
◆getTheaterData()関数の機能概要
[映画館]シートからデータを取得します。
function updTheaterData(cond) {
  const fileId = getFileIdFromYearSettings(cond.year);
  const sheet = SpreadsheetApp.openById(fileId).getSheetByName('映画館');
  let targetRow;
  if(cond.row == '0') {
    var lastRow = sheet.getLastRow();
    targetRow = lastRow + 1;
    cond.id = String(lastRow - 1);
  }
  else {
    targetRow = Number(cond.row);
  }

  sheet.getRange(targetRow, 3, 1, 4).setValues([[cond.theaterName, cond.viewingType, cond.firstTime, cond.googleTheaterName]]);

  return getTheaterData(cond.year);
}
◆updTheaterData()関数の機能概要
[映画館]シートのデータの更新もしくは追加を行います。
引数のcondはオブジェクトで、1行分のデータと行番号(.row)などを保持しています。
.rowはシートの行番号を表していて(更新処理)、この値が0の場合は追加処理を行います。
クライアント側処理の修正
次に、クライアント(画面)側の処理ならびに画面表示を作成します。
Vuejs.html
[映画メンテナンス]画面をVueコンポーネント(#theater-template)として追加します。
Vue.component("theater", {
  template: "#theater-template",
  props: {
    message: String,
    subject: String,
    tabledata: Array,
    viewingtypes: Array,
  },
  data: function() {
    return {
      title: '',
      processingType: '追加',
      dialogFormVisible: false,
      formLabelWidth: '120px',
      form: {
        row: 0,
        theaterName: '',
        viewingTypeLabel: '映画館',
        viewingType: '1',
        firstTime: '1',
        firstTimeDisabled: false,
        googleTheaterName: ''
      }
    }
  },
  methods: {
    updTheaterData: function() {
      if(this.form.firstTimeDisabled) {
        this.form.firstTime = '9';
      }
      this.$emit('upd-data', this.form);
      this.dialogFormVisible = false;
    },
    showDialogForm: function(row) {
      this.form.row = Number(row);
      if(this.form.row == 0) {
        this.title = '映画館の新規追加';
        this.processingType = '追加';
        this.form.theaterName = '';
        this.form.viewingTypeLabel = '映画館';
        this.form.viewingType = '1';
        this.form.firstTimeDisabled = false;
        this.form.firstTime = '1';
        this.form.googleTheaterName = '';
      }
      else {
        this.title = '映画館の修正';
        this.processingType = '更新';
        for(const row of this.tabledata) {
          if(row.row == this.form.row) {
            this.form.theaterName = row.theaterName;
            this.form.viewingTypeLabel = this.convViewingType(0, 0, row.viewingType, 0);
            this.form.viewingType = row.viewingType;
            this.form.firstTimeDisabled = (row.firstTime == 9) ? true : false;
            this.form.firstTime = (row.firstTime == 9) ? '0' : String(row.firstTime);
            this.form.googleTheaterName = row.googleTheaterName;
            break;
          }
        }
      }
      this.dialogFormVisible = true;
    },
    updViewingType: function() {
      let val = null;
      for(const viewingType of this.viewingtypes) {
        if(viewingType[1] == this.form.viewingTypeLabel) {
          val = viewingType[0];
          break;
        }
      }
      if(val == 1) {
        this.form.firstTimeDisabled = false;
      }
      else {
        this.form.firstTimeDisabled = true;
      }
      this.form.viewingType = val;
    },
    convViewingType: function(row, column, cellValue, index) {
      let res = null;
      for(const viewingType of this.viewingtypes) {
        if(viewingType[0] == cellValue) {
          res = viewingType[1];
          break;
        }
      }
      return res;
    },
    convFirstTime: function(row, column, cellValue, index) {
      let res = '-';
      if(cellValue == 0) {
        res = 'いいえ';
      }
      else if(cellValue == 1){
        res = 'はい';
      }
      return res;
    }
  }
});
Vueコンポーネントを作成する際の注意点
props:オプションが、Vueインスタンス(#app)とのデータ連携で使用されます。
このオプションの変数名は、全て小文字で記述します。(キャメルケースで記述する
事はできません)
data:オプションは、オブジェクトではなく関数として記述します。
Vueインスタンスのdata:オプションにshowTheater tableData viewingTypesを追加します。
showTheaterがtrueの時に[映画館メンテナンス]画面が表示されます。
tableDataには、サーバから取得した[映画館]のデータがセットされます。
viewingTypesには、サーバから取得した[鑑賞種別]のデータがセットされます。
var app = new Vue({
  el: '#app',
  data: {
      :
    showTheater: false,
      :
    tableData: [],
    viewingTypes : [],
methods:オプションに下記の関数を追加します。
  methods: {
      :
    doHideTheater: function() {
      this.showTheater = false;
      this.message = '';
    },
    doShowTheater: function() {
      this.subject = '映画館メンテナンス';
      this.message = '';
      google.script.run.withSuccessHandler(
        function(v, element) {
          app.tableData = v;
          app.showTheater = true;
        })
        .withFailureHandler(
          function(msg, element) {
            showError(msg);
          })
        .withUserObject(this)
        .getTheaterData(this.selectedYear);
    },
    doUpdTheaterData: function(cond) {
      cond.year = this.selectedYear;
      google.script.run.withSuccessHandler(
        function(v, element) {
          app.tableData = v;
        })
        .withFailureHandler(
          function(msg, element) {
            showError(msg);
          })
        .withUserObject(this)
        .updTheaterData(cond);
    },
theaterScript.html(新規ファイル)
HTMLファイル( theaterScript.html )を追加して、次のHTMLを入力します。(実際には<script>コードとして実装)
このファイルが、Vueコンポーネント(#theater-template)のテンプレートとなります。
<script type="text/x-template" id="theater-template">
  <transition name="modal">
    <div class="modal-mask">
      <div class="modal-wrapper">
        <div class="modal-container theater-container">

          <div class="modal-header">
            <slot name="header">
              default header
            </slot>
          </div>

          <div class="modal-body">
            <slot name="body">
              {{ message }}
            </slot>

            <el-table v-bind:data="tabledata" height="500" style="width: 100%">
              <el-table-column prop="theaterName" label="映画館名" width="400"></el-table-column>
              <el-table-column prop="viewingType" label="鑑賞種別" width="80" :formatter="convViewingType"></el-table-column>
              <el-table-column prop="firstTime" label="初回" width="70" :formatter="convFirstTime"></el-table-column>
              <el-table-column prop="googleTheaterName" label="Google映画館名" width="400"></el-table-column>
              <el-table-column fixed="right" label="編集" width="80" align="center">
                <template slot-scope="scope">
                  <el-button @click="showDialogForm(scope.row.row)" size="small" type="warning">修正</el-button>
                </template>
              </el-table-column>
            </el-table>

            <el-dialog :title="title" :visible.sync="dialogFormVisible" width="800px">
              <el-form :model="form">
                <el-form-item label="映画館名" :label-width="formLabelWidth">
                  <el-input v-model="form.theaterName"></el-input>
                </el-form-item>
                <el-form-item label="鑑賞種別" :label-width="formLabelWidth">
                  <el-radio-group v-model="form.viewingTypeLabel" @change="updViewingType">
                    <el-radio-button v-for="item in viewingtypes" :label="item[1]"></el-radio-button>
                  </el-radio-group>
                </el-form-item>
                <el-form-item label="初回" :label-width="formLabelWidth">
                  <el-switch v-model="form.firstTime" active-value="1" inactive-value="0" :disabled="form.firstTimeDisabled"></el-switch>
                </el-form-item>
                <el-form-item label="Google映画館名" :label-width="formLabelWidth">
                  <el-input v-model="form.googleTheaterName"></el-input>
                </el-form-item>
              </el-form>
              <span slot="footer" class="dialog-footer">
                <el-button @click="dialogFormVisible = false">キャンセル</el-button>
                <el-button type="primary" @click="updTheaterData">{{ processingType }}</el-button>
              </span>
            </el-dialog>
          </div>

          <div class="modal-footer theater-footer">
            <slot name="footer">
              <el-button type="primary" @click="showDialogForm(0)">新規追加</el-button>
              <el-button type="info" @click="$emit('close-theater')">閉じる</el-button>
            </slot>
          </div>

        </div>
      </div>
    </div>
  </transition>
</script>
一覧表示には、<el-table>を使用します。「編集」列の表示を右側に固定する為に、<el-table-column>にfixed="right"を指定します。
データ入力用のダイアログ画面の表示には、<el-dialog>と<el-form>を使用します。
Index.html
今回追加した theaterScript.html を読み込む為に下記を追加する。
<?!= HtmlService.createHtmlOutputFromFile('theaterScript').getContent(); ?>
[映画館メンテナンス]画面を表示する為の〔映画館メンテナンス〕ボタンを追加します。
〔カレンダー登録〕ボタン(<button type="button">)の下に<el-button>を追加します。
<button type="button" class="btn btn-primary" id="show-calendar" @click="doShowCalendar">カレンダー登録</button>
<el-button @click="doShowTheater">映画館メンテナンス</el-button>
今回作成したVueコンポーネント([映画館メンテナンス])を使用する為に下記も追加します。
v-bind:xxxxxxxのxxxxxxxが、#theater-templateのprops:オプションの変数名になります。
    <theater v-if="showTheater" v-on:close-theater="doHideTheater" v-on:upd-data="doUpdTheaterData" v-bind:message="message" v-bind:subject="subject" v-bind:tabledata="tableData" v-bind:viewingtypes="viewingTypes">
      <h3 slot="header">{{ subject }}</h3>
    </theater>
modalStyle.html
下記のスタイルを追加します。
.theater-container {
  width: 700px;
}

.theater-footer {
  text-align: right;
}
Element UIの詳細については、下記を参照してください。
◆参考サイト Element 公式サイト
結果
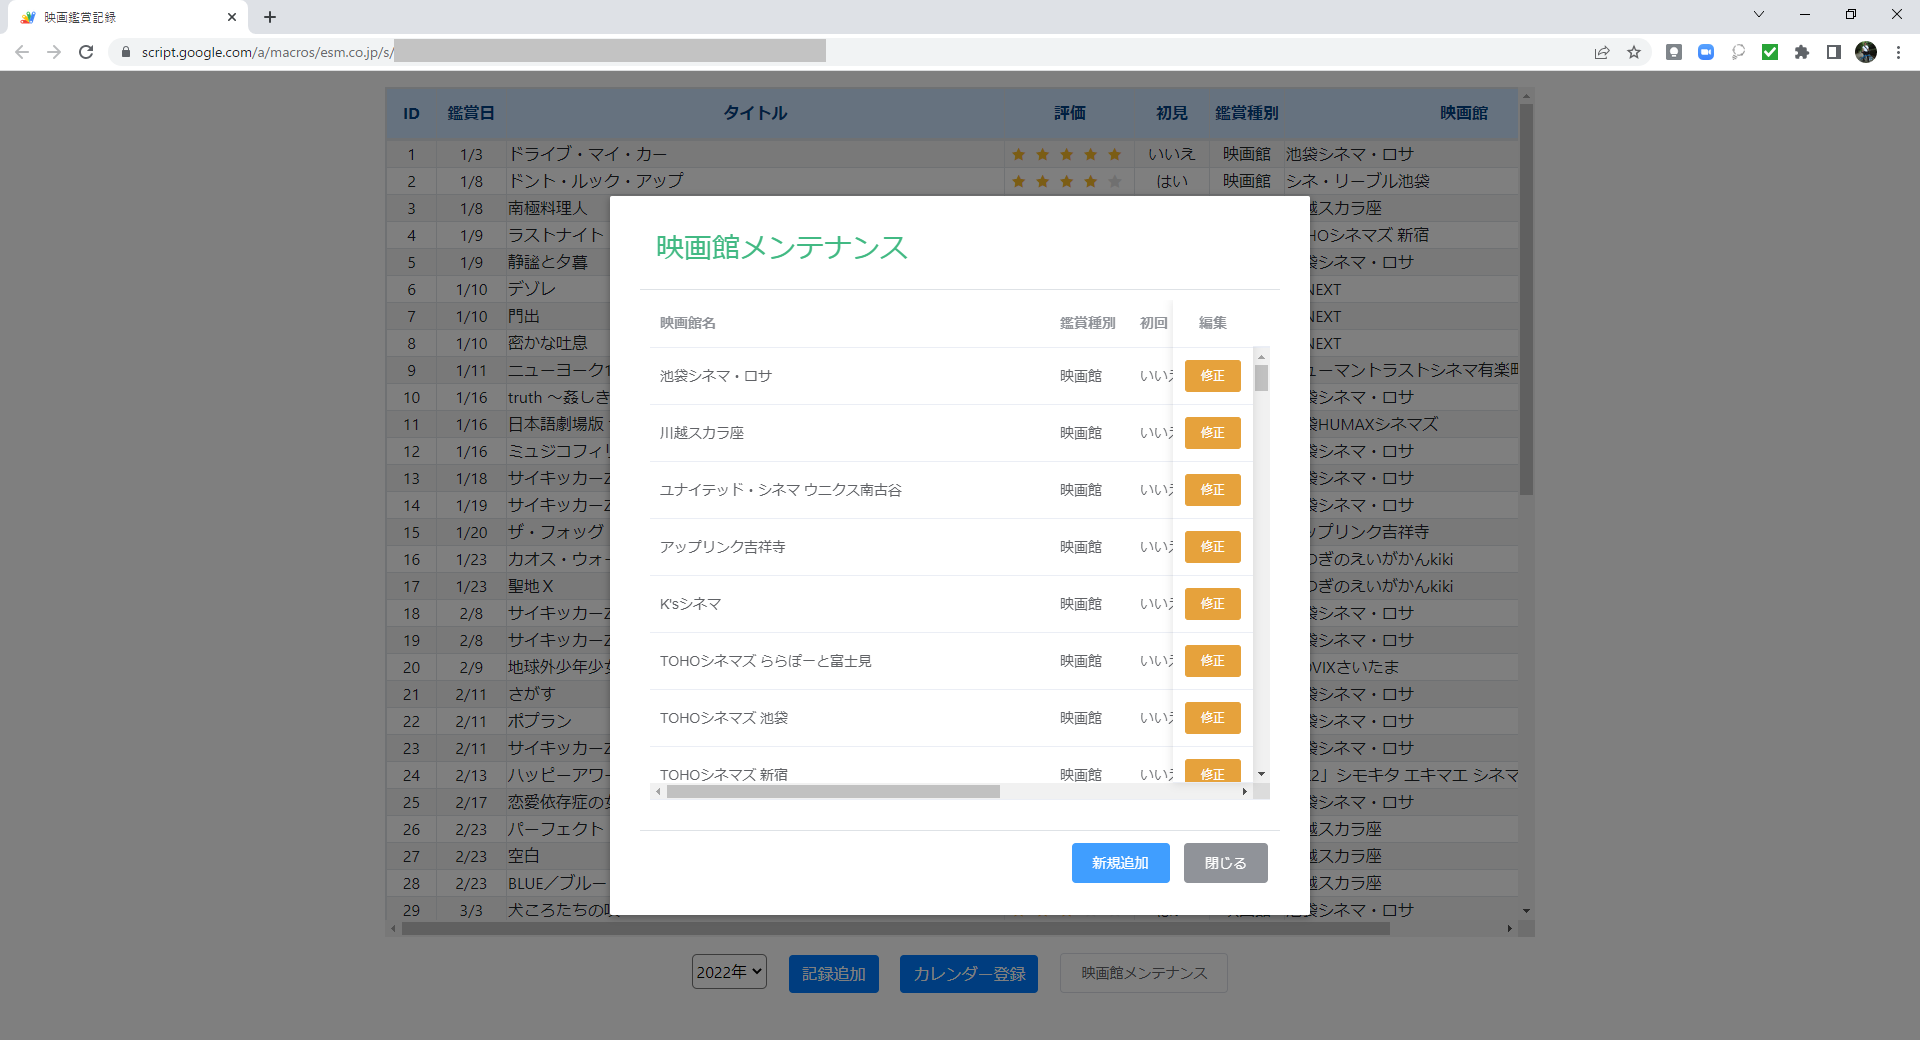
では、今回追加した「映画館メンテナンス」機能を確認してみます。
メイン画面

〔映画館メンテナンス〕ボタンをクリックすると、[映画館メンテナンス]画面が表示されます。
「新規追加」処理
[映画館メンテナンス]画面の〔新規追加〕ボタンをクリックすると、[映画館の新規追加]ダイアログ画面が表示されます。


各項目に入力を行い〔追加〕ボタンをクリックすると、入力したデータが一覧に表示されます。
[映画館]シートにも「ポレポレ東中野」のデータが追加されています。

「修正」処理
「ポレポレ東中野」行の〔修正〕ボタンをクリックすると、[映画館の修正]ダイアログ画面が表示されます。

「鑑賞種別」を《映画館》に変更して、「初回」を《ON》にします。

続けて〔更新〕ボタンをクリックすると、入力したデータが一覧に反映されます。

[映画館]シートにも修正内容が反映されています。

◆前の記事 GASでWebアプリ「映画鑑賞記録」を作る⑯
◆次の記事 GASでWebアプリ「映画鑑賞記録」を作る⑱