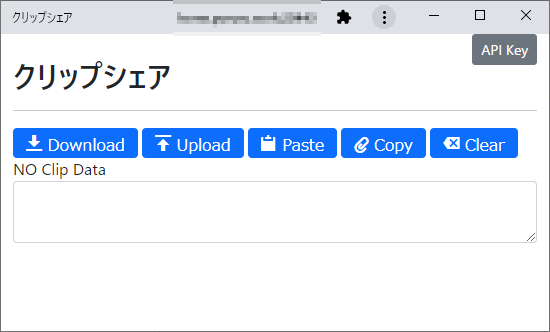
WindowsとAndroidでテキストを共有したいことがよくあり、最近はMacやiPhoneとも共有することが増えてきたので、クリップボードのテキストを共有するPWAアプリを作成します。
PWAにすれば、アプリっぽく使えるのと、後程示すショートカットが便利だったりします。
以下のGitHubにソースコードを上げておきます。
poruruba/ClipShare
#テキストの共有方法
単に、Node.jsサーバを立ち上げて、テキストを保持するようにし、HTTP Post呼び出して、Set/Getするようにしているだけです。
ソースコードを載せますが、大したことはやっていません。
一応、セキュリティを考慮して、APIKeyがあっていないと受け付けないようにするのと、1日間以上はテキストを保持しないようにしています。以下に示す変数APIKEYの部分です。
'use strict';

const HELPER_BASE = process.env.HELPER_BASE || "/opt/";
const Response = require(HELPER_BASE + 'response');

const APIKEY = "【任意のAPIKey】";
const EXPIRES_IN = 60 * 60 * 1000;
var clip = null;

exports.handler = async (event, context, callback) => {
	var body = JSON.parse(event.body);

	if( event.requestContext.apikeyAuth.apikey != APIKEY )
		throw "apikey invalid";

	switch(event.path){
		case "/clipshare-get":{
			if( !clip || new Date().getTime() > clip.created_at + EXPIRES_IN )
				return new Response({status: "ng"});
			return new Response({ status: "ok", clip: clip });
		}
		case "/clipshare-set":{
			clip = {
				text: body.text,
				created_at: new Date().getTime()
			};
			return new Response({ status: "ok" } );
		}
	}
};
※セキュリティ上の配慮はないので、自己責任でお願いします。
※それから、HTTPSで通信するようにしないと、テキストの内容は漏洩します。
#クライアント側
PWA化するために、マニフェストファイルを作成します。
{
	"short_name": "クリップシェア",
	"name": "クリップシェア",
	"display": "standalone",
	"start_url": "index.html",
	"icons": [
		{
			"src": "img/192x192.png",
			"sizes": "192x192"
		}
	],
	"shortcuts": [
		{
			"name": "Clip⇒Upload",
			"description": "クリップボードをアップロードします。",
			"url": "/clipshare/index.html?cmd=clip2upload",
			"icons": [
				{
					"src": "img/192x192.png",
					"sizes": "192x192"
				}
			]
		},
		{
			"name": "Download⇒Clip",
			"description": "ダウンロードしてクリップボードにコピーします。",
			"url": "/clipshare/index.html?cmd=download2clip",
			"icons": [
				{
					"src": "img/192x192.png",
					"sizes": "192x192"
				}
			]
		}
	]
}
少し補足しますと、「shortcuts」という項目がありますが、これは、PWAとしてインストールした後に、右クリックまたは長押しで、ワンタッチでクリップボード上のテキストをサーバにアップしたり、サーバ上のテキストをクリップボードにコピーするためのショートカットの設定です。ホーム画面にショートカットとしてもおけるのがうれしい。
HTMLで指定します。
  <link rel="manifest" href="manifest.json">
  <link rel="manifest" href="manifest.webmanifest" />
  <script async src="https://cdn.jsdelivr.net/npm/pwacompat" crossorigin="anonymous"></script>
また、PWAのために、ServiceWorkerを立ち上げる必要があるため、以下のJSを作成します。
var CACHE_NAME = 'clipshare-pwa-caches';
self.addEventListener('fetch', function(event) {
  console.log('sw event: fetch called');
});
あとは、これを、ページロード後に読み出すようにします。
        if ('serviceWorker' in navigator) {
            navigator.serviceWorker.register('sw.js').then(async (registration) => {
                console.log('ServiceWorker registration successful with scope: ', registration.scope);
            }).catch((err) => {
                console.log('ServiceWorker registration failed: ', err);
            });
        }
PWAについては、以下を参考にしてください。
PWAを試してみよう
#クリップボードのコピー/ペースト
以下の通りです。
    clip_paste: async function(){
    	return navigator.clipboard.readText();
    },
    clip_copy: async function(text){
    	return navigator.clipboard.writeText(text);
    },
async/awaitなので注意です。
参考:Clipboard API
https://developer.mozilla.org/en-US/docs/Web/API/Clipboard_API
#クライアント側ソースコード
Javascriptソースを以下に示します。
'use strict';

//const vConsole = new VConsole();
//window.datgui = new dat.GUI();

var vue_options = {
    el: "#top",
    mixins: [mixins_bootstrap],
    data: {
        dialog_input: {},
        base_url: "",
        apikey: "",
        payload: "",
        message: "",
    },
    computed: {
    },
    methods: {
        clipshare_get: async function(){
            try{
                this.message = "";
                var json = await do_post_with_apikey(this.base_url + "/clipshare-get", {}, this.apikey);
                if( json.clip ){
                    this.payload = json.clip.text;
                    await this.clip_copy(this.payload);
                    this.message = "DOWNLOAD created_at " + new Date(json.clip.created_at).toLocaleString( 'ja-JP', {} );
                }else{
                    this.message = "NO Clip Data";
                }
            }catch(error){
                alert(error);
            }
        },
        clipshare_set: async function(){
            try{
                this.message = "";
                var params = {
                    text: this.payload
                };
                await do_post_with_apikey(this.base_url + "/clipshare-set", params, this.apikey);
                this.message = "UPLOAD at " + new Date().toLocaleString( 'ja-JP', {} );
            }catch(error){
                alert(error);
            }
        },
        clipshare_paste: async function(){
            this.payload = await this.clip_paste();
            this.message = "clipboard PASTE";
        },
        clipshare_copy: async function(){
            await this.clip_copy(this.payload);
            this.message = "clipboard COPY";
        },
        clipshare_clear: function(){
            this.message = "";
            this.payload = "";
        },
        set_apikey: function(){
            this.dialog_input = {
                base_url: this.base_url || "",
                apikey: this.apikey || ""
            };
            this.dialog_open('#apikey_dialog');
        },
        apkey_update: function(){
            localStorage.setItem("base_url", this.dialog_input.base_url);
            localStorage.setItem("apikey", this.dialog_input.apikey);
            this.dialog_close('#apikey_dialog');
            alert('設定しました。リロードしてください。');
        }
    },
    created: function(){
    },
    mounted: async function(){
        proc_load();

        if ('serviceWorker' in navigator) {
            navigator.serviceWorker.register('sw.js').then(async (registration) => {
                console.log('ServiceWorker registration successful with scope: ', registration.scope);
            }).catch((err) => {
                console.log('ServiceWorker registration failed: ', err);
            });
        }

        this.base_url = localStorage.getItem('base_url');
        this.apikey = localStorage.getItem('apikey');
        if( this.apikey ){
            switch(searchs.cmd){
                case 'clip2upload':{
                    this.payload = await this.clip_paste();
                    await this.clipshare_set();
                    alert('クリップボードをアップロードしました。');
                    window.close();
                    break;
                }
                case 'download2clip':{
                    await this.clipshare_get()
                    alert('ダウンロードしてクリップボードにコピーしました。');
                    window.close();
                    break;
                }
                default:{
                    this.clipshare_get();
                    break;
                }
            }
        }else{
           setTimeout( () =>{
                alert('API Keyを指定してください。');
            }, 0);
        }
    }
};
vue_add_data(vue_options, { progress_title: '' }); // for progress-dialog
vue_add_global_components(components_bootstrap);
vue_add_global_components(components_utils);

/* add additional components */

window.vue = new Vue( vue_options );

function do_post_with_apikey(url, body, apikey) {
    const headers = new Headers({ "Content-Type": "application/json; charset=utf-8", "X-API-KEY": apikey });

    return fetch(url, {
      method: 'POST',
      body: JSON.stringify(body),
      headers: headers
    })
    .then((response) => {
      if (!response.ok)
        throw 'status is not 200';
      return response.json();
  //    return response.text();
  //    return response.blob();
  //    return response.arrayBuffer();
    });
  }
#セットアップ
以下から、ZIPでダウンロードします。
その後、適当なフォルダで展開して、npm install; node app.js; でOKです。
HTTPSにするには、certフォルダを作ってそこにSSL証明書を置いてください。
クライアント側では最初に立ち上げたサーバのURLとAPIKeyを設定してください。
以上
