前回の投稿で、ESP32をAlexaでLチカする準備が整いました。
ESP32をAlexaでLチカする(1):これから作るものと環境セットアップ
今回は、肝心のAlexa Smart HomeをNode.jsサーバに実装していきます。
詳細は以下を参照してください。
今回実装したソースコードもろもろはGitHubに上げておきました。
poruruba/AlexaSmartHome_Test
前提
前回の投稿で、AWS Lambdaから、ローカルに立ち上げたNode.jsサーバに転送しました。
Node.jsサーバは、Lambdaを模擬した環境にしてあるので、Lambdaと思って実装すればよいです。
さらに、Alexa Smart Homeの通信処理を扱いやすいように、ユーティリティを挟んでいます。
class AlexaSmartHomeUtils{
    constructor(){
        this.intentHandles = new Map();
    }

    intent( matcher, handle ){
        this.intentHandles.set(matcher, handle);
    }

    handle(){
        return async (handlerInput, context) => {
            var intent = handlerInput.directive.header.namespace + '.' + handlerInput.directive.header.name;
            console.log('intent: ' + intent);
            var handler = this.intentHandles.get(intent);
            if( handler )
                return handler(handlerInput, context);
            else
                console.log('not found intent: ' + intent);
        }
    }
}

module.exports = AlexaSmartHomeUtils;
以下のように呼び出しています。
const AlexaSmartHomeUtils = require(HELPER_BASE + 'alexa-smarthome-utils');
const app = new AlexaSmartHomeUtils();

・・・ appにコールバックを実装

exports.fulfillment = app.handle();
大した処理ではないので、上記が間に介在している前提で、以降の説明をします。
Discoveryインタフェース
まず実装するべきは、Discoveryインタフェースです。
※参考:Discoveryインタフェース
https://developer.amazon.com/ja-JP/docs/alexa/device-apis/alexa-discovery.html
Discoveryインタフェースは、初めてアクセスしてきたユーザに対して、サポートするデバイスの種類をリストで返します。
単純な、スイッチOn/OffだけのデバイスPowerControllerをサポートするDiscoveryインタフェースの実装を示します。
app.intent('Alexa.Discovery.Discover', async (handlerInput, context) => {
  console.log('Alexa.Discovery.Discover called.');

  var payload = {
    endpoints: []
  };

  payload.endpoints.push({
    endpointId: "switch_01",
    manufacturerName: MANUFACTURE_NAME,
    friendlyName: "LED",
    description: "スマートデバイスのLED",
    displayCategories: ["SWITCH"],
    capabilities: [{
        type: "AlexaInterface",
        interface: "Alexa",
        version: "3"
      },
      {
        interface: "Alexa.PowerController",
        version: "3",
        type: "AlexaInterface",
        properties: {
          supported: [{
            name: "powerState"
          }],
          proactivelyReported: false,
          retrievable: true,
          nonControllable: false
        }
      }
    ]
  });

  var responseHeader = handlerInput.directive.header;
  responseHeader.name = "Discover.Response";

  context.succeed({
    event: {
      header: responseHeader,
      payload: payload
    }
  });
});
payload.endpointsに複数のデバイスを定義できます。
endpointIdは、おそらく複数のデバイスをサポートすることにするかと思いますので、それを区別するためのIDです。自由につけてください。
displayCategoriesは、Alexaアプリ上で、どのようなアイコンで見せるかを指定します。
※参考:表示カテゴリ
https://developer.amazon.com/ja-JP/docs/alexa/device-apis/alexa-discovery.html#display-categories
capabilitiesに、デバイスでサポートしたい機能の配列です。今回は、単純なOn/Offを表すAlexa.PowerControllerにしています。その他どんな値を指定すればよいかは、インタフェースに依存します。Alexa.PowerControllerは以下に記載があります。
※参考:PowerController 検出
https://developer.amazon.com/ja-JP/docs/alexa/device-apis/alexa-powercontroller.html#discovery
ここで、共通で大事なプロパティが3つあります。
〇retrievable
これをtrueにすると、Alexaサーバから情報が欲しいときに状態取得要求(ReportState)が送られてきます。いつでも状態問い合わせに返答できるわけではない場合は、falseを指定します。デフォルトはfalseです。
〇proactivelyReported
デバイス側で状態が変わった場合に、能動的にAlexaサーバに状態変更の通知(ChangeReport)できる場合には、trueを指定します。デバイスでのボタン押下をトリガとして伝えたい場合があります。デフォルトはfalseです。
〇nonControllable
デバイス側は読み出しのみ出来て、状態変更の要求を受け付けられない場合にtrueを設定します。例えば、温度計は取得のみとしたいでしょう。デフォルトはfalseです。
※参考:状態および変更レポートのサポートを指定する
https://developer.amazon.com/ja-JP/docs/alexa/smarthome/state-reporting-for-a-smart-home-skill.html
Authorization.AcceptGrantインタフェース
次に実装するのが、Alexa.Authorization.AcceptGrantインタフェースです。
※参考:Alexa.Authorizationインターフェース
https://developer.amazon.com/ja-JP/docs/alexa/device-apis/alexa-authorization.html
基本的には、Alexaサーバからのリクエストに対してレスポンスを返せばよいのですが、Alexaサーバからの状態変更要求に対する変更応答を非同期で返したり、ボタン押下イベントといった能動的に返す場合には、受信先を指定するためのトークンが必要です。
トークンは、ユーザ本人であることの証であり、ユーザがAmazonにログインすることで、得ることができます。
ユーザ本人がログインすると、Alexaサーバから認可コード(code)と一緒に、このAcceptGrantインタフェースが呼び出されますので、以前にメモった「AlexaクライアントID」と「Alexaクライアントシークレット」を使ってトークンを得ることができます。
app.intent('Alexa.Authorization.AcceptGrant', async (handlerInput, context) => {
	console.log('Alexa.Authorization.AcceptGrant called.');
	var code = handlerInput.directive.payload.grant.code;

	var body = await do_post('https://api.amazon.com/auth/o2/token', {
		grant_type: 'authorization_code',
		code: code,
		client_id: ALEXA_CLIENT_ID,
		client_secret: ALEXA_CLIENT_SECRET
	});
	console.log(body);
	body.created_at = new Date().getTime();
	await jsonfile.write_json(TOKEN_FNAME, body);

	var responseHeader = handlerInput.directive.header;
	responseHeader.name = "AcceptGrant.Response";
	context.succeed({ event: { header: responseHeader, payload: {} }});
});
取得したトークンは後で使うので、ファイルに保存しています。
御覧の通り、ユーザはおひとり様限りの手抜き実装です。
ReportStateインタフェース
Discoveryインタフェースにおいて、今回は、retrievableをtrueにしました。
ですので、Alexaサーバから適宜状態の問い合わせが来ます。それがこのReportStateです。
context.propertiesに、デバイスのインタフェースに合わせて応答を返してあげます。
PowerControllerの場合は以下に説明があります。
※参考:PowerController 状態レポート
https://developer.amazon.com/ja-JP/docs/alexa/device-apis/alexa-powercontroller.html#state-report
app.intent('Alexa.ReportState', async (handlerInput, context) => {
  console.log('Alexa.ReportState called.');
  var endpointId = handlerInput.directive.endpoint.endpointId;
  var requestToken = handlerInput.directive.endpoint.scope.token;

  var contextResult = {
    properties: []
  };

  if (endpointId == "switch_01") {
    var val = await arduino.Gpio.digitalRead(10);

    contextResult.properties.push({
      namespace: "Alexa.PowerController",
      name: "powerState",
      value: (val == arduino.Gpio.LOW) ? 'ON' : 'OFF',
      timeOfSample: new Date().toISOString(),
      uncertaintyInMilliseconds: 1000
    });
  }

  var responseHeader = handlerInput.directive.header;
  responseHeader.namespace = "Alexa";
  responseHeader.name = "StateReport";

  var response = {
    context: contextResult,
    event: {
      header: responseHeader,
      endpoint: {
        scope: {
          type: "BearerToken",
          token: requestToken
        },
        endpointId: endpointId
      },
      payload: {}
    }
  };
  console.log(response);
  context.succeed(response);
});
変更要求インタフェース
Discoveryインタフェースにおいて、nonControllable: false としましたので、Alexaサーバから状態変更の要求が来ます。Echoで「○○をオンにして」と言ったり、Alexaアプリでスイッチをタップしたりすると、要求が来ます。
どんな要求が来るかは、デバイスのインタフェースに依存します。
PowerControllerの場合には、TurnOnとTurnOffディレクティブが来ます。
ですので、それに応答するように実装します。
app.intent('Alexa.PowerController.TurnOn', async (handlerInput, context) => {
  console.log('Alexa.PowerController.TurnOn called.');
  await handlePowerControl(handlerInput, context);
});
app.intent('Alexa.PowerController.TurnOff', async (handlerInput, context) => {
  console.log('Alexa.PowerController.TurnOff called.');
  await handlePowerControl(handlerInput, context);
});

async function handlePowerControl(handlerInput, context) {
  var requestToken = handlerInput.directive.endpoint.scope.token;
  var requestMethod = handlerInput.directive.header.name;
  var endpointId = handlerInput.directive.endpoint.endpointId

  if (endpointId == "switch_01") {
    if (requestMethod == "TurnOn")
      await arduino.Gpio.digitalWrite(10, arduino.Gpio.LOW);
    else
      await arduino.Gpio.digitalWrite(10, arduino.Gpio.HIGH);
  }

  var contextResult = {
    properties: [{
      namespace: "Alexa.PowerController",
      name: "powerState",
      value: (requestMethod === "TurnOn") ? 'ON' : 'OFF',
      timeOfSample: new Date().toISOString(),
      uncertaintyInMilliseconds: 1000
    }]
  };

  var responseHeader = handlerInput.directive.header;
  responseHeader.namespace = "Alexa";
  responseHeader.name = "Response";

  var response = {
    context: contextResult,
    event: {
      header: responseHeader,
      endpoint: {
        scope: {
          type: "BearerToken",
          token: requestToken
        },
        endpointId: endpointId
      },
      payload: {}
    }
  };

  context.succeed(response);

  var report_header = {
    messageId: uuidv4(),
    namespace: "Alexa",
    name: "ChangeReport",
    payloadVersion: "3"
  };

  var report_payload = {
    change: {
      cause: {
        type: "APP_INTERACTION"
      },
      properties: contextResult.properties
    }
  };
  await sendReport(report_header, endpointId, report_payload);
}
何を返すかは、ディレクティブによりますが、PowerControllerの場合は以下を参照してください。
※参考:PowerController ディレクティブ
https://developer.amazon.com/ja-JP/docs/alexa/device-apis/alexa-powercontroller.html#directives
最後に、「 context.succeed(response) 」を呼び出して返してます。これで完了です。
が、実はそのあとに、sendReportを呼び出しています。これが、状態変更の通知(ChangeReport)です。Alexaのドキュメントを見ると、Alexaサーバからの変更要求に対して状態を変更したらChanreReportも返すのがよいそうです。
変更内容は、ディレクティブによりますが、PowerControllerの場合は以下を参照してください。
※参考:PowerContrller 変更レポート
https://developer.amazon.com/ja-JP/docs/alexa/device-apis/alexa-powercontroller.html#change-report
sendReport()の中身
さきほどの、sendReport()の中身はこんな感じになっています。
async function sendReport(header, endpointId, payload){
	console.log("sendReport", report);
	var token = await jsonfile.read_json(TOKEN_FNAME);
	if( token.created_at + token.expires_in * 1000 <= new Date().getTime() ){
		var params = {
			grant_type: "refresh_token",
			refresh_token: token.refresh_token,
		};
		var new_token = await do_post_urlencoded_with_basic("https://api.amazon.com/auth/o2/token", params, ALEXA_CLIENT_ID, ALEXA_CLIENT_SECRET)
		token.access_token = new_token.access_token;
		if( new_token.refresh_token )
			token.refresh_token = new_token.refresh_token;
		token.created_at = new Date().getTime();
		await jsonfile.write_json(TOKEN_FNAME, token);
	}

	var report = {
		context: {
			properties: []
		},
		event: {
			header: header,
			endpoint: {
				scope: {
					type: "BearerToken",
					token: token.access_token
				},
				endpointId : endpointId
			},
			payload: payload
		}
	};

	return do_post_text_with_token("https://api.fe.amazonalexa.com/v3/events", report, token.access_token);
}
各ディレクティブの定義の通りに返しているだけですが、1点違うのがトークンを使っているところです。
これまでは、Alexサーバからのリクエストに対して応答を返していましたので、誰に返しているかは意識する必要はありませんでした。
ですが、このChangeReportやボタン押下などの状態変更イベントは、誰に送りたいかを示す必要があるため、トークンを付ける必要があります。
すでにトークンを取得してあるので、それを使えばよいのですが、実はトークンの有効期限は1時間なので、1時間を経過したら、リフレッシュすなわち再取得する必要があります。
トークンを取得したときに、リフレッシュトークンというものも取得していたのでそれを使います。
※参考:リフレッシュトークンの使用
https://developer.amazon.com/ja/docs/login-with-amazon/authorization-code-grant.html#using-refresh-tokens
ボタン押下の通知
最後に、ボタン押下の通知ができるデバイスの実装を示しておきます。
Discoveryインタフェースにおいて以下を返すことを想定します。
		payload.endpoints.push({
		  endpointId: "bell_01",
		  manufacturerName: MANUFACTURE_NAME,
		  friendlyName: 'ドアベル',
		  description: 'スマートデバイスのドアベル',
		  displayCategories: ["DOORBELL"],
		  capabilities: [{
		      type: "AlexaInterface",
		      interface: "Alexa",
		      version: "3"
		    },
		    {
		      type: "AlexaInterface",
		      interface: "Alexa.DoorbellEventSource",
		      version: "3",
		      proactivelyReported: true,
		    }
		  ]
		});
ドアベルですね。
※参考:Alexa.DoorbellEventSourceインターフェース 検出
https://developer.amazon.com/ja-JP/docs/alexa/device-apis/alexa-doorbelleventsource.html#discovery
この中で、proactiveryReportedをtrueにしています。また、endpointIdはbell_01にしています。
ボタン押下の通知は、Node.jsサーバ側から発動します。
Node.jsサーバには、Alexaサーバからのリクエストを受け取るエンドポイントのほかに、デバイスからの変更通知を受け取るエンドポイントも用意しています。
デバイスからの通知を受け取ると以下が呼び出されるようにしています。
ドアベルが押されたときには、DoorbellPressイベントをAlexaサーバに通知します。
※参考:Alexa.DoorbellEventSourceインターフェース DoorbellPressイベント
https://developer.amazon.com/ja-JP/docs/alexa/device-apis/alexa-doorbelleventsource.html#doorbellpress-event
exports.handler = async (event, context, callback) => {
      if (event.path == '/alexahome-push') {
        var body = JSON.parse(event.body);
        console.log(body);

        if (body.endpoint == 'input.wasPressed') {
          switch (body.result.type) {
            case 1:
              {
                var report_header = {
                  messageId: uuidv4(),
                  namespace: "Alexa.DoorbellEventSource",
                  name: "DoorbellPress",
                  payloadVersion: "3"
                };

                var report_payload = {
                  cause: {
                    type: "PHYSICAL_INTERACTION"
                  },
                  timestamp: new Date().toISOString()
                };

                await sendReport(report_header, "bell_01", report_payload);
                break;
              }
          }
        }

        return new Response({
          status: "OK"
        });
      }
}
PowerController・DoorbellEventSource以外のインタフェース
PowerController以外にも、ColorController、BrightnessController、TemperatureSensor、RangeController、ToggleControllerのインタフェースを実装していますので、参考にしてください。
少し補足しますが、RangeControllerとToogleControllerは、汎用コントローラと呼ばれる部類に属し、instanceというプロパティが増えて子番号のデバイスを併記することができるようになりますが、それ以外はほとんど同じです。
※参考:Generic Controller Interfaces
https://developer.amazon.com/ja-JP/docs/alexa/device-apis/generic-controllers.html
おうちに登録する
それではさっそく自宅のAlexaに登録しましょう。
前回の投稿で、メールが来てましたよね。
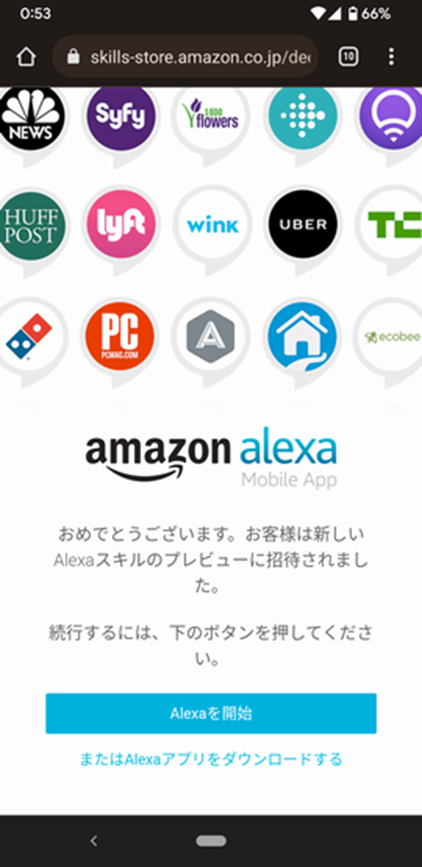
リンクをクリックしてブラウザを立ち上げた後に、Alexaアプリを起動します。
こんな感じで表示されるので、有効にしてあげましょう。
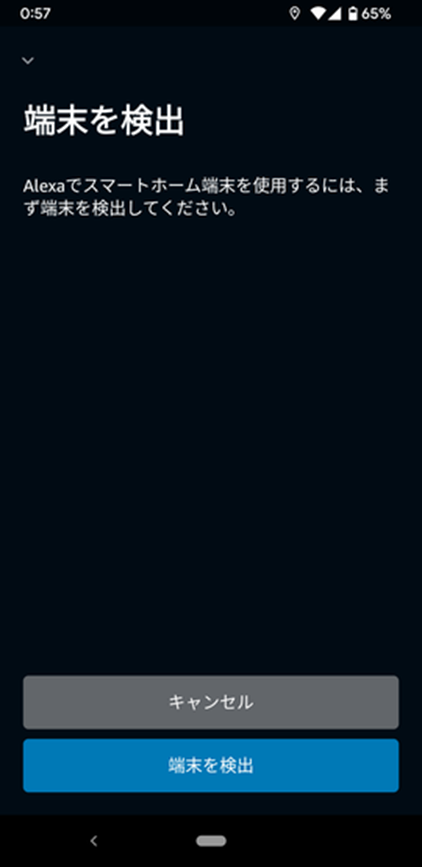
めでたく、認識成功しました。
次に、Discoveryインタフェースで定義したデバイスを登録します。
ちっと時間がかかります。
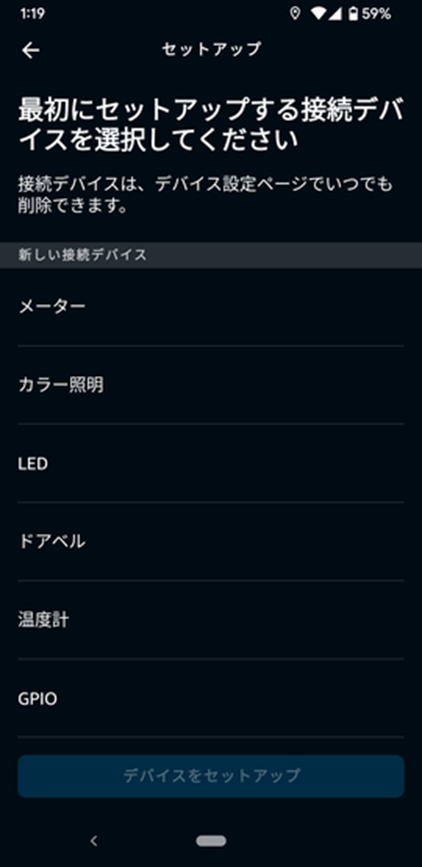
登録成功です。
こんな感じでリストアップされてます。(今回関係ないデバイスも含まれてます)
終わりに
説明は以上です。
そんなに複雑ではないことがわかるかと思います。
あとは、PowerController以外にもデバイスに合わせて最適なインタフェースを選択すればよいでしょう。
以前、黒豆を使った赤外線リモコンをAlexaスマートホームで実現していましたので、ご参考まで。
スマートホームスキルを作る(2):いよいよスマートホームスキルを作成する
以上


