戦車ラジコンネタ はまだ続きます。
M5CameraでQRコードを探していましたが、今回は、発見したQRコードに画像を張り付けて、より敵キャラっぽくしてみようと思います。
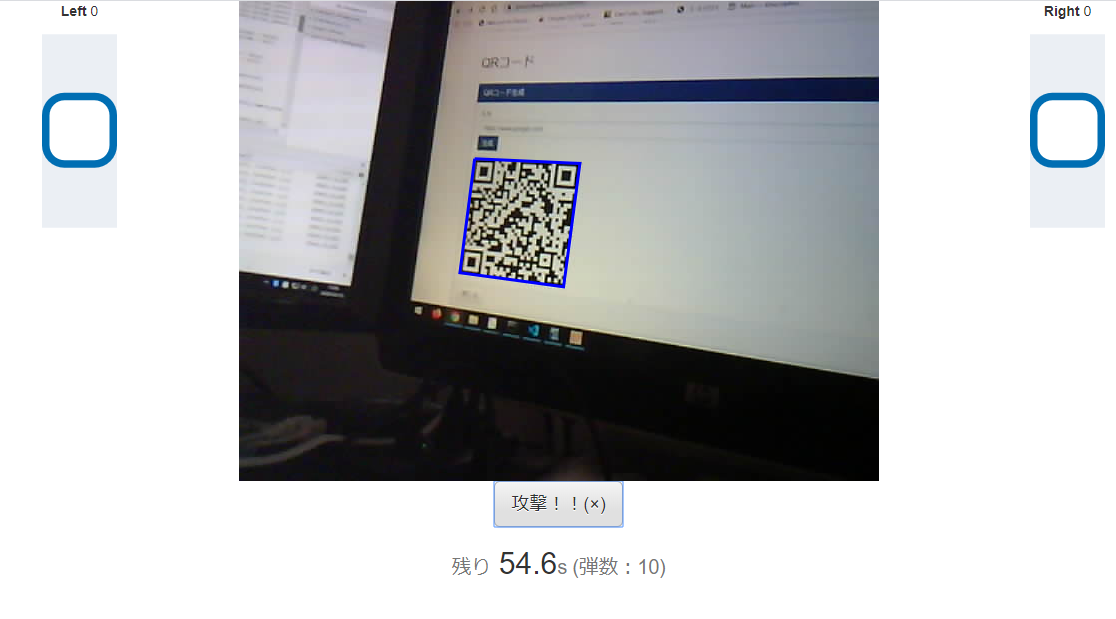
まずは通常のQRコードを発見したとき。
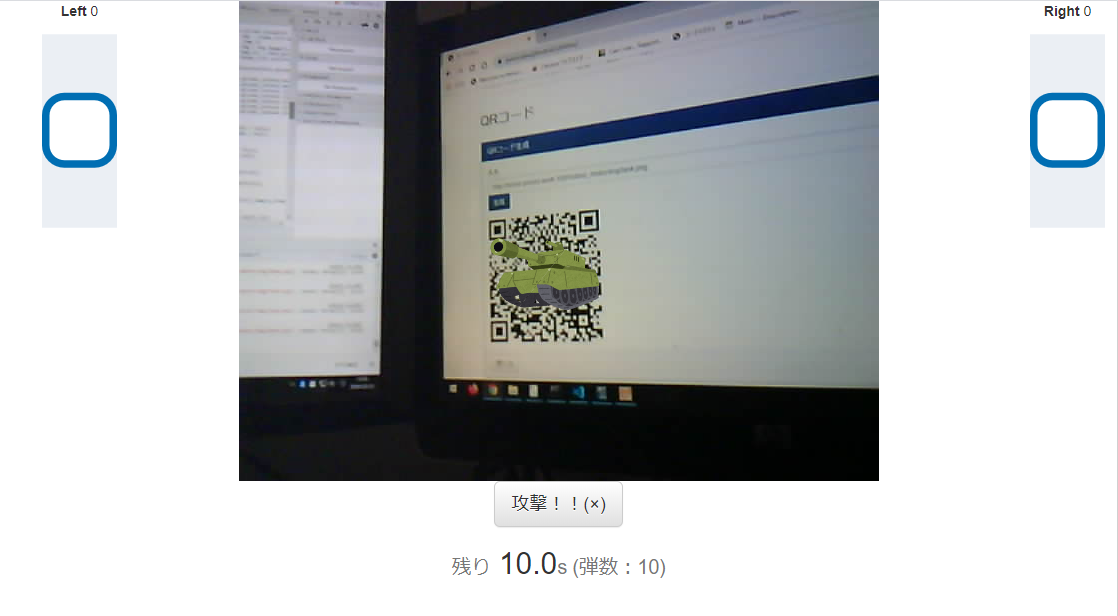
こっちが、画像のQRコードを発見したときです。敵戦車の画像がはめ込まれています。
毎度の通り、GitHubに上げておきました。
https://github.com/poruruba/obniz_motor
以下からもページを参照できます。(Obnizにつながないと使えないですが)。
https://poruruba.github.io/obniz_motor/
※M5Cameraがhttp接続なので、https上にある上記ページからは解像度の変更ができないようです。
画像の変形
発見したQRコードは、見る角度によって、正方形ではなく、遠近法によって台形状になっていたり、斜めになっていたりします。
そこで、はめ込む画像をそれに合わせて変形します。
以下のサイトをそのまま使わせていただきました。(ありがとうございました)
4角形の変形
http://oldmist.html.xdomain.jp/game_make/t001.html
function drawTexture(g, img, plsttx){
    var imgw = img.width;
    var imgh = img.height;

    var m11 = (plsttx[1].x - plsttx[0].x) / imgw;
    var m12 = (plsttx[1].y - plsttx[0].y) / imgw;
    var m21 = (plsttx[3].x - plsttx[0].x) / imgh;
    var m22 = (plsttx[3].y - plsttx[0].y) / imgh;
    var dx = plsttx[0].x;
    var dy = plsttx[0].y;

    try{
        g.save();
        g.beginPath();
        g.moveTo(plsttx[0].x, plsttx[0].y);
        g.lineTo(plsttx[1].x, plsttx[1].y);
        g.lineTo(plsttx[3].x, plsttx[3].y);
        g.closePath();
        g.clip();
        g.setTransform(m11, m12, m21, m22, dx, dy);
        g.drawImage(img, 0, 0);
        g.restore();

        m11 = (plsttx[2].x - plsttx[3].x) / imgw;
        m12 = (plsttx[2].y - plsttx[3].y) / imgw;
        m21 = (plsttx[2].x - plsttx[1].x) / imgh;
        m22 = (plsttx[2].y - plsttx[1].y) / imgh;
        dx = plsttx[1].x - imgw * m11;
        dy = plsttx[3].y - imgh * m22;

        g.save();
        g.beginPath();
        g.moveTo(plsttx[1].x, plsttx[1].y);
        g.lineTo(plsttx[2].x, plsttx[2].y);
        g.lineTo(plsttx[3].x, plsttx[3].y);
        g.closePath();
        g.clip();
        g.setTransform(m11, m12, m21, m22, dx, dy);
        g.drawImage(img, 0, 0);
        g.restore();
    }catch(error){
        console.log(error);
        g.restore();
    }
}
この関数を、QRコードを発見したときに呼び出します。
ただし、発見したQRコードの拡張子が.pngのときだけ上記関数を呼び出しています。
    if( this.qrcode_list.indexOf(code.data) < 0){
        this.qrcode = code.data;
        this.lockon = true;

        var pos = code.location;
        this.qrcode_context.beginPath();
        this.qrcode_context.moveTo(pos.topLeftCorner.x, pos.topLeftCorner.y);
        this.qrcode_context.lineTo(pos.topRightCorner.x, pos.topRightCorner.y);
        this.qrcode_context.lineTo(pos.bottomRightCorner.x, pos.bottomRightCorner.y);
        this.qrcode_context.lineTo(pos.bottomLeftCorner.x, pos.bottomLeftCorner.y);
        this.qrcode_context.lineTo(pos.topLeftCorner.x, pos.topLeftCorner.y);
        this.qrcode_context.stroke();

        if( this.qrcode.toLowerCase().endsWith('.png') ){
            var img = this.enemy_list.get(this.qrcode);
            if( !img ){
                var image = new Image();
                image.crossOrigin = "Anonymous";
                image.src = this.qrcode;
                img = { image: image, count: 0 };
                this.enemy_list.set(this.qrcode, img );
            };
            drawTexture(this.qrcode_context, img.image, [pos.topLeftCorner, pos.topRightCorner, pos.bottomRightCorner, pos.bottomLeftCorner]);
        }else if( this.qrcode.toLowerCase().endsWith('.mp3') ){
            if( this.audio == null ){
                this.audio = new Audio();
                this.audio.addEventListener("ended", () => this.audio = null, false);
                this.audio.src = this.qrcode;
                this.audio.play();
            }
        }
補足
・変形させた画像に、斜めに白い線がでちゃうんですが、消し方がわからない。。。
・QRコードの検出がシビアな場合、画像が表示されたり消えたりで、ちかちかします。
・QRコードから画像を取得する場合、ここでも汚染が影響します。同じドメインに画像を配置してください。
おまけ:QRコードの的の作り方
Choromeブラウザとプリンタを使います。
まずは、以下のページを開きます。
https://poruruba.github.io/utilities/
(参考) 便利ページ:Javascriptでちょっとした便利な機能を作ってみた
QRコードタブの「QRコード生成」の入力に、画像のURLを入力し、「生成」ボタンを押下します。
(例えば、https://poruruba.github.io/obniz_motor/img/tank.png )
すると、QRコードが表示されます。
その画像の上で、右クリックし、「新しいタブで画像を開く」を選択すると、別のタブにQRコードだけ表示されます。
そのタブ上で、右クリックし、「印刷」を選択して、プリンタで紙に印刷します。
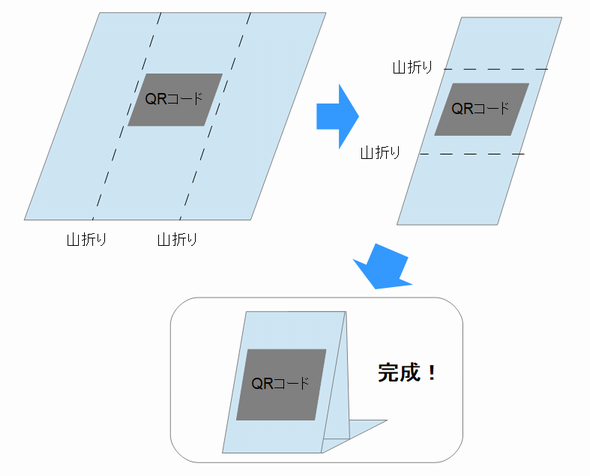
あとは、以下のように折りたためば、QRコード的(まと)の完成です。
※上下逆さまにすると、表示される画像も逆さまになるので注意です。(とはいっても、どっちが上かわかりにくいですが)
以上


