前回の投稿「 QuickJSでお手軽ESP32+Javascript実行環境 」で、ESP32(M5StickC)上でJavascriptを動かしてみましたが、今回は、細かいことは置いておいて、とりあえず動かしてみるまでを説明します。
GitHubはこちら。
poruruba/Esp32quickJS_sample
https://github.com/poruruba/Esp32QuickJS_sample
前提条件
Microsoft Visual Studio Codeがインストールされ、PlatformIOがセットアップされている状態にします。
Visual Studio Code
https://azure.microsoft.com/ja-jp/products/visual-studio-code/
PlatformIO
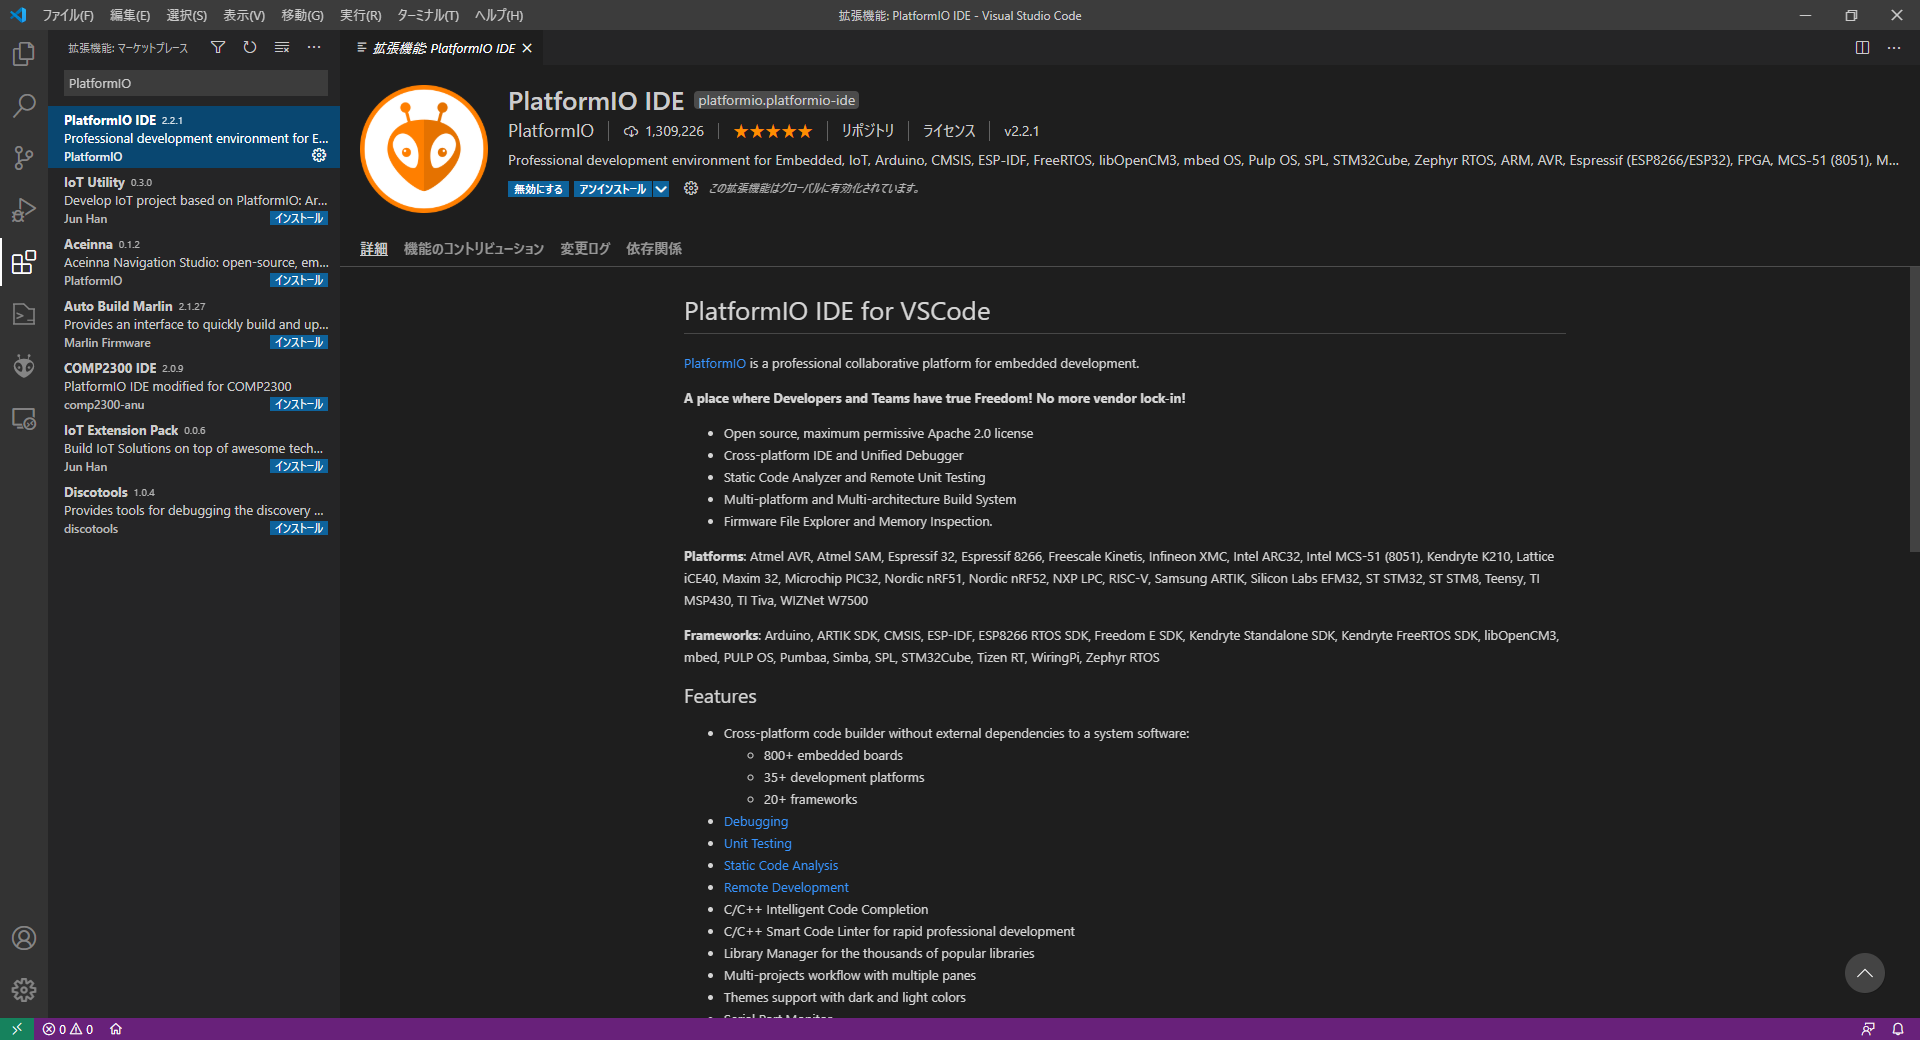
Visual Studio Codeの左側の拡張機能から、PlatformIOと入れると出てくる「PlatfomIO IDE」をインストール。
※私の環境ではいろいろセットアップ済みの状態で実施したため、新規の場合足りない作業があるかもしれません。
Wifiアクセスポイントの書き換え
ソース一式はGitHubに上げているのですが、各環境に合わせて変更する箇所があります。
・WiFiアクセスポイントの変更
・M5StickCのCOMポート番号の変更
まずは、以下のURLからZIPをダウンロードします。
ダウンロードして展開し、以下のフォルダでVisual Studio Codeを開きます。
unzip Esp32QuickJS_sample-main.zip
cd Esp32QuickJS_sample-main\Esp32QuickJS_sample-main\Esp32QuickJS
src/main.cppの以下の部分を環境に合わせて書き換えます。
const char *wifi_ssid = "【WiFiアクセスポイントのSSID】";
const char *wifi_password = "【WiFiアクセスポイントのパスワード】";
platformio.iniの以下の部分を環境に合わせて書き換えます。
upload_port = COM6
monitor_port = COM6
私の環境では、M5StickCのCOMポート番号が6でした。
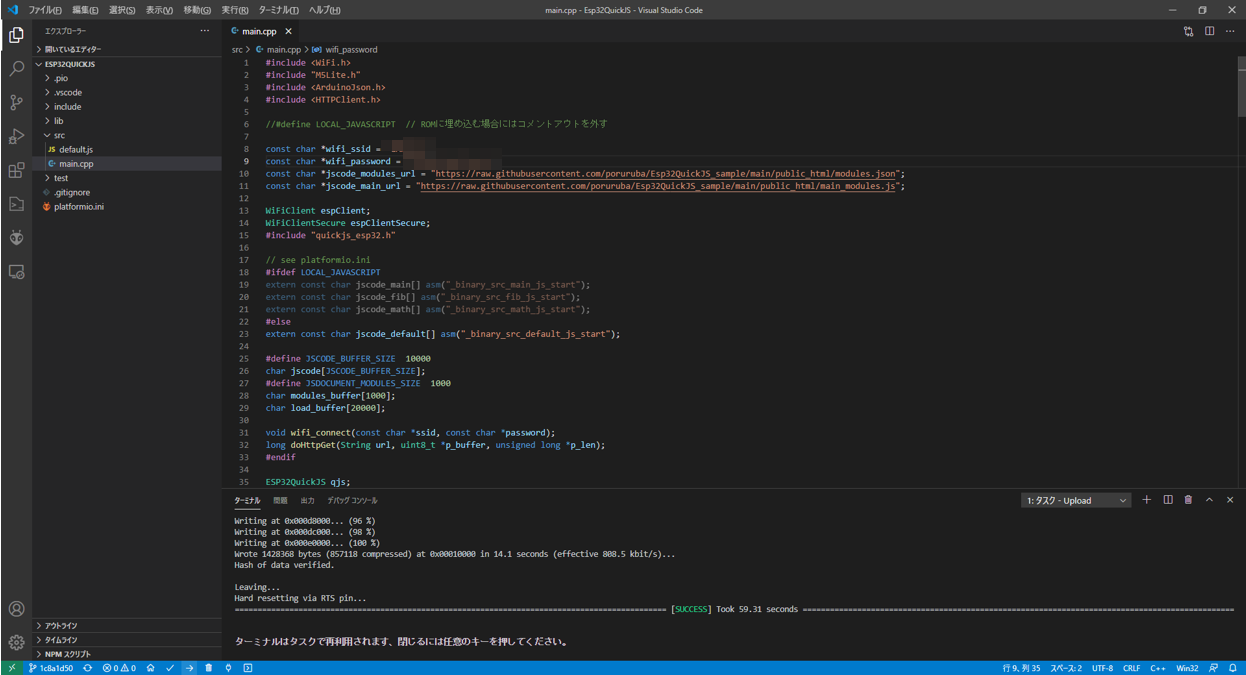
あとは、左下の「→」のところをクリックします。ツールチップで「PlatfomIO: Upload」と表示されている部分です。
そうすると、必要なファイルのダウンロードとコンパイルし、問題なければ、M5StickCに書き込みます。
成功すると以下のように表示されます。
ここで、Ctrl+Shift+Pを押すと、拡張コマンドの入力ができるようになるため、以下を選択してEnterを押下します。
PlatformIO: Serial Monitor
そうすると、M5StickCのCOMポートに接続されたターミナルが表示されます。
すでにJavascriptは動いていて、main.jsの内容の通りにconsole.logの内容が出力されているのがわかります。
> Executing task: C:\Users\XXXX\.platformio\penv\Scripts\pio.exe device monitor <

--- Available filters and text transformations: colorize, debug, default, direct, esp32_exception_decoder, hexlify, log2file, nocontrol, printable, send_on_enter, time
--- More details at http://bit.ly/pio-monitor-filters
--- Miniterm on COM6  9600,8,N,1 ---
--- Quit: Ctrl+C | Menu: Ctrl+T | Help: Ctrl+T followed by Ctrl+H ---

Connected : XXX.XXX.XXX.XXX
https://raw.githubusercontent.com/poruruba/Esp32QuickJS_sample/main/public_html/modules.json
[HTTP] GET begin...
[HTTP] GET...
[HTTP] GET... code: 200
[HTTP] Content-Length=265
https://raw.githubusercontent.com/poruruba/Esp32QuickJS_sample/main/public_html/fib.js
[HTTP] GET begin...
[HTTP] GET...
[HTTP] GET... code: 200
[HTTP] Content-Length=176
fib.js
https://raw.githubusercontent.com/poruruba/Esp32QuickJS_sample/main/public_html/math.js
[HTTP] GET begin...
[HTTP] GET...
[HTTP] GET... code: 200
[HTTP] Content-Length=98
math.js
https://raw.githubusercontent.com/poruruba/Esp32QuickJS_sample/main/public_html/main_modules.js
[HTTP] GET begin...
[HTTP] GET...
[HTTP] GET... code: 200
[HTTP] Content-Length=309
Hello World
fib(10)=
55
add(1, 2)=
3
sub(3, 4)=
-1
Hello World
fib(10)=
55
・・・・
COMポートを開いたタイミングによっては、HTTP Getしている様の出力の表示はないかもしれません。
何も変更していなければ、以下の部分に指定したmain.jsが動いています。(GitHubにあげているやつです)
const char *jscode_main_url = "https://raw.githubusercontent.com/poruruba/Esp32QuickJS_sample/main/public_html/main_modules.js";
内容は以下の通りです。
/* example of JS module importing a C module */

import { fib } from "fib.js";
import * as math from "math.js";

setInterval(() =>{
  console.log("Hello World");
  console.log("fib(10)=", fib(10));
  console.log("add(1, 2)=", math.add(1, 2));
  console.log("sub(3, 4)=", math.sub(3, 4));
}, 1000);
フィボナッチの計算をしたり、mathというモジュールを呼んだ結果をconsole.logしています。
では、これらモジュールはどこからとってきているかというと、以下の部分で指定しています。
const char *jscode_modules_url = "https://raw.githubusercontent.com/poruruba/Esp32QuickJS_sample/main/public_html/modules.json";
内容は以下の通りです。
[
	{
		"name": "fib.js",
		"url": "https://raw.githubusercontent.com/poruruba/Esp32QuickJS_sample/main/public_html/fib.js"
	},
	{
		"name": "math.js",
		"url": "https://raw.githubusercontent.com/poruruba/Esp32QuickJS_sample/main/public_html/math.js"
	}
]
JSONファイルになっていて、そこに示されたJavascriptをさらに取得してロードしています。たとえば、math.jsは以下の内容になっています。
export function add(a, b){
  return a + b;
}

export function sub(a, b){
  return a - b;
}
modules.jsonで示されている通りmath.jsという名前でモジュールが登録され、それをmain_modules.jsから以下のように指定しています。
import * as math from "math.js";
カスタマイズ
あとはサーバに配置するmodules.jsonやJavascriptを編集したのち、M5StickCを再起動すればよいです。
再起動は、M5StickCのBボタン(横側面のボタン)を押下することで再起動するようにしています。
オフライン実行
オフラインで実行する場合は、JavascriptをM5StickCのROMに埋め込む必要があります。
まずは、main.cppにある以下の部分のコメントアウトを外します。
# define LOCAL_JAVASCRIPT
srcフォルダ等に、Javascriptファイルを置きます。
※Cソースとごっちゃになるので、別のフォルダ(jsとか)に置けばよかった。後で直そう。
platformio.iniにそのJavascriptファイルを指定して埋め込みます。
(参考) https://docs.platformio.org/en/latest/platforms/espressif32.html#embedding-binary-data
board_build.embed_txtfiles =
;	src/default.js
	src/fib.js
	src/math.js
	src/main_modules.js
main.cppで埋め込んだJavascriptを参照できるようにします。
extern const char jscode_main[] asm("_binary_src_main_modules_js_start");
extern const char jscode_fib[] asm("_binary_src_fib_js_start");
extern const char jscode_math[] asm("_binary_src_math_js_start");
後は以下のようにしてロードし実行します。
  qjs.begin();

  qjs.load_module(jscode_fib, strlen(jscode_fib), "fib.js");
  qjs.load_module(jscode_math, strlen(jscode_math), "math.js");

  qjs.exec(jscode_main);
以上

