はじめに
Velodyne VLP16とlidarslam_ros2を使ってAutowareで使用するPCDマップを作成する手順
環境
OS : ubuntu22.04
ROS : Humble
Velodyne VLP16のセットアップ
Velodyneドライバのインストール
mkdir -p ~/velodyne_ws/src
cd ~/velodyne_ws/src
git clone https://github.com/ros-drivers/velodyne.git -b ros2
git clone https://github.com/ros/angles.git -b ros2
git clone https://github.com/ros/diagnostics.git -b humble
cd ~/ros2_ws/
colcon build --symlink-install
またはaptで取得
sudo apt install -y ros-humble-velodyne
ネットワークの設定
VLP16のIPアドレスはデフォルトの'192.168.1.201'になっているとする。
VelodyneをEthernetでPCに接続した状態でubuntuの設定画面からPCのIPアドレスの値を設定
('192.168.1.100'の100には201 を除く 1 ~ 254 の範囲の適当な値を設定)
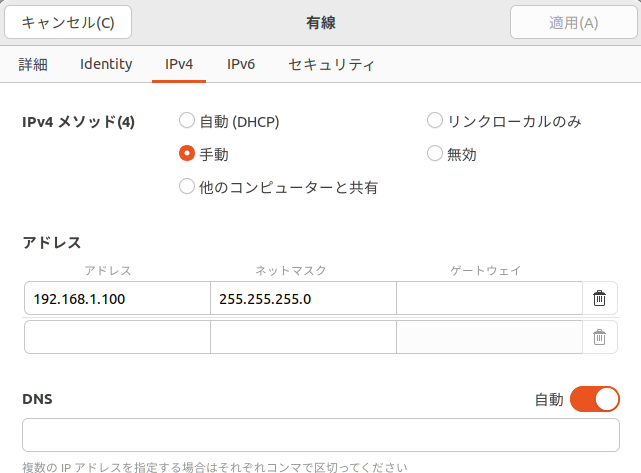
設定を適応したらpingで疎通確認
ping 192.168.1.201
lidarslam_ros2 のインストール
mkdir -p ~/slam_ws/src
cd ~/slam_ws/src
git clone --recursive https://github.com/rsasaki0109/lidarslam_ros2
cd ..
rosdep install --from-paths src --ignore-src -r -y
colcon build --symlink-install --cmake-args -DCMAKE_BUILD_TYPE=Release
実行
Velodyneドライバの実行
ros2 launch velodyne velodyne-all-nodes-VLP16-launch.py
lidarslam_ros2の実行
ros2 launch lidarslam lidarslam.launch.py
rviz2 でmapの確認
cd /slam_ws/src/lidarslam_ros2/lidarslam/rviz
rviz2 -d mapping.rviz
PCDファイルの保存
ros2 service call /map_save std_srvs/Empty
rqt_graph

参考