📝 はじめに
この記事では、LINE上で動くAIチャットボットを、Google Cloud上に構築し、ユーザごとに会話履歴を保存して文脈を踏まえた応答を返すシステムを作る手順を紹介します。
使用する主要技術:
- LINE Messaging API(ユーザと会話する)
- Google Cloud Functions(Webhookサーバ)
- Google Cloud Firestore(会話履歴を保存)
- OpenAI API(ChatGPT応答生成)
- Python
🧠 全体構成
全体アーキテクチャは下記の通りです。

- ユーザがLINEで話しかけると → Webhookで Cloud Functions(Python) に届く
- Cloud FunctionsはFirestoreから会話履歴を取得し、OpenAI APIに投げる
- 応答をFirestoreに保存して、LINEに返信
⚙️ 構築手順
ステップ①:事前準備
① LINE Developersでチャネル作成
- LINE Developers のコンソールにアクセス
- プロバイダを作成
- チャネル作成(チャネルタイプ:Messaging API)
- チャネルシークレットとチャネルアクセストークンをメモ
② Google Cloudのプロジェクト作成
- Google Cloud Console にログイン
- 「プロジェクトを作成」
- 以下のAPIを有効化
- Cloud Functions
- Firestore
- Secret Manager
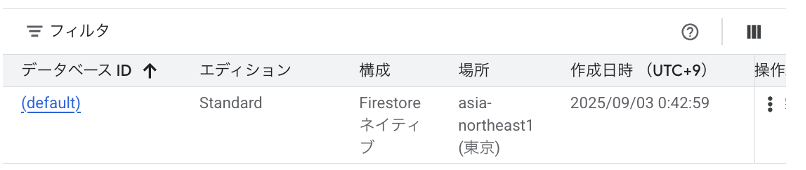
③ Firestoreデータベース作成
- Google Cloudのコンソールにて「ナビゲーションメニュー → Firestore → データベースを作成」
- ネイティブモードを選択
- リージョンを選んで作成
※今回は特に名前を指定せず(default)でOK
ステップ②:Cloud Run Functionsを作成
① 関数を作成
- 「ナビゲーションメニュー → Cloud Run Functions → サービスを作成」
- 「インライン エディタで関数を作成する」を選択
- ランタイムは「Python 3.11」を選択
- 他は必要に応じて変更してください
② 環境変数を設定
-
LINE_CHANNEL_SECRET→ LINEチャネルシークレット -
LINE_CHANNEL_ACCESS_TOKEN→ LINEチャネルアクセストークン -
OPENAI_API_KEY→ OPEN AIキー
③ ソースコードを貼り付け
- エディタ種別:インラインエディタにしているので、そのまま貼り付ければOK
-
main.pyとrequirements.txtを作成して貼り付け
import os, json, base64, hmac, hashlib, logging
import requests, openai
from google.cloud import firestore
from flask import Request

LINE_CHANNEL_SECRET = os.environ.get("LINE_CHANNEL_SECRET")
LINE_CHANNEL_ACCESS_TOKEN = os.environ.get("LINE_CHANNEL_ACCESS_TOKEN")
OPENAI_API_KEY = os.environ.get("OPENAI_API_KEY")

openai.api_key = OPENAI_API_KEY
db = firestore.Client()

def line_webhook(request: Request):
    signature = request.headers.get("X-Line-Signature", "")
    body_bytes = request.get_data()
    if not verify_line_signature(LINE_CHANNEL_SECRET, body_bytes, signature):
        return ("", 401)

    body = request.get_json(silent=True)
    if not body:
        return ("", 400)

    events = body.get("events", [])
    for ev in events:
        if ev.get("type") == "message" and ev["message"].get("type") == "text":
            user_id = ev["source"].get("userId")
            reply_token = ev.get("replyToken")
            user_text = ev["message"].get("text")

            save_message(user_id, "user", user_text)
            history = get_recent_messages(user_id, limit=20)

            system_prompt = (
                "あなたは親切で礼儀正しいアシスタントです。"
                "以下の過去の会話(ユーザごと)を必ず参照してから応答してください。"
                "過去の会話内容を踏まえて、回答の矛盾がないようにしてください。"
            )

            messages = [{"role": "system", "content": system_prompt}]
            for m in history:
                messages.append({"role": m["role"], "content": m["text"]})
            messages.append({"role": "user", "content": user_text})

            try:
                resp = openai.chat.completions.create(
                    model="gpt-3.5-turbo",
                    messages=messages,
                    max_tokens=800,
                    temperature=0.6
                )
                assistant_text = resp.choices[0].message.content.strip()
            except Exception as e:
                logging.error("OpenAI API呼び出しエラー: %s", e)
                assistant_text = "申し訳ありません。応答の生成中にエラーが発生しました。"

            save_message(user_id, "assistant", assistant_text)
            reply_to_line(reply_token, assistant_text)

    return ("", 200)


def verify_line_signature(channel_secret, body, signature):
    if not channel_secret or not signature:
        return False
    hash = hmac.new(channel_secret.encode("utf-8"), body, hashlib.sha256).digest()
    computed = base64.b64encode(hash).decode()
    return hmac.compare_digest(computed, signature)

def save_message(user_id, role, text):
    doc_ref = db.collection("users").document(user_id).collection("messages").document()
    doc_ref.set({"role": role, "text": text, "timestamp": firestore.SERVER_TIMESTAMP})

def get_recent_messages(user_id, limit=20):
    col = db.collection("users").document(user_id).collection("messages")
    docs = col.order_by("timestamp", direction=firestore.Query.DESCENDING).limit(limit).stream()
    return list(reversed([
        {"role": d.to_dict().get("role"), "text": d.to_dict().get("text")}
        for d in docs
    ]))

def reply_to_line(reply_token, text):
    url = "https://api.line.me/v2/bot/message/reply"
    headers = {"Authorization": f"Bearer {LINE_CHANNEL_ACCESS_TOKEN}",
               "Content-Type": "application/json"}
    payload = {"replyToken": reply_token, "messages": [{"type": "text", "text": text}]}
    requests.post(url, headers=headers, json=payload)
flask
requests
openai
google-cloud-firestore
- デプロイ後、関数URLが発行されます(例:
https://xxxxx-asia-northeast1.run.app)
ステップ③:LINEのWebhookを設定
- LINE Developers → Messaging API設定 → Webhook URL に関数URLを貼り付け
- 「接続確認」で
200 OKが返ってくれば成功
📁 Firestoreのデータ構造
Firestoreには、ユーザごとの会話履歴が次のように保存されます。
users
 └── {user_id}
      └── messages
           ├── {auto_id1}: {role:"user", text:"こんにちは"}
           ├── {auto_id2}: {role:"assistant", text:"こんにちは!"}
これにより、次回以降のやり取りで過去履歴を取得して、ChatGPTに文脈を引き継げます。
🧠 仕組みのポイント
- LINE → Cloud Functions(Webhook)
- Firestoreに履歴を保存 → 過去20件を取得してChatGPTに渡す
- ChatGPTからの応答も保存 → 次回以降の文脈に利用
✏️ 開発の時に気がついたこと
firestoreへの格納はdb = firestore.Client()のみで、Cloud Functionが実行されるプロジェクトの(default)データベースが指定されます。
これは、過去のfirestoreは1プロジェクトにつき1つしか作れなかったため、DBが複数あってDB名を指定することを想定していなかったためです。
複数DBを作成していて、指定したい場合はdb = firestore.Client(database="my-database-name")とします。
まとめ
- LINE × ChatGPT × Google Cloud を組み合わせることで
- GUI操作だけでも
- 会話履歴つきチャットボットを簡単に構築できる
- Firestoreに履歴を保存することで、文脈を踏まえた応答が可能になる
ぜひ皆さんも作ってみてください!