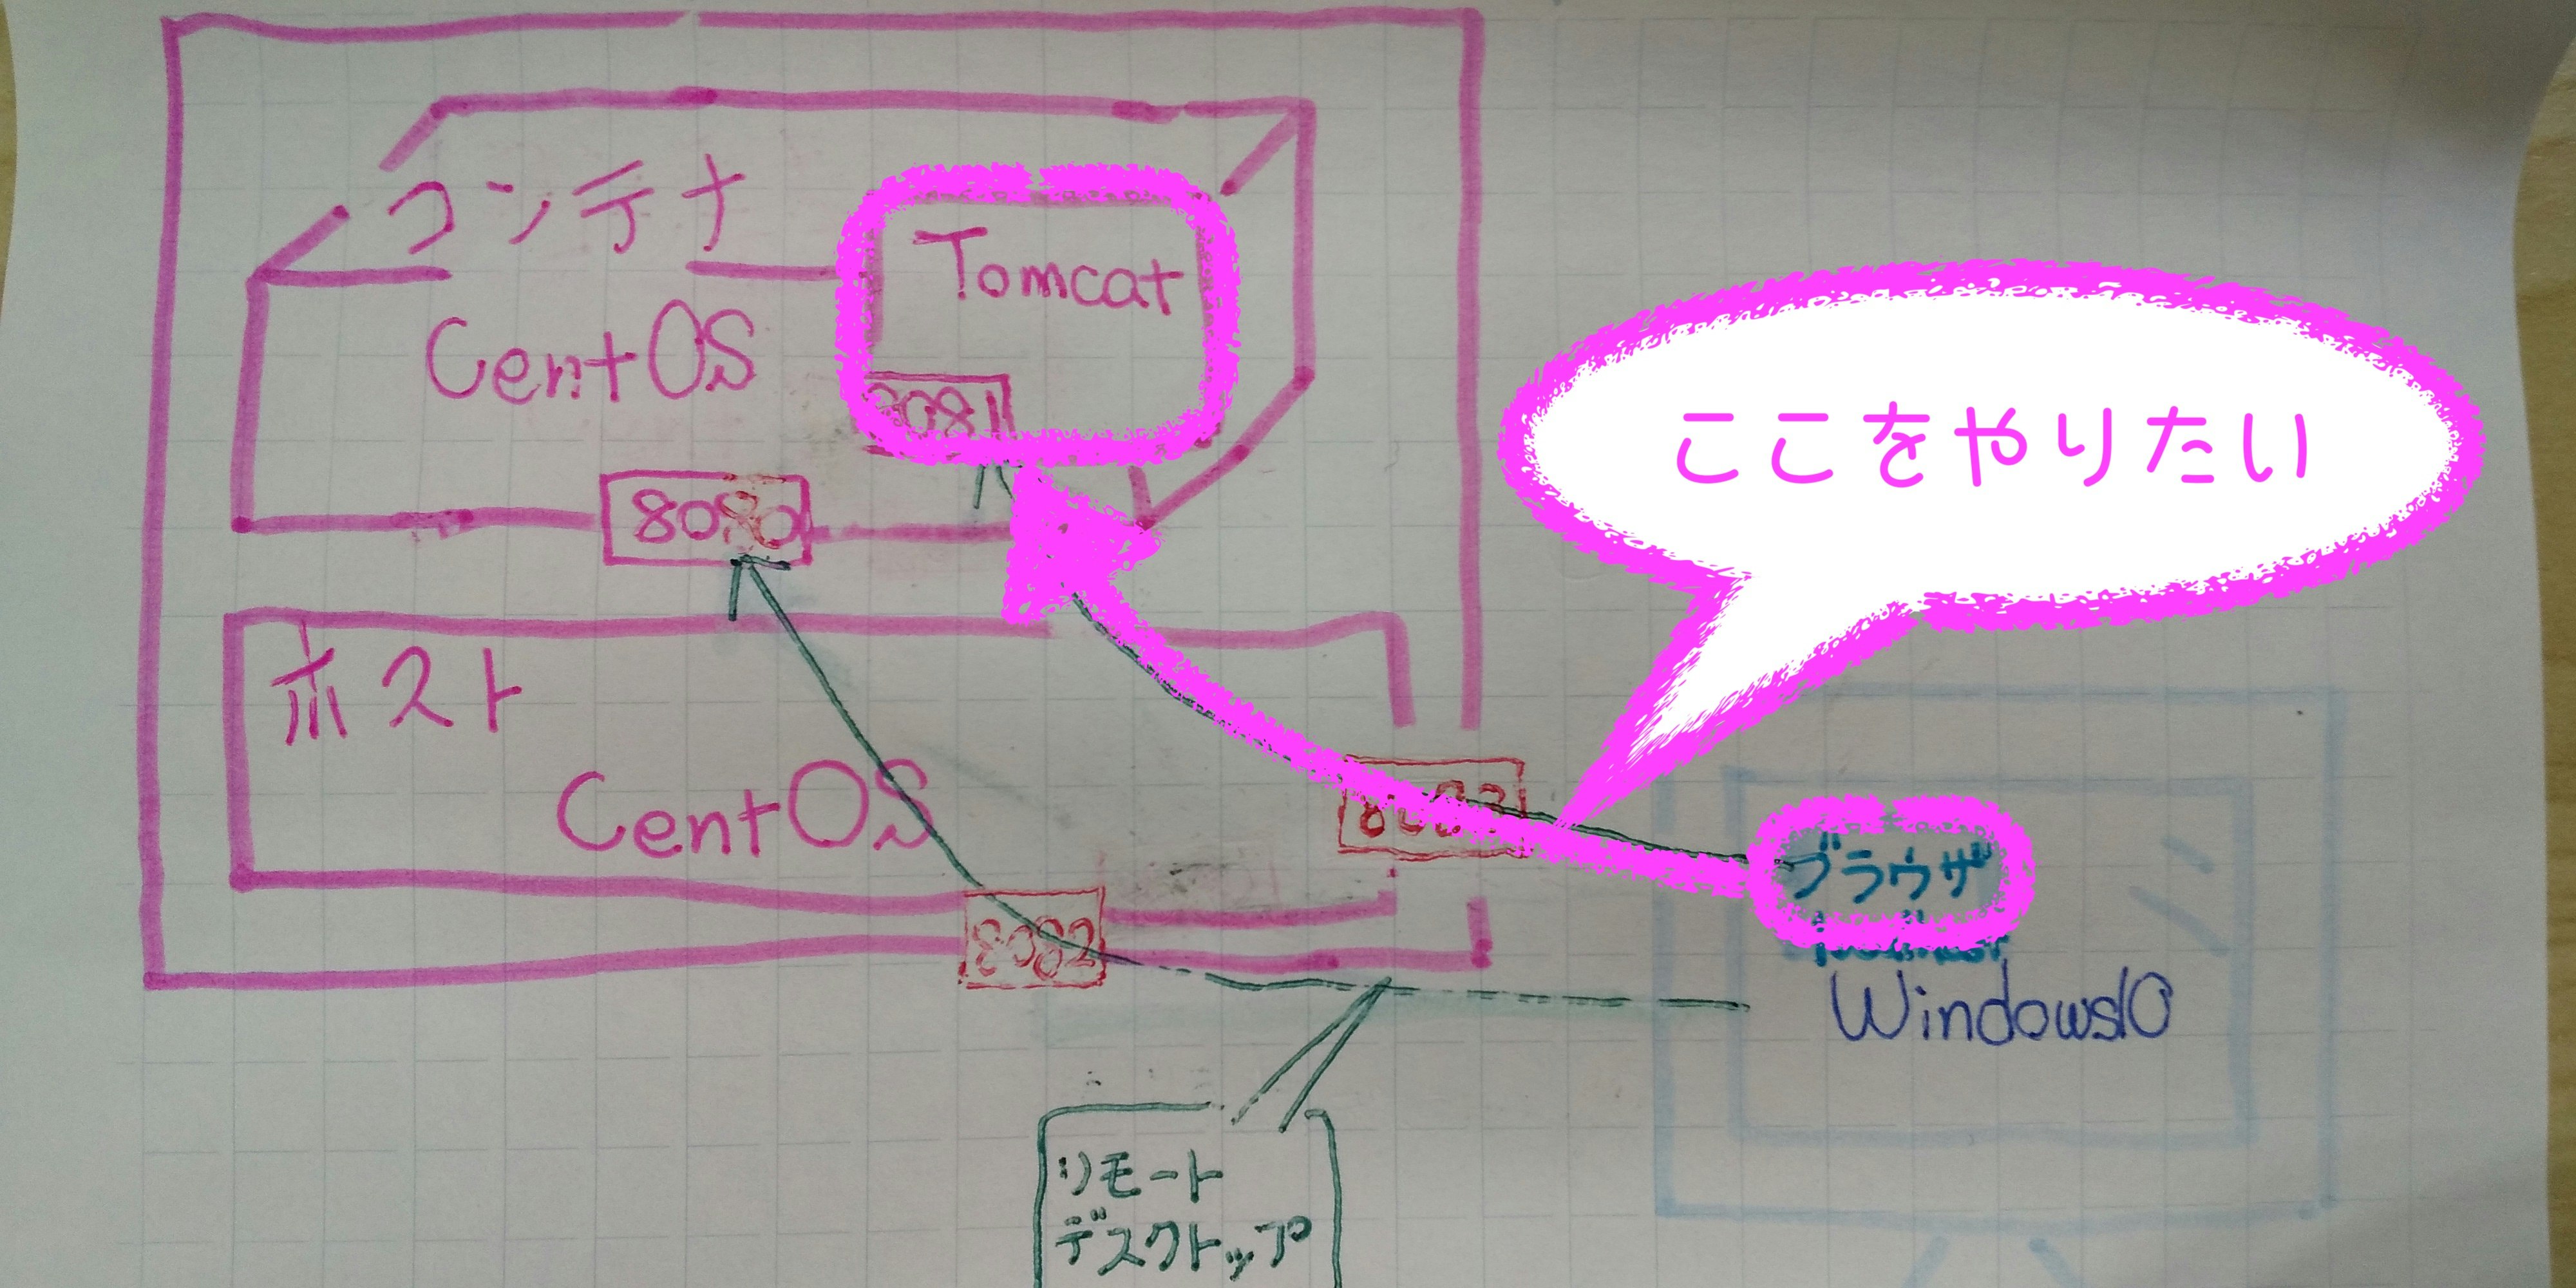
- 環境
- 外部:Windows10 64bit
- Dockerコンテナへはリモートデスクトップで接続している
- Dockerホスト:
- CentOS Linux release 7.6.1810 (Core)
- Docker version 18.09.6, build 481bc77156
- docker-compose version 1.24.0, build 0aa59064
- Dockerコンテナ
- CentOS Linux release 7.6.1810 (Core)
- Tomcat v6.0
- 外部:Windows10 64bit
やりたいことのイメージ
1. docker-compose.ymlにTomcat用のポートを設定する
docker-compose.yml
# 省略
    build:
      context: .
      dockerfile: doubutu/Dockerfile
      args:
        USER: ponsuke
        PORT: 8080
    ports:
      - "8082:8080" # リモートデスクトップ用のポート
      - "{Tomcat用ホストのポート}:{コンテナでのTomcatのポート}"
# 省略
2. コンテナを作る
$ docker-compose up -d --build {コンテナ名}
Building {コンテナ名}
Step 1/56 : FROM centos:7.6.1810
 ---> f1cb7c7d58b7
# 省略
Recreating {コンテナ名} ... done
確認する
$ docker ps
CONTAINER ID    IMAGE             COMMAND          CREATED             STATUS              PORTS                                                                              NAMES
{コンテナID}    {イメージ名}      "/usr/sbin/init"  About an hour ago   Up About an hour    0.0.0.0:8082->8080/tcp, 0.0.0.0:{Tomcat用ホストのポート}->{コンテナでのTomcatのポート}/tcp  {コンテナ名}

$ docker port {コンテナID}
8080/tcp -> 0.0.0.0:8082
{コンテナでのTomcatのポート}/tcp -> 0.0.0.0:{Tomcat用ホストのポート}
3. Tomcatを起動して外部のブラウザから接続する
- Tomcatを起動する
- 外部のブラウザで
http://{ホストのID}:{Tomcat用ホストのポート}を表示する
