MacにHomebrewでインストールする
- 環境
- macOS Big Sur バージョン11.1
# アップデートして
$ brew update
Updated 3 taps (homebrew/core, homebrew/cask and homebrew/cask-fonts).
....
You can update them with brew upgrade.

# 健康をお医者さんに確認して
$ brew doctor
Your system is ready to brew.

# インストール前に一応検索しておく
$ brew search tomcat
==> Formulae
tomcat                                           tomcat-native                                    tomcat@7                                         tomcat@8

# 新めのTomcatをインストールする
$ brew install tomcat
Updating Homebrew...
==> Auto-updated Homebrew!
Updated 1 tap (homebrew/core).
==> Updated Formulae
Updated 1 formula.

==> Downloading https://homebrew.bintray.com/bottles/openjdk-15.0.1.big_sur.bottle.1.tar.gz
==> Downloading from https://d29vzk4ow07wi7.cloudfront.net/e91cd8028e8bb7415bcb9a8dfb0843e98cb983d9fd2a65f6bbe7a58efaf8a9e3?response-content-disposition=attachment%3Bfilename%3D%22openjdk-15.0.1.
######################################################################## 100.0%
==> Downloading https://www.apache.org/dyn/closer.lua?path=tomcat/tomcat-9/v9.0.43/bin/apache-tomcat-9.0.43.tar.gz
==> Downloading from https://downloads.apache.org/tomcat/tomcat-9/v9.0.43/bin/apache-tomcat-9.0.43.tar.gz
######################################################################## 100.0%
==> Installing dependencies for tomcat: openjdk
==> Installing tomcat dependency: openjdk
==> Pouring openjdk-15.0.1.big_sur.bottle.1.tar.gz
==> Caveats
For the system Java wrappers to find this JDK, symlink it with
  sudo ln -sfn /usr/local/opt/openjdk/libexec/openjdk.jdk /Library/Java/JavaVirtualMachines/openjdk.jdk

openjdk is keg-only, which means it was not symlinked into /usr/local,
because macOS provides similar software and installing this software in
parallel can cause all kinds of trouble.

If you need to have openjdk first in your PATH, run:
  echo 'export PATH="/usr/local/opt/openjdk/bin:$PATH"' >> ~/.zshrc

For compilers to find openjdk you may need to set:
  export CPPFLAGS="-I/usr/local/opt/openjdk/include"

==> Summary
🍺  /usr/local/Cellar/openjdk/15.0.1: 614 files, 324.9MB
==> Installing tomcat
==> Caveats
To have launchd start tomcat now and restart at login:
  brew services start tomcat
Or, if you don't want/need a background service you can just run:
  catalina run
==> Summary
🍺  /usr/local/Cellar/tomcat/9.0.43: 633 files, 15.1MB, built in 4 seconds
==> Caveats
==> openjdk
For the system Java wrappers to find this JDK, symlink it with
  sudo ln -sfn /usr/local/opt/openjdk/libexec/openjdk.jdk /Library/Java/JavaVirtualMachines/openjdk.jdk

openjdk is keg-only, which means it was not symlinked into /usr/local,
because macOS provides similar software and installing this software in
parallel can cause all kinds of trouble.

If you need to have openjdk first in your PATH, run:
  echo 'export PATH="/usr/local/opt/openjdk/bin:$PATH"' >> ~/.zshrc

For compilers to find openjdk you may need to set:
  export CPPFLAGS="-I/usr/local/opt/openjdk/include"

==> tomcat
To have launchd start tomcat now and restart at login:
  brew services start tomcat
Or, if you don't want/need a background service you can just run:
  catalina run

# TomcatもろともインストールされたJava15にパスを通して
$ echo 'export JAVA_HOME="/usr/local/opt/openjdk/bin"' >> ~/.zshrc
$ echo 'export PATH="${JAVA_HOME}:$PATH"' >> ~/.zshrc

# TomcatのJavaとしても設定して
$ echo 'export CPPFLAGS="-I/usr/local/opt/openjdk/include"' >> ~/.zshrc

# 反映する
$ source ~/.zshrc

# できた
$ catalina version
Using CATALINA_BASE:   /usr/local/Cellar/tomcat/9.0.43/libexec
Using CATALINA_HOME:   /usr/local/Cellar/tomcat/9.0.43/libexec
Using CATALINA_TMPDIR: /usr/local/Cellar/tomcat/9.0.43/libexec/temp
Using JRE_HOME:        /usr/local/opt/openjdk
Using CLASSPATH:       /usr/local/Cellar/tomcat/9.0.43/libexec/bin/bootstrap.jar:/usr/local/Cellar/tomcat/9.0.43/libexec/bin/tomcat-juli.jar
Using CATALINA_OPTS:
NOTE: Picked up JDK_JAVA_OPTIONS:  --add-opens=java.base/java.lang=ALL-UNNAMED --add-opens=java.base/java.io=ALL-UNNAMED --add-opens=java.base/java.util=ALL-UNNAMED --add-opens=java.base/java.util.concurrent=ALL-UNNAMED --add-opens=java.rmi/sun.rmi.transport=ALL-UNNAMED
Server version: Apache Tomcat/9.0.43
Server built:   Jan 28 2021 20:25:45 UTC
Server number:  9.0.43.0
OS Name:        Mac OS X
OS Version:     11.1
Architecture:   x86_64
JVM Version:    15.0.1+9
JVM Vendor:     Oracle Corporation
Macにtar.gzでインストールする
EclipseでTomcatを設定する。 - ponsuke_tarou’s blog
Windowsにzipでインストールする
- 環境 : Windows10 Pro バージョン1909
-
Apache Tomcat® - Welcome!を表示して左のメニューから欲しいバージョンのページへ遷移する
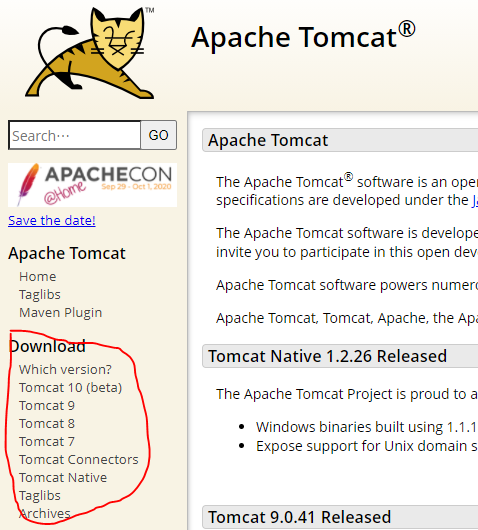
- 各バージョンでの最新以外が欲しい場合は[Archives]から表示
-
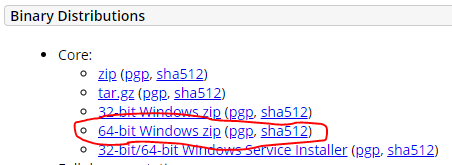
Coreにあるリンクからzipをダウンロードする - 解凍して任意の場所に配置する
# 解凍して任意の場所に配置する
$ unzip apache-tomcat-8.5.61-windows-x64.zip -d /c/apps/
Archive:  apache-tomcat-8.5.61-windows-x64.zip
   creating: /c/apps/apache-tomcat-8.5.61/
   creating: /c/apps/apache-tomcat-8.5.61/bin/
...省略...
バージョンを確認するときは、バッチをクリックするとバージョンを見る前にプロンプトが閉じるから、コマンドプロンプトから実行する
> {インストールディレクトリ}\apache-tomcat-8.5.61\bin\version.bat
...省略...
Server version: Apache Tomcat/8.5.61
Eclipseに設定する
- プラグインをインストールする(任意)
2. [Help] > [Eclipse Marketplace] > 「Tomcat」を検索
3. [Eclipse Tomcat Plugin]を[Install]ボタンからインストールする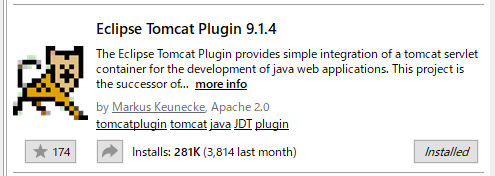
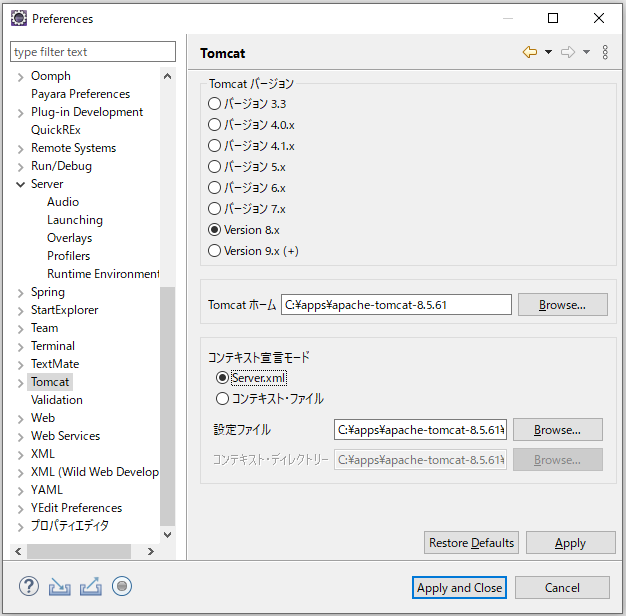
- [Preferences]ダイアログ(F10) > [Tomcat]で以下を設定して[Apply and Close]ボタンでダイアログを閉じる
- [Window] > [Show View] > [Other...] > [Server] > [Servers]でサーバのビューを開く
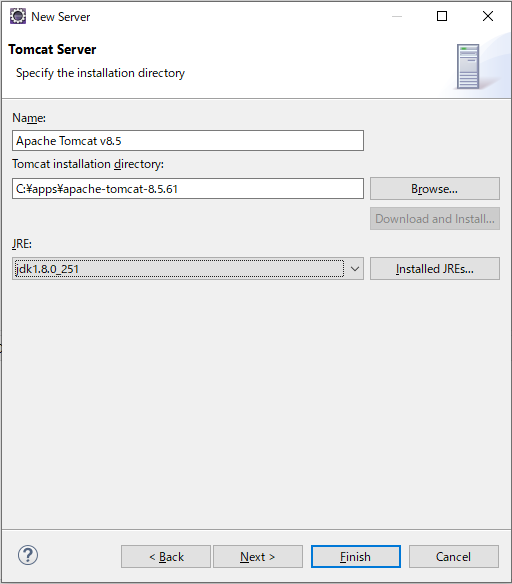
- サーバのビューの[No servers...]リンクから[New Server]でダイアログを開く
- [Apache] > [Tomcat v{インストールしたバージョン} Server]を選択 > [Next]ボタン
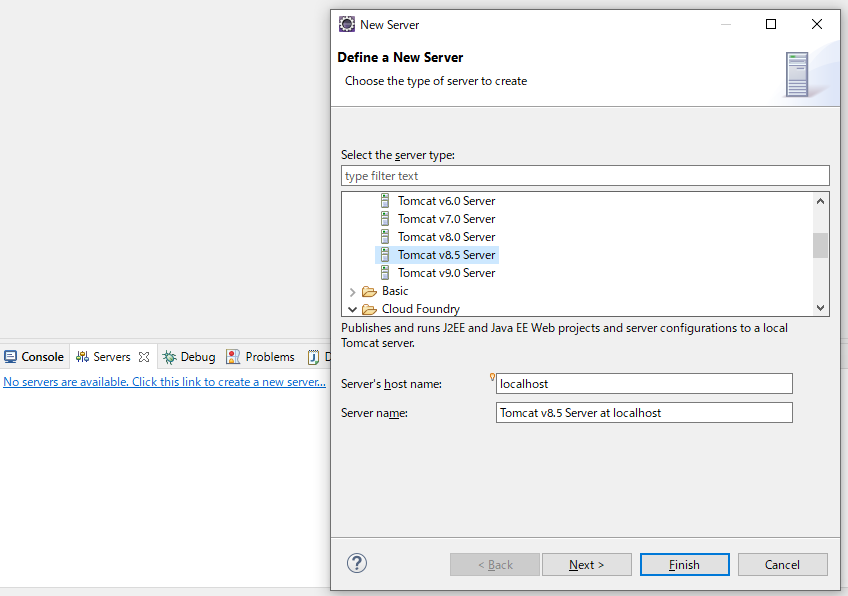
- [JRE]でTomcatに使うバージョンを設定して[Finish]ボタンを押下すると[Server]にTomcatが追加される
