何?Visual Studio Codeって?
Visual Studio CodeはMicrosoftが開発したWindows、Linux、macOS用のソースコードエディタである。
Visual Studio Code - Wikipedia
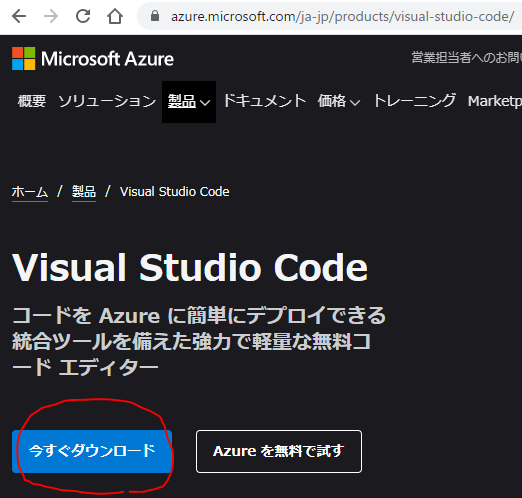
インストールする
CentOSにRpmでインストール
CentOSにRpmでインストール
- 環境 : CentOS Linux release 7.9.2009 (Core)
- 参考
# 1. GPG鍵をインポートする
$ sudo rpm --import https://packages.microsoft.com/keys/microsoft.asc
# 2. リポジトリファイルを作成する
$ sudo bash -c 'echo -e "[code]\nname=Visual Studio Code\nbaseurl=https://packages.microsoft.com/yumrepos/vscode\nenabled=1\ngpgcheck=1\ngpgkey=https://packages.microsoft.com/keys/microsoft.asc" > /etc/yum.repos.d/vscode.repo'
## 内容はこんな感じ
$ cat /etc/yum.repos.d/vscode.repo
[code]
name=Visual Studio Code
baseurl=https://packages.microsoft.com/yumrepos/vscode
enabled=1
gpgcheck=1
gpgkey=https://packages.microsoft.com/keys/microsoft.asc

# 3. アップデートをチェックする
$ sudo yum check-update
# 4. インストールする
$ sudo yum -y install code
MacにHomebrewでインストール
MacにHomebrewでインストール
- 環境 : macOS Big Surバージョン11.1
# 1. 使う前にはアップデートして、
$ brew update
Updated 3 taps (homebrew/core, homebrew/cask and homebrew/cask-fonts).
==> New Formulae
...
# 2. お医者さんに健康診断してもらう
$ brew doctor
Your system is ready to brew.

# 3. 一応存在を確認して
$ brew search visual-studio
==> Casks
visual-studio                              homebrew/cask-versions/mono-mdk-for-visual-studio
visual-studio-code                         homebrew/cask-versions/visual-studio-code-insiders

# 4. インストールする
$ brew install visual-studio-code
==> Downloading https://update.code.visualstudio.com/1.52.1/darwin/stable
==> Downloading from https://az764295.vo.msecnd.net/stable/ea3859d4ba2f3e577a159bc91e3074c5d85c0523/VSCode-darwin.zip
######################################################################## 100.0%
==> Installing Cask visual-studio-code
==> Moving App 'Visual Studio Code.app' to '/Applications/Visual Studio Code.app'
==> Linking Binary 'code' to '/usr/local/bin/code'
🍺  visual-studio-code was successfully installed!
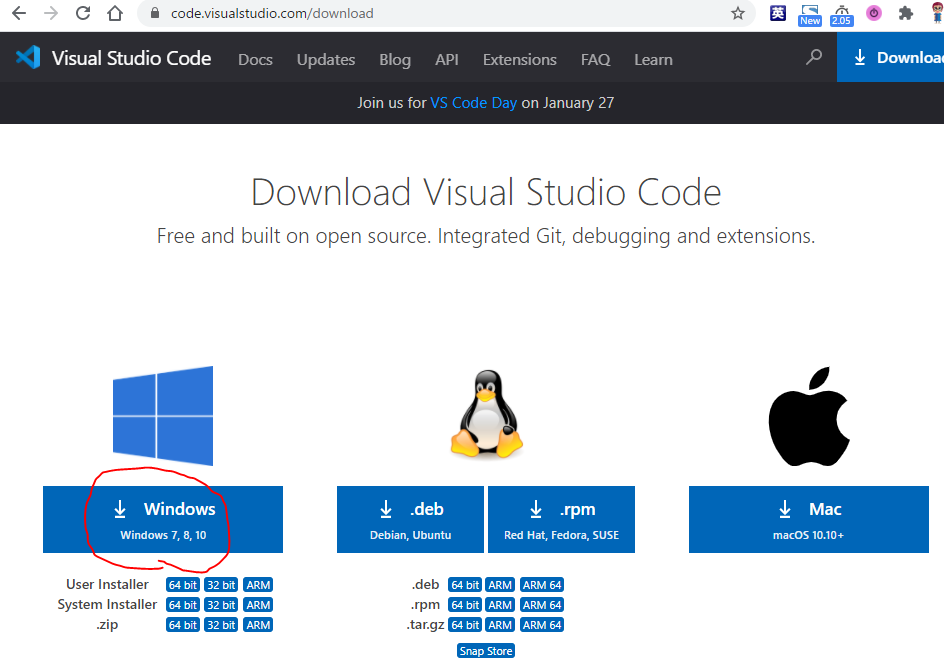
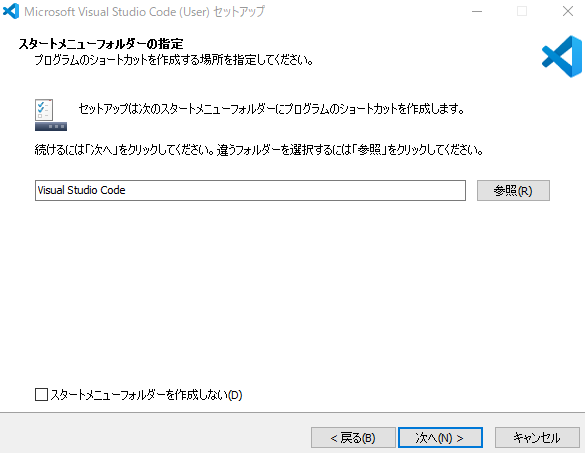
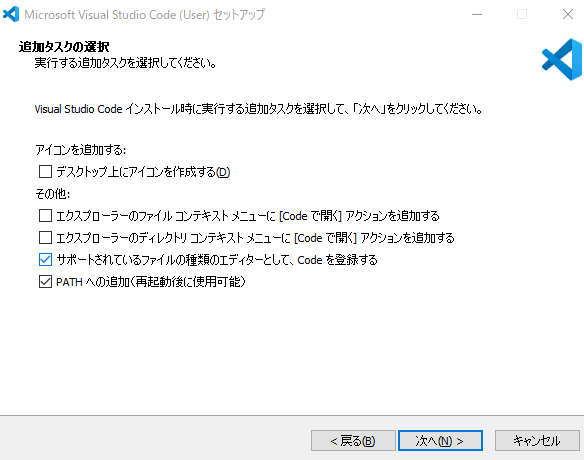
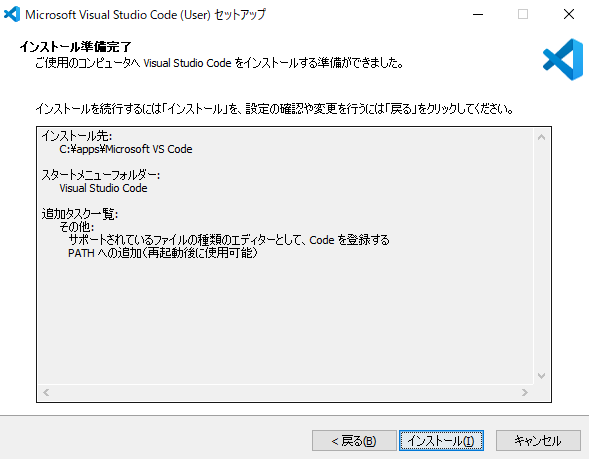
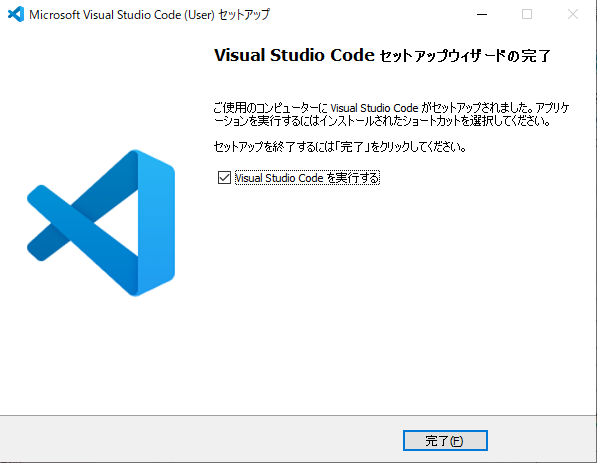
Windows10にEXEでインストール
## Windows10にEXEでインストール
- 環境 : Windows10 Pro バージョン1909
ダウンロードしたEXEをポチポチしていけばインストールできる
-
Visual Studio Codeのサイトからexeファイルをダウンロードして起動する
- 今回は
VSCodeUserSetup-x64-1.60.0.exeをダウンロード
- 今回は
- ダイアログが起動するので契約書に同意して進む
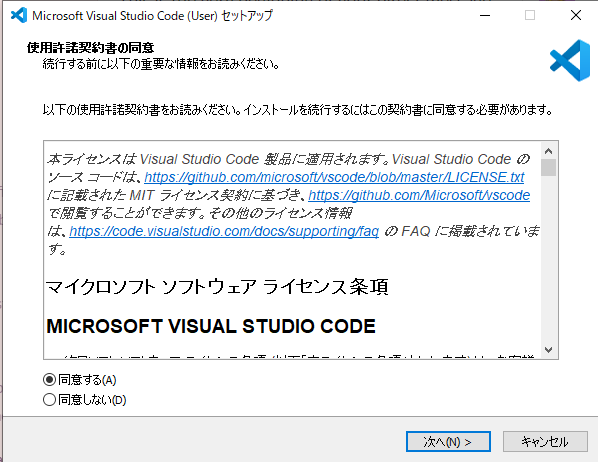
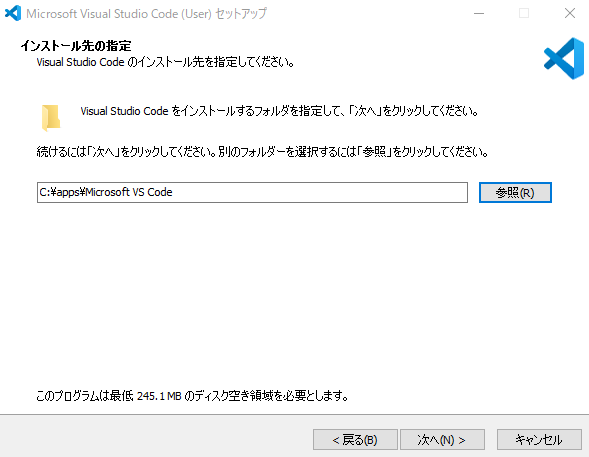
- インストールディレクトリを指定して進む
- どんどん進んで[インストール]ボタンでインストールする
設定する
- [File] > [Preferences] > [Setting]で設定を開く
- やりたいことを検索して設定をする
- 例えばテーマはデフォルトの暗いのじゃなくて明るいのにしたいので検索に「theme」を入れて表示された[Workbench]の[Color Theme]で「Light+(default light)」を選ぶと明るくなる
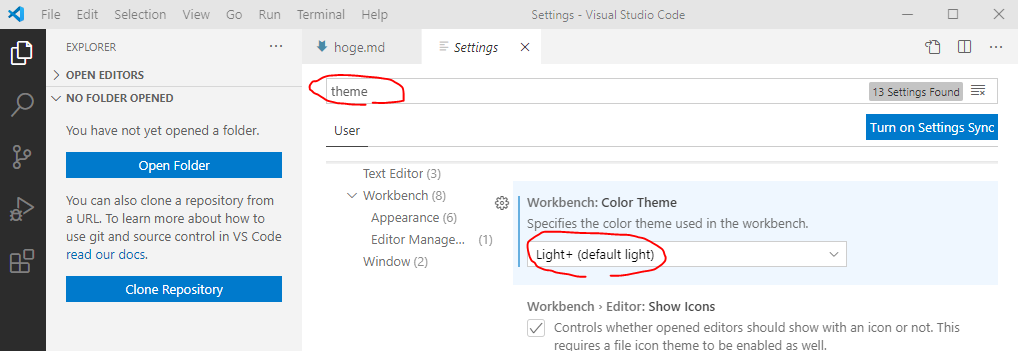
- 例えばテーマはデフォルトの暗いのじゃなくて明るいのにしたいので検索に「theme」を入れて表示された[Workbench]の[Color Theme]で「Light+(default light)」を選ぶと明るくなる
- 保存は、設定を変更するだけで即時適用となる
TerminalをGitBashにする
- 環境
- Windows10 Pro バージョン20H2
- Git Bash : mintty2.7.3
- 参考 : VSCode のターミナルを Git Bash に変更 - Qiita)
-
Ctrl + ,で[Settings]を開く >Terminal.Integrated.Default Profile: Windowsで設定を検索 -
Terminal.Integrated.Default Profile: Windowsのプルダウンを確認する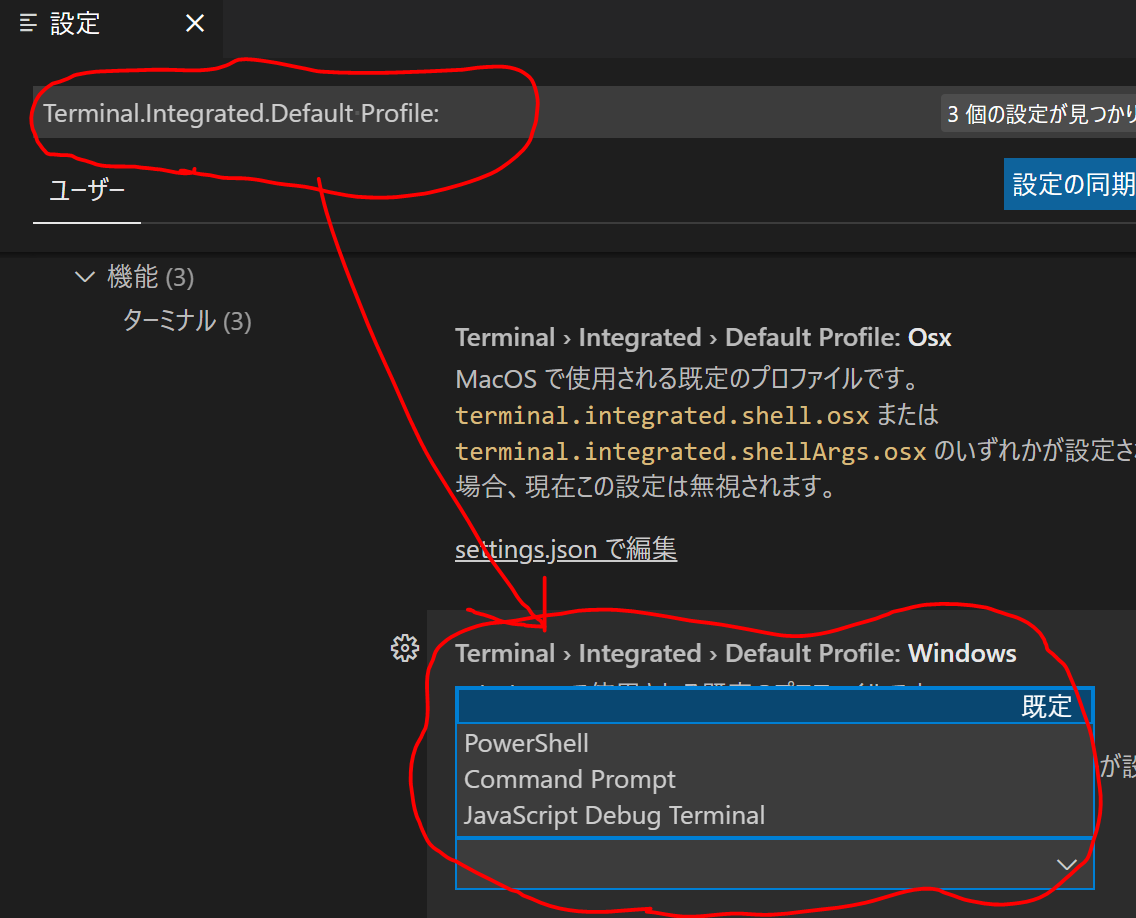
- プルダウンにGitBashが表示される場合 : GitBashを選択する
- プルダウンにGitBashが表示されない場合 :
- 近くにある[setting.jsonで編集]リンクでsetting.jsonを開く
- 下記の
"terminal.integrated.profiles.windows"の設定を追記して保存する - プルダウンにGitBashが表示されるようになるのでGitBashを選択する
-
Ctrl + @で[TERMINAL]タブを開いてBashになっていることを確認する

{
...省略...pathには「{GitBashのインストール場所}\\Git\\bin\\bash.exe」を記載する...
    "terminal.integrated.profiles.windows": {
        "GitBash": {
            "path": ["C:\\app\\Git\\bin\\bash.exe"]
        }
    },
...省略...
}
ターミナルから「{ユーザー}@{ホスト} MINGW64'」を消す
参考 : Git Bashのプロンプトから不要な箇所を消してスッキリさせる - Qiita
- ターミナルで以下を実行してGitBashのプロンプト設定を開く
$ code -r /c/apps/Git/etc/profile.d/git-prompt.sh
- PS1の設定を変更して保存する : 具体的な内容はこちら
- Visual Studio Codeを再起動して
Ctrl + @で[TERMINAL]タブを開くと「{ユーザー}@{ホスト} MINGW64'」が消えている

ファイルの種類毎に設定する
参考 : Visual Studio Code User and Workspace Settings
- Command Palette表示 > 「Preferences: Configure Language Specific Settings」入力(候補が表示されるので途中まででもOK)
- ファイルの種類を選択
- settings.jsonが開いてファイルの種類毎に設定ができる
例えばこんな感じのが簡単に書ける、しかも補完機能があって便利
{
    "[yaml]": { # <<<YAMLファイルの設定
        "editor.tabSize": 2 # <<<タブサイズは2
    }
}
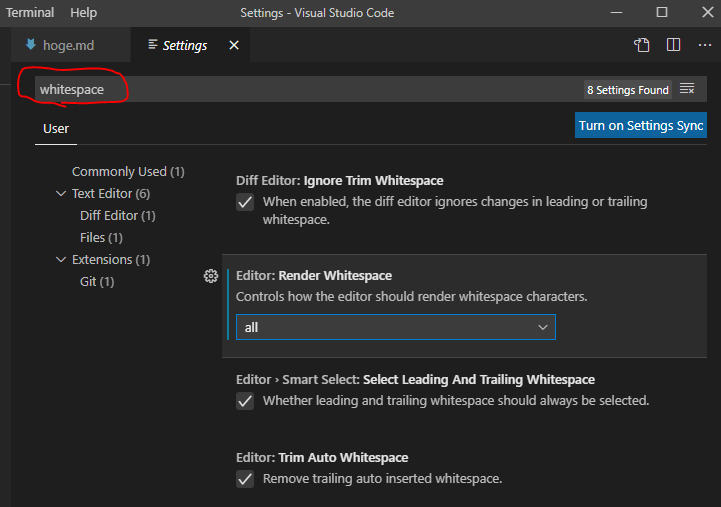
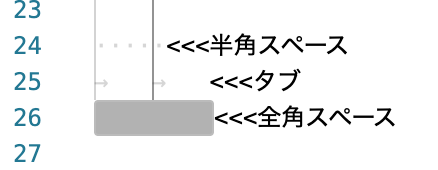
スペースを表示する
- 半角スペースを見えるようにする
- [Settings] >
editor.renderWhitespace> 「all」(全ての空白文字を描画する)を選択
- [Settings] >
- 全角スペースを見えるようにする
- 拡張機能 > 「zenkaku」を検索 > zenkaku - Visual Studio Marketplaceの[Install]ボタンでインストール
- Command Palette表示 > 「Enable Zenkaku」を選択
Terminalのシェルを一時的に変える
普段は使わないけど、たまに*.batとか*.exeとか実行したいとかでコマンドプロンプトを使いたい、とかちょっとPowerShell使いたいとか、そんなときのお話。
# コマンドプロンプトに切り替える
/c/path/to/dir (develop)
$ cmd
Microsoft Windows [Version 10.0.18363.1379]
(c) 2019 Microsoft Corporation. All rights reserved.

# Bashに切り替える
C:\path\to\dir>bash

# PowerShellに切り替える
/c/path/to/dir (develop)
$ powershell
Windows PowerShell
Copyright (C) Microsoft Corporation. All rights reserved.

新しいクロスプラットフォームの PowerShell をお試しください https://aka.ms/pscore6

PS C:\path\to\dir>
ショートカット
| やりたいこと | Macのショートカット | Windowsのショートカット |
|---|---|---|
| Command Palette表示 | Command + Shift + P | Cntrl + Shift + P |
| 行を削除したい | Command + Shift + K | Cntrl + Shift + K |
| 行をコピーしたい | Alt + Shift + ↓ | |
| Terminalを表示 | Cntrl + Shift + @ | Cntrl + @ |
| 新しくTerminalを表示 | Cntrl + Shift + ^ | Cntrl + Shift + @ |
| 拡張機能表示 | Command + Shift + X | Ctrl + Shift + X |
| Markdownのプレビューを横に表示したい | Ctrl + K > V | |
| 大文字(小文字)変換 | Command Palette表示 > [Transform to Uppercase(Lowercase)] | |
| 拡大(縮小) | Command + 「+」(Command+Shift+「+」) |