この記事はDocker Advent Calendar 2021の18日目の記事として書かれました。
はじめに
ちょっとしたウェブアプリを独自ドメインでインターネットに公開してみた時、
httpsアクセスできるよう設定していなくて何だかなあという気持ちになったことはありませんか。
僕はたくさんあります。
ワイルドカード証明書を取得してリバースプロキシに設定しておけば、
適当なサブドメインをアプリに割り当ててhttpsアクセス可能にできそうですね。
前提
- Amazon Route 53のパブリックホストゾーンとして登録しているドメインがある。
※検証目的であればfreenomがおすすめです。 - 以下の手順はインターネット経由でアクセスできるサーバで実施する。
なお、自分のIPからのみアクセスできるようにする等のセキュリティ設定は任意です。
環境
$ docker -v
Docker version 20.10.11, build dea9396

$ docker-compose -v
docker-compose version 1.29.2, build 5becea4c
手順
1.以下の通りの構成のディレクトリを作成
.
├── .aws
│   ├── .gitkeep
│   ├── config
│   └── credentials
├── docker-compose.yml
├── .env
└── etc
    └── nginx
        └── conf.d
            └── ssl.conf.template
2.docker-compose.ymlと.envを編集
version: "3.3"

services:
  web:
    image: nginx:${NGINX_TAG}
    container_name: nginx
    network_mode: host
    environment:
      SERVER_NAME: ${SERVER_NAME}
      DOMAIN_NAME: ${DOMAIN_NAME}
    volumes:
      - letsencrypt:/etc/letsencrypt:ro
      - ./etc/nginx/conf.d:/etc/nginx/conf.d
    command: >
      /bin/sh -c
      "envsubst '
      $$SERVER_NAME
      $$DOMAIN_NAME
      ' < /etc/nginx/conf.d/ssl.conf.template > /etc/nginx/conf.d/ssl.conf
      && nginx -g 'daemon off;'"
  cert:
    image: certbot/dns-route53:${CERTBOT_TAG}
    container_name: certbot
    command: certonly --dns-route53 --dns-route53-propagation-seconds=300 --non-interactive --agree-tos -m ${MAIL_ADDR} -d "${DOMAIN_NAME}" -d "*.${DOMAIN_NAME}"
    network_mode: host
    volumes:
      - letsencrypt:/etc/letsencrypt
      - ./.aws:/root/.aws

volumes:
  letsencrypt:
${} で囲われている部分は docker-compose によって設定される環境変数です。
コマンド実行時、デフォルトで .env という名前のファイルを参照して、 docker-compose.yml 内の変数を書き換えます。
以下のように .env を作成します。 DOMAIN_NAME 以下はご自身の情報を入力して下さい。
NGINX_TAG=latest
CERTBOT_TAG=v1.22.0
DOMAIN_NAME=hoge.com
SERVER_NAME=www.hoge.com
MAIL_ADDR=mail@hoge.com
| 変数名 | 意味 | 例 |
|---|---|---|
| NGINX_TAG | nginxコンテナのタグ | latest |
| CERTBOT_TAG | certbotコンテナのタグ | v1.22.0 |
| DOMAIN_NAME | ドメイン名 | hoge.com |
| SERVER_NAME | ウェブサーバ名 | www.hoge.com |
| MAIL_ADDR | メールアドレス | mail@hoge.com |
3.nginxの設定ファイルのテンプレートを作成
./etc/nginx/conf.d ディレクトリ以下にファイルを作成します。
server {
    listen 443 ssl;
    server_name ${SERVER_NAME};

    location / {
        root   /usr/share/nginx/html;
        index  index.html index.htm;
    }

    ssl_certificate     /etc/letsencrypt/live/${DOMAIN_NAME}/fullchain.pem;
    ssl_certificate_key /etc/letsencrypt/live/${DOMAIN_NAME}/privkey.pem;
}
docker-compose.yml の以下の部分に注目します。
    command: >
      /bin/sh -c
      "envsubst '
      $$SERVER_NAME
      $$DOMAIN_NAME
      ' < /etc/nginx/conf.d/ssl.conf.template > /etc/nginx/conf.d/ssl.conf
      && nginx -g 'daemon off;'"
${SERVER_NAME} と ${DOMAIN_NAME} に対応する環境変数が envsubst によって注入されます。
また、注入された結果が ssl.conf として保存されます。
4.IAMユーザのアクセスキー等を.aws以下に記載
以下のポリシーを含むIAMユーザを作成します。
参考:Welcome to certbot-dns-route53’s documentation!
{
    "Version": "2012-10-17",
    "Id": "certbot-dns-route53 sample policy",
    "Statement": [
        {
            "Effect": "Allow",
            "Action": [
                "route53:ListHostedZones",
                "route53:GetChange"
            ],
            "Resource": [
                "*"
            ]
        },
        {
            "Effect" : "Allow",
            "Action" : [
                "route53:ChangeResourceRecordSets"
            ],
            "Resource" : [
                "arn:aws:route53:::hostedzone/YOURHOSTEDZONEID"
            ]
        }
    ]
}
ここで、 YOURHOSTEDZONEID はホストゾーンのIDに置き換えてください。
アクセスキーを取得できたら、.aws 以下のファイルを編集します。
[default]
region = ap-northeast-1
output = json
[default]
aws_access_key_id = XXXXXXXXXXXXXXXXXXXX
aws_secret_access_key = XXXXXXXXXXXXXXXXXXXXXX
5.docker-compose を実行
ここまでできたら docker-compose.yml のある階層に戻り 、以下のように cert -> web の順でサービスを実行します。
$ docker-compose up cert
cert の cmd に注目します。デフォルトの entrypoint とあわせて、以下のコマンドが実行されています。
certbot certonly --dns-route53 --dns-route53-propagation-seconds=300 --non-interactive --agree-tos -m ${MAIL_ADDR} -d "${DOMAIN_NAME}" -d "*.${DOMAIN_NAME}"
つまり、ドメイン名の証明書とそのサブドメインすべてに対するワイルドカード証明書をリクエストしています。
以下のようなログが出力され、exit codeが0で終われば成功です。
certbot | Successfully received certificate.
certbot | Certificate is saved at: /etc/letsencrypt/live/ドメイン名/fullchain.pem
certbot | Key is saved at:         /etc/letsencrypt/live/ドメイン名/privkey.pem
certbot | This certificate expires on 2022-03-18.
certbot | These files will be updated when the certificate renews.
certbot | NEXT STEPS:
certbot | - The certificate will need to be renewed before it expires. Certbot can automatically renew the certificate in the background, but you may need to take steps to enable that functionality. See https://certbot.org/renewal-setup for instructions.
certbot | Saving debug log to /var/log/letsencrypt/letsencrypt.log
certbot |
certbot | - - - - - - - - - - - - - - - - - - - - - - - - - - - - - - - - - - - - - - - -
certbot | If you like Certbot, please consider supporting our work by:
certbot |  * Donating to ISRG / Let's Encrypt:   https://letsencrypt.org/donate
certbot |  * Donating to EFF:                    https://eff.org/donate-le
certbot | - - - - - - - - - - - - - - - - - - - - - - - - - - - - - - - - - - - - - - - -
certbot exited with code 0
続けて、nginxを起動します。
exitしないプロセスなので、 -d をつけてバックグラウンドで実行させます。
$ docker-compose up -d web
こちらは以下のようにしてログを見に行きます。
"start worker process" と出ていれば、問題なく起動しています。
$ docker-compose logs -f web

nginx   | 2021/12/18 13:25:07 [notice] 10#10: using the "epoll" event method
nginx   | 2021/12/18 13:25:07 [notice] 10#10: nginx/1.21.4
nginx   | 2021/12/18 13:25:07 [notice] 10#10: built by gcc 10.2.1 20210110 (Debian 10.2.1-6)
nginx   | 2021/12/18 13:25:07 [notice] 10#10: OS: Linux 5.11.0-1020-aws
nginx   | 2021/12/18 13:25:07 [notice] 10#10: getrlimit(RLIMIT_NOFILE): 1048576:1048576
nginx   | 2021/12/18 13:25:07 [notice] 10#10: start worker processes
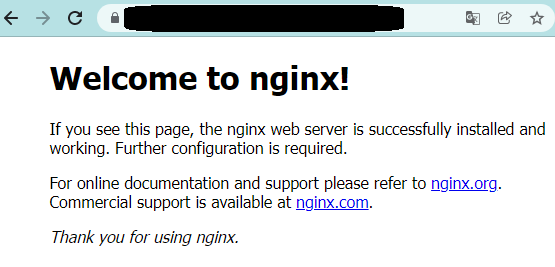
https:// をつけてアクセスし、nginxのウェルカムページが表示されれば成功です!
以下の例ではアドレスバーに錠のアイコンが出ていることがわかります。
おわりに
nginx コンテナはホストの ./etc/nginx/conf.d に対してバインドマウントしているため、
confファイルを追加してリロードすれば別のアプリをバックエンドサーバとして設定できます。
必ずしもnginxとcertbotを同じComposeファイルで管理する必要はありません、
取得した証明書を letsencrypt なるボリュームで管理してnginxとcertbotで共有すると便利なので、
今回はこのような形にしています。
ボリュームではなくバインドマウントにして、ホストに既に存在するletsencryptの証明書を
更新させるといった実現方法もあると思います。
検証したいだけのアプリに対して頑張ってSSL対応する必要もないのですが、
簡易に実現する方法があるということを知っておくことには大いに意義があると思います。