rustで作成したアプリケーションをherokuで動かした際の作業の記録。
アプリケーションの内容としては「awsの料金をslackに通知する」というものなので、スケジューラのアドオンを使って定期的に実行させるようにする。
0) 事前にやっておくこと
- herokuのアカウントの用意(クレジットカード登録もしておく)
- herokuのcliのインストール
1) heroku.ymlの用意
heroku.ymlをアプリケーションのルートディレクトリに用意する。
build:
  docker:
    web: Dockerfile
run:
  web: cli cost
このリポジトリのDockerfileを動かすためのheroku.ymlなのですごいシンプル。
heroku.ymlの内容はどんなアプリケーションかによって変わってくる。
2) コマンドを実行していく
$ cd /hoge/huga                                                          # アプリケーションのコードがあるところに移動
$ heroku container:login                                                 # ログイン
$ heroku create -a aws-cost-rs                                           # herokuアプリの作成(アプリ名はheroku内で一意である必要あり)
$ heroku git:remote -a aws-cost-rs                                       # herokuリポジトリをgitに登録
$ heroku addons:create scheduler:standard                                # スケジューラのアドオンを追加
$ heroku $ heroku config:set AWS_ACCESS_KEY_ID="****"                    # 環境変数の登録
$ heroku config:set AWS_SECRET_ACCESS_KEY="****"
$ heroku config:set SLACK_WEBHOOK_URL="****"
$ heroku config                                                          # 登録された環境変数の確認
$ heroku stack:set container                                             # heroku.ymlを使う時はこれがいるぽい
$ heroku buildpacks:set https://github.com/emk/heroku-buildpack-rust.git # ビルドパックの指定
$ git push heroku master                                                 # リリース
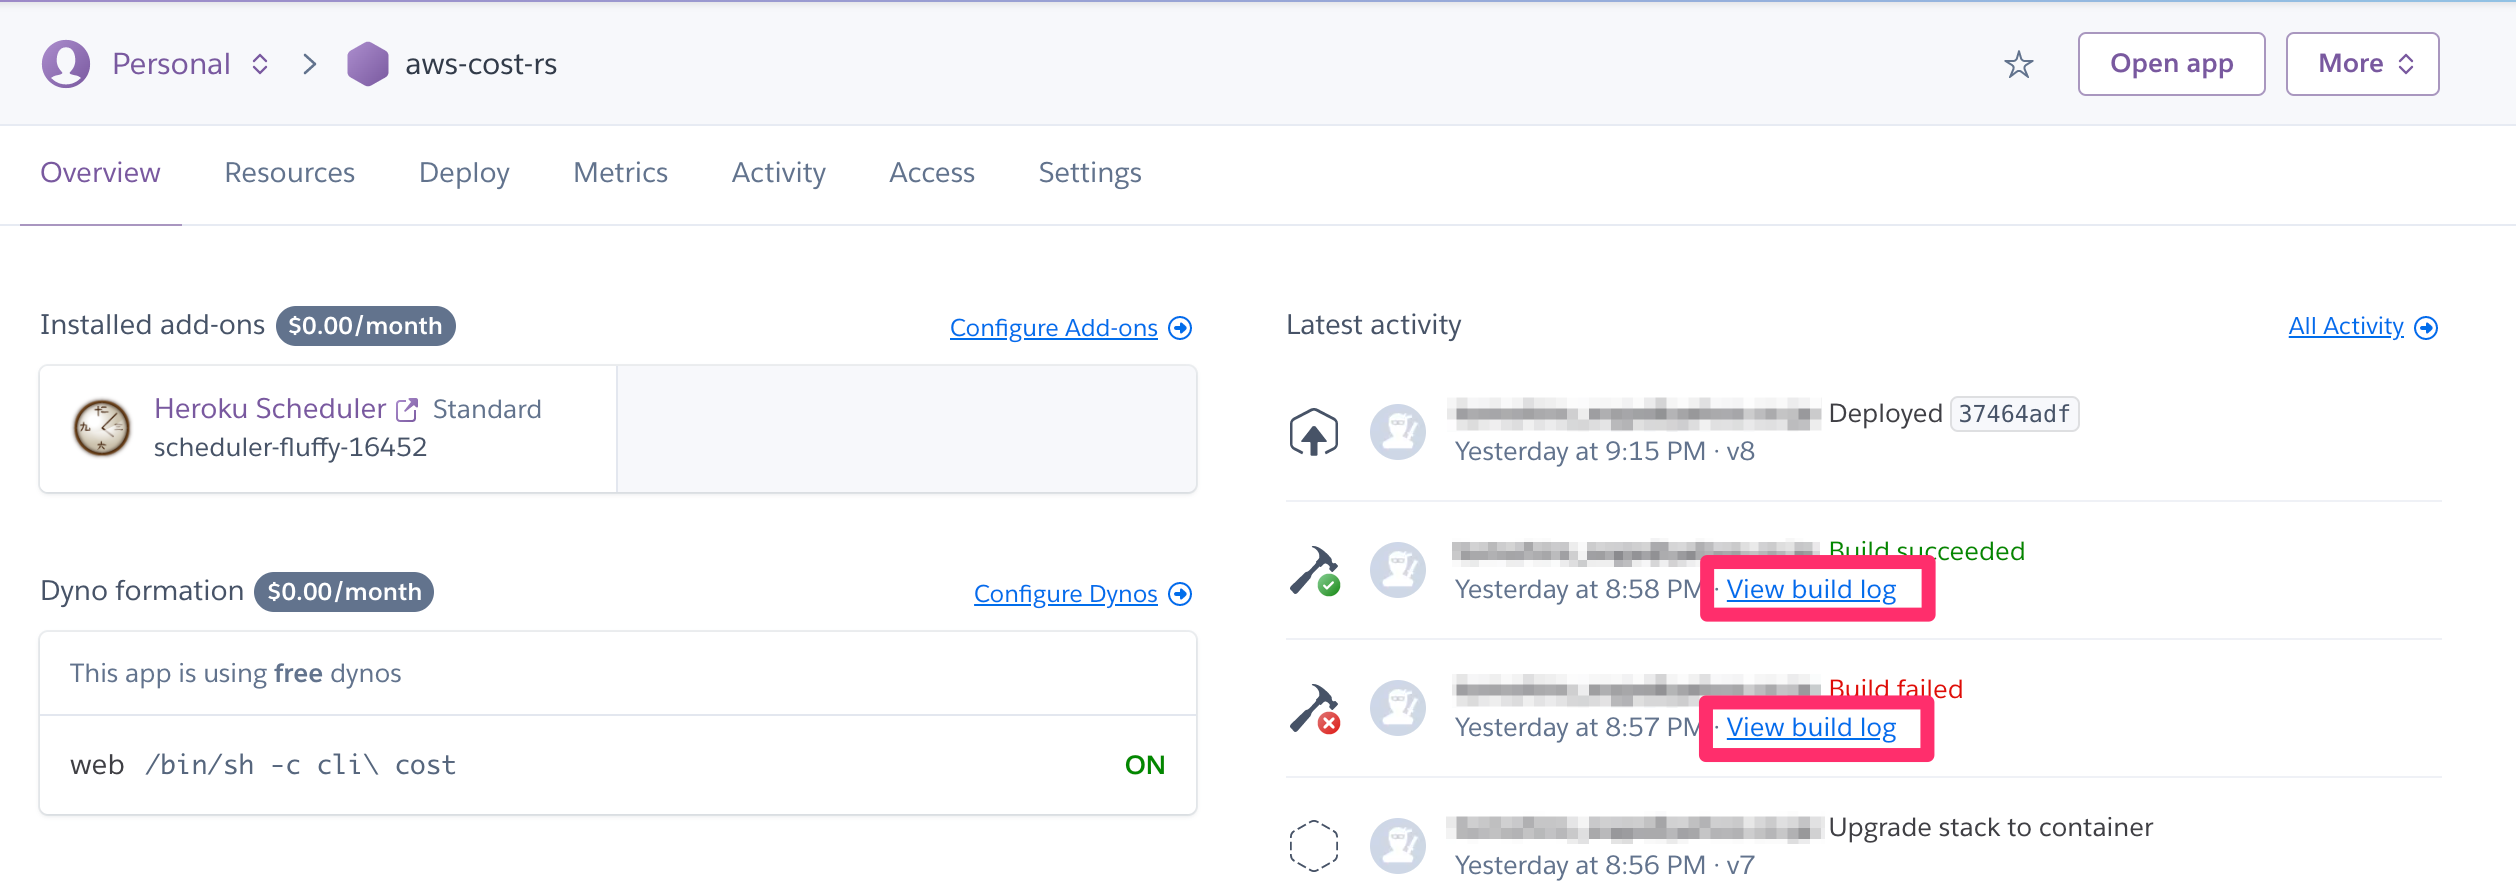
これでリリース完了。herokuのコンソール上でBuild succeededとDeployedの表示があればちゃんとリリースできてるはず。

あとはスケジューラの設定をして終わり。

ビルドパックについて
herokuで公式に利用できる言語は以下の通り。ここに記載されている言語以外を使いたい場合はサードパーティ製のビルドパックを指定する必要がある。

これでrustのビルドパックを指定している。
$ heroku buildpacks:set https://github.com/emk/heroku-buildpack-rust.git
ビルドパックを指定せずにherokuへpushすると以下のようなエラーが出る。
$ git push heroku master
Enumerating objects: 84, done.
Counting objects: 100% (84/84), done.
Delta compression using up to 16 threads
Compressing objects: 100% (79/79), done.
Writing objects: 100% (84/84), 31.25 KiB | 3.91 MiB/s, done.
Total 84 (delta 22), reused 0 (delta 0), pack-reused 0
remote: Compressing source files... done.
remote: Building source:
remote:
remote:  !     No default language could be detected for this app.
remote: 			HINT: This occurs when Heroku cannot detect the buildpack to use for this application automatically.
remote: 			See https://devcenter.heroku.com/articles/buildpacks
remote:
remote:  !     Push failed
remote: Verifying deploy...
remote:
remote: !	Push rejected to aws-cost-rs.
remote:
To https://git.heroku.com/aws-cost-rs.git
 ! [remote rejected] master -> master (pre-receive hook declined)
error: failed to push some refs to 'https://git.heroku.com/aws-cost-rs.git'
クレジットカード登録について
今回スケジューラのアドオンを利用しているが、スケジューラのアドオンはクレジットカード登録がされているアカウントじゃないと利用することができない。
クレジットカード登録をしていない状態でアドオンを追加しようとすると以下のようなエラーが出る。
$ heroku addons:add scheduler:standard
Creating scheduler:standard on ⬢ <アプリ名>... !
 ▸    Please verify your account to install this add-on plan (please enter a credit card) For more information, see
 ▸    https://devcenter.heroku.com/categories/billing Verify now at https://heroku.com/verify
クレジットカードを登録したアカウントは月1000時間まで無料なのでちょろっとスケジューラを使う分には無料枠に全然おさまる。ちなみにクレジットカードを登録していないアカウントの場合は月550時間までしか無料にならないらしい。
ビルド時のログ確認について
herokuのconsole上からbuild時のログが確認できるが、この機能はリリースするイメージにcurlが含まれている必要がある。curlがないとログが何も表示されなくなるので、もしリリースの際に死んでても調査がしにくい。
なのでherokuにリリースするイメージにはcurlを含めておいた方がいい。