環境構築編から来てくれた方はお久しぶりです。今回から本格的にKotlinのコードを書いていきたいと思います。
kotlinでOpenCVを用いて画像と画像の特徴量比較をやってみたいと思います。
Kotin Android Extensionが入ってる前提で話進めていきます。
MainActivityだけで完結するプロジェクトを作っていきたいと思います。python勢に負けるな!
見た目部分
<?xml version="1.0" encoding="utf-8"?>
<LinearLayout xmlns:android="http://schemas.android.com/apk/res/android"
    xmlns:app="http://schemas.android.com/apk/res-auto"
    xmlns:tools="http://schemas.android.com/tools"
    android:orientation="vertical"
    android:layout_width="match_parent"
    android:layout_height="match_parent"
    tools:context="com.example.pokotsun.opencvtestbykotlin.MainActivity">

    <LinearLayout
        android:layout_width="match_parent"
        android:layout_height="wrap_content"
        android:layout_margin="8dp"
        android:orientation="horizontal">
        <Button
            android:id="@+id/select_img1_btn"
            android:layout_width="0dp"
            android:layout_height="wrap_content"
            android:layout_weight="1"
            android:text="画像1選択"/>
        <Button
            android:id="@+id/select_img2_btn"
            android:layout_width="0dp"
            android:layout_height="wrap_content"
            android:layout_weight="1"
            android:text="画像2選択"/>
    </LinearLayout>
    <!--画像のラッパー-->
    <LinearLayout
        android:layout_width="match_parent"
        android:layout_height="wrap_content">
        <ImageView
            android:id="@+id/src_img1"
            android:layout_width="0dp"
            android:layout_height="100dp"
            android:layout_weight="1"/>
        <ImageView
            android:id="@+id/src_img2"
            android:layout_width="0dp"
            android:layout_height="100dp"
            android:layout_weight="1"/>
    </LinearLayout>

    <Button
        android:id="@+id/decition_btn"
        android:layout_width="wrap_content"
        android:layout_height="wrap_content"
        android:layout_gravity="center_horizontal"
        android:text="決定"/>
    <ImageView
        android:id="@+id/result_img"
        android:layout_width="wrap_content"
        android:layout_height="200dp"
        android:layout_gravity="center_horizontal"/>
    <TextView
        android:id="@+id/count_txt"
        android:layout_width="wrap_content"
        android:layout_height="wrap_content"
        android:layout_gravity="center_horizontal" />
</LinearLayout>
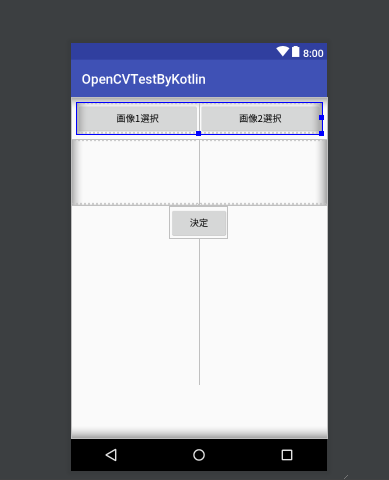
こんな感じのxmlをかいてください。すると見た目はこんな感じになります。
中身
import android.app.Activity
import android.content.Intent
import android.graphics.Bitmap
import android.graphics.BitmapFactory
import android.graphics.drawable.BitmapDrawable
import android.net.Uri
import android.support.v7.app.AppCompatActivity
import android.os.Bundle
import android.os.ParcelFileDescriptor
import android.util.Log
import android.widget.ImageView
import kotlinx.android.synthetic.main.activity_main.*
import org.opencv.android.OpenCVLoader
import org.opencv.android.Utils
import org.opencv.core.*
import org.opencv.features2d.AKAZE
import org.opencv.features2d.DescriptorMatcher
import org.opencv.features2d.Features2d
import org.opencv.imgproc.Imgproc
import java.io.FileDescriptor
import java.io.IOException

class MainActivity : AppCompatActivity() {

    override fun onCreate(savedInstanceState: Bundle?) {
        super.onCreate(savedInstanceState)
        setContentView(R.layout.activity_main)


        if(!OpenCVLoader.initDebug()) {
            Log.d("OpenCV", "error_openCV")
        }

        // 画像選択ボタン1のリスナー
        select_img1_btn.setOnClickListener {
            val intent = Intent(Intent.ACTION_OPEN_DOCUMENT)
            intent.addCategory(Intent.CATEGORY_OPENABLE)
            intent.setType("*/*")
            startActivityForResult(intent, RESULT_PICK_IMAGEFILE1)
        }

        // 画像選択ボタン2のリスナー
        select_img2_btn.setOnClickListener {
            val intent = Intent(Intent.ACTION_OPEN_DOCUMENT)
            intent.addCategory(Intent.CATEGORY_OPENABLE)
            intent.setType("*/*")
            startActivityForResult(intent, RESULT_PICK_IMAGEFILE2)
        }

        // 決定ボタンのリスナー
        decition_btn.setOnClickListener {
            try {
                // src_img1の画像をMatに
                var bitmap: Bitmap = Bitmap.createScaledBitmap(getBitmapFromImageView(src_img1), 640, 480, false)
                val scene1 = Mat(bitmap!!.height, bitmap!!.width, CvType.CV_8UC1).apply { Utils.bitmapToMat(bitmap, this) }

                // src_img2の画像をMatに
                bitmap = Bitmap.createScaledBitmap(getBitmapFromImageView(src_img2), 640, 480, false)
                val scene2 = Mat(bitmap!!.height, bitmap!!.width, CvType.CV_8UC1).apply { Utils.bitmapToMat(bitmap, this) }

                // アルゴリズムはAKZEで
                val algorithm: AKAZE = AKAZE.create()

                // 特徴点抽出
                val keypoint1 = MatOfKeyPoint().apply { algorithm.detect(scene1, this) }
                val keypoint2 = MatOfKeyPoint().apply { algorithm.detect(scene2, this) }

                // 特徴量記述
                val descriptor1 = Mat().apply { algorithm.compute(scene1, keypoint1, this) }
                val descriptor2 = Mat().apply { algorithm.compute(scene2, keypoint2, this) }

                // マッチング (アルゴリズムにはBruteForceを使用)
                val matcher = DescriptorMatcher.create("BruteForce")

                var matches_list: MutableList<DMatch> = mutableListOf()
                val match12 = MatOfDMatch().apply { matcher.match(descriptor1, descriptor2, this) }
                val match21 = MatOfDMatch().apply { matcher.match(descriptor2, descriptor1, this) }

                // クロスチェック(1→2と2→1の両方でマッチしたものだけを残して精度を高める)
                val size: Int = match12.toArray().size - 1
                val match12_array = match12.toArray()
                val match21_array = match21.toArray()
                var count: Int = 0
                for(i in 0..size) {
                    val forward: DMatch =match12_array[i]
                    val backward: DMatch = match21_array[forward.trainIdx]
                    if(backward.trainIdx == forward.queryIdx) {
                        matches_list.add(forward)
                        count++
                    }
                }

                val matches = MatOfDMatch().apply { this.fromList(matches_list) }

                // 結果画像の背景真っ黒になるのを防ぐ
                val scene1rgb = Mat().apply { Imgproc.cvtColor(scene1, this, Imgproc.COLOR_RGBA2RGB, 1) }
                val scene2rgb = Mat().apply { Imgproc.cvtColor(scene2, this, Imgproc.COLOR_RGBA2RGB, 1) }

                // マッチ結果を出力
                val dest = scene1.clone().apply {
                    Features2d.drawMatches(scene1rgb, keypoint1, scene2rgb, keypoint2, matches, this)
                }

                val result_btm: Bitmap = Bitmap.createBitmap(dest.cols(), dest.rows(), Bitmap.Config.ARGB_8888)
                        .apply { Utils.matToBitmap(dest, this) }

                // マッチング結果画像の出力
                result_img.setImageBitmap(result_btm)

                // マッチング数を出力
                count_txt.text = "マッチング数: ${count}"

            } catch(e: NullPointerException) {
                e.printStackTrace()
            }
        }

    }

    // 画像を選択したときの動き
    override fun onActivityResult(requestCode: Int, resultCode: Int, resultdata: Intent?) {
        if((requestCode == RESULT_PICK_IMAGEFILE1 || requestCode == RESULT_PICK_IMAGEFILE2)
                && resultCode == Activity.RESULT_OK) {
            val image_view: ImageView =
                    if(requestCode == RESULT_PICK_IMAGEFILE1) src_img1
                    else src_img2

            if(resultdata?.data != null) {
                try {
                    val uri: Uri = resultdata.data
                    val parcelFileDesc: ParcelFileDescriptor = getContentResolver().openFileDescriptor(uri, "r")

                    val fDesc: FileDescriptor = parcelFileDesc.fileDescriptor
                    val bmp: Bitmap = BitmapFactory.decodeFileDescriptor(fDesc)
                    parcelFileDesc.close()
                    image_view.setImageBitmap(bmp)

                } catch(e: IOException) {
                    e.printStackTrace()
                }
            }
        }
    }

    // BitmapをImageViewから取得する
    private fun getBitmapFromImageView(view: ImageView): Bitmap {
        view.getDrawingCache(true)
        return (view.drawable as BitmapDrawable)?.let { it.bitmap }
    }

    companion object {
        private val RESULT_PICK_IMAGEFILE1: Int = 1001
        private val RESULT_PICK_IMAGEFILE2: Int = 1002
    }
}
まず全体を載せてから部分の説明したいと思います。
if(!OpenCVLoader.initDebug()) {
            Log.d("OpenCV", "error_openCV")
        }
この三行がないとjava.lang.UnsatisfiedLinkError: Native method not foundというOpenCVちゃんと読み込まれてる?というエラーが出ます。結構詰まります。お気をつけください。
// 画像選択ボタン1のリスナー
        select_img1_btn.setOnClickListener {
            val intent = Intent(Intent.ACTION_OPEN_DOCUMENT)
            intent.addCategory(Intent.CATEGORY_OPENABLE)
            intent.setType("*/*")
            startActivityForResult(intent, RESULT_PICK_IMAGEFILE1)
        }

        // 画像選択ボタン2のリスナー
        select_img2_btn.setOnClickListener {
            val intent = Intent(Intent.ACTION_OPEN_DOCUMENT)
            intent.addCategory(Intent.CATEGORY_OPENABLE)
            intent.setType("*/*")
            startActivityForResult(intent, RESULT_PICK_IMAGEFILE2)
        }

// 画像を選択したときの動き
    override fun onActivityResult(requestCode: Int, resultCode: Int, resultdata: Intent?) {
        if((requestCode == RESULT_PICK_IMAGEFILE1 || requestCode == RESULT_PICK_IMAGEFILE2)
                && resultCode == Activity.RESULT_OK) {
            val image_view: ImageView =
                    if(requestCode == RESULT_PICK_IMAGEFILE1) src_img1
                    else src_img2

            if(resultdata?.data != null) {
                try {
                    val uri: Uri = resultdata.data
                    val parcelFileDesc: ParcelFileDescriptor = getContentResolver().openFileDescriptor(uri, "r")
                    if(parcelFileDesc != null) {
                        val fDesc: FileDescriptor = parcelFileDesc.fileDescriptor
                        val bmp: Bitmap = BitmapFactory.decodeFileDescriptor(fDesc)
                        parcelFileDesc.close()
                        image_view.setImageBitmap(bmp)
                    }
                } catch(e: IOException) {
                    e.printStackTrace()
                }
            }
        }
    }
ここでは画像選択ボタンが押されたときにアルバムにIntentを渡してImageViewにセットしていってます。
decition_btn.setOnClickListener {
            try {
                // src_img1の画像をMatに
                var bitmap: Bitmap = Bitmap.createScaledBitmap(getBitmapFromImageView(src_img1), 640, 480, false)
                val scene1 = Mat(bitmap?.height, bitmap?.width, CvType.CV_8UC1).apply { Utils.bitmapToMat(bitmap, this) }

                // src_img2の画像をMatに
                bitmap = Bitmap.createScaledBitmap(getBitmapFromImageView(src_img2), 640, 480, false)
                val scene2 = Mat(bitmap?.height, bitmap?.width, CvType.CV_8UC1).apply { Utils.bitmapToMat(bitmap, this) }

                // アルゴリズムはAKZEで
                val algorithm: AKAZE = AKAZE.create()

                // 特徴点抽出
                val keypoint1 = MatOfKeyPoint().apply { algorithm.detect(scene1, this) }
                val keypoint2 = MatOfKeyPoint().apply { algorithm.detect(scene2, this) }

                // 特徴量記述
                val descriptor1 = Mat().apply { algorithm.compute(scene1, keypoint1, this) }
                val descriptor2 = Mat().apply { algorithm.compute(scene2, keypoint2, this) }

                // マッチング (アルゴリズムにはBruteForceを使用)
                val matcher = DescriptorMatcher.create("BruteForce")

                var matches_list: MutableList<DMatch> = mutableListOf()
                val match12 = MatOfDMatch().apply { matcher.match(descriptor1, descriptor2, this) }
                val match21 = MatOfDMatch().apply { matcher.match(descriptor2, descriptor1, this) }

                // クロスチェック(1→2と2→1の両方でマッチしたものだけを残して精度を高める)
                val size: Int = match12.toArray().size - 1
                val match12_array = match12.toArray()
                val match21_array = match21.toArray()
                var count: Int = 0
                for(i in 0..size) {
                    val forward: DMatch =match12_array[i]
                    val backward: DMatch = match21_array[forward.trainIdx]
                    if(backward.trainIdx == forward.queryIdx) {
                        matches_list.add(forward)
                        count++
                    }
                }

                val matches = MatOfDMatch().apply { this.fromList(matches_list) }

                // 結果画像の背景真っ黒になるのを防ぐ
                val scene1rgb = Mat().apply { Imgproc.cvtColor(scene1, this, Imgproc.COLOR_RGBA2RGB, 1) }
                val scene2rgb = Mat().apply { Imgproc.cvtColor(scene2, this, Imgproc.COLOR_RGBA2RGB, 1) }

                // マッチ結果を出力
                val dest = scene1.clone().apply {
                    Features2d.drawMatches(scene1rgb, keypoint1, scene2rgb, keypoint2, matches, this)
                }

                val result_btm: Bitmap = Bitmap.createBitmap(dest.cols(), dest.rows(), Bitmap.Config.ARGB_8888)
                        .apply { Utils.matToBitmap(dest, this) }

                // マッチング結果画像の出力
                result_img.setImageBitmap(result_btm)

                // マッチング数を出力
                count_txt.text = "マッチング数: ${count}"

            } catch(e: NullPointerException) {
                e.printStackTrace()
            }
        }
ここが実質肝です。今回特徴量取得アルゴリズムとしてはAKAZEを使わせてもらいました。
大雑把な流れとしてはアルバムから取ってきた画像データをMatに変換した後、特徴量を取得して1->2と2->1の両方向でマッチングさせ、その後クロスマッチングさせてる感じです。
またクロスマッチング数をcountでカウントさせてます。
個人的に詰まったところとしては、
// 結果画像の背景真っ黒になるのを防ぐ
val scene1rgb = Mat().apply { Imgproc.cvtColor(scene1, this, Imgproc.COLOR_RGBA2RGB, 1) }
val scene2rgb = Mat().apply { Imgproc.cvtColor(scene2, this, Imgproc.COLOR_RGBA2RGB, 1) }
この部分です。MatをRGBA方式からRGB方式に変換してから出力してやらないとマッチング結果は出ても背景が真っ暗になります。ここに割と面食らいました。どんな風になるのか気になる人はここの処理を抜いてやってみてください。
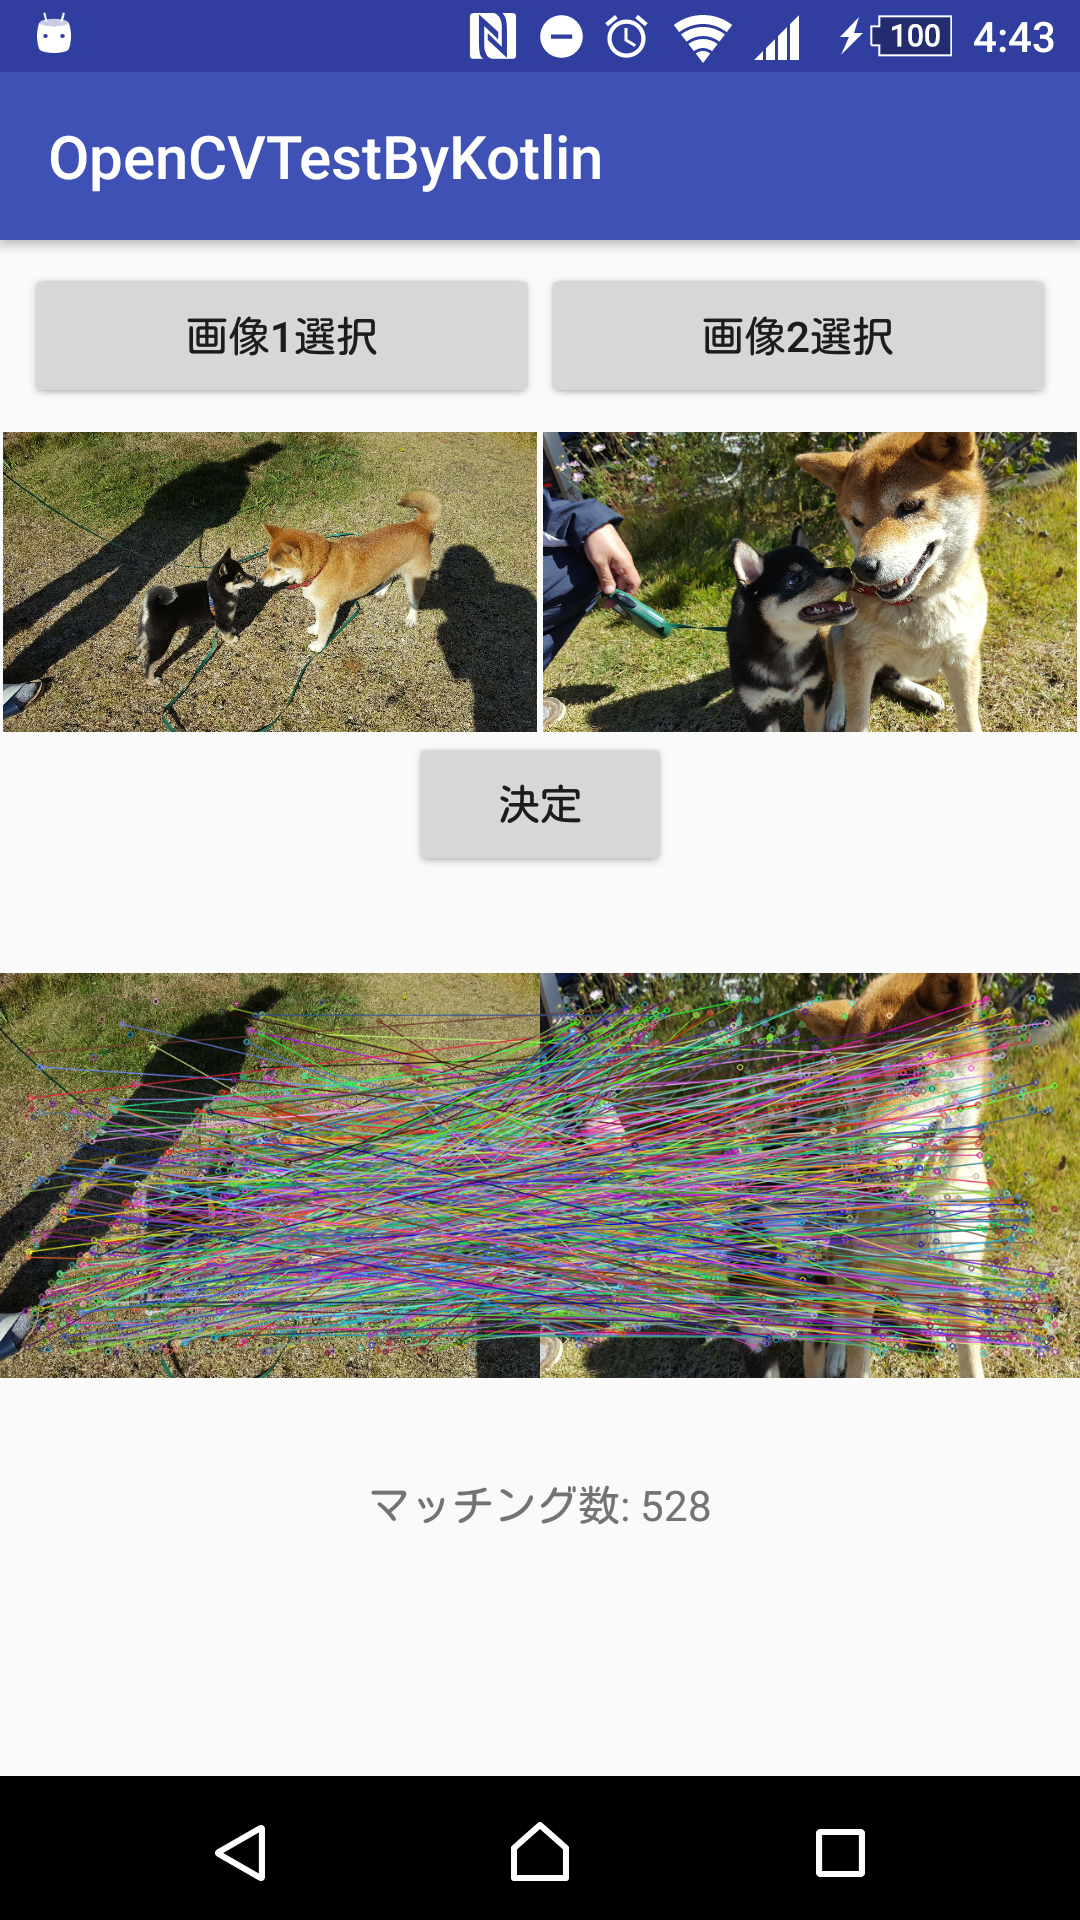
結果
こんな感じになります。
画像に対しての加工をピクセル数変える以外してないので芝生に対してもマッチングしちゃってますがまあこんな感じです。
最後に
とまあ、javaとほぼ同じ感覚でやれます。せっかく今年火がついている言語ですしjavaよりも書きやすいと思うので色んな方面で使っていきたいです。ただ画像処理なんかはべらぼうに時間がかかる処理なので無理にkotlinで書かず、NDK使ってC++使うほうが無難な感じはします。今回のコードでも1回の比較あたり10sくらいかかるのは当たり前です。気長に待ってください。
追記
時間に関しては特徴量処理が遅いようです。openCVの中身はc++で動いているようなので今回の例の場合はNDK使おうと速さはあまり変わりません。ピクセル単位でfor文回して処理していく場合はポインタが使えるのでc++のほうが圧倒的に早いです。
今回はこちらのサイトを参考にさせていただきました。ありがとうございました!!
明日は前前代表です。きっと素晴らしい記事だと思います。読むだけで心が洗われるような技術的名文を書いてくれるだろうと楽しみにしています。明日を待ちましょう。
あと次は画像と動画のリアルタイム?特徴量比較です。こんなウルトラC級なこともopenCVなら簡単にできちゃいます。素晴らしい。
なんかやる気なくなったんでやめました...

