はじめに
LovyanGFXに最近Windowsで動くバージョンが公開されています。
これを使用することにより、従来Arduino上で動作を確認していたGUIまわりの開発を効率的に進めることが可能になります。
この記事では、LovyanGFX for Windowsのインストール方法の補足と簡単な使用方法について説明します。
LovyanGFX for Windowsのインストール
以下のドキュメントを参考に、VisualStudio Community 2022 とWindows用 C++ Clang ツールをインストールします。
https://github.com/lovyan03/LovyanGFX/tree/master/examples_for_PC
OpenCVのSDLのダウンロード元は以下のGitHubに移動しているので注意が必要です。
https://github.com/libsdl-org/SDL/releases/tag/release-2.26.1
この中から以下のファイルをダウンロードします。
https://github.com/libsdl-org/SDL/releases/download/release-2.26.1/SDL2-devel-2.26.1-VC.zip
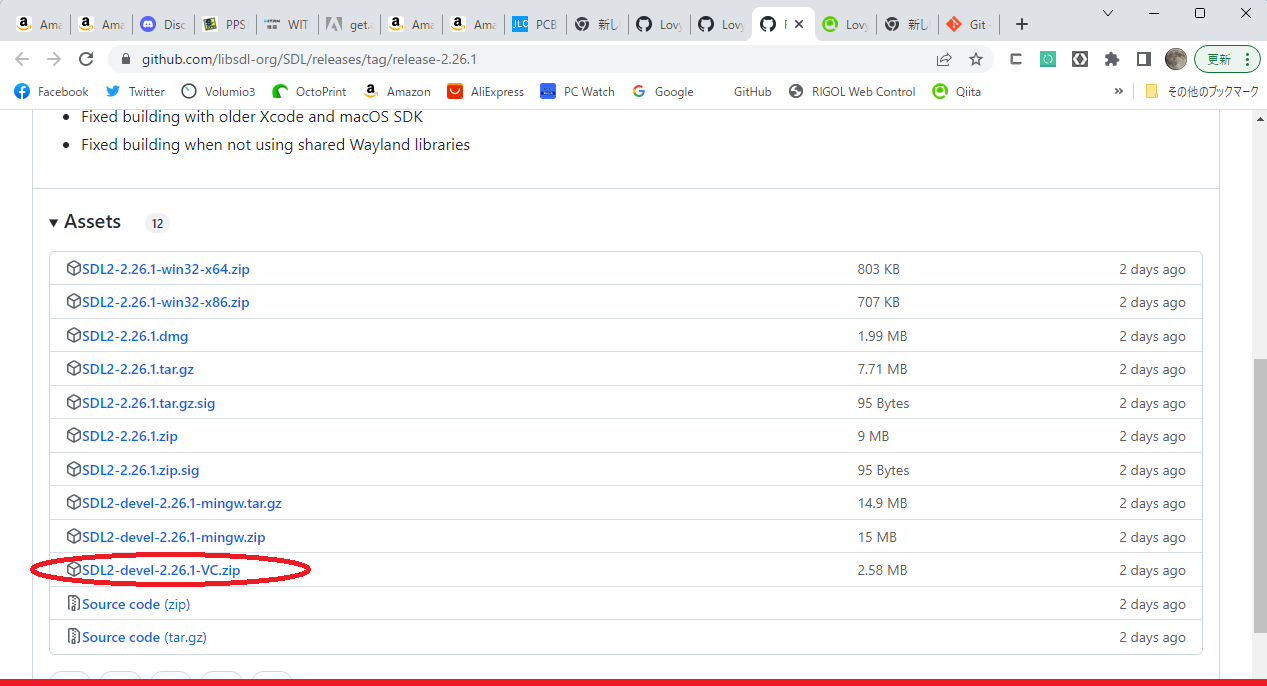
ダウンロード後、c:\sdl2に展開しておきます。インストール先は変更しないほうが、のちの修正が不要になります。
使用方法
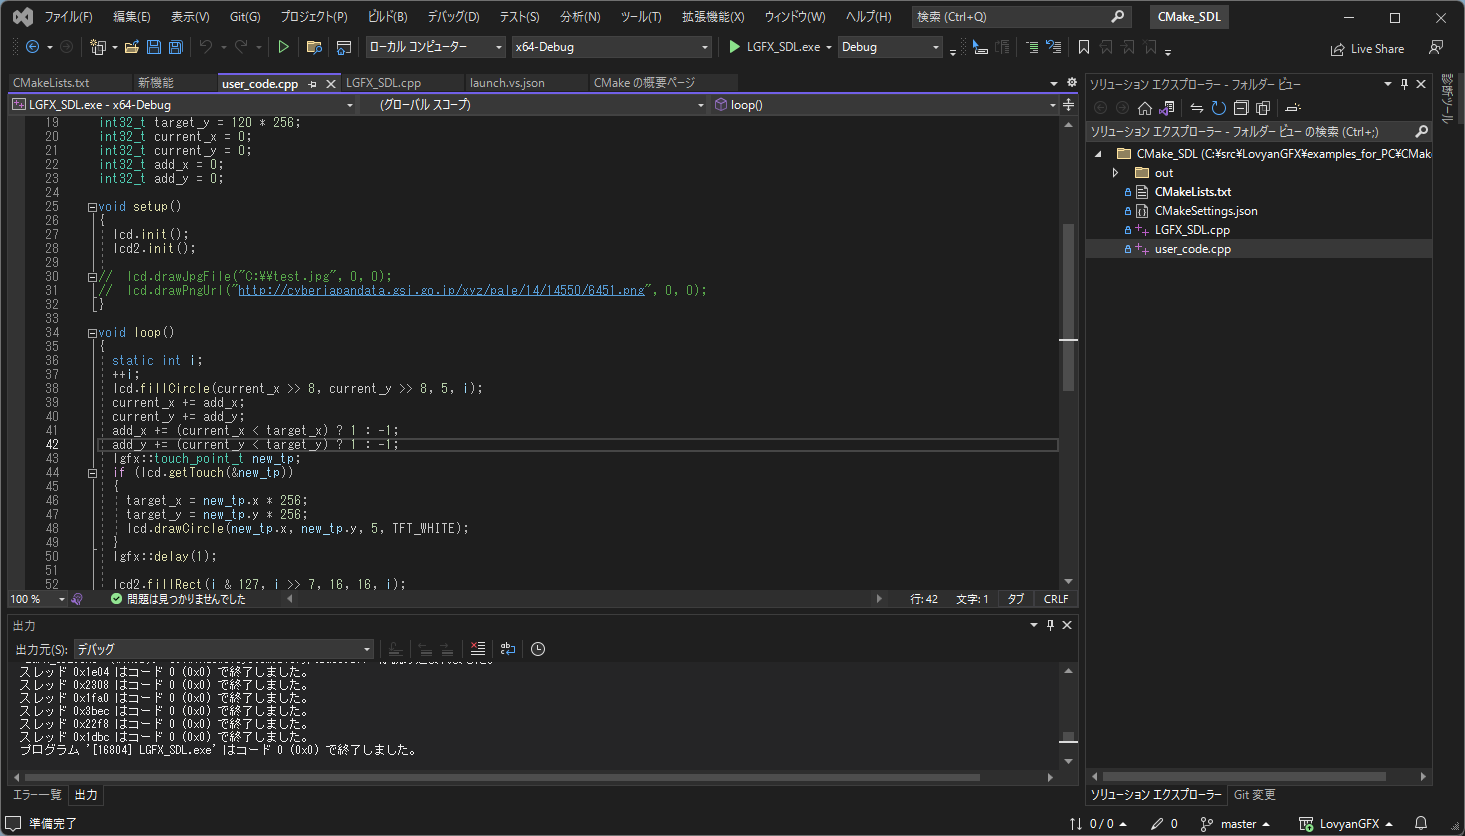
公式のドキュメントに従い、Visual Studio 2022を起動しフォルダを開きます。
右側のペインのフォルダビューから、user_code.cppを開きます。
このソースファイルにlovyanGFXの描画関数を記述することによりWindows上でLovyanGFXを使用したGUI画面の確認をWindows上で実施することができます。
サンプルコード例
LovyanGFXのAPIを使用した簡単な例を以下に示します。
ArduinoのAPIは使用できませんので、ソースコードはそのまま共通化はできません。
例えば、delay()関数はSleep()関数に置き換えるなどの修正が必要になります。
// If you write this, you can use drawBmpFile / drawJpgFile / drawPngFile
// #include <stdio.h>

// If you write this, you can use drawBmpUrl / drawJpgUrl / drawPngUrl ( for Windows )
#include <windows.h>    // Sleep()を使うために追加
// #include <winhttp.h>
// #pragma comment (lib, "winhttp.lib")

#define LGFX_USE_V1
#include <LovyanGFX.hpp>
#include <LGFX_AUTODETECT.hpp>

LGFX gfx ( 128, 64, 4);    // 128x64の表示機を使用した場合、

void setup()
{
  gfx.init();
}

void loop()
{
    int w = gfx.width();
    int h = gfx.height() >> 3;
    for (int x = 0; x < w; ++x) {
        int c1 = (x << 8) / w;
        int c2 = 255 - c1;
        gfx.drawFastVLine(x, 0 * h, h, gfx.color565(c1, 0, 0));
        gfx.drawFastVLine(x, 1 * h, h, gfx.color565(c2, 0, 0));
        gfx.drawFastVLine(x, 2 * h, h, gfx.color565(0, c1, 0));
        gfx.drawFastVLine(x, 3 * h, h, gfx.color565(0, c2, 0));
        gfx.drawFastVLine(x, 4 * h, h, gfx.color565(0, 0, c1));
        gfx.drawFastVLine(x, 5 * h, h, gfx.color565(0, 0, c2));
        gfx.drawFastVLine(x, 6 * h, h, gfx.color565(c1, c1, c1));
        gfx.drawFastVLine(x, 7 * h, h, gfx.color565(c2, c2, c2));
    }
    Sleep(2000);    //  delay()を置き換え
    gfx.fillScreen(TFT_BLACK);
    for (int i = 1; i < 1000; i++) {
        gfx.fillCircle(rand() % gfx.width(), rand() % gfx.height(), (rand() & 7) + 3, rand());
        Sleep(10);    // delay()を置き換え
    }
}
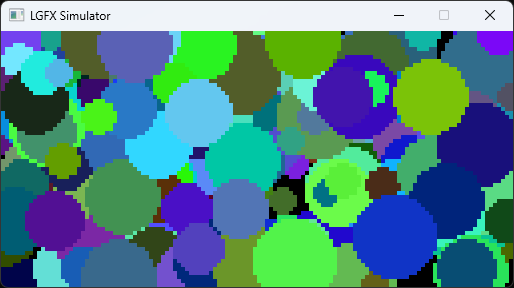
実行結果
実ウインドウの4倍のサイズで描画結果を確認することができます。
まとめ
- LovyanGFX for Windowsをインストールし、動作の確認を行った。
- Visual Studio上でLovyanGFXのAPIを)記述したソースコードが動作することを確認した。
- Arduino固有のAPI(delay()関数等)はWindowsの関数に置き換えが必要となる。
- Visual Studioのデバッグ機能等を用いて、ArduinoのGUI開発を効率的に行うことが可能であることを確認した。