この記事はCSS Advent Calendar 2022の2日目の分です。
はじめに
tailwindcssで単純なHTMLとcssをAWS、それもcloudFront+S3ではなく、S3の静的webサイトホスティングでデプロイする記事が見つからなかったので書きます。
この記事では、tailwindcss自体にはあまり触れません。どちらかというとどうやってデプロイして全世界公開するか?というところになります。
私はaws大好き勢なので、今回はs3へのデプロイ&公開です。
AWS CLIのコマンドでデプロイする方法と、AWS CDKでデプロイする2種類を試してみたので両方ともまとめてみます。
>cdk --version
2.50.0 (build 4c11af6)
>node -v
v14.17.5
>aws --version
aws-cli/2.1.27 Python/3.7.9 Windows/10 exe/AMD64 prompt/off
CLIによるデプロイ
tailwindCSSのプロジェクト作成とローカルサーバーでの表示まで
まずはtailwindCSSのプロジェクトを作るところからです。
mkdir tailwind
cd tailwind
続いてtailwind公式のTailwind CLIによるインストール手順をそのままなぞって実行します。
- Install Tailwindcss
npm init -y
npm install -D tailwindcss
tailwind.config.jsファイルが作成されているはずなので、contentに情報を追加しましょう。
2. Configure your template paths
- tailwind.config.css
/** @type {import('tailwindcss').Config} */
module.exports = {
  content: ["./src/**/*.{html,js}"],
  theme: {
    extend: {},
  },
  plugins: [],
}
次にsrc/input.cssファイルを作成して次の3行を追加します。
3. Add the Tailwind directives to your CSS
@tailwind base;
@tailwind components;
@tailwind utilities;
src/input.cssをもとにdist/output.cssファイルを作成します。
4. Start the Tailwind CLI build process
npx tailwindcss -i ./src/input.css -o ./dist/output.css
最後に、src/index.htmlファイルを作成して必要最低限のbody,h1タグを記載します。
私は公式の最低限だけだと物足りなかったので、Utility-First FundamentalsのWhy not just use inline styles?のサンプルコードを適当に付け足してます。
- src/index.html
<!DOCTYPE html>
<html>
  <head>
    <meta charset="UTF-8" />
    <meta name="viewport" content="width=device-width, initial-scale=1.0" />
    <link href="/dist/output.css" rel="stylesheet" />
  </head>
  <body>
    <h1 class="text-3xl font-bold underline text-blue-900">Hello world!</h1>
  </body>
  <div class="py-8 px-8 max-w-sm mx-auto bg-white rounded-xl shadow-lg space-y-2 sm:py-4 sm:flex sm:items-center sm:space-y-0 sm:space-x-6">
    <img class="block mx-auto h-24 rounded-full sm:mx-0 sm:shrink-0" src="/img/run_gopher.png" alt="Icon">
    <div class="text-center space-y-2 sm:text-left">
      <div class="space-y-0.5">
        <p class="text-lg text-black font-semibold">
          pisa-kun
        </p>
        <p class="text-slate-500 font-medium">
          Product Engineer
        </p>
      </div>
      <button class="px-4 py-1 text-sm text-purple-600 font-semibold rounded-full border border-purple-200 hover:text-white hover:bg-purple-600 hover:border-transparent focus:outline-none focus:ring-2 focus:ring-purple-600 focus:ring-offset-2">Message</button>
    </div>
  </div>
</html>
<img class="block mx-auto h-24 rounded-full sm:mx-0 sm:shrink-0" src="/img/run_gopher.png" alt="Icon">の部分で画像ファイルをimg/直下に置いて参照させているので、皆さんは好きな画像を置いてください。
これでtailwindcssの恩恵を受けた簡易的なwebサイトを表示することができます。
vscodeを使っている場合はLive Serverを拡張機能で追加することで、簡単にローカルサーバーを立ち上げてテスト表示することができます。詳しくはこちら
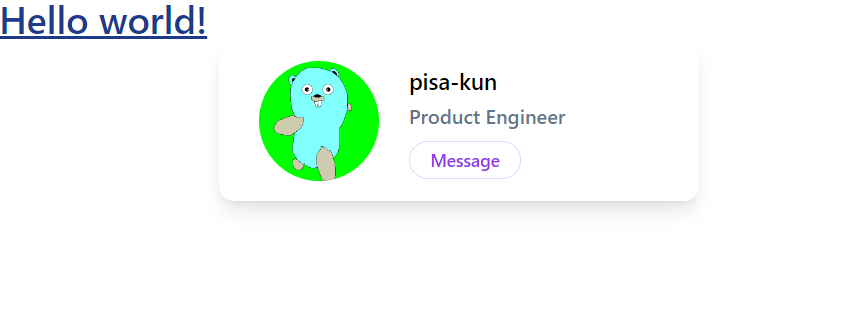
こんな感じでローカルサーバーで表示されればOKです。
AWS CLIコマンドによるS3へのデプロイ
先に必要なコマンドだけ書いておきます。
aws s3 mb s3://<bucket-name>

aws s3api put-public-access-block --bucket <bucket-name> --public-access-block-configuration  "BlockPublicAcls=false,IgnorePublicAcls=false,BlockPublicPolicy=false,RestrictPublicBuckets=false"

aws s3api put-bucket-policy --bucket <bucket-name> --policy file://policy/bucket-policy.json

aws s3 cp src/index.html s3://<bucket-name>/index.html
aws s3 cp dist/output.css s3://<bucket-name>/dist/output.css
aws s3 cp img/run_gopher.png s3://<bucket-name>/img/run_gopher.png

aws s3 website s3://<bucket-name> --index-document index.html
aws s3 mb s3://
aws s3api put-public-access-block --bucket --public-access-block-configuration "BlockPublicAcls=false,IgnorePublicAcls=false,BlockPublicPolicy=false,RestrictPublicBuckets=false"
指定したバケット名のs3バケットを作成して、パブリックアクセスブロックを設定します。
- policy/bucket-policy.json
{
    "Version": "2012-10-17",
    "Statement": [
        {
            "Effect": "Allow",
            "Principal": "*",
            "Action": "s3:GetObject",
            "Resource": "arn:aws:s3:::<bucket-name>/*"
        }
    ]
}
バケット内のオブジェクトにGetだけ許可するポリシーをjsonで作成してS3バケットにアタッチメントします。
aws s3api put-bucket-policy --bucket --policy file://policy/bucket-policy.json
これでs3バケットへの設定周りはほぼほぼ終わったので、index.html、output.css、アイコン画像(img/hoge.png)をs3にデプロイします。
aws s3 cp src/index.html s3:///index.html
aws s3 cp dist/output.css s3:///dist/output.css
aws s3 cp img/run_gopher.png s3:///img/run_gopher.png
src/index.htmlをs3ではルートの位置にデプロイする点だけ気を付けてください。
最後に、ウェブサイトホスティングを有効にするため、インデックスドキュメントとして先ほどデプロイしたindex.htmlを設定します。
aws s3 website s3:// --index-document index.html
この設定が完了すれば、ウェブブラウザで
http://<bucket-name>.s3-website.<Region>.amazonaws.com/
を入力すればローカルサーバーで表示していた画面と同じ画面が表示されます。
- bucket-name を
tailwind-static-cli-deploy、Regionがap-northeast-1の場合
http://tailwind-static-cli-deploy.s3-website-ap-northeast-1.amazonaws.com/
CDKによるデプロイ
CDKプロジェクトの作成
CDK用のプロジェクトを最初に作ります。
mkdir tailwind-cdk-deploy
cd tailwind-cdk-deploy
cdk initコマンドで初期化を行います。今回はtypescriptでプロジェクトを作成します。
cdk init --language typescript
s3に関するモジュールをnpm installで追加します。
npm install -D @aws-cdk/aws-s3 @aws-cdk/aws-s3-deployment
先にtailwindcssのプロジェクトを作成しておきます。
mkdir tailwind
cd tailwind
ここからtailwindcssの設定を行い、src/index.htmlの修正とローカルサーバーへの表示までは同じ手順になるため省略して、aws CDKを使ったデプロイ方法について記載します。
- tailwind-cdk-deploy/lib/tailwind-cdk-deploy-stack.ts
import * as cdk from 'aws-cdk-lib';
import { Construct } from 'constructs';

export class TailwindCdkDeployStack extends cdk.Stack {
  constructor(scope: Construct, id: string, props?: cdk.StackProps) {
    super(scope, id, props);

    const bucketName = "tailwind-cdk-deploy-stack";
    const staticBucket = new cdk.aws_s3.Bucket(this, bucketName, {
        bucketName: bucketName,
        removalPolicy: cdk.RemovalPolicy.DESTROY,
        autoDeleteObjects: true,
        websiteIndexDocument: "index.html",
    });

    const staticBucketOpenPolicy = new cdk.aws_iam.PolicyStatement({
      effect: cdk.aws_iam.Effect.ALLOW,
      actions: ['s3:GetObject'],
      principals: [new cdk.aws_iam.ArnPrincipal('*')],
      resources: [staticBucket.bucketArn + '/*'],
    });

    staticBucket.addToResourcePolicy(staticBucketOpenPolicy);

    // Deploy index.html to s3 bucket
    new cdk.aws_s3_deployment.BucketDeployment(this, 'DeployTargetFiles', {
      sources: [cdk.aws_s3_deployment.Source.asset('./tailwind/src', { exclude: ['*', '!index.html'] })],
      destinationBucket: staticBucket,
    });

    new cdk.aws_s3_deployment.BucketDeployment(this, 'DeployImages', {
      sources: [cdk.aws_s3_deployment.Source.asset('./tailwind/img')],
      destinationBucket: staticBucket,
      destinationKeyPrefix: 'img'
    });

    new cdk.aws_s3_deployment.BucketDeployment(this, 'DeployOutputCss', {
      sources: [cdk.aws_s3_deployment.Source.asset('./tailwind/dist')],
      destinationBucket: staticBucket,
      destinationKeyPrefix: 'dist'
    });

  }
}
はい、一つずつ説明していきます。最初はs3バケットの生成コードです。
    const bucketName = "tailwind-cdk-deploy-stack";
    const staticBucket = new cdk.aws_s3.Bucket(this, bucketName, {
        bucketName: bucketName,
        removalPolicy: cdk.RemovalPolicy.DESTROY,
        autoDeleteObjects: true,
        websiteIndexDocument: "index.html",
    });
ここでは、tailwind-cdk-deploy-stackという名前のバケットを作成するときに、インデックスドキュメント(websiteIndexDocumentプロパティ)にindex.htmlを指定しています。
    const staticBucketOpenPolicy = new cdk.aws_iam.PolicyStatement({
      effect: cdk.aws_iam.Effect.ALLOW,
      actions: ['s3:GetObject'],
      principals: [new cdk.aws_iam.ArnPrincipal('*')],
      resources: [staticBucket.bucketArn + '/*'],
    });
CLIの項目で説明したpolicy/bucket-policy.jsonと同等のポリシーを作成しています。
staticBucket.addToResourcePolicy(staticBucketOpenPolicy);
ポリシーをs3にアタッチします。
    // Deploy index.html to s3 bucket
    new cdk.aws_s3_deployment.BucketDeployment(this, 'DeployTargetFiles', {
      sources: [cdk.aws_s3_deployment.Source.asset('./tailwind/src', { exclude: ['*', '!index.html'] })],
      destinationBucket: staticBucket,
    });
対象のバケットにファイルをデプロイするコードです。
注意してほしいところとして、index.htmlファイルのみをデプロイしようとしているのですが、cdk.aws_s3_deployment.Source.assetは第一引数のフォルダごとデプロイしようとするため、asset('./tailwind/src/index.html') のような単一ファイルをデプロイさせようとするとエラーになります。第二引数で特定ファイルを除外するオプションを追加しましょう。
    new cdk.aws_s3_deployment.BucketDeployment(this, 'DeployImages', {
      sources: [cdk.aws_s3_deployment.Source.asset('./tailwind/img')],
      destinationBucket: staticBucket,
      destinationKeyPrefix: 'img'
    });

    new cdk.aws_s3_deployment.BucketDeployment(this, 'DeployOutputCss', {
      sources: [cdk.aws_s3_deployment.Source.asset('./tailwind/dist')],
      destinationBucket: staticBucket,
      destinationKeyPrefix: 'dist'
    });
アイコン画像とoutput.cssをimgフォルダとdistフォルダにそれぞれデプロイしています。
これでCDKのコードは完成したので、CDK deployコマンドでcloudFormationを作成してデプロイしましょう。
CDK deploy
CLIのデプロイと同様、の部分を対象のバケット名(今回の例だとtailwind-cdk-deploy-stack)に置き換えてブラウザ表示させてみましょう。
next.js+tailwindcssをamplifyにデプロイする手順などは調べると色々出てきましたが、必要最小限であるhtml+css(tailwindcss)をs3に置いて表示する情報がなかったのでまとめてみました。
CDKでデプロイする際に、ver1とver2だとawsリソースのインスタンス生成の記載が異なり、ネット上はほとんどv1の生成方法しか書かれていなかったので
いつまでたってもインスタンス生成の部分でなぜかエラーになり困っていました。
もし、手順通りに進めていて上手く進まない場合は、一度自分が使っているnodeやCLIなどのバージョンを確認してみてください。
