fukuoka.ex代表のpiacereです
ご覧いただいて、ありがとうございます![]()
Vue.jsを始めると、Vue CLIやnpmを使ったり、webpackを使う解説やチュートリアルが多いですが、デザインから動的なページ作成を始めた方や、Webで開発を始めたのでサーバサイドプログラミングでの複雑な手順に慣れていない方には、本質に辿り付く前に心が折れそうになります
そこで、CDN … つまり、URL指定のライブラリ利用のみでも、Vue.jsでSPA(Single Page Application)が組める、ということを実感していただくチュートリアルを作ってみました
流れとしては、まずブラウザのみで動くページをCDN版のVue.jsで作成した後、簡単なDBアクセスAPIを作成(開発にはElixir/Phoenixを使用)し、Vue.jsからデータ追加/更新/削除するSPAもCDN版のVue.jsでこなそうと思います
なお、「Phoenix」は、ElixirのWebフレームワークです
内容が、面白かったり、役に立ったら、「いいね」よろしくお願いします ![]()
Vue.jsとHTMLの間でデータ受け渡しを行う
以下ファイルを適当な場所に作成します
<script src="https://cdnjs.cloudflare.com/ajax/libs/vue/2.5.17/vue.min.js"></script>
<script src="https://cdnjs.cloudflare.com/ajax/libs/axios/0.18.0/axios.min.js"></script>

<div id="app">

<h1>Posts</h1>
<table border="1">
<tr v-for="result in results">
	<td style="padding: 10px;">{{ result.id }}</td>
	<td style="padding: 10px;"><input type="text" v-model="result.title"></td>
	<td style="padding: 10px;"><input type="text" v-model="result.body"></td>
</tr>
</table>
<button v-on:click="onView">データ表示</button>

</div>

<script>
var app = new Vue
( {
	el: '#app',
	data:
	{
		results:   [],
	},
	mounted()
	{
		this.results.push( { id: 1, title: 'title1', body: 'body1' } )
		this.results.push( { id: 2, title: 'title2', body: 'body2' } )
		this.results.push( { id: 3, title: 'title3', body: 'body3' } )
	},
	methods:
	{
		onView: async function( evt )
		{
			console.log( this.results )
		},
	},
} )
</script>
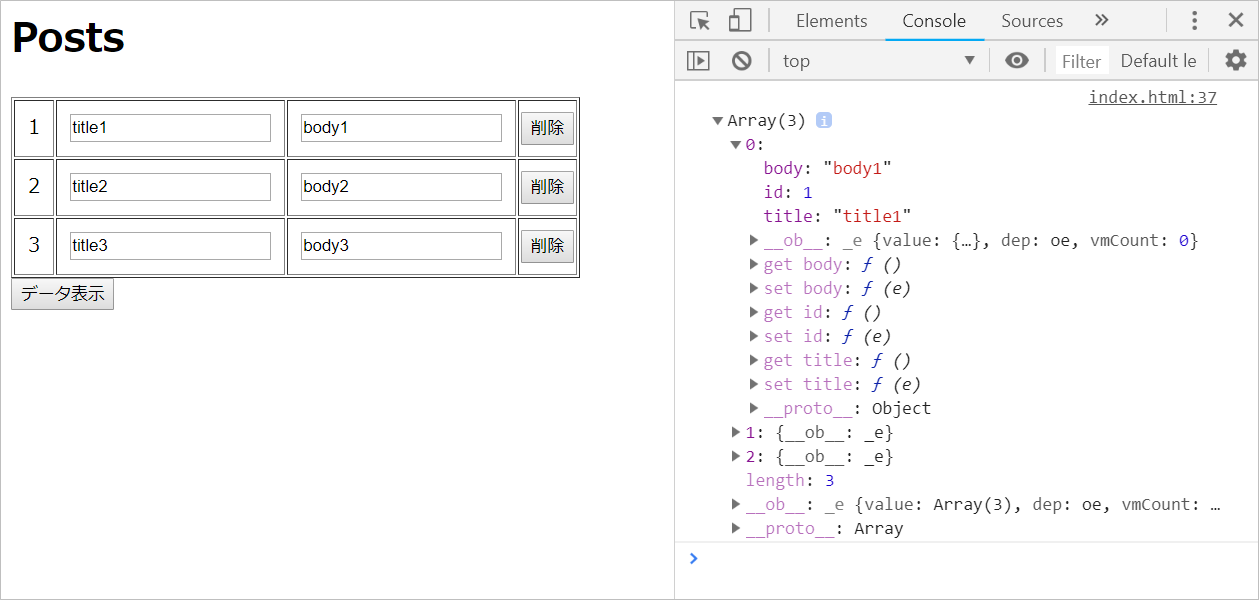
ブラウザを起動し、上記ファイルをドラッグ&ドロップするか、オープンすると、以下の画面が表示されます
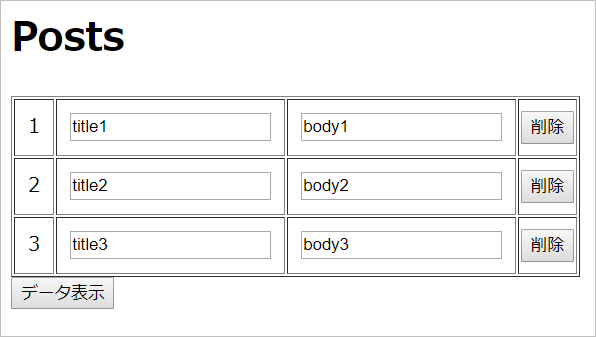
F12キーもしくはCtrl+Shift+iキーを押して、コンソールウインドウを開いた後、テーブル表示しているデータをVue.js側で保持している中身を「データ表示」ボタンでコンソールウインドウに出力します
コンソールウインドウに表示される、「(3) [{...}, {...}, …」が、Vue.js側で保持しているデータです
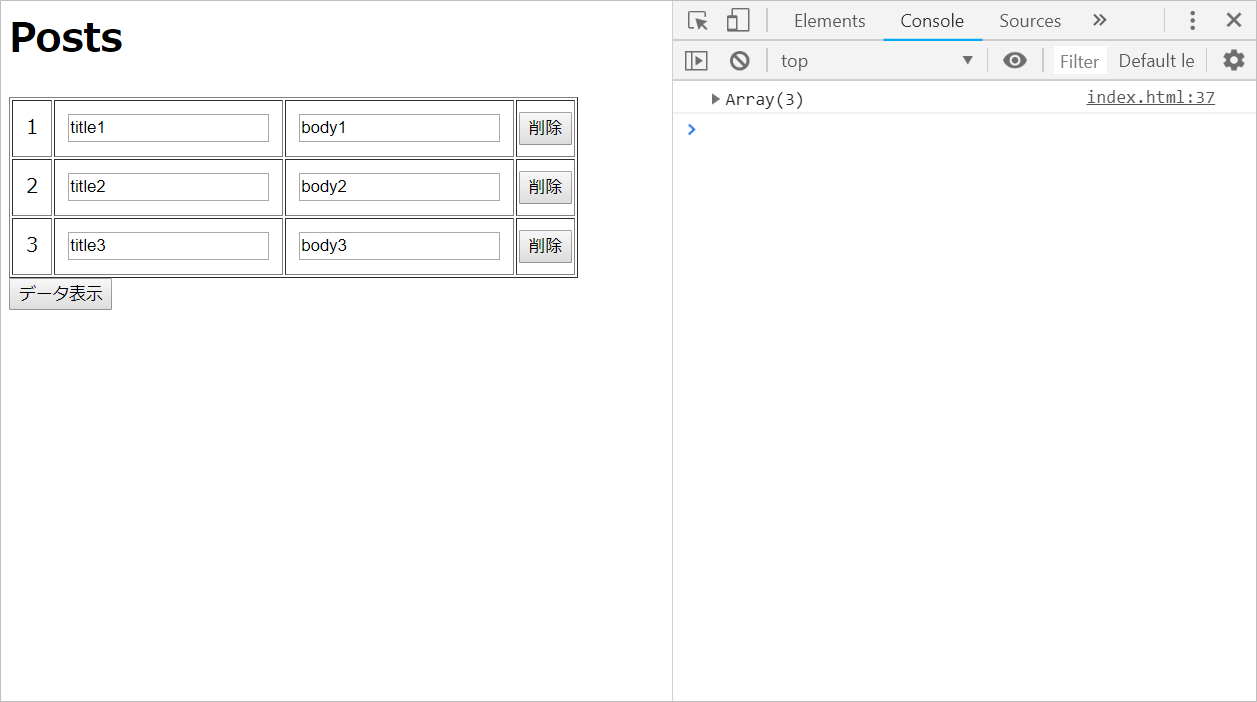
この「(3) [{...}, {...}, …」の左側の「▶」をクリックして開くと、「0: {__ob__: _e}」~「2: {__ob__: _e}」と出てきますが、これは画面上のテーブル3行に表示されているデータを表し、たとえば「0: {__ob__: _e}」の左側の「▶」をクリックして開くと、テーブルに表示されているデータと同じ値がコンソールウインドウで見れます
テーブルの入力フィールドで値を書き換え、「データ表示」ボタンを押すと、書き換わったデータがコンソールウインドウで確認できます
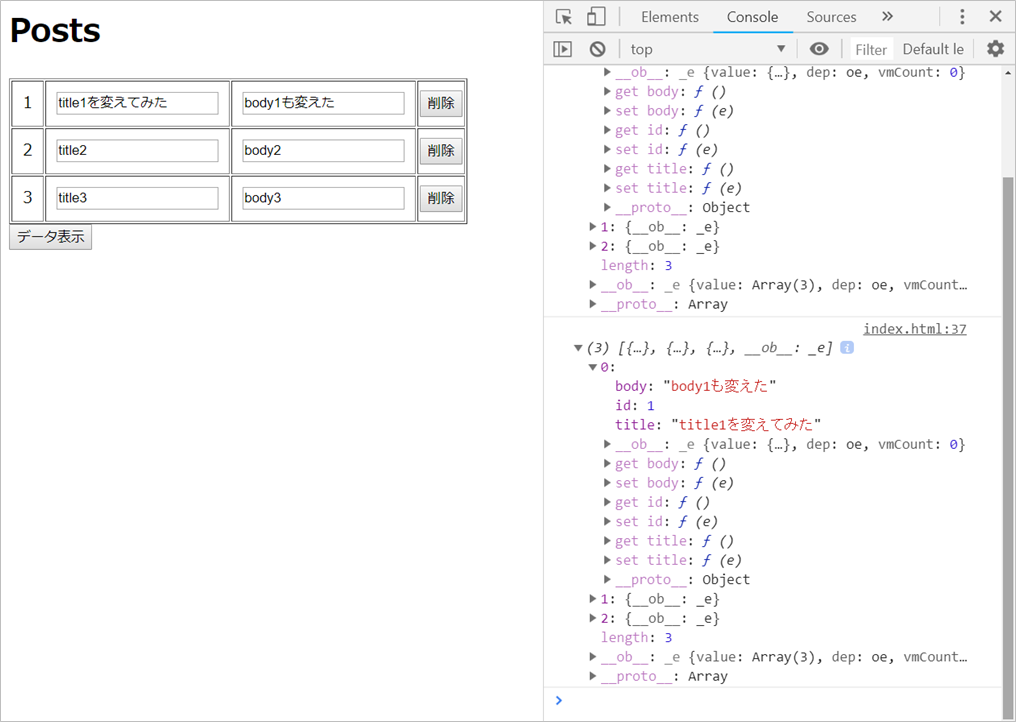
このような感じで、HTML側での入力値変更と、Vue.js側のデータ反映が、上記コードのみで実行できる訳です
大きく分けて、「①Vue.js側で保持しているデータ部分」と「②HTMLでのVue.js側データ表示」の2つによって実現されています
① Vue.js側で保持しているデータ部分(と初期化)
以下コードが、Vue.js側で保持しているデータ部分(data:の配下)と、その初期化(mounted)です
ページがロードされると、mountedが呼び出され、data:配下のresultsに、3件のデータが追加されます
	data:
	{
		results:   [],
	},
	mounted()
	{
		this.results.push( { id: 1, title: 'title1', body: 'body1' } )
		this.results.push( { id: 2, title: 'title2', body: 'body2' } )
		this.results.push( { id: 3, title: 'title3', body: 'body3' } )
	},
② HTMLでのVue.js側データ表示
以下HTMLで、上記で初期化されたVue.js側データを表示します
入力フィールドで変更されたデータをVue.js側データに反映するには、「v-model」という属性を使います
v-modelの中に書くのは、Vue.jsの「data:」部で定義したモデルとなります(実際には、v-forでバラされたモデル断片を指定しています)
なお、v-modelは、HTMLからVue.jsへの一方通行の反映では無く、Vue.jsからHTMLへの反映も兼ねているので、mountedでの初期化では、Vue.js側で「data:」部のモデルを書き換えることで、画面表示に自動反映されています(双方向データバインディングと呼ばれます)
…
<table border="1">
<tr v-for="result in results">
	<td style="padding: 10px;">{{ result.id }}</td>
	<td style="padding: 10px;"><input type="text" v-model="result.title"></td>
	<td style="padding: 10px;"><input type="text" v-model="result.body"></td>
</tr>
</table>
…
基本的には、ここまでのコードだけで、Vue.jsとHTMLとの間で、データの受け渡しが行なえます
このように非常に簡潔なコードにも関わらず、アプリ開発の根幹となる「表示」と「データ」の連携が自動的に行われることが、Vue.jsの最大の強みです
その他コード解説
さて、データの受け渡し以外の部分も見てみましょう
Vue.js側データのコンソールウインドウへのログ出力
以下HTMLとJSで、「データ表示」ボタンの表示と、クリック時のコンソールウインドウへのログ表示を行っています
「v-on:click」という属性を使うことで、クリック時のハンドラメソッドを指定できます
「v-on:click」以外にも、「v-on:change」や「v-on:focus」、「v-on:blur」等、JavaScriptで利用可能なハンドラと同じものをVue.jsでも利用できます
なお、引数を指定することもでき、引数指定無の場合は、クリックイベントが発生したパーツ(今回だとbutton)のDOMが、暗黙の引数として渡されます
…
<button v-on:click="onView">データ表示</button>
…
	methods:
	{
		onView: async function( evt )
		{
			console.log( this.results )
		},
	},
…
Vue.jsの有効範囲
「var app = new Vue」で始まるブロックが、Vue.jsのメイン処理です
メイン処理の「el」で指定したものと同じidを、上方のdivタグで指定していますが、Vue.jsはこのdivタグの内部でのみ有効です
…
<div id="app">
…
</div>
…
var app = new Vue
( {
	el: '#app',
…
CDNでのライブラリ導入
先頭にある、URL指定で、Vue.jsと、APIアクセス用ライブラリ「axios」をロードしています
<script src="https://cdnjs.cloudflare.com/ajax/libs/vue/2.5.17/vue.min.js"></script>
<script src="https://cdnjs.cloudflare.com/ajax/libs/axios/0.18.0/axios.min.js"></script>
…
このように、CDNのみでも、Vue.jsは利用できるので、心が折れること無く、気軽にVue.jsを始められます
Vue.jsと自前のAPIを連結する
では、このページをベースに、テーブルの中身のデータを、自前のAPIにすげ替えてみましょう
ここでは、自前のAPIをElixir+Phoenixで作ってみます
Elixirのインストール
Elixirを使い始めるのに、3種類の方法があります
- インストーラ/Homebrewを使う
- ソースコードからビルドする
- DockerでElixirイメージをインスト―ル (pull) する
Windows/macOSは1.、Linux含むUNIX系は2.、普段Dockerを使い慣れている方は3.がオススメです
1. インストーラ/Homebrewを使う
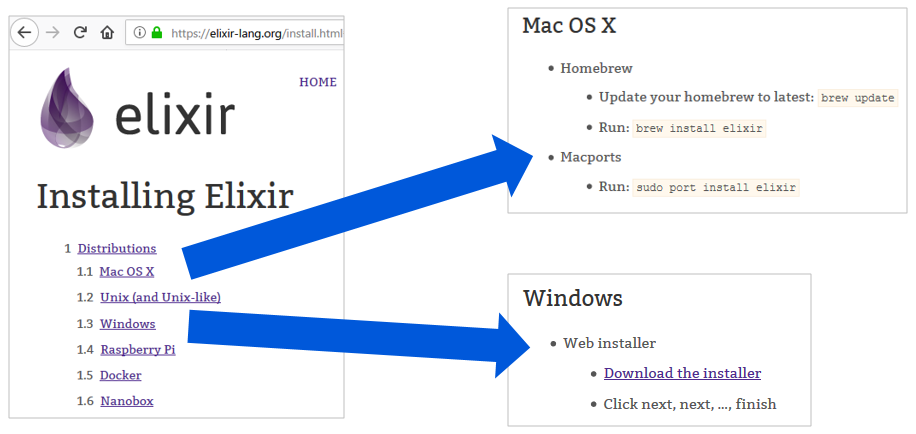
下記URLの手順に沿って、Elixirをインストールします
https://elixir-lang.org/install.html
Windowsはインストーラをダウンロードしてインストール、macOSはHomebrewでインストールと、簡単です
なお、Linux含むUNIX系の手順も記載されていますが、手順通りにすると、古いバージョンがインストールされるため、2. の方が良いです
2. ソースコードからビルドする
以下の手順通り、まずErlangをソースコードからビルドして、インストールします
なお、実施するタイミング次第では、新しいものがリリースされているかも知れないので、気になる方は、下記URLをチェックして、適宜、変更してください
http://erlang.org/download
wget http://erlang.org/download/otp_src_20.3.tar.gz
tar vzfx otp_src_20.3.tar.gz
cd otp_src_20.3/
./configure --enable-hipe
make && make install
次に、Elixirをソースコードからビルドして、インストールします
こちらも、Elixirのメジャーバージョンが新しくなっている場合は適宜、バージョンを変更してください
git clone https://github.com/elixir-lang/elixir/
cd elixir
git checkout v1.6
git pull
export PATH="${PATH}:/usr/local/bin"
make && make install
elixir -v
3. DockerでElixirイメージをインスト―ル (pull) する
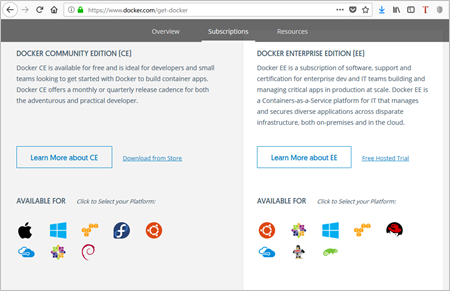
下記URLを、「Docker Community Edition (CE)」までスクロールし、利用OS毎のDockerをインストールします
https://www.docker.com/get-docker
その後、以下コマンドでElixirイメージを入れます
docker pull trenpixster/elixir
以下コマンドで、Elixirイメージのコンテナを起動します
docker run -p 4000:4000 -i -t trenpixster/elixir /bin/bash
PostgreSQLのインストール
下記OS毎のインストール手順を実施してください
なお、postgresユーザのパスワードは、「postgres」とするのを忘れず行ってください
Windows:https://eng-entrance.com/postgresql-download-install
macOS:https://qiita.com/okame_qiita/items/ac7b6a7d96d07ecbc50b
Ubuntu:https://qiita.com/eighty8/items/82063beab09ab9e41692
CentOS 7:https://weblabo.oscasierra.net/postgresql10-centos7-install/
CentOS 6:https://weblabo.oscasierra.net/postgresql-installing-postgresql9-centos6-1/
Phoenixのインストール
以下コマンドでPhoenixをインストールします
mix archive.install hex phx_new 1.4.0
Vue.js向けAPI用Phoenix PJを作成
Phoenix PJを作成します
mix phx.new vue_sample --no-webpack
Fetch and install dependencies? [Yn] (←y、Enterを入力)
…
cd vue_sample
mix ecto.create
Phoenixサーバーを起動します
iex -S mix phx.server
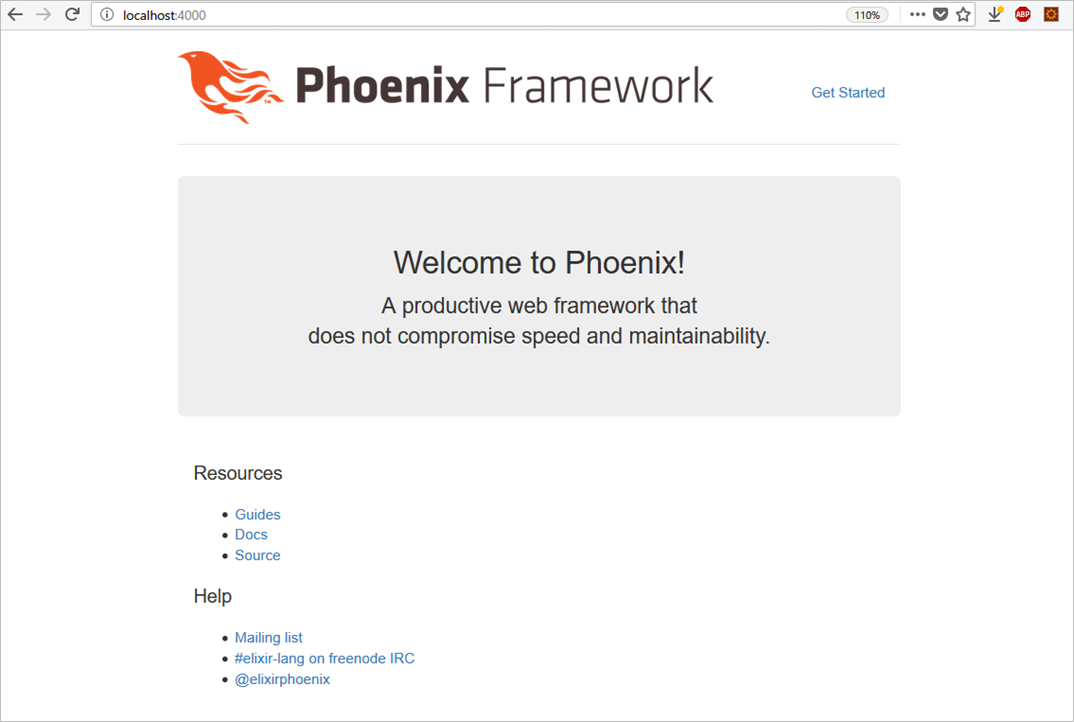
ブラウザで「http://localhost:4000」にアクセスすると、Phoenixで作られたWebページが見れます(この後も、このページを見ますので、閉じずに、開いたままにしておいてください)
PhoenixでAPIを作る
PhoenixでAPIを作るには、mixコマンドで、以下のように行います
Ctrl+cを2回押して、一度、Phoenixを停止してから、コマンドを入力します
mix phx.gen.json Api Post posts title:string body:text
以下ログと、実行後の作業指示が示されます
* creating lib/vue_sample_web/controllers/post_controller.ex
* creating lib/vue_sample_web/views/post_view.ex
* creating test/vue_sample_web/controllers/post_controller_test.exs
* creating lib/vue_sample_web/views/changeset_view.ex
* creating lib/vue_sample_web/controllers/fallback_controller.ex
* creating lib/vue_sample/api/post.ex
* creating priv/repo/migrations/20181021164507_create_posts.exs
* creating lib/vue_sample/api/api.ex
* injecting lib/vue_sample/api/api.ex
* creating test/vue_sample/api/api_test.exs
* injecting test/vue_sample/api/api_test.exs

Add the resource to your :api scope in lib/vue_sample_web/router.ex:

    resources "/posts", PostController, except: [:new, :edit]


Remember to update your repository by running migrations:

    $ mix ecto.migrate
まず、ルーティングにAPI用エントリーとして、上記「resources "/posts", ~」を、「get "/", ~」直下に追記します
defmodule VueSampleWeb.Router do
  use VueSampleWeb, :router
  …
  scope "/", VueSampleWeb do
    pipe_through :browser # Use the default browser stack

    get "/", PageController, :index
    resources "/posts", PostController, except: [:new, :edit]
  end
  …
マイグレートします
mix ecto.migrate
以下ログのように、テーブルが作成されます
01:51:55.226 [debug] Selecting all records by match specification `[{{:schema_migrations, :"$1", :"$2"}, [], [[:"$1"]]}]` with limit nil

01:51:55.282 [info]  == Running VueSample.Repo.Migrations.CreatePosts.change/0 forward

01:51:55.282 [info]  create table posts

01:51:55.310 [info]  == Migrated in 0.0s
router.exにデフォルト設定されているSCRF対策は、API利用時に不要かつ邪魔なので、解除します
defmodule VueSampleWeb.Router do
  use VueSampleWeb, :router

  pipeline :browser do
    plug :accepts, ["html"]
    plug :fetch_session
    plug :fetch_flash
#   plug :protect_from_forgery
    plug :put_secure_browser_headers
  end
  …
Phoenixを起動してください
iex -S mix phx.server
Vue.jsから自前のAPIを呼び出す
冒頭のVue.jsで作ったページをベースに、Phoenixで作成したAPIを呼び出すVue.jsへとindex.html.eexを置き換えます
処理概要は、以下の通りです
- データ追加(1件ずつ)
- POSTメソッドで追加APIを呼び出す
- メソッドに「async」、axios.deleteに「await」を付け、「同期処理」化
- 削除が完全に終わってから、データ取得するよう、「同期処理」にするため
- 「非同期処理」だと、データ削除が完了する前にデータ取得する可能性がある
- その後、データ取得し直すことで画面更新する
- データ全件更新
- v-modelで更新されたresultsを全件、PUTメソッドで更新APIを呼び出し続ける
- results全件を更新に回す部分は、forEachを使うと、JSでも関数型っぽく書ける
- 1件毎のデータ削除
- DELETEメソッドで削除APIをid指定付きで呼び出す
- 追加同様、「同期処理」化
- その後、データ取得し直すことで画面更新する
<script src="https://cdnjs.cloudflare.com/ajax/libs/vue/2.5.17/vue.min.js"></script>
<script src="https://cdnjs.cloudflare.com/ajax/libs/axios/0.18.0/axios.min.js"></script>

<div id="app">

<h1>Posts</h1>
<table border="1">
<tr v-for="result in results">
	<td style="padding: 10px;"><input type="text" v-model="result.title"></td>
	<td style="padding: 10px;"><input type="text" v-model="result.body"></td>
	<td><button v-on:click="onDelete( result.id )">削除</button></td>
</tr>
<tr>
	<td style="padding: 10px;"><input type="text" v-model="new_title"></td>
	<td style="padding: 10px;"><input type="text" v-model="new_body"></td>
	<td><button v-on:click="onCreate">追加</button></td>
</tr>
</table>
<button v-on:click="onUpdate">全件更新</button>

</div>

<script>
	var app = new Vue
	( {
		el: '#app',
		data:
		{
			results:   [],
			new_title: '',
			new_body:  '',
		},
		mounted()
		{
			axios.get( '/posts' )
			.then( response => { this.results = response.data.data } )
		},
		methods:
		{
			onUpdate: function( evt )
			{
				this.results.forEach( ( result, i ) =>
				{
					axios.put( '/posts/' + result.id,
						{
							'post':
							{
								'title': result.title,
								'body':  result.body,
							}
						} )
				} )
			},
			onDelete: async function( id )
			{
				await axios.delete( '/posts/' + id )

				axios.get( '/posts' )
				.then( response => { this.results = response.data.data } )
			},
			onCreate: async function( evt )
			{
				await axios.post( '/posts/',
					{
						'post':
						{
							'title': this.new_title,
							'body':  this.new_body,
						}
					} )

				this.new_title = ''
				this.new_body  = ''

				axios.get( '/posts' )
				.then( response => { this.results = response.data.data } )
			},
		},
	} )
</script>
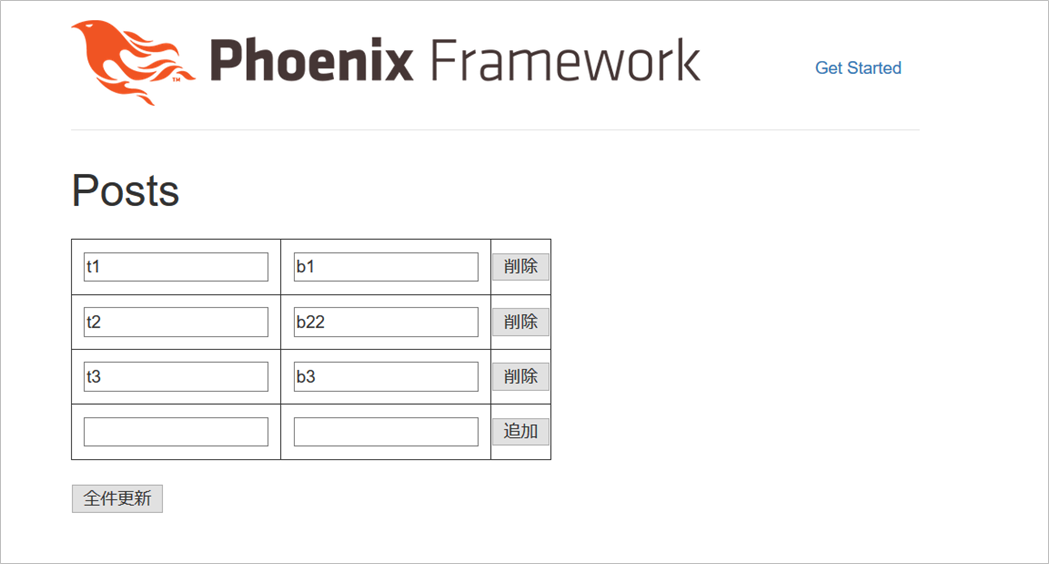
上記ファイルを保存すると、データの追加/更新/削除ができるようになるので、色々遊んでみてください
p.s.「いいね」よろしくお願いします
ページ左上の  や
や  のクリックを、どうぞよろしくお願いします
![]()
ここの数字が増えると、書き手としては「ウケている」という感覚が得られ、連載を更に進化させていくモチベーションになりますので、もっとElixirネタを見たいというあなた、私達と一緒に盛り上げてください!![]()
