この記事は、「NervesJP Advent Calendar 2020」の20日目です
昨日は、@nishiuchikazuma さんの「NervesとPhonenix(Gigalixir)とGCP Cloud PubSubを使ってBBG CapeのLEDをチカした話〜NervesでSub編〜(2/2)」でした
Elixir Digitalization Implementors/fukuoka.ex/kokura.exのpiacereです
ご覧いただいて、ありがとうございます ![]()
無線LANとGPIOが標準装備のIoTデバイス「Raspberry Pi Zero WH」に、ElixirのIoTエンジン「Nerves」をインストールして動かす入門コラムです
普段のElixir IoT構築では、Nervesでは無く、Raspberry Pi OS上にElixir/Phoenixをインストール(少し古いElixirだけど)して、ごく普通のPCと同じ使い方をしていますが、今後、Nervesでの構築/運用も試していくことも視野に入れて、トライしてみます
内容が、面白かったり、役に立ったら、「いいね」よろしくお願いします ![]()
 Advent Calendar、fukuoka.ex1位、Elixir2位達成ヽ(=´▽`=)ノ
fukuoka.ex Advent Calendar、Webテクノロジーカテゴリで堂々1位 … 各コラムぜひお読みください
https://qiita.com/advent-calendar/2020/fukuokaex

そして、プログラミング言語カテゴリは、1位がRust、2位がElixir、3位がGoとモダン言語揃い踏みでのトップ3、熱いネー![]()
https://qiita.com/advent-calendar/2020/elixir

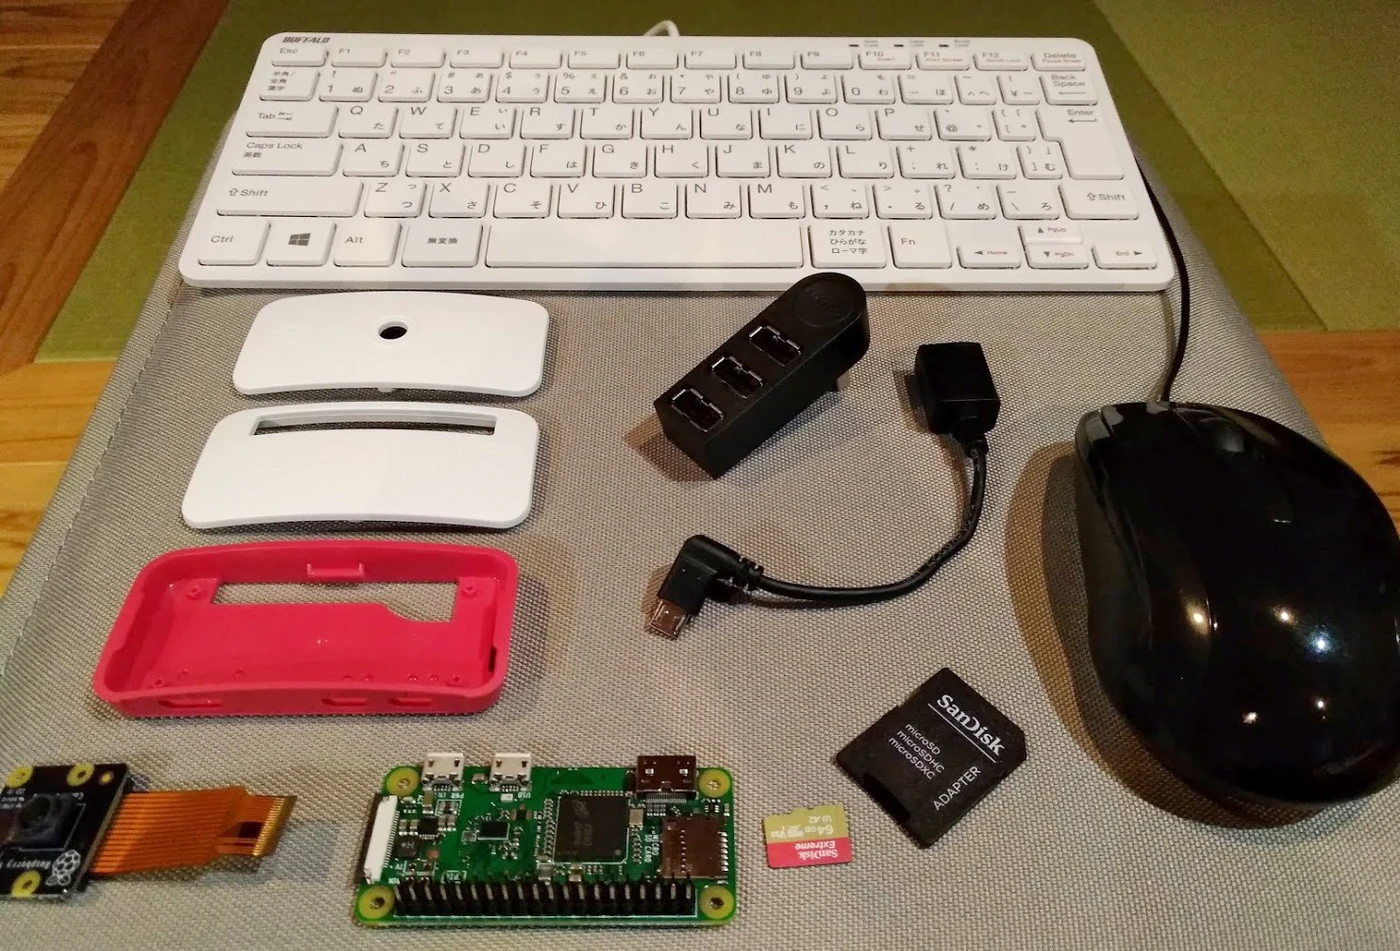
Raspberry Pi Zero WHを組み立てる
ケースに入れる前/ケーブルを接続する前の状態はこんな感じです
組み立てると、こんな感じです(まぁ、この後、コラム内の操作中は、ケース外して作業ですが)
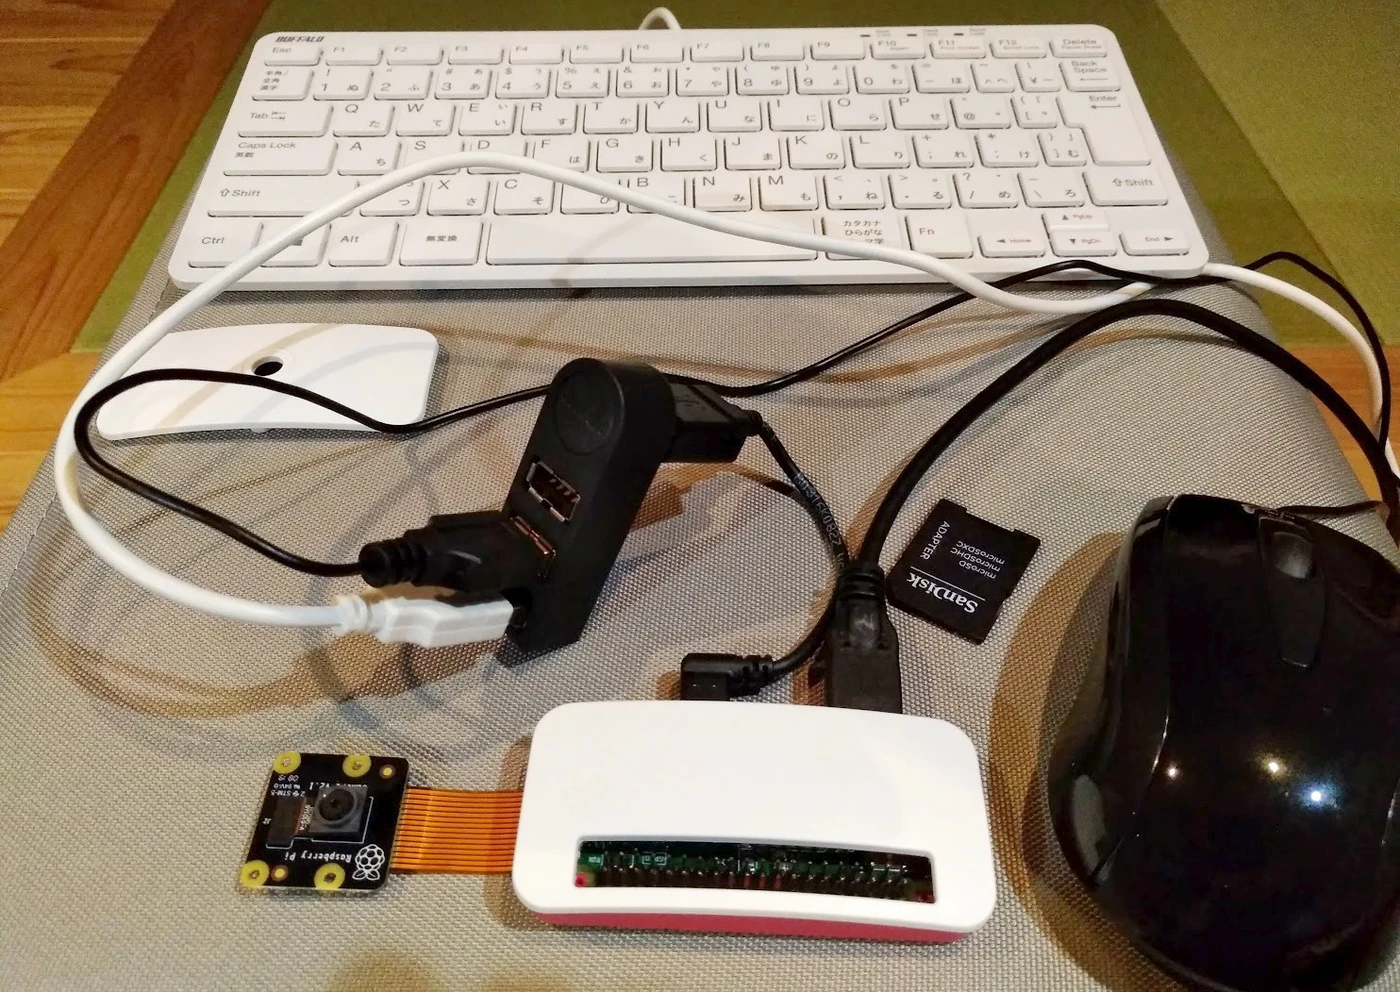
ケーブル周りは、ノートPCやデスクトップPCとだいぶ異なるので、以下に注意です
- USBハブの接続は「Type-B」なので、「Type-Aメス→Type-Bオス」変換ケーブルが必要
- USBハブは、「USB 3.0」だと動かない
- ディスプレイの接続は「ミニHDMI」なので、「HDMIメス→ミニHDMIオス」変換ケーブルが必要
- 本体のUSB Type-Bは、外側が電源用、内側がUSBハブ用(逆にするとキーボード等が動かない)
また、下記もちょっとした注意点です
- Bluetoothキーボード/マウスは、Raspberry Pi OSはOKでもNervesで苦労するっぽいので、USB接続で
- microSDカードは、
64GByte以上はNGらしいので、64GByteのもので128GByte、OKでした - 各OSのインストールで、microSDの着脱を繰り返すため、ケースは完了するまで付けない
Raspberry Pi Zero WHと周辺デバイスの事前動作確認
下記コラム等を参考に、microSDにRaspberry Pi OSを焼きます(以前よりずいぶんラクになりました)
USB 1本とSDカードライタだけでできるUSB OTGを用いたRapsberry Pi Zero WH のセットアップ
https://qiita.com/Liesegang/items/dcdc669f80d1bf721c21#112-os%E3%81%AE%E6%9B%B8%E3%81%8D%E8%BE%BC%E3%81%BF
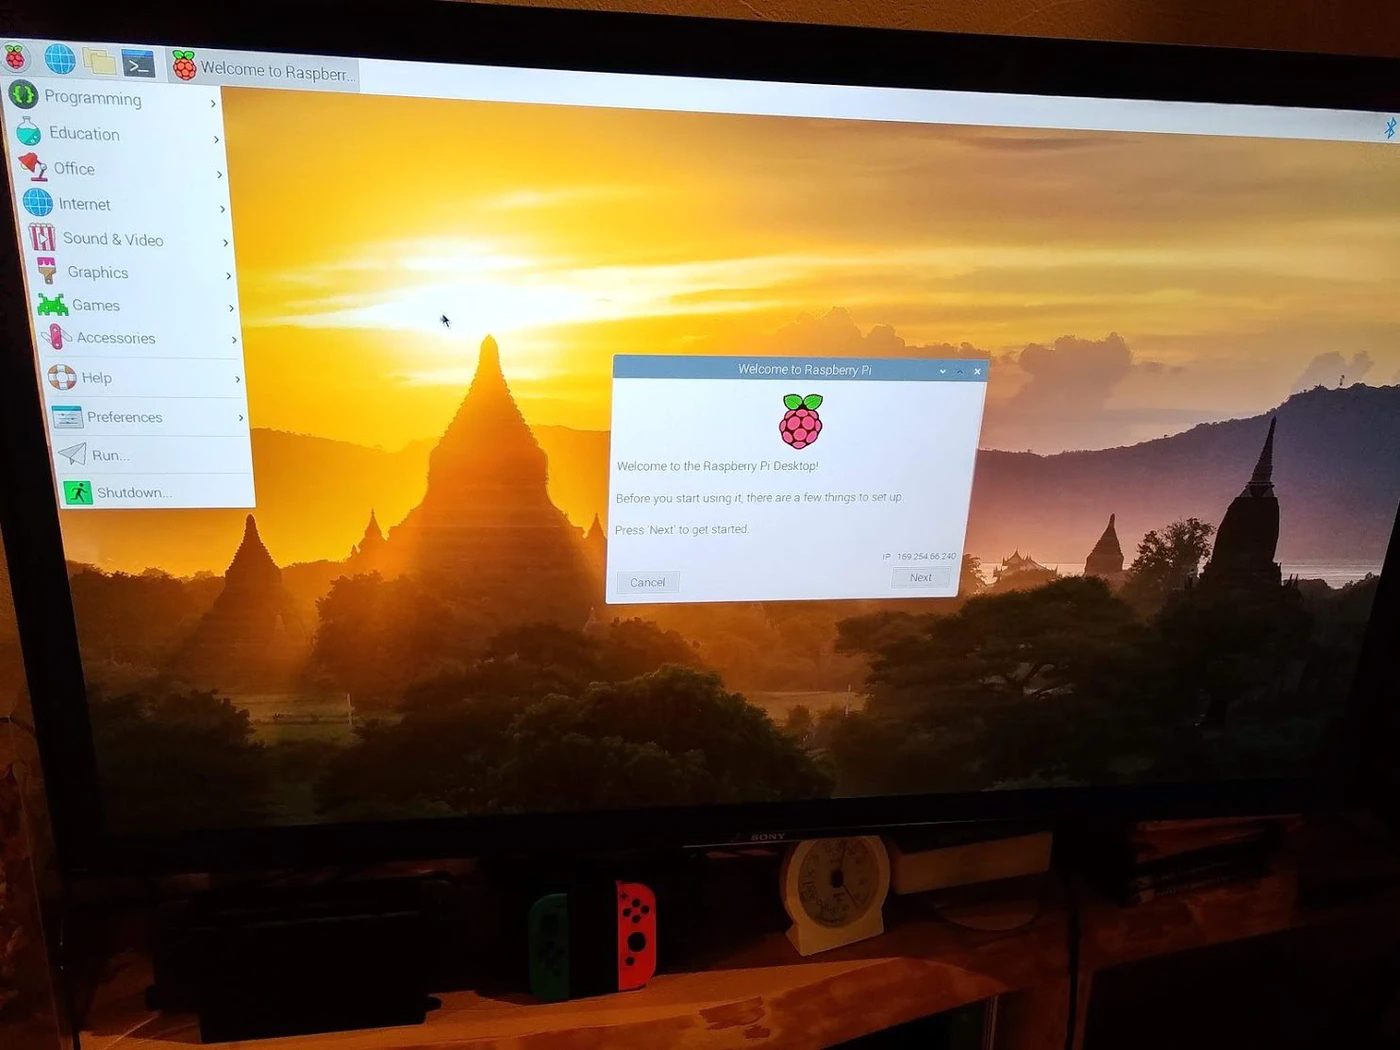
それから、Raspberry Pi Zero WHにRaspberry Pi OSを焼いたmicroSDを差し、ミニHDMIからディスプレイに繋ぎ、Raspberry Pi OSが無事ブートすることを確認しておきます(キーボードやマウス、無線LANなどが動くことも確認します)
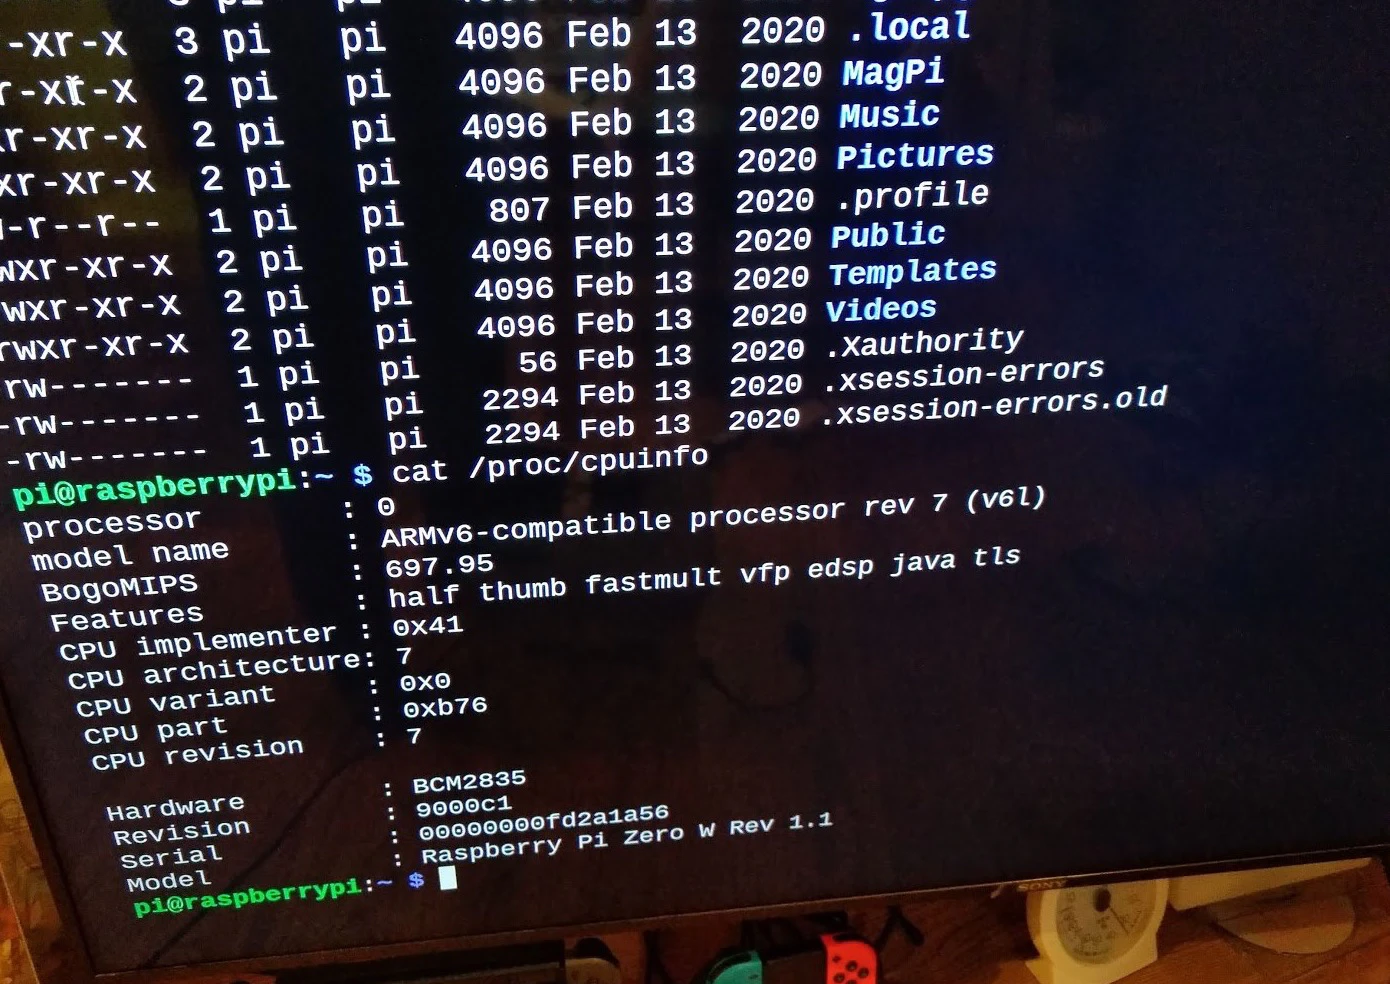
CPUは、こんな感じらしい(Intel性能比で言うと、どんなもんなのか、さっぱりイメージが付かない…)
無線LANを設定後、Raspberry Pi Zero WHで、ifconfigでIPアドレスを調べ、同一セグメント内(≒同じWifiに接続)の別PCからpingを打って到達することが確認できたら、無線LANの動作確認も完了です
ここまでを事前にやっておくと、Nervesを入れた後にmicroSDやディスプレイ、キーボード等が、実は壊れてて動かなかった … なんて事態を切り分けることができるので、使い慣れたセッティングで無い限り、やっておくと安心です
(… が、このコラムのオチは、これらのほとんどをNervesで使うところまで行けなかった![]() )
)
Nervesを動かすまでのステップ
さて、ここからは、下記5ステップで進めます
①Nervesのインストール
②fwupのインストール
③Nerves開発
④NervesファームウェアをmicroSDに焼く
⑤NervesファームウェアをRaspberry Pi Zero WHで実行
①~④は、母艦PC上での操作で、⑤のみRaspberry Pi Zero WHをいじります
①Nervesをインストール
方法a)Docker+VSCodeを使う ※オススメ
最も手軽にNervesを試すには、Docker+VSCodeでの構築を、下記 @matsujirushi さんコラムの内容に沿って行います
WindowsでNervesやるならWSL2+Docker+VSCode
https://qiita.com/matsujirushi/items/f0bde41400e45e309df2
基本、手順にある通りにやるだけで出来てしまうので、あまり悩むこともありませんでした、凄い(そして、書くことが無くなってしまったw)![]()
方法b)WSL2上でUbuntu 18.04 LTSを使う
1年ちょい前、はじめてNervesを触ったとき、Windows開発ではVirtualBox+Ubuntuしか使えませんでしたが、現在は、WSL2(≒Windows上でLinuxディストリビューションを動かすサブシステム)でもできるようになっています
WSL2のインストール
下記手順でWSL2をインストールしてください(PC再起動があります)
Windows 10 用 Windows Subsystem for Linux のインストール ガイド
https://docs.microsoft.com/ja-jp/windows/wsl/install-win10#manual-installation-steps
なお手順中に「Ubuntu」をWindows Storeでインストールする手順がありますが、ココは不要です … この手順で入る「Ubuntu 20.04」は、ビルドツールのインストールや、Elixirビルドが上手くいきませんので、この後インストールするUbuntu-18.04の利用を推奨します
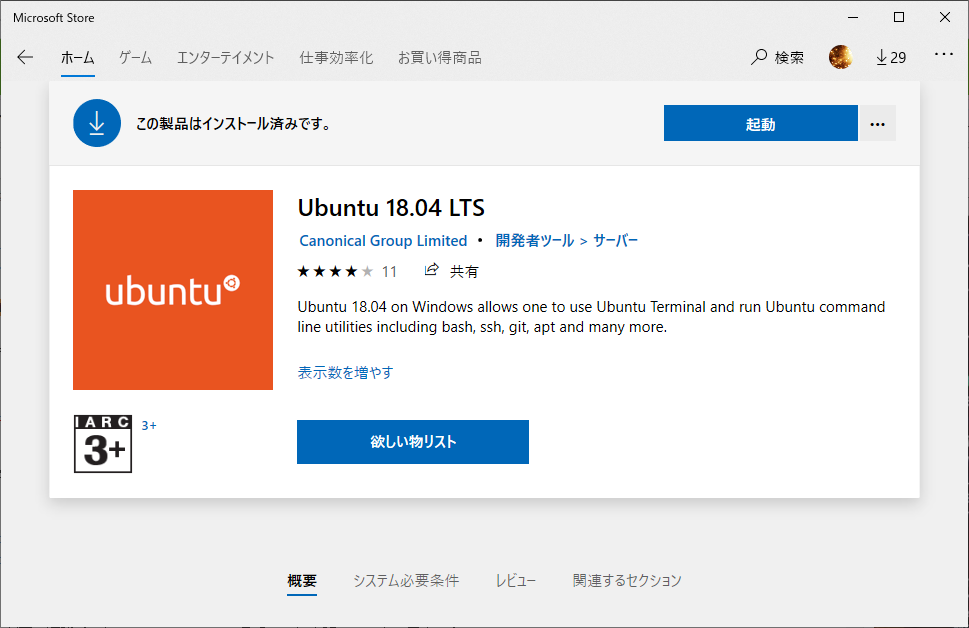
WSL2上にUbuntu 18.04 LTSのインストール
Windows Storeで「Ubuntu-18.04」と検索し、インストールした後、「起動」ボタンをクリックします
ユーザ作成を求めてくるので、ユーザ名(下記ではpiacereという名前で入れてますがココは変えてOK)/パスワード/パスワード確認を入力します
Enter new UNIX username: piacere
Enter new UNIX password:
Retype new UNIX password:
passwd: password updated successfully
Installation successful!
To run a command as administrator (user "root"), use "sudo <command>".
See "man sudo_root" for details.

piacere@XXXXXXXXXXXXXXX:~$
OSバージョンを確認します
cat /etc/issue
Ubuntu 18.04.2 LTS \n \l
なお、次回以降は、以下コマンドでUbuntu 18.04 LTSが起動できます
wsl -d Ubuntu-18.04
もしくは、以下コマンドでも起動できます
ubuntu1804
ビルドツールをインストール
さて、Ubuntuが起動したのでビルドツールをインストールします
まず、aptを最新化します(ここを忘れると後続でエラー出て進めなくなります)
sudo apt update -y
それから、コラム通りに各種コマンドをインストールしていきます
sudo apt install build-essential automake autoconf git squashfs-tools ssh-askpass pkg-config curl -y
sudo apt install git libssl-dev libncurses5-dev bc m4 make unzip cmake python libwxgtk3.0-dev libgl1-mesa-dev libglu1-mesa-dev libglfw3 libglfw3-dev libglew2.0 libglew-dev -y
sudo apt install default-jdk unixodbc-dev -y
sudo apt install fop xsltproc libxml2-utils -y
sshの設定
ssh公開鍵を作ります
mkdir ~/.ssh
ssh-keygen -t rsa -f ~/.ssh/id_rsa
ssh接続設定ファイルを作ります
vi ~/.ssh/config
ファイル内容は、以下の通りです
Host nerves.local
  UserKnownHostsFile /dev/null
  StrictHostKeyChecking no
  IdentityFile ~/.ssh/id_rsa
Elixirをインストール
Elixirを、Ubuntuの手順でインストールします(少し前に、Ubuntuはちゃんと最新版が入る手順へとElixir公式サイトがアップデートされたんです)
wget https://packages.erlang-solutions.com/erlang-solutions_2.0_all.deb && sudo dpkg -i erlang-solutions_2.0_all.deb
sudo apt update
sudo apt install esl-erlang -y
sudo apt install elixir -y
Hex、Rebarを最新化します
mix local.hex
mix local.rebar
Nervesをインストール
Nervesをインストールします
mix archive.install hex nerves_bootstrap
②fwupのインストール
microSDにNervesファームウェアを焼くための「fwup」コマンドをインストールします
なおfwupは、Windows側だけで無く、Ubuntu側にもインストールする必要があります
Windows側にfwup.exeをインストール
下記URLからダウンロードし、pathを通してください
fwup executable
https://github.com/fhunleth/fwup/releases/download/v1.8.3/fwup.exe
それから、立ち上げたままのUbuntuでは、このfwup.exeを認識できないため、一度Ubuntuのターミナルを落とし、それから「ファイル名を指定して実行」かコマンドプロンプトで下記コマンドを打ち、fwup.exeのpathが反映されたUbuntuを起動し直します
> ubuntu1804
Ubuntu側にfwupをインストール
Ubuntu上で、下記コマンドにてインストールします
wget https://github.com/fhunleth/fwup/releases/download/v1.8.3/fwup_1.8.3_amd64.deb
sudo dpkg -i fwup_1.8.3_amd64.deb
③Nerves開発
Ubuntu上で、mix nerves.new コマンドを使い、Nerves PJを作ります
mix nerves.new hello_nerves
* creating hello_nerves/config/config.exs
* creating hello_nerves/config/host.exs
* creating hello_nerves/config/target.exs
* creating hello_nerves/lib/hello_nerves.ex
* creating hello_nerves/lib/hello_nerves/application.ex
* creating hello_nerves/test/test_helper.exs
* creating hello_nerves/test/hello_nerves_test.exs
* creating hello_nerves/rel/vm.args.eex
* creating hello_nerves/rootfs_overlay/etc/iex.exs
* creating hello_nerves/.gitignore
* creating hello_nerves/.formatter.exs
* creating hello_nerves/mix.exs
* creating hello_nerves/README.md

Fetch and install dependencies? [Yn] Y
* running mix deps.get
Your Nerves project was created successfully.

You should now pick a target. See https://hexdocs.pm/nerves/targets.html#content
for supported targets. If your target is on the list, set `MIX_TARGET`
to its tag name:

For example, for the Raspberry Pi 3 you can either
  $ export MIX_TARGET=rpi3
Or prefix `mix` commands like the following:
  $ MIX_TARGET=rpi3 mix firmware

If you will be using a custom system, update the `mix.exs`
dependencies to point to desired system's package.

Now download the dependencies and build a firmware archive:
  $ cd hello_nerves
  $ mix deps.get
  $ mix firmware

If your target boots up using an SDCard (like the Raspberry Pi 3),
then insert an SDCard into a reader on your computer and run:
  $ mix firmware.burn

Plug the SDCard into the target and power it up. See target documentation
above for more information and other targets.
ビルドターゲットの設定として、「Raspberry Pi Zero and Zero W」向けの設定である rpi0 を設定します(なお、ターゲット自体は、Targetsページに記載されています)
export MIX_TARGET=rpi0
作成したNerves PJをビルドして、Raspberry Pi Zero WH向けのイメージファイルを生成します
cd hello_nerves
mix deps.get
mix firmware
==> nerves
==> hello_nerves

Nerves environment
  MIX_TARGET:   rpi0
  MIX_ENV:      dev

Compiling 2 files (.ex)
Generated hello_nerves app
|nerves_bootstrap| Building OTP Release...

* skipping runtime configuration (config/runtime.exs not found)
* creating _build/rpi0_dev/rel/hello_nerves/releases/0.1.0/vm.args
Updating base firmware image with Erlang release...
Copying rootfs_overlay: /tmp/hello_nerves/_build/rpi0_dev/nerves/rootfs_overlay
Copying rootfs_overlay: /tmp/hello_nerves/rootfs_overlay
Pseudo modify file "/lib/firmware/brcm/brcmfmac43430a0-sdio.ONDA-V80" does not exist in source filesystem.  Ignoring.
Parallel mksquashfs: Using 4 processors
Creating 4.0 filesystem on /tmp/hello_nerves/_build/_nerves-tmp/combined.squashfs, block size 131072.

Exportable Squashfs 4.0 filesystem, gzip compressed, data block size 131072
        compressed data, compressed metadata, compressed fragments, compressed xattrs
        duplicates are removed
Filesystem size 37931.65 Kbytes (37.04 Mbytes)
        57.99% of uncompressed filesystem size (65405.32 Kbytes)
Inode table size 19786 bytes (19.32 Kbytes)
        28.29% of uncompressed inode table size (69930 bytes)
Directory table size 23000 bytes (22.46 Kbytes)
        41.50% of uncompressed directory table size (55421 bytes)
Number of duplicate files found 13
Number of inodes 2106
Number of files 1725
Number of fragments 218
Number of symbolic links  165
Number of device nodes 0
Number of fifo nodes 0
Number of socket nodes 0
Number of directories 216
Number of ids (unique uids + gids) 3
Number of uids 3
        root (0)
        piacere (1000)
        www-data (33)
Number of gids 3
        root (0)
        piacere (1000)
        www-data (33)
Building /tmp/hello_nerves/_build/rpi0_dev/nerves/images/hello_nerves.fw...
なお、fwupのインストールやpath設定が上手くいっていないときは、下記のエラーが出るので、fwupのインストールを見直してください
mix firmware
==> nerves
==> hello_nerves

Nerves environment
  MIX_TARGET:   rpi0
  MIX_ENV:      dev

** (Mix) fwup.exe is required by the Nerves tooling.

Please see https://hexdocs.pm/nerves/installation.html for installation
instructions.
④NervesファームウェアをmicroSDに焼く
ナント、以前はWindowsでは出来なかった mix burn が出来るようになってます、これは嬉しい![]()
mix burn
==> nerves
==> hello_nerves

Nerves environment
  MIX_TARGET:   rpi0
  MIX_ENV:      dev

'\\wsl\Ubuntu-18.04\tmp\hello_nerves'
CMD.EXE was started with the above path as the current directory.
UNC paths are not supported.  Defaulting to Windows directory.
Use 59.48 GiB memory card found at \\.\PhysicalDrive1? [Yn] y
ちなみに、手動でfwupしたい方は、UbuntuがWindows側ディスクを /mnt/ 配下にマウントしているので、Windows側にコピーしてから、fwup.exeコマンドで実施できます
⑤NervesファームウェアをRaspberry Pi Zero WHで実行
microSDを、PCから抜き、Raspberry Pi Zero WHに差し、母艦PCのUSBとRaspberry Pi Zero WHの内側のUSBポートを繋ぐことで起動します(外側のUSBポートで繋ぐと動かないので要注意)
その後、Windows側で「USB Ethernet/RNDIS Gadget」が認識されるので、デバイスマネージャで「ポート(COMとLPT)」を開き、「USBシリアルデバイス(COMx)」の「ドライバーの更新」を行ってください
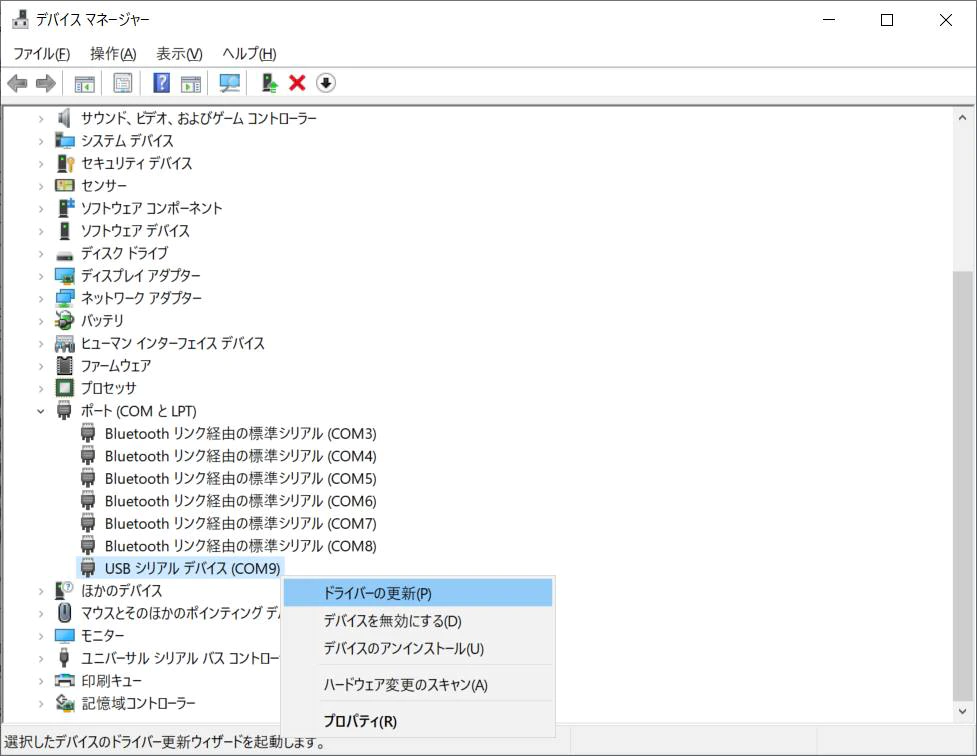
下記でドライバーをダウンロードし、解凍し、検索フォルダに指定してください
RPI Driver OTG
https://caron.ws/wp-content/uploads/telechargement/RPI%20Driver%20OTG.zip
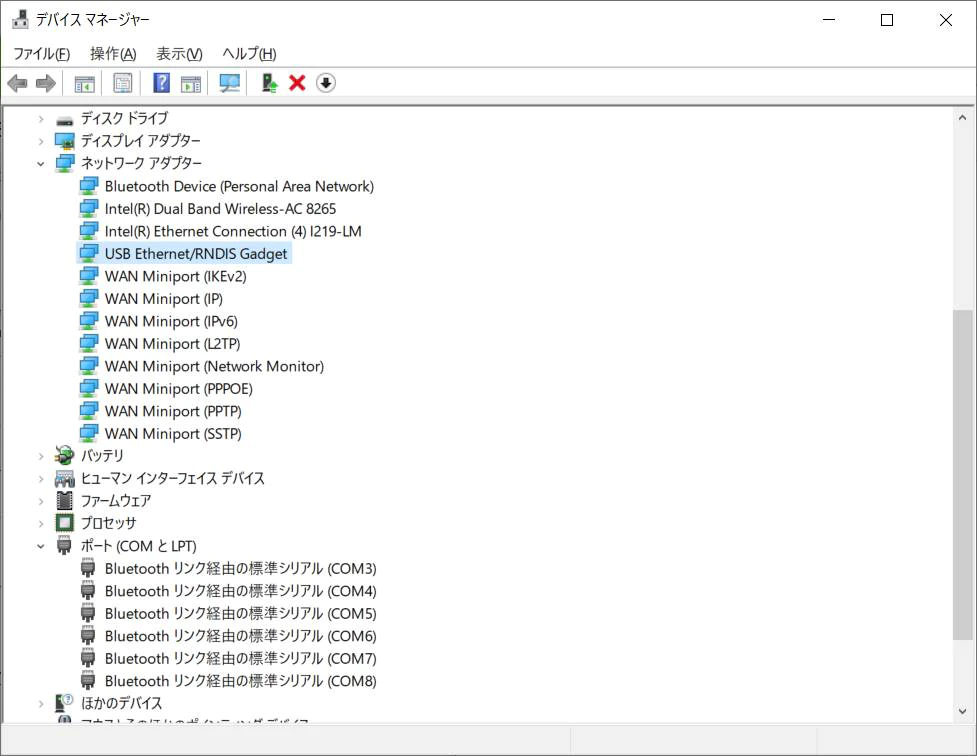
無事、ドライバーがインストールされると、「ポート(COMとLPT)」から減り、「ネットワークアダプター」に「USB Ethernet/RNDIS Gadget」が追加されます
ここまでの設定が終わったら、一度、USBを抜き、差し直し、10秒ほど待ってから ssh nerves.local でssh接続します
ssh nerves.local
Warning: Permanently added 'nerves.local,172.31.195.153' (RSA) to the list of known hosts.
Enter passphrase for key '/home/piacere/.ssh/id_rsa':
Interactive Elixir (1.11.2) - press Ctrl+C to exit (type h() ENTER for help)
Toolshed imported. Run h(Toolshed) for more info.
RingLogger is collecting log messages from Elixir and Linux. To see the
messages, either attach the current IEx session to the logger:

  RingLogger.attach

or print the next messages in the log:

  RingLogger.next

iex(1)>
やった、ssh経由で、Raspberry Pi Zero WH上のiexが動いたっ![]()
早速、焼いたファームウェア上のアプリを実行してみると … おぉ、上手く動いてる
iex> HelloNerves.hello
:world
このiex上でモジュール定義をしてみても … よしよし、ちゃんと動いてる
iex> defmodule A do
...>   def a(), do: "I'm a in A"
...> end
{:module, A,
 <<70, 79, 82, 49, 0, 0, 4, 164, 66, 69, 65, 77, 65, 116, 85, 56, 0, 0, 0, 129,
   0, 0, 0, 14, 8, 69, 108, 105, 120, 105, 114, 46, 65, 8, 95, 95, 105, 110,
   102, 111, 95, 95, 10, 97, 116, 116, 114, ...>>, {:a, 0}}
iex> A.a
"I'm a in A"
これでようやく、WindowsでのNerves開発にマトモに踏み込んでいけそうです
最後に
Docker+VSCodeでの手順は、実にお手軽で、WindowsにおけるNerves利用のメインストリームになりそうです
WSL2+Ubuntuでの手順も、VirtualBoxのものと比べたら、キビキビと動くことから、かなり快適で、コチラも有力な開発環境として使えます
相変わらずWindowsは、fwupが必要なものの、以前との大きな違いは、mix burn でSDカードに焼けるようになっており、手順がLinux版/macOS版と同じになっていた点は、とてもグッドでした
そして最大の感激ポイントは、sshが動くようになったこと … これは本当に嬉しかった
今回は、時間が無くて、NervesHubや、本体接続のディスプレイやキーボードを試すことは出来ませんでしたが、これらを調べつつ、Raspberry Pi OS上のElixir/Phoenixだけで無いプロダクション採用も検討できたらいいなぁって思います
あと、PhoenixやNeosVR接続を試すことも出来なかったので、これらも追々やっていきたいと思います
ひとまず、Windowsでも、エッジ/エッジサーバ/クラウドの全てをElixirで開発可能になった … やったね![]()
p.s.このコラムが、面白かったり、役に立ったら…
 や
や  にて、どうぞ応援よろしくお願いします
![]()
明日の記事は、@mnishiguchi さんの「[Elixir/Nerves] I2CでLCDに「Hello」」です