せっかく開発したならデプロイして世間に公開したくなるのが世の常ですね(?)
AWSは個人開発で使うには複雑で、ランニングコストも馬鹿にならん。けど、管理もデプロイも簡単にしたいなーってなったらherokuでデプロイしてみましょう。
対象読者
・初めてherokuでデプロイする人
・herokuでMySQLを使いたい人
・楽にデプロイしたい人
参考記事
railsアプリをgithubとherokuにpush
【初心者向け】railsアプリをherokuを使って確実にデプロイする方法【決定版】
Herokuへのデプロイ方法【Heroku+Rails+MySQL】
Railsアプリでherokuを使うときのDBをMySQLに変更する
開発環境
Ruby 2.6.5
Rails 6.0.0
MySQL 14.14
herokuでデプロイ
デプロイのためのツールをインストール
$ brew install heroku-toolbelt
とやったものの、エラーが。

Error: No available formula with the name "heroku-toolbelt"
==> Searching for a previously deleted formula (in the last month)...
Warning: homebrew/core is shallow clone. To get complete history run:
  git -C "$(brew --repo homebrew/core)" fetch --unshallow

Error: No previously deleted formula found.
==> Searching for similarly named formulae...
Error: No similarly named formulae found.
==> Searching taps...
==> Searching taps on GitHub...
Error: No formulae found in taps.
MasutomoMacBook-Pro:medipra user$ cd ~
MasutomoMacBook-Pro:~ user$ brew install heroku-toolbelt
Error: No available formula with the name "heroku-toolbelt"
==> Searching for a previously deleted formula (in the last month)...
Warning: homebrew/core is shallow clone. To get complete history run:
  git -C "$(brew --repo homebrew/core)" fetch --unshallow

Error: No previously deleted formula found.
==> Searching for similarly named formulae...
Error: No similarly named formulae found.
==> Searching taps...
==> Searching taps on GitHub...
Error: No formulae found in taps.
で、色々調べてみると、今(2020/03/27現在)、toolbeltというのは使われていないらしい。。。
今はCLI(Command Line Interface)だそうです。
なので、herokuのページにあるSet Upから以下を実行。
herokuのセットアップに従って下記を実行(macの場合)
$ brew install heroku/brew/heroku
そしたら次のエラー
Error: The `brew link` step did not complete successfully
The formula built, but is not symlinked into /usr/local
Could not symlink bin/heroku
Target /usr/local/bin/heroku
already exists. You may want to remove it:
  rm '/usr/local/bin/heroku'  <=これを実行する

・・・略

To use the Heroku CLI's autocomplete --
  Via homebrew's shell completion:
    1) Follow homebrew's install instructions https://docs.brew.sh/Shell-Completion
        NOTE: For zsh, as the instructions mention, be sure compinit is autoloaded
              and called, either explicitly or via a framework like oh-my-zsh.
    2) Then run
      $ heroku autocomplete --refresh-cache <=次にこれを実行

  OR

  Use our standalone setup:
    1) Run and follow the install steps:
      $ heroku autocomplete
解決方法らしきこと書いてあったので以下を順に実行。
$ rm '/usr/local/bin/heroku'
$$ heroku autocomplete --refresh-cache
そしたらherokuのログインが求められ
無事にログインできました(^O^)/
これで、herokuのコマンドが使えるようになります。
herokuでMysqlを使えるようにする
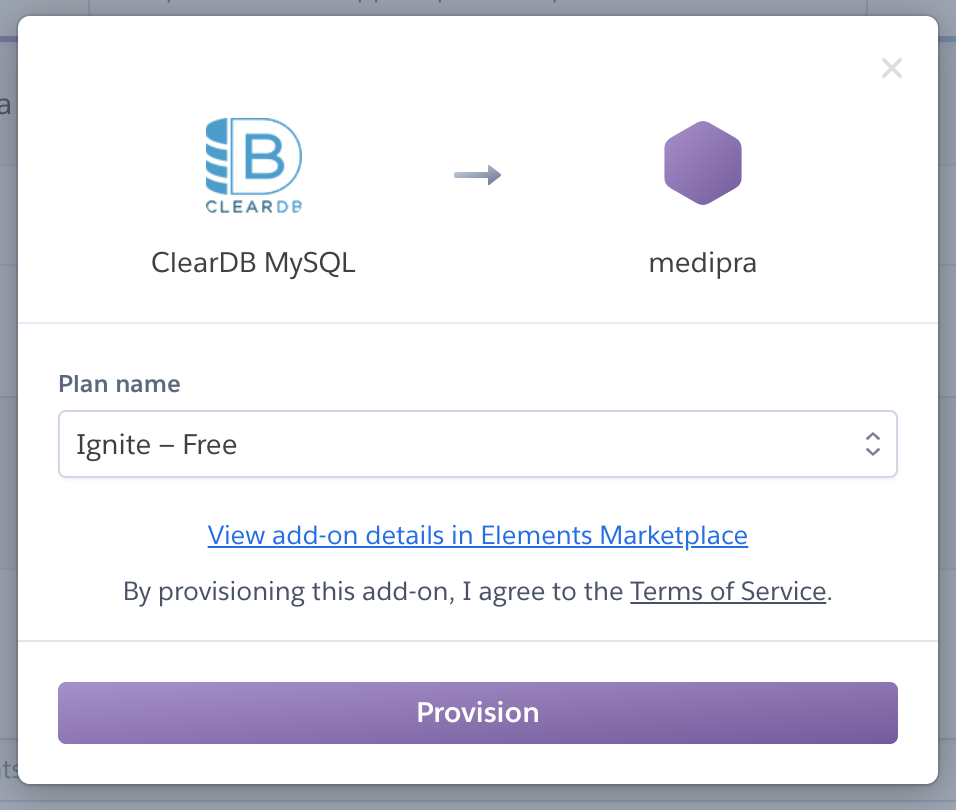
クレジットカード情報が必要なので、まだの人は予め登録しておきましょう(無料で使えますので)
MySQLのURLを追加する
Settingsの二段目を確認しましょう。Config Varsです。
ちゃんとClearDBが追加できていれば、上のだんCLEARDB_DATABASE_URLはすでに入っています。

ターミナル から以下を実行してください。
hogehogeの部分は、CLEARDB_DATABASE_URLのmysql://以下の部分をコピーして入れ替えます。
$ heroku config:add DATABASE_URL='mysql2:{hogehoge}'
heroku masterにアップ
masterにプッシュするときは以下のコマンド
$ git push heroku master
エラー①puma
こんなエラーが出ました
Your bundle is locked to puma (3.12.3), but that version could not be found in
remote:        any of the sources listed in your Gemfile. If you haven't changed sources, that
remote:        means the author of puma (3.12.3) has removed it. You'll need to update your
remote:        bundle to a version other than puma (3.12.3) that hasn't been removed in order
remote:        to install.
どうやらpumaがダメっぽいです。
そういえばgithubのsecurityで指摘されていたので、gemfileで以下のように追記してbundle install
gem 'puma', '~> 3.12.4'
エラー②URIの登録ミス
次はこちらでした。真っ赤な字で書かれています。
remote:  !     Could not detect rake tasks
remote:  !     ensure you can run `$ bundle exec rake -P` against your app
remote:  !     and using the production group of your Gemfile.
remote:  !     rake aborted!
remote:  !     URI::InvalidURIError: bad URI(is not URI?): mysql2:{//b4...略...}
指示に従って bundle exec rake -P を実行するも、なんも変わらず。
で、よく見たらURIのエラーっぽい
よーくみると、mysql2:の後に余計な{}が入っている!
なので、一旦削除して、再度登録し直し。
で、めでたくデプロイできました。
Githubとの連携も可能
ご存知githubでバージョン管理しているなら、デプロイはgithubのmasterにマージするだけで完了させることもできます。楽すぎてやばいですね。
各自のダッシュボードから画像のページにいけると思うので、Githubと連携させたら完了です。なお、Githubと連携後も $ git push heroku master は使えます。
herokuでmigrate
masterにプッシュできたら、おなじみのマイグレーションを忘れずに実行しましょう。
$ heroku run rake db:migrate
僕の場合はseedファイルを用意しているのでそれもやっておきます
$ heroku run rake db:seed
うまくいけば、ザーーーーーッとデータが入る様子がみられます。
migrate時のエラー
rails aborted!
NoMethodError: undefined method `standard_name_cont_all
「どのファイルのstandard_name_cont_allだよぉ」って探したら、
modelのproduct.rbのコードが原因でした。
コメントアウトで通しておきました。
てか、このmodel、あまり意味なく残しておいたコードでした。余計なコードはエラーの元になるので消しておくのがよろしいですね。
その他メモ
clearDBは無料だと3,600クエリ/時間
seedファイルでデータを流し込んだ時のエラー
rails aborted!
ActiveRecord::StatementInvalid: Mysql2::Error: User 'hogehogehoge' has exceeded the 'max_questions' resource (current value: 3600)
公式Q&Aに回答がありました。

無料だと1時間当たり3,600クエリで、有料にすると18,000クエリまで増えるんだとか。必要ならアップグレード必須ですね。
また、容量は以下のようになってます。
Ignite : 5MB (free)
Punch : 1GB (9.99/month)
Drift : 5GB ($49.99/month)
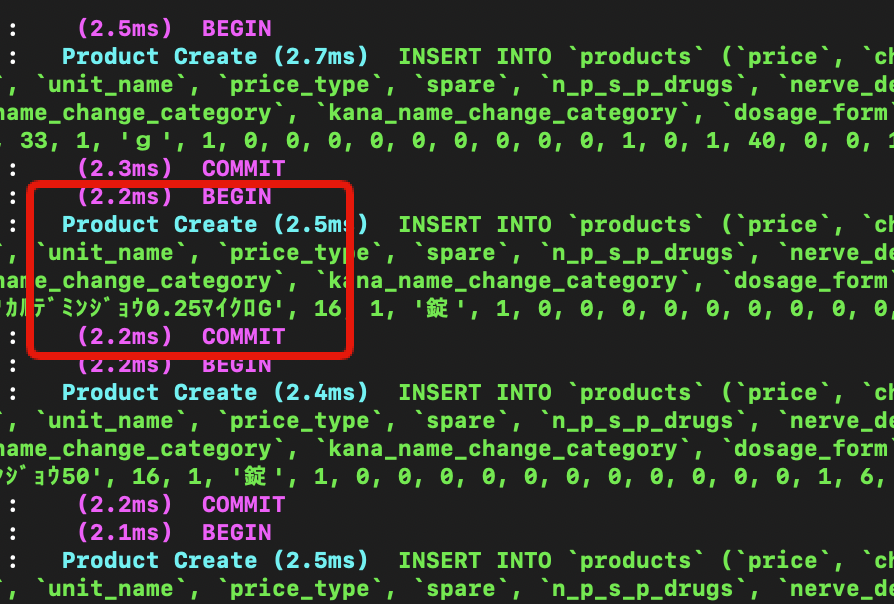
ちなみに、csvファイルでデータを入れるとき、1行のデータを入れるのに3回クエリが飛ぶようです。(画像の赤枠で1行分(3クエリ)です)
大量のデータをseedで入れるときはこのへんも気を配る必要があります。

独自ドメイン、SSLが必要なら有料化が必要
無料の範囲だとドメインはhogehoge.herokuapp.comとなっていて、ちょっとダサめ。
また、今はSSL化が必須なので、サービスとして稼働させるならこちらもやっておきましょう。
$7/monthからできます。
ということで、以上です。
役に立ったらコメント残してもらえるとモチベーションになります。


