How to Configure High Volume Email in Exchange Online: A Step-by-Step Guide
In this post, I’ll walk through configuring High Volume Email (HVE) in Exchange Online, especially useful for Microsoft 365 admins dealing with internal bulk messaging workloads.
High Volume Email (HVE) is a recent addition to Exchange Online in Microsoft 365, currently in Public Preview. This feature is built to support internal communication needs for scenarios like line-of-business applications or other automated systems that require large-scale SMTP-authenticated email delivery.
For organizations still depending on on-premises Exchange servers in a hybrid setup to manage internal bulk messaging, Microsoft recommends migrating to HVE, allowing a full shift to the cloud and simplifying infrastructure.
Why Use High Volume Email?
With HVE, organizations gain several critical advantages:
- Bulk Internal Delivery Without Throttling: Bypass the standard 10,000 internal recipient daily cap to deliver messages at scale.
- Granular Control: Assign message limits individually to each HVE account for improved governance.
- Trackable and Transparent: Benefit from consumption-based billing, alongside clear metrics and reporting for each HVE sender.
Note: HVE is optimized for internal messaging. External mail volume is intentionally restricted, and Microsoft recommends using Azure Communication Services for high-volume external email scenarios.
Comparison: Standard Mailbox vs. HVE Account
Here’s how HVE stacks up against regular Exchange Online mailboxes:
| Feature | Standard Mailbox | HVE Account (Public Preview) |
|---|---|---|
| Number of Accounts | Unlimited | Up to 20 |
| Message Rate Limit | 30 messages per minute | No Limit |
| Daily Recipient Limit | 10,000 | 100,000 |
| External Recipients | No Limit | 2,000 per day |
HVE limits are expected to evolve as the feature reaches General Availability (GA).
Getting Started with HVE
Step 1: Create an HVE Account in Exchange Admin Center
-
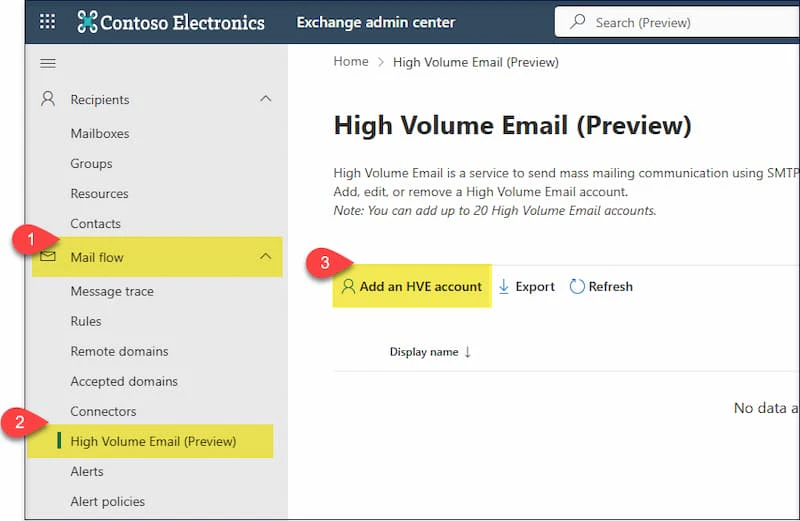
Navigate to Exchange Admin Center.
-
Go to Mail flow > High Volume Email (Preview).
-
Click Add an HVE account and enter the required details.
-
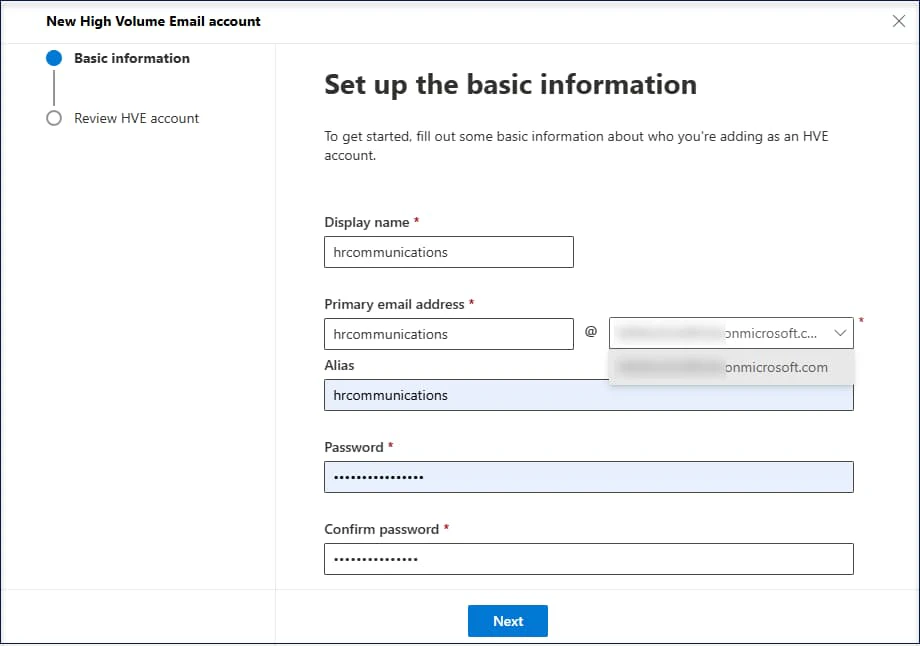
Add the basic details,Choose the domain, review, and click Create.
-
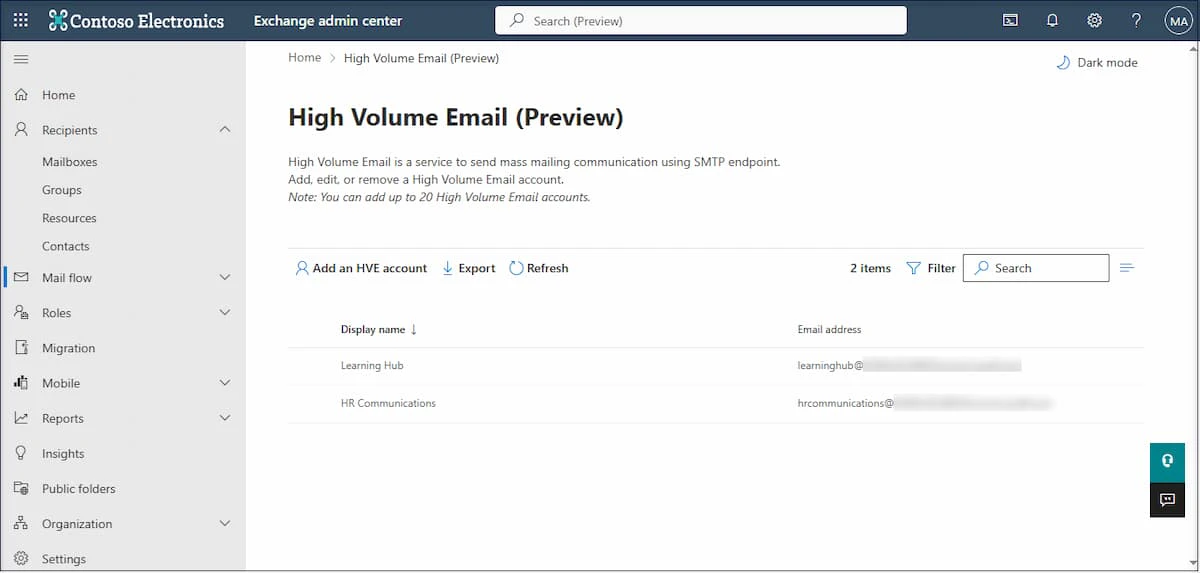
The new HVE account will appear in the list.
Alternatively, use PowerShell:
New-MailUser -HVEAccount -PrimarySmtpAddress "hrcommunications@contoso.com"
Step 2: Enable Basic Auth SMTP
To send messages via SMTP, Basic Authentication must be explicitly enabled for HVE accounts.
New-AuthenticationPolicy -Name "Auth Policy for HVE" -AllowBasicAuthSmtp
Set-User hrcommunications -AuthenticationPolicy "Auth Policy for HVE"
This is necessary to avoid connection or sending errors.
Step 3: Test Sending Emails
Use the PowerShell script below to test email delivery through the newly created HVE account:
param (
[Parameter(Mandatory = $true)][string]$senderEmailAddress,
[Parameter(Mandatory = $true)][string]$recipientEmailAddresses,
[Parameter(Mandatory = $true)][string]$subject,
[Parameter(Mandatory = $true)][string]$body
)
$smtpServer = "smtp-lob.office365.com"
$smtpPort = "587"
$credentials = Get-Credential -UserName $senderEmailAddress -Message "Enter sender credentials"

Send-MailMessage -From $senderEmailAddress -To $recipientEmailAddresses `
-Subject $subject -Body $body -SmtpServer $smtpServer -Port $smtpPort `
-UseSsl -Credential $credentials
Step 4: OAuth Configuration (Optional)
For application-based communication via HVE:
- Register the app in Azure AD.
- Add required SMTP delegated permissions.
- Follow Microsoft’s OAuth SMTP guidance.
Step 5: Monitor HVE Usage Reports
To track usage and performance:
-
Open Exchange Admin Center.
-
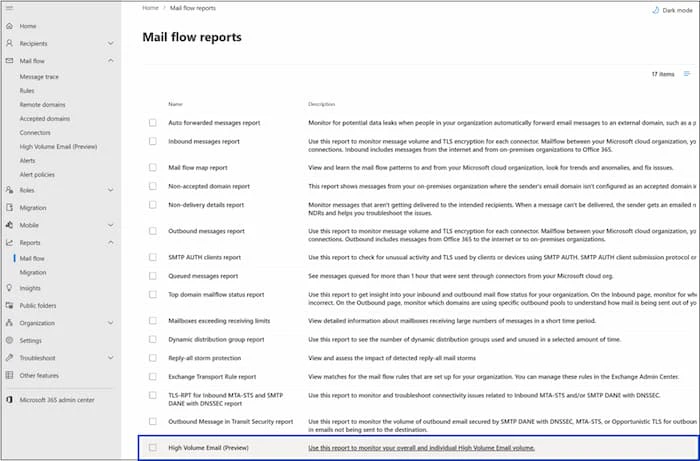
Navigate to Reports > Mail flow > High Volume Email (Preview).
-
View summary reports by tenant or sender.
-
Use Request Report to receive detailed message-level data for specific accounts and time ranges.
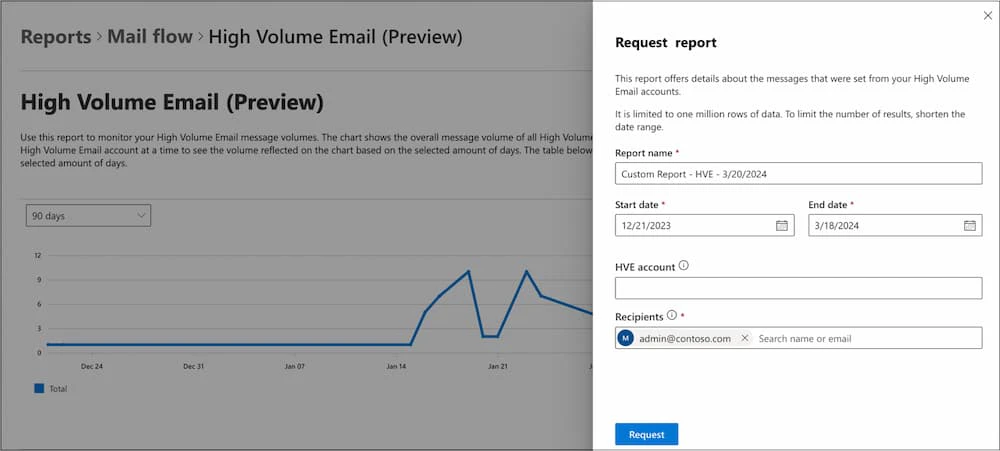
HVE usage report images courtesy : https://learn.microsoft.com/en-us/exchange/mail-flow-best-practices/high-volume-mails-m365#view-hve-usage-report