Windows.hの中身
Windows.hについて詳しくなりたいと思います。そのため、まずは次の軽量プログラムでWindows.hを辿っていきます。MinGW/mingw64/bin/gcc.exe でビルドして実行します。
#include <Windows.h>

int main()
{
    MessageBoxA(NULL, "Hello, World!", "Greetings", MB_OK);
    return 0;
}
# ビルド (実行ファイル「WindowsTester.exe」が生成されます)
$ gcc WindowsTester.c -o WindowsTester.exe

# 実行 (実行ファイル「WindowsTester.exe」が起動します)
$ .\WindowsTester.exe
VS code上で <Windows.h> にカーソルを当て、その状態で F12 を押すと定義にジャンプできます。 Windows.h がどこにあるファイルかわかります。
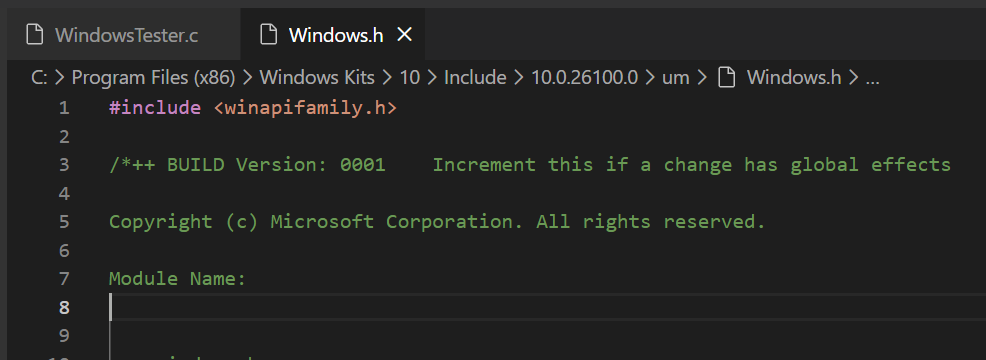
私の環境では次の場所でした。 10.0.26100.0 は WindowsSDK のバージョンです。
C:\Program Files (x86)\Windows Kits\10\Include\10.0.26100.0\um\Windows.h
❗注意❗
ここで一つ気を付けることがあります。Windows.hは複数の場所にある可能性があります。私は MinGW の gcc でビルドをしますが、この場合 Windows SDK は全く関係ないです。上記のVS code 上では Windows.h の場所を Windows SDK の管理フォルダの下にあると誘導してくれましたが、これはミスリードです。
MinGWの場合
ファイルパス
MinGWをインストールしたフォルダをファイルエクスプローラーで開き、ファイル検索で windows.hを検索すると、ビルドに使用されるファイルが表示できます。
.../MinGW/mingw64/x86_64-w64-mingw32/include/windows.h
$ gcc --version

# 出力
# gcc (x86_64-posix-seh-rev0, Built by MinGW-Builds project) 15.2.0
# Copyright (C) 2025 Free Software Foundation, Inc.
# This is free software; see the source for copying conditions.  There is NO
# warranty; not even for MERCHANTABILITY or FITNESS FOR A PARTICULAR PURPOSE.
MSYS2のUCRT64の場合
同様にもし、MSYS2環境もある方は、MSYS2をインストールしたフォルダをファイルエクスプローラーで開き、ファイル検索するとヒットします。
ファイルパス
.../msys64/usr/include/w32api/windows.h
$ gcc --version

# 出力
# gcc (GCC) 13.4.0
# Copyright (C) 2023 Free Software Foundation, Inc.
# This is free software; see the source for copying conditions.  There is NO
#warranty; not even for MERCHANTABILITY or FITNESS FOR A PARTICULAR PURPOSE.
MSVCの場合
Visual StudioのC/C++のビルド時に使用されるWindows.hの場所を探します。MSVCではインクルードパスの探索するフォルダ一覧として %INCLUDE% があります。これを x64 Native Tools Command Prompt for VS のターミナル上で echo %INCLUDE% をして表示してみます。
echo %INCLUDE%

# 出力 (セミコロン;区切りで改行して見やすくしています)
# C:\Program Files\Microsoft Visual Studio\18\Community\VC\Tools\MSVC\14.50.35717\include;
# C:\Program Files\Microsoft Visual Studio\18\Community\VC\Tools\MSVC\14.50.35717\ATLMFC\include;
# C:\Program Files\Microsoft Visual Studio\18\Community\VC\Auxiliary\VS\include;
# C:\Program Files (x86)\Windows Kits\10\include\10.0.26100.0\ucrt;
# C:\Program Files (x86)\Windows Kits\10\\include\10.0.26100.0\\um;
# C:\Program Files (x86)\Windows Kits\10\\include\10.0.26100.0\\shared;
# C:\Program Files (x86)\Windows Kits\10\\include\10.0.26100.0\\winrt;
# C:\Program Files (x86)\Windows Kits\10\\include\10.0.26100.0\\cppwinrt;
# C:\Program Files (x86)\Windows Kits\NETFXSDK\4.8\include\um
対象のヘッダーファイルが見つかるまで、上記の登録された順番で上から探索します。目的のファイルが見つかれば探索がビルドに使用します。
VS code 上で表示されたWindows.hはインクルードパス一覧の上から5番目にありました。
um は user modeの略だそうです。
ちなみにバックスラッシュ 「\」とダブルバックスラッシュ「\\」が混在していますが、特に問題はないそうです。
ファイルの場所を記述しただけで終わってしまいました。
更新履歴
ver 1.0 ---- 2026年01月19日(火)