1. はじめに
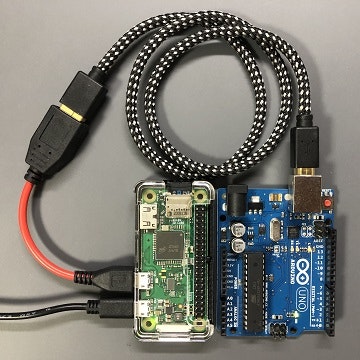
シリアルポートのデータ送受信ツールを作成し、Arduino治具のコマンド制御をRaspberry Piで手軽にできるようにします。
1.1 これまでの記事
2. 環境
- Raspberry Pi Zero WH Rev 1.1
- Raspberry Pi OS Lite(32-bit)
- A port of Debian Bullseye with no desktop environment
- リリース日時:2022-09-22
- Python 3.9.2(Raspberry Pi OS Liteにプリインストールされているもの)
-
PyUSB 1.2.1
- sudo pip3 install pyusb
-
pySerial 3.5
- sudo pip3 install pyserial
3. ソースコード
mytools_pyserial.py
# mytools_pyserial.py by ka's@pbjpkas 2023
# MIT License
# on the Raspberry Pi OS(Bullseye),
#   AE-TTL-232R:/dev/ttyUSB0
#   Arduino UNO:/dev/ttyACM0
import serial

def main():
    h = None

    while True:
        print("== myTools PySerial ==")
        if h != None:
            print("current:%s, baudrate=%d, timeout=%.1f, dsrdtr=%d" % (h.port, h.baudrate, h.timeout, h.dsrdtr))
        else:
            print("current:None")
        print("a: open /dev/ttyUSB0, baudrate=115200, timeout=2.0, dsrdtr=False")
        print("b: open /dev/ttyACM0, baudrate=115200, timeout=2.0, dsrdtr=False")
        print("o: open with parameters")
        print("w: write")
        print("r: readline")
        print("p: print settings")
        print("x: exit")

        s = input(">")

        if s == "a":
            try:
                h = serial.Serial("/dev/ttyUSB0", baudrate=115200, timeout=2.0, dsrdtr=False)
            except:
                h = None
                print("Port Not Found.")

        if s == "b":
            try:
                h = serial.Serial("/dev/ttyACM0", baudrate=115200, timeout=2.0, dsrdtr=False)
            except:
                h = None
                print("Port Not Found.")

        if s == "o":
            port     = input("port?      >")
            baudrate = input("baudrate?  >")
            timeout  = input("timeout?   >")
            dsrdtr   = input("dsrdtr? 0/1>")
            s = input("OK? y/n>")
            if s == "y":
                try:
                    h = serial.Serial(port, int(baudrate), timeout=float(timeout), dsrdtr=bool(dsrdtr))
                except:
                    h = None
                    print("Port Not Found.")
            else:
                pass

        if s == "w":
            if h != None:
                cmd = input()
                cmd = cmd + "\n"
                h.write(cmd.encode("shift_jis"))

        if s == "r":
            if h != None:
                str = h.readline().strip().decode("utf-8")
                print(str)

        if s == "p":
            print(h)

        if s == "x":
            if h != None:
               h.close()
            if __name__ == "__main__":
                print("Bye.")
            return


if __name__ == "__main__":
    main()
4. 使い方
sudoを付けて実行します。
sudo python3 mytools_pyserial.py
以下のようにメニューとプロンプト(>)が表示されればOKです。
== myTools PySerial ==
current:None
a: open /dev/ttyUSB0, baudrate=115200, timeout=2.0, dsrdtr=False
b: open /dev/ttyACM0, baudrate=115200, timeout=2.0, dsrdtr=False
o: open with parameters
w: write
r: readline
p: print settings
x: exit
>
4.1 シリアルポートのオープン
Raspberry PiにArduinoを接続すると/dev/ttyACM0で認識されます。"b"を選択するとポート:/dev/ttyACM0、ボーレート:115200、タイムアウト:2.0秒、DSRDTR:Falseでシリアルポートをオープンします。エラーなくオープンするとメニューのcurrentの行にシリアルポートの情報が表示されます。
>b
== myTools PySerial ==
current:/dev/ttyACM0, baudrate=115200, timeout=2.0, dsrdtr=0    ←シリアルポートの情報
a: open /dev/ttyUSB0, baudrate=115200, timeout=2.0, dsrdtr=False
b: open /dev/ttyACM0, baudrate=115200, timeout=2.0, dsrdtr=False
o: open with parameters
w: write
r: readline
p: print settings
x: exit
>
"o"を選択するとパラメータを任意に設定してオープンします。
>o
port?      >/dev/ttyACM0
baudrate?  >115200
timeout?   >2.0
dsrdtr? 0/1>1
OK? y/n>y
== myTools PySerial ==
current:/dev/ttyACM0, baudrate=115200, timeout=2.0, dsrdtr=1
(メニューは省略、以下同)
4.2 コマンド送信
Arduinoへコマンド"ver"を送信する例です。
>w
ver
4.3 コマンド受信
verの戻り値を受信する例です。"r"を選択するたびに受信データを1行ずつ表示します。受信データが空の場合はタイムアウトしてメニューに戻ってきます。
>r
This is C:\Users\hoge\Documents\Arduino\ArduinoTools\ArduinoTools.ino Build at Dec 17 2022 12:11:10
>r
OK
>r
4.4 シリアルポート設定値の表示
"p"を選択すると設定値が表示されます。
>p
Serial<id=0xaabe7e68, open=True>(port='/dev/ttyACM0', baudrate=115200, bytesize=8, parity='N', stopbits=1, timeout=2.0, xonxoff=False, rtscts=False, dsrdtr=False)
4.5 exit
"x"を選択すると"Bye."を表示して終了します。
>x
Bye.
5. mytools.pyへの組み込み
5.1 mytools.pyの改修
mytools.pyを3か所編集します。
mytools(Ver.5).py
# myTools.py by ka's@pbjpkas 2023
# python 3.x
# MIT License
import sys
import cv2
import mytools_visa
import mytools_pyserial             # 1.mytools_pyserialをimportする

#(略)

def main():
    while True:
        print("== myTools ==")
        print("a: comparison of old and new value")
        print("b: crop image")
        print("c: VISA menu")
        print("d: Serial menu")     # 2.メニューにSerial menuを追加する
        print("x: exit")

        s = input(">")

        if s == "a":
            comparison_value()

        if s == "b":
            crop_image_menu()

        if s == "c":
            mytools_visa.main()

        if s == "d":
            mytools_pyserial.main() # 3.mytools_pyserial.main()を呼び出す

        if s == "x":
            print("Bye.")
            sys.exit()
5.2 実行例
sudoを付けて実行します。
sudo python3 mytools.py
メニューにSerialメニューが追加されています。
== myTools ==
a: comparison of old and new value
b: crop image
c: VISA menu
d: Serial menu
x: exit
>
6. おわりに
Arduino治具のコマンド制御をRaspberry Piで手軽にできるようになりました。