はじめに
TerraformとAnsibleを使ってAWSにGitLabを構築してみました。これからTerraform/Ansibleを始めよう思っている方の参考になれば幸いです。前提条件として、AWSのアカウントを持っていてEC2・IAM・VPC等の基本的なAWSリソースの使い方を理解していればスムーズに進めれるかと思います。
目次
- 実行環境
- 実際のコード
- 実行のイメージ
- 環境構築
- Terraformを動かしてみる
- Terraformで実践的なインフラリソースを構築してみる
- Ansibleを動かしてみる
- AnsibleでGitLabを構築する
- リソースのクリーンアップ
- 参考資料
実行環境
macOS Mojave v10.14.5
Terraform v0.11.14
ansible v2.9.2
virtualenv v16.6.2
pip3 v19.1.1
Amazon Linux 2 t2.medium(GitLab環境)
実際のコード
GitHubに置いておきます。参考までに。
実行のイメージ
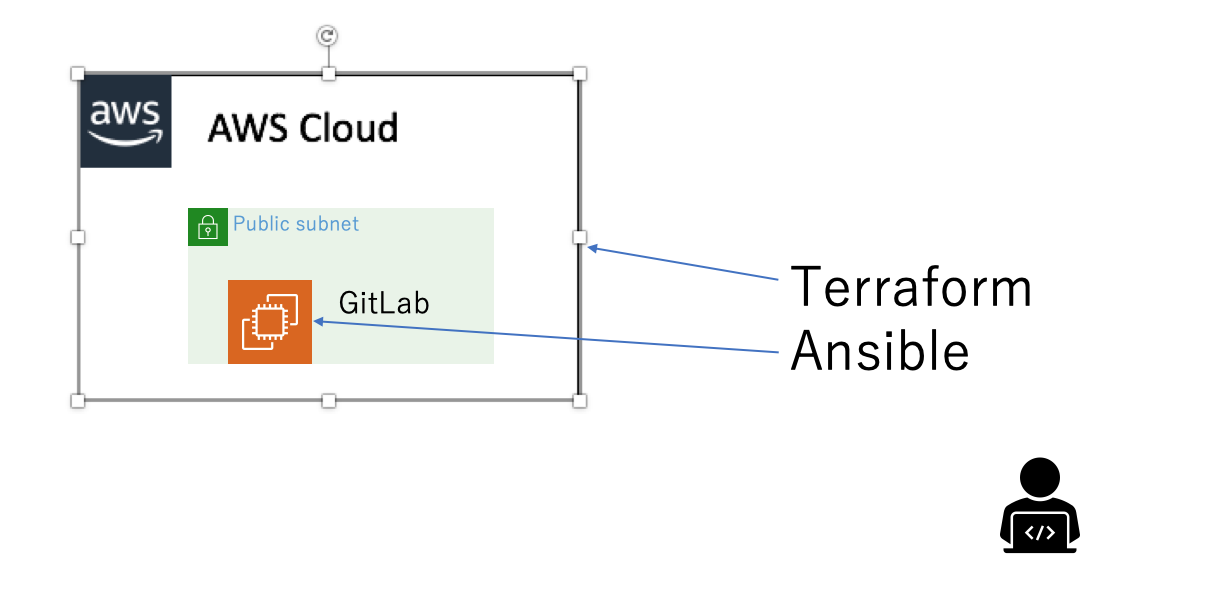
実行のイメージです。ローカルPCにTerraformとAnsibleをインストールしています。TerraformでEC2・VPC等のリソースを構築し、AnsibleでGitLabとそれに必要なモジュールをインストールしています。

環境構築
Terraformのインストール
公式サイトを参考に自分のマシンにあったインストールを行ってください。
Ansibleのインストール
Ansibleは色々なインストール方法があるのですが、今回はvirtualenv上でpip経由でインストールしました。virtuaenvをインスとーしてない方は以下の方法でダウンロードし、virtualenvを有効にしてください。
$ pip3 install virtualenv
$ mkdir sample
$ cd sample
$ virtualenv --no-site-packages ansible
$ source ansible/bin/activate # virtualenvが有効になる
$ (ansible) ← 有効化された
$ pip3 install ansible # インストール
$ ansible --version # version確認
AWS側でIAMユーザーを作成する
Terraformの実行にはIAMユーザーとそのシークレットキーとアクセスキーが必要になります。ここではterraform-userというIAMユーザーを作成しました。また、シークレットキーとアクセスキーも控えておきましょう。(シークレットキーとアクセスキーの取り扱いには気をつけてください。)
Terraformを動かしてみる
まず、Terraformから動かしてみようと思います。プロジェクトディレクトリにterraform.tfvarsというファイルを作成し、IAMユーザーのシークレットキーとアクセスキーを記述します。(Gitなどのバージョン管理システムのの管理対象からは必ず外してください。)
access_key = "xxxxxxxxxxxx"
secret_key = "xxxxxxxxxxxx"
次にvariables.tfというファイルを作成し、terraform.tfvarsで定義した情報を変数として定義し、Terraformの実行ファイルから変数を参照できるようにします。
variable "access_key" {}
variable "secret_key" {}
それではいよいよTerraformの実行ファイルを作成し、動かしていきたいと思います。main.tfを作成し、次のように記述します。regionとamiは任意の値に置き換えてください。
provider "aws" {
  profile = "default"
  region = "ap-northeast-1"
  access_key = "${var.access_key}"
  secret_key = "${var.secret_key}"
}

resource "aws_instance" "example" {
  ami = "ami-xxxx"
  instance_type = "t2.micro"
}
最後に実行していきます。-auto-approveオプションを入力することで実行前の確認をスキップできます。コマンド実行後AWSのコンソールを確認すると、新しいEC2インスタンスが作成されているはずです。
$ terraform init  # 初期化
$ terraform apply -auto-approve# 実行
EC2が作成されたのが確認できたらリソースを削除していきます。削除コマンドは以下の通りです。
$ terraform destroy -auto-approve
Destroy complete! Resources: 1 destroyed.
Terraformで実践的なインフラリソースを構築してみる
前のセクションではTerraformを使ってEC2インスタンスを起動しましたが、VPCやセキュリティグループはデフォルトのものを利用しており、キーペアも作成されていないのでSSHログインすることができません。このセクションではより実践的なインフラを構築していきます。
EC2にSSHするための鍵を生成する
EC2はAWS側で作成したキーペアでSSH接続することが多いのですが、ここではキーペアをローカルPCで作成し、その公開鍵を元にEC2を作成していきます。
$ ssh-keygen # 公開認証方式に必要なキーペアを作成
Enter file in which to save the key (/Users/user-name/.ssh/id_rsa): # Enterで省略
Enter passphrase (empty for no passphrase): # Enterで省略
Enter same passphrase again: # Enterで省略
ここで作られた公開鍵を元にAWS側でキーペアを作成していきます。公開鍵の内容が必要になるのでcatコマンドでファイルの中身を表示し、控えておきます。
$ cat ~/.ssh/id_rsa.pub
ssh-rsa ・・・・・・・・省略
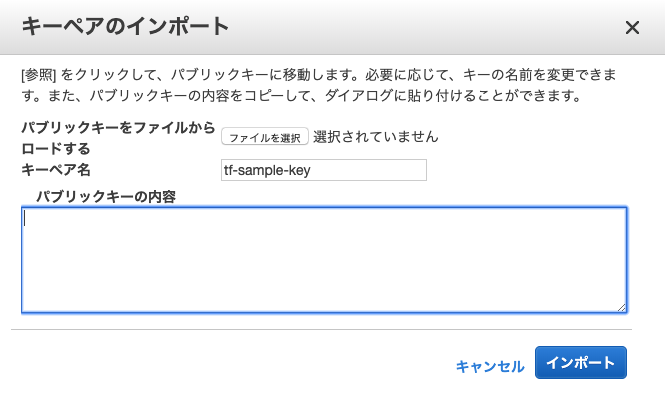
次にAWSのコンソール画面でキーペアを作成します。キーペアのインポートから先ほどcatコマンドで出力した公開鍵の中身をコピペします。
これで準備が完了しました。次にTerraformの実行ファイルを作成していきます。この例ではインスタンスサイズにt2.mediumを使用しています。t2.microインスタンスだとGitLabのインストール要件を満たさずインストールに失敗するからです。
provider "aws" {
  profile = "default"
  region = "ap-northeast-1"
  access_key = "${var.access_key}"
  secret_key = "${var.secret_key}"
}

# VPC
resource "aws_vpc" "tf-vpc" {
  cidr_block = "10.0.0.0/16"
  instance_tenancy = "default"
  enable_dns_support = "true"
  enable_dns_hostnames = "true"
  tags = {
    Name = "tf-vpc"
  }
}

# internet gateway
resource "aws_internet_gateway" "tf-gw" {
  vpc_id = "${aws_vpc.tf-vpc.id}"

}

# piblic subnet
resource "aws_subnet" "tf-public-subnet" {
  vpc_id = "${aws_vpc.tf-vpc.id}"
  cidr_block = "10.0.10.0/24"
  availability_zone = "ap-northeast-1a"
}

# route table
resource "aws_route_table" "tf-pub-rt" {
  vpc_id = "${aws_vpc.tf-vpc.id}"

  route = {
    cidr_block = "0.0.0.0/0"
    gateway_id = "${aws_internet_gateway.tf-gw.id}"
  }
}

#  An association between a route table and a subnet.
resource "aws_route_table_association" "tf-public_subnet" {
  subnet_id = "${aws_subnet.tf-public-subnet.id}"
  route_table_id = "${aws_route_table.tf-pub-rt.id}"
}

# EC2 instance
resource "aws_instance" "tf-ec2" {
  ami = "ami-068a6cefc24c301d2" # Amazon linux2
  instance_type = "t2.medium"
  key_name = "${aws_key_pair.tf-sample-key.id}"
  vpc_security_group_ids = ["${aws_security_group.tf-sg.id}"]
  subnet_id = "${aws_subnet.tf-public-subnet.id}"
  associate_public_ip_address = "true"
  tags = {
    Name = "tf-ec2"
  }
}

# key-pair
resource "aws_key_pair" "tf-sample-key" {
  key_name = "${var.key_name}"
  public_key = "${file(var.public_key_path)}"
}

# security group
resource "aws_security_group" "tf-sg" {
  name = "tf-sg"
  description = "tf test"
  vpc_id = "${aws_vpc.tf-vpc.id}"
    ingress {
        from_port = 22
        to_port = 22
        protocol = "tcp"
        cidr_blocks = ["0.0.0.0/0"]
    }
}
terraform.tfvarsとvariables.tfにキーペアの名前とローカルにおいてある公開鍵のパス情報を追記します。
~省略~
key_name = "tf-sample-key"
public_key_path = "~/.ssh/id_rsa.pub"
~省略~
variable "key_name" {}
variable "public_key_path" {}
それではいよいよ動かしていきます。完了まで数分かかります。
$ terraform apply
リソースが作成されたら、試しにEC2インスタンスにssh接続してみてください。
$ ssh -i .ssh/id_rsa ec2-user@<your-ec2-ip>

[ec2-user@ip-10-0-10-157 ~]$
ここで一点、修正を加えたいと思います。現在作成されているセキュリティグループでは22番ポートのみ解放していますが、あとでブラウザから表示する必要があるので80番ポートを解放したいと思います。また、既存のルールだとアウトバウンドのルールが記載されておらず、Ansibleが外部リポジトリを参照できないのでmain.tfの一部を変更します。aws_security_groupのブロックに直接ルールを記載せず、aws_security_group_ruleに外出ししてsecurity_group_id = "${aws_security_group.tf-sg.id}"で紐付けを行っています。また、22番ポートを解放するインバウンドルールは明示的に記述していません。デフォルトで作成されるので明示的に22番ポートを解放するルールを作成してしまうと、エラーになります。なので、ここでは80番ポートの解放ルールのみ記述します。
~省略~

resource "aws_security_group" "tf-sg" {
  name = "tf-sg"
  description = "tf test"
  vpc_id = "${aws_vpc.tf-vpc.id}"
}

resource "aws_security_group_rule" "http-port" {
  type = "ingress"
  from_port = 80
  to_port = 80
  protocol = "tcp"
  cidr_blocks = ["0.0.0.0/0"]
  security_group_id = "${aws_security_group.tf-sg.id}"
}

resource "aws_security_group_rule" "out-bound" {
  type = "egress"
  from_port = 0
  to_port = 0
  protocol = "-1"
  cidr_blocks = ["0.0.0.0/0"]
  security_group_id = "${aws_security_group.tf-sg.id}"
}
再度コマンドを実行します。
$ terraform apply
マネジメントコンソール画面からセキュリティグループのインバウンドルールが変更されていることを確認します。

Ansibleを動かしてみる
Terraformを使ってリソースを作成することができたので次はAnsibleでEC2にGitLabを構築していきます。
まずはカレントディレクトリにansible関連のファイルを保存するansible-projectディレクトリを作成します。
$ mkdir ansible-project
$ cd ansible-project
Ansibleはコントロールノードからターゲットノードに対してplaybookを実行する際、SSHを利用します。なので、まずはSSHの接続情報が書かれたssh_configファイルを作成し、以下を記述します。HostNameは任意の値に書き換えてください。
Host *
  StrictHostKeyChecking no
  UserKnownHostsFile /dev/null

Host gitlab
  HostName ec2-<your ec2 instance>.ap-northeast-1.compute.amazonaws.com
  User ec2-user
  IdentityFile ~/.ssh/id_rsa
以下のコマンドでファイルを利用してssh接続できます。
$ ssh -F ssh_config ec2-user@ec2-<your-ec2-ip>.ap-northeast-1.compute.amazonaws.com
まずはいきなりGitLabを構築せず、Apacheをインストールし、起動するところから始めたいと思います。次のplaybookを用意します。
- hosts: gitlab
  become: yes
  become_user: root
  tasks:
    - name: Install http server
      yum:
        name: httpd

    - name: Start http server
      service:
        name: httpd
        state: started
        enabled: yes
同ディレクトリにhostsファイルを用意し、ターゲット情報を記載します。
[gitlab]
gitlab
次のコマンドでplaybookを実行していきます。
$ ansible-playbook -i hosts test.yml
すると。。。失敗しました。
fatal: [gitlab]: UNREACHABLE! => {"changed": false, "msg": "Failed to connect to the host via ssh: ssh: Could not resolve hostname gitlab: nodename nor servname provided, or not known", "unreachable": true}
Ansibleがターゲットノードに接続しようとしていますが、sshコマンドのオプションが明示されておらず失敗しています。playbook.ymlと同じディレクトリにansible.cfgを作成し、以下の設定を記載します。
[defaults]
inventory = hosts
retry_files_enabled = False

[privilege_escalation]
become = True

[ssh_connection]
control_path = %(directory)s/%%h-%%r
ssh_args = -o ControlPersist=15m -F ssh_config -q
scp_if_ssh = True
気を取り直してもう一度実行してみます。
$ ansible-playbook -i hosts test.yml
~省略~
ok: [gitlab]
 ____________________________
< TASK [Install http server] >
 ----------------------------
    \   ^__^
     \  (oo)\_______
        (__)\       )\/\
            ||----w |
            ||     ||
~省略
gitlab                     : ok=3    changed=2    unreachable=0    failed=0    skipped=0    rescued=0    ignored=0
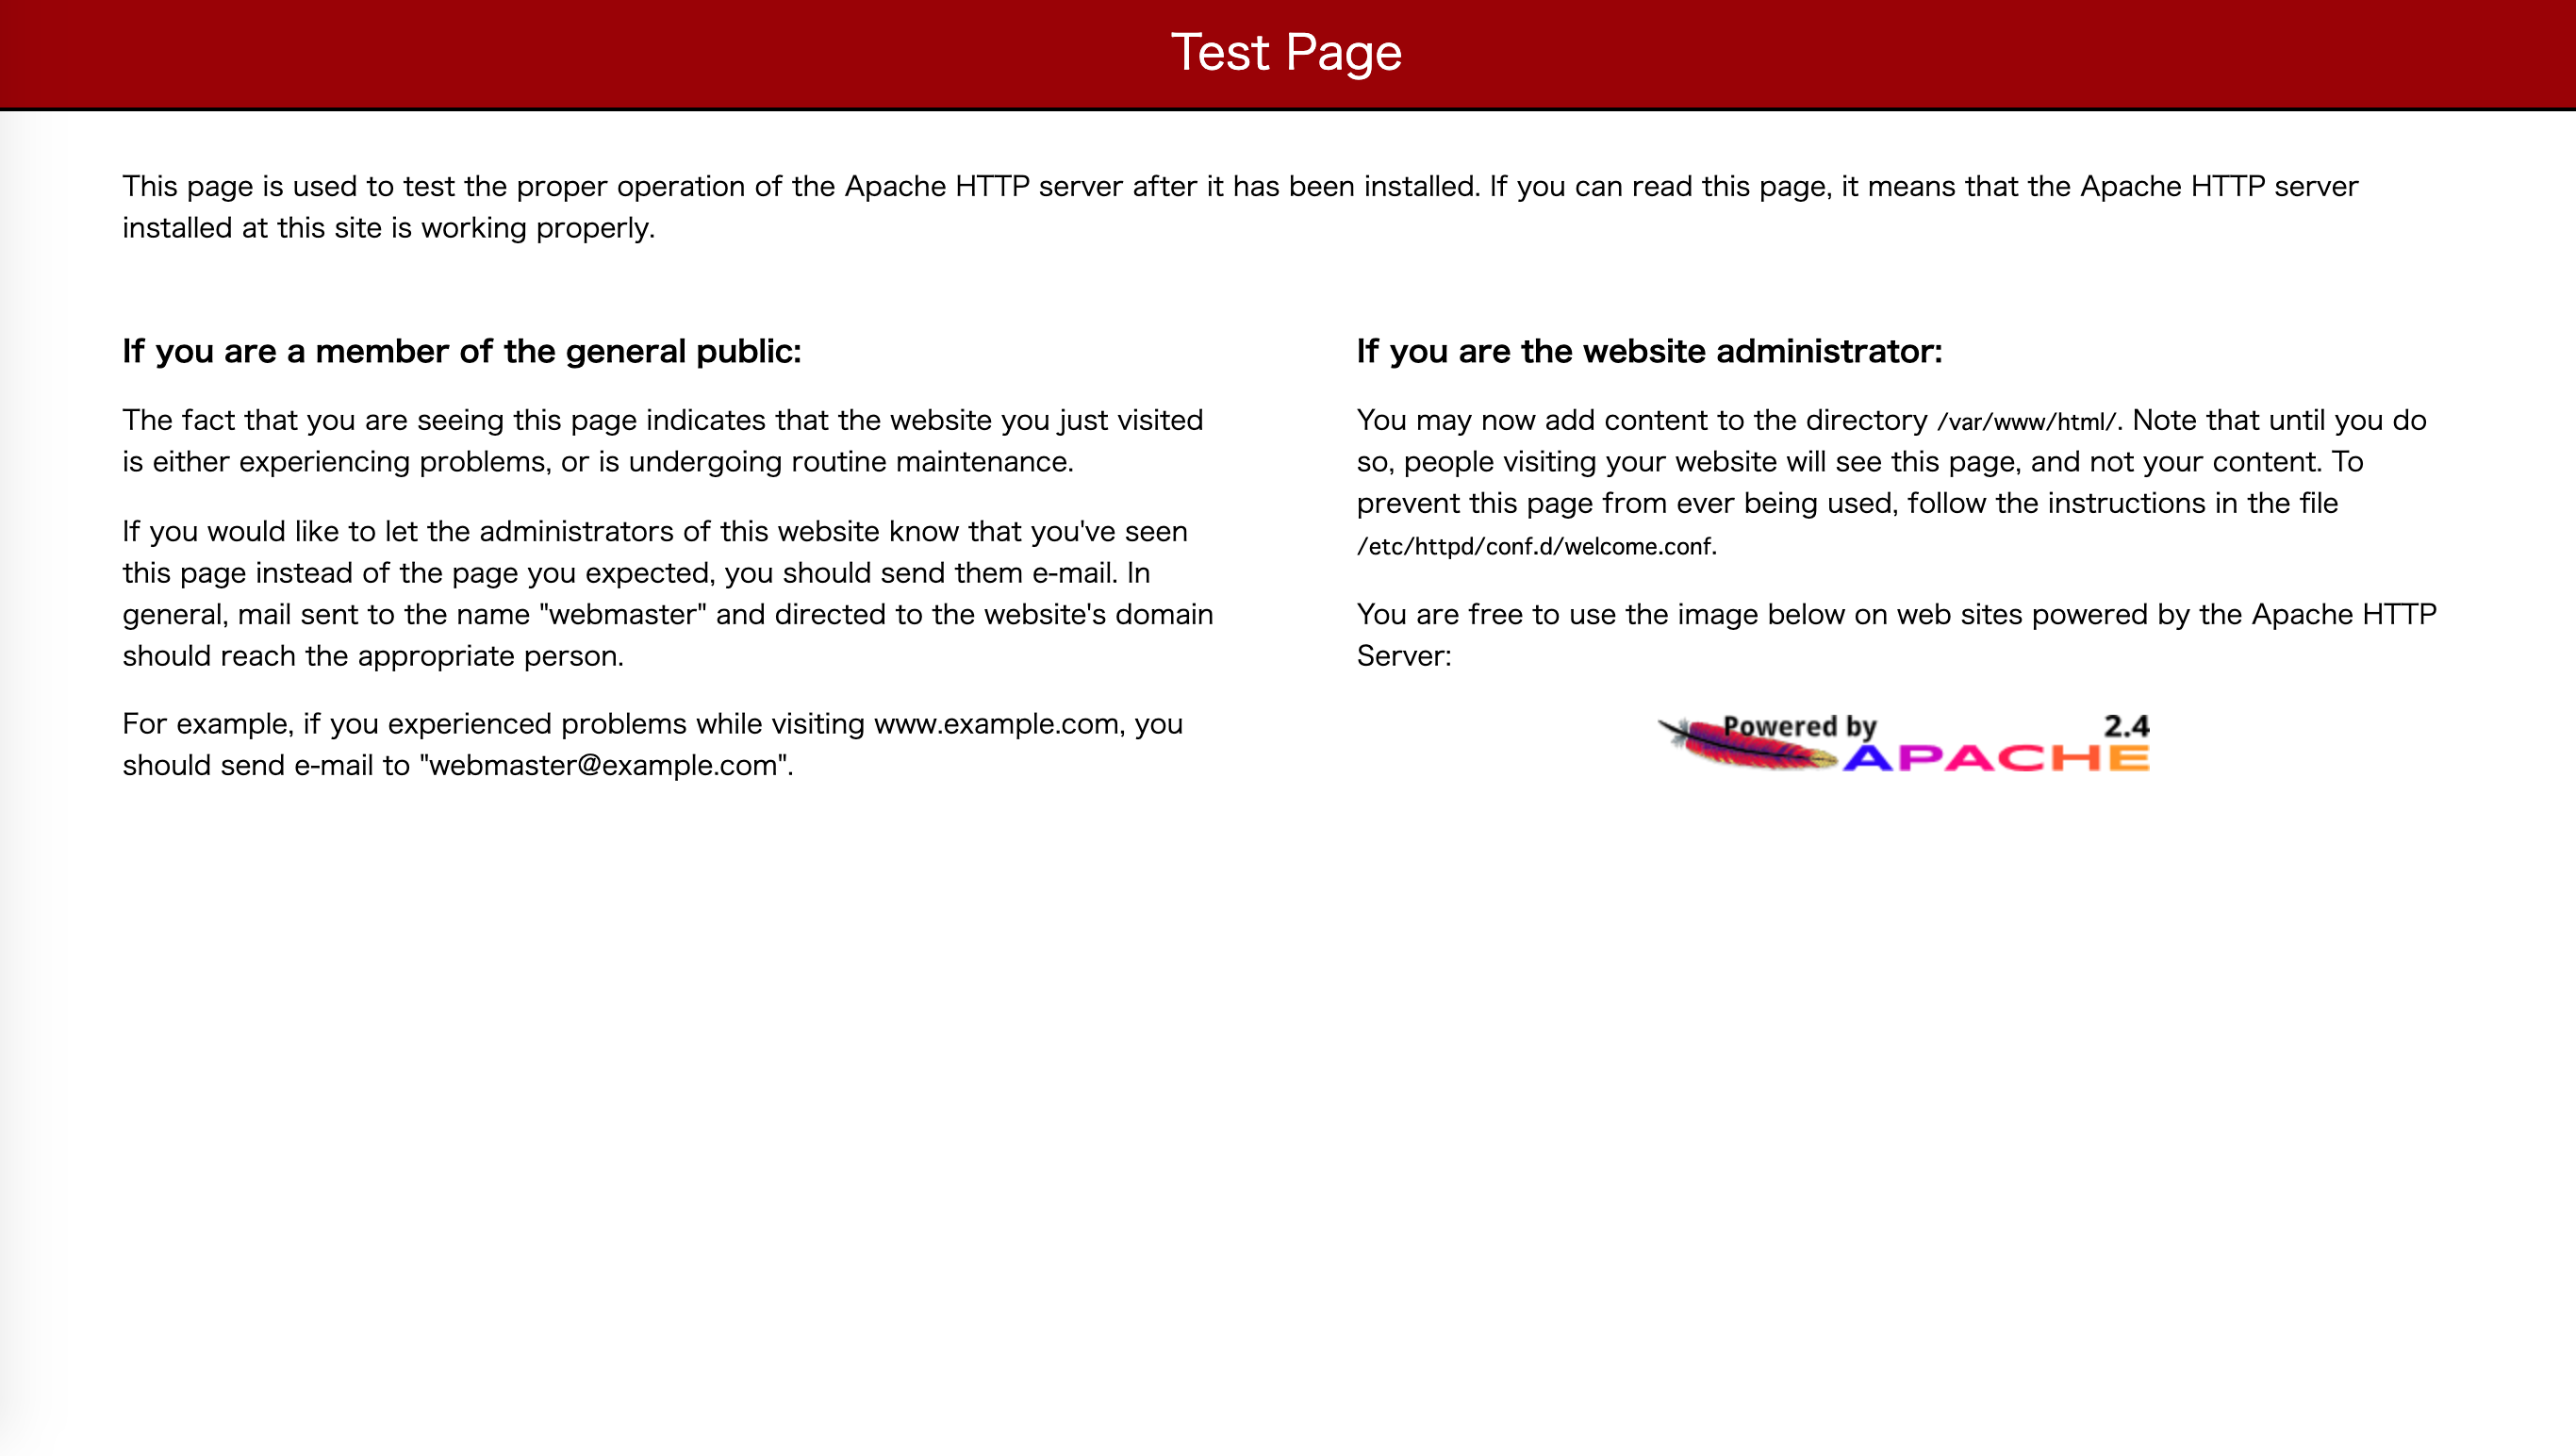
確認のためにブラウザにEC2インスタンスのIPアドレスを入力します。以下のように表示されていれば成功です。

AnsibleでGitLabを構築する
それではいよいよ、AnsibleでGitLabを構築していきたいと思います。playbook.ymlを作成し、以下を記述します。GitLabのインストールの詳細が知りたい方はこちらをご覧ください。
- name: Install GitLab
  hosts: gitlab
  tasks:
  - name: Upgrade all packages
    yum:
      name: '*'
      state: latest

  - name: Install a list of packages
    yum:
      name:
        - curl
        - golang
        - policycoreutils
        - openssh-server
        - openssh-clients
        - postfix
        - vim
        - wget
        - "@Development tools"
      state: latest

  - name: systemctl enabled sshd & systemctl start sshd
    systemd:
      name: sshd
      state: started
      enabled: yes

  - name: systemctl enabled postfix & systemctl start postfix
    systemd:
      name: postfix
      state: started
      enabled: yes


  - name: Download gitlab-ce
    get_url:
      url: https://packages.gitlab.com/install/repositories/gitlab/gitlab-ce/script.rpm.sh
      dest: /usr/local/src
      mode: '0755'
    become: yes
    become_user: root

  - name: Run script.rpm.sh
    shell: ./script.rpm.sh
    args:
      chdir: /usr/local/src
    become: yes
    become_user: root

  - name: Install gitlab-ce
    yum:
      name: gitlab-ce
      state: latest

  - name: gitlab-ctl reconfigure
    shell: gitlab-ctl reconfigure
    become: yes
    become_user: root
実行してみます。実行には数分かかります。また、サーバー上sudo systemctl status httpdを実行しApacheのプロセス停止させておいてください。新しい、playbookを実行したらApcheのプロセスが停止するのかと思ったのですが、実行状態のままでGitLabにアクセスすることができませんでした。(泣))
$ ansible-playbook -i hosts playbook.yml
ブラウザからアクセスし、GitLabのトップページが表示されていれば成功です。

リソースのクリーンアップ
EC2のt2.mediumインスタンスは無料枠の対象外なので削除しておきます。また、このハンズオンで利用したTerraform用のIAMユーザーも念の為消しておきましょう。
$ terraform destroy
