目的
この記事は
- gradleとspring bootの機能を使ったらほぼコーディングなしでAPIのコンテナ起動までいけそう。やってみたい。
- 勉強用にREST APIの型が欲しい。この世で一番楽ちんにREST APIのサンプル作ってコンテナにのっけてローカルで動かし、開発の流れを復習したい。
という目的で筆者が作成した手順をまとめたものです。「業務でAPI作ってって言われたけど記事をいくつか読んでもわからん! とりあえず動かしたい!」「復習したいけど色々混乱してて手が動かない!」という方向けです。
前提条件
- オンライン接続可の環境
- git bash、Windows Terminalなどのコマンドラインツール(筆者はWindows Terminalからgit bashを使用)
- VS code、eclipseなどのIDE(筆者はVS codeを使用)
- gradle 7.1
- Docker Desktop
それぞれ初めて使う際にはダウンロード、gradleはそれに加えてパス設定などが必要です。
「○○ インストール」「○○ 導入」などで検索してやり方を見つけてみてください。
たとえば「gradle インストール」で検索するとWindows10にGradleをインストールというgradleの導入方法を説明してくださっている記事が出てきます。
手順
手順は以下の3フェーズからなっています。
- gradle(ビルドツール)で空のjavaアプリケーションを作成
- spring bootでサンプルAPIを作成
- サンプルAPIをコンテナ起動
1. Javaアプリケーションの作成
- Windows Terminalからgit bashを開きます。
- Javaアプリケーションをつくるためのディレクトリを以下のコマンドで作成し、フォルダ内へ移動します。
mkdir sample-app
cd sample-app
- gradleプロジェクトを作成します。
gradle init
- 以下のように、何度か
Enter selectionにてプロジェクト設定を入力するよう求められるので- プロジェクトタイプ:application
- 言語:Java
- マルチプロジェクトかどうか:No(Yesを選択した場合のフォルダ構成:gradle公式)
- build.gradleで使用する言語:Groovy
- テスト環境:JUnit Jupiter
と設定していきます。
- その後、
Project name、Source packageについても命名を求められます。最初に付けた「sample-app」のままで良ければEnterを都度押します。 - コンソール画面は以下のようになります。
BUILD SUCCESSFULが出たら成功です。
Starting a Gradle Daemon (subsequent builds will be faster)

Select type of project to generate:
  1: basic
  2: application
  3: library
  4: Gradle plugin
Enter selection (default: basic) [1..4] 2

<=====<======-------> 50% EXECUTING [6s]                                                                                            <<==<======-------> 50% EXECUTING [37s]7s]                                                         <======-------> 50% EXECUTING [9s]<Select implementation language:
  1: C++
  2: Groovy--> 50% EXECUTING [47s]
  3: Java
  4: Kotlin
  5: Scala
  6: Swift
Enter selection (default: Java) [1..6] 3

<======-------> 50% EXECUTING [1m 2s]3s]                                                                                            <Split functionality across multiple subprojects?:
  1: no - only one application project
  2: yes - application and library projects
Enter selection (default: no - only one application project) [1..2] 1

Select build script DSL:
  1: Groovy
  2: Kotlin----> 50% EXECUTING [1m 46s]
Enter selection (default: Groovy) [1..2] 1

Select test framework:
  1: JUnit 4---> 50% EXECUTING [1m 52s]
  2: TestNG
  3: Spock
  4: JUnit Jupiter
Enter selection (default: JUnit Jupiter) [1..4] 4

Project name
Source package (default: sample.app):

<======-------> 50% EXECUTING [2m 7s]                                                                                               [

> Task :init> 50% EXECUTING [2m 6s]
Get more help with your project: https://docs.gradle.org/7.1/samples/sample_building_java_applications.html

BUILD SUCCESSFUL in 2m 23s
2 actionable tasks: 2 executed
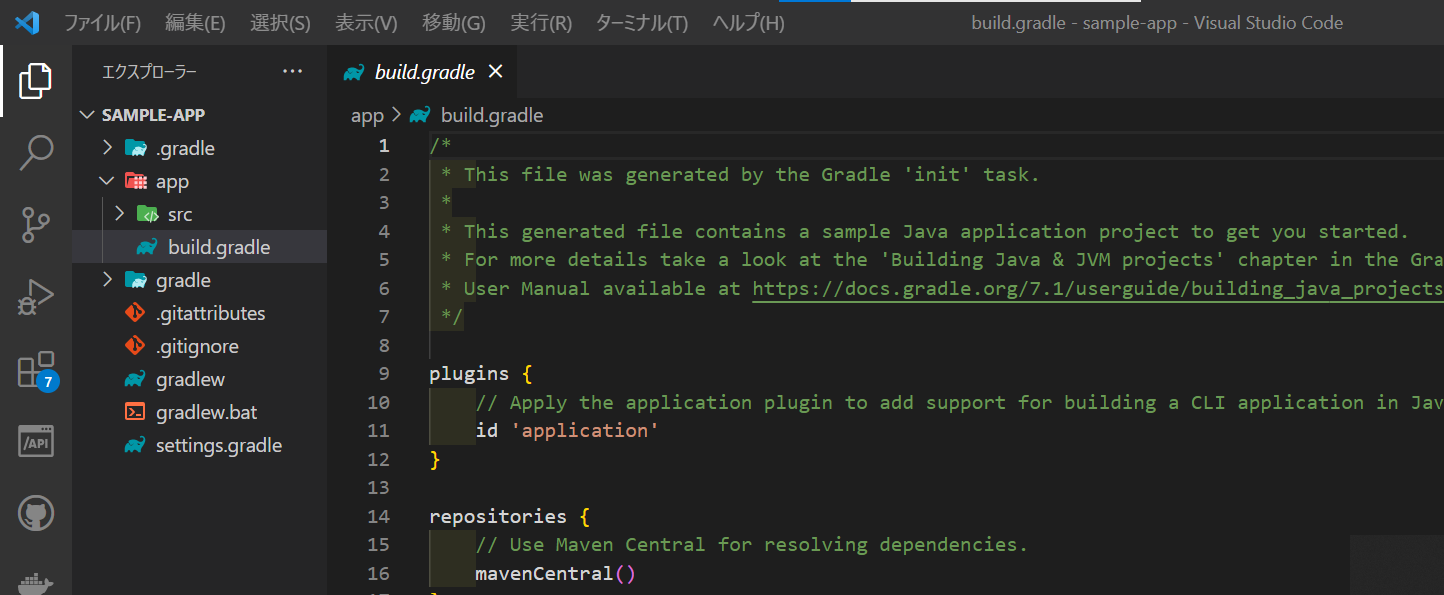
- これで空のJavaアプリケーションが作成できました。次は、このアプリケーションがspring-bootを使用できるように、build.gradleを書き換えていきます。
2. Spring bootでサンプルAPIを作成
- 今度は、作った空のjavaアプリケーションにspring boot(API作成のための軽量フレームワーク)を適用し、APIを作っていきます。
- そのために、build.gradleを編集します。
- まずはsample-appフォルダの階層で、VS codeを起動します。
code .
-
まず、pluginsを以下のように書き換えます。これにより、idで指定したプラグインをパブリックリポジトリから使用できるよう設定できます。
ex)id 'org.springframework.boot' version '2.3.12.RELEASE'という記載で、このリポジトリからプラグインを引っ張ってきています。
plugins {
    id 'java'//追加
    id 'org.springframework.boot' version '2.3.12.RELEASE'//追加
    id 'io.spring.dependency-management' version '1.0.9.RELEASE'//追加
    id 'application'
}
- 次に、dependenciesを以下のように書き換えます。これにより、モジュール依存関係を指定します(gradle公式)。
dependencies {
    implementation 'org.springframework.boot:spring-boot-starter'//追加
    implementation 'org.springframework.boot:spring-boot-starter-web'//追加
    testImplementation 'org.junit.jupiter:junit-jupiter:5.7.1'
    implementation 'com.google.guava:guava:30.1-jre'
}
- 上記のbuild.gradleの修正で、プロジェクトがmavenリポジトリからspring bootフレームワーク使用に必要なライブラリを参照できるようになりました。
- つぎに、空のjavaアプリケーションをSpring bootアプリケーションに編集します。
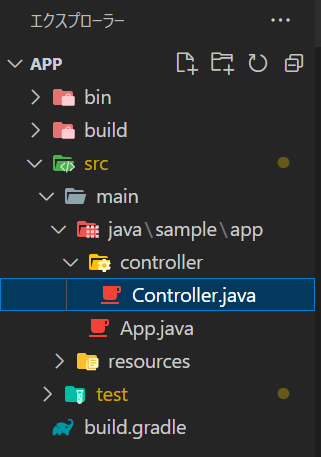
- appフォルダの下、src.main.java.sample.appの下のApp.javaを開いてください。
- 現在のApp.javaは、「javaアプリケーションとして起動されると"Hello World!"という文字列を返す」というプログラムになっています。
- これを「SpringApplicationを起動する」というプログラムに書き換えます。このクラスを、sample-appがSpringアプリケーションとして起動する際の入り口にするようなイメージです。
/*
 * This Java source file was generated by the Gradle 'init' task.
 */
package sample.app;

public class App {
    public String getGreeting() {
        return "Hello World!";
    }

    public static void main(String[] args) {
        System.out.println(new App().getGreeting());
    }
}
package sample.app;

import org.springframework.boot.SpringApplication;
import org.springframework.boot.autoconfigure.SpringBootApplication;

@SpringBootApplication
public class App {

    public static void main(String[] args) {
        SpringApplication.run(App.class, args);
    }
}
- これにより、この階層以下にあるクラスがSpringBootApplicationとして認識されるようになります。
- 今はSpringBootApplicationとしてできることが無い状態なので、次に新しくcontrollerクラスを作成し、httpで通信が来た際に文字列を返却できるようにします。
- コンソールから、App.javaと同階層にcontrollerフォルダ(パッケージ)を作成してください。
mkdir controller
package sample.app.controller;

import org.springframework.web.bind.annotation.RequestMapping;
import org.springframework.web.bind.annotation.RestController;
import static org.springframework.web.bind.annotation.RequestMethod.*;

@RestController
public class Controller {
    @RequestMapping(path = "/hello", method = { GET, POST })
    public String hello() {
        return "Hello World";
    }
}
- 次に、src/test/java/sample/app/AppTest.javaを開き、classの中身をコメントアウトしてください。先程App.javaにてgreetingメソッドを削除したので、テストが通らなくなっているためです。(そのままにすると
gradle buildにてBUILD FAILEDとなります。)
/*
 * This Java source file was generated by the Gradle 'init' task.
 */
package sample.app;

import org.junit.jupiter.api.Test;
import static org.junit.jupiter.api.Assertions.*;

class AppTest {
    // @Test void appHasAGreeting() {
    // App classUnderTest = new App();
    // assertNotNull(classUnderTest.getGreeting(), "app should have a greeting");
    // }
}
- さて、アプリケーションがきちんと動くか確認していきます。まずはbuild.gradleよりプロジェクトがビルド可能か、以下のコマンドで実験します。
BUILD SUCCESSFULが出ればOKです。
gradle build
- OKであれば、Jarを作成し、アプリケーションを起動してみます。
- Jarを作成
gradle bootJar
-
- Webアプリケーションを起動
gradle bootRun
- 起動したWebアプリケーション(API)と通信できるか確認します。
- Windows Terminalの別ウィンドウを開き、以下を打ち込みます。
curl http://localhost:8080/hello
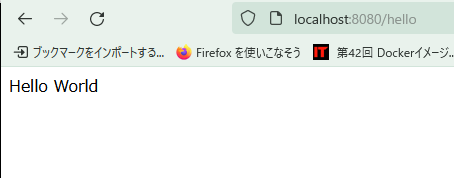
以下のように返ってくれば、SpringBootApplicationの起動は成功です。
$ curl http://localhost:8080/hello
Hello World
ブラウザに直接http://localhost:8080/helloといれて確認することもできます。

3. サンプルAPIをコンテナ起動
- Cloud Native Buildpacksを用いてアプリケーションを起動します。
- まずはbuild.gradleから現在実行可能なタスクの中に
bootBuildImageが入っているか確認します。以下のコマンドをbuild.gradleがある階層で入力してください。
gradle tasks --all build
- コンソールログにて、Build tasksの中に以下のようにbootBuildImageがあればOKです。無い場合は、build.gradleを開き、spring bootのversionが2.3以上になっているか確認してください。
Build tasks
-----------
assemble - Assembles the outputs of this project.
bootBuildImage - Builds an OCI image of the application using the output of the bootJar task
bootJar - Assembles an executable jar archive containing the main classes and their dependencies.
build - Assembles and tests this project.
buildDependents - Assembles and tests this project and all projects that depend on it.
buildNeeded - Assembles and tests this project and all projects it depends on.
classes - Assembles main classes.
clean - Deletes the build directory.
jar - Assembles a jar archive containing the main classes.
testClasses - Assembles test classes.
- ※任意:混乱を避けるため、build.gradleにて、bootBuildImageにて作成されるimageの名前を指定します。以下をbuild.gradleの一番下に書き加えます。
tasks.named("bootBuildImage") {
    imageName = "sample.app"
}
- 以降、dockerコマンドを使用します。Docker Desktopを起動してください。
- まずはSpringBootApplicationをコンテナ起動するためのimageを作成します。Windows Terminalにて以下のコマンドを入力してください。
gradle bootBuildImage
-
BUILD SUCCESSFULと出たら成功です。 - Windows Terminalにて以下のコマンドを入力し、imageを確認します。
docker images
- 以下のように、build.gradleで指定した名前のimageが出来ていたら成功です。
$ docker images
REPOSITORY                         TAG                     IMAGE ID       CREATED         SIZE
sample.app                         latest                  d188907cb854   42 years ago    263MB
- なぜ42年前にimageが作成されたことになっているのか、、、? 気になります。
- さて、コンテナを起動しましょう。Windows Terminalにて以下のコマンドを入力してください。
docker run -p "8080:8080" -d sample.app
- コンテナが起動されたか確認しましょう。
docker ps
- 以下のように、sample.appイメージを使用して新しくコンテナが起動していたら成功です。
$ docker ps
CONTAINER ID   IMAGE        COMMAND                  CREATED          STATUS          PORTS                                       NAMES
cbf614adea6d   sample.app   "/cnb/lifecycle/laun…"   14 seconds ago   Up 12 seconds   0.0.0.0:8080->8080/tcp, :::8080->8080/tcp   upbeat_elion
- 最後に、起動したコンテナに対してhttpリクエストを送ってみます!
curl http://localhost:8080/hello
先ほどと同じく、Hello Worldが返ってきたら成功です。お疲れ様でした!
まとめ
やってみて、gradleとSpring Boot、なんて便利なんだ...! とひしひしと感じました。DockerFileも書かずにコンテナ起動できてしまうとは!
ここからAPIをDBからデータを引っ張ってくる形にしたり、複数コンテナを起動するためにはDockerFileをやっぱり書くしかないのか確認したりしていけたらと思います。
この記事で間違っている点や、省略できる手順などがありましたら、コメント欄にてご指摘いただけますと幸いです。

