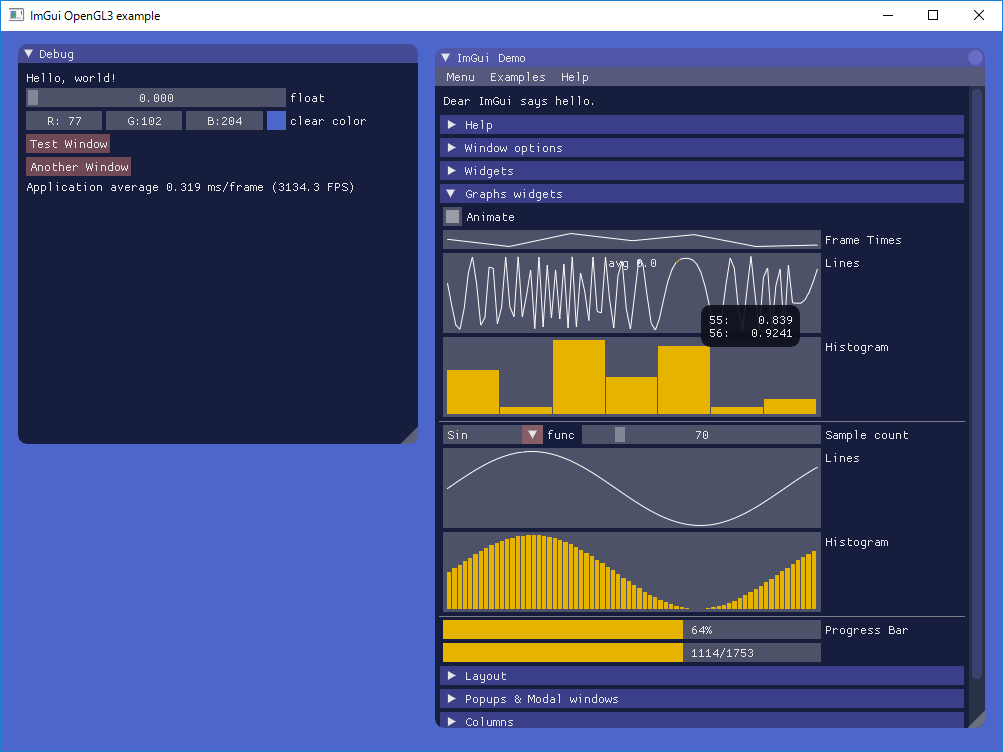
ImGuiが何なのかについては
OpenGLやDirectXなGUIにimguiが最強すぎる
をどうぞ。
本記事では、ImGuiのCラッパーである
https://github.com/Extrawurst/cimgui
のDバインディング
https://github.com/Extrawurst/DerelictImgui
を使ってみます。
今回のコード
https://github.com/ousttrue/dimgui_sample
Dバインディングとして同様の
https://github.com/d-gamedev-team/dimgui
というのもあった。
記事書きながらなんかさっき見たリポジトリと違うなぁと思ったら
本当に違うリポジトリだったという・・・
環境は、
Windows10(64bit) + DMD + dub + VisualD
サンプルを試してみる
cloneして試してみると・・・
> dub
Failed to load symbol igGetFont from shared library cimgui.dll
dependency walkerでcimgui.dllを確認すると確かに無い。
https://github.com/Extrawurst/DerelictImgui
のsubmoduleのバージョンでcimguiをビルドする。
igGetFontが存在することを確認した。
差し替えてみる。
動いた。
自分のプロジェクトで使う
今後使っていく上でもいろいろありそうなので、関連ソースを手元に置いておく方向でプロジェクトを構成する。
構成
> dub init dimgui_sample
> cd dimgui_sample
dimgui_sample> mkdir submodules
dimgui_sample> cd submodules
dimgui_sample/submodules> git submodule add https://github.com/glfw/glfw.git glfw
dimgui_sample/submodules> git submodule add https://github.com/Extrawurst/DerelictImgui DerelictImgui
dubのdependencyでDerelictImguiをクローンしたローカルの方を参照させる。
name "dimgui_sample"
description "A minimal D application."
authors "ousttrue"
copyright "Copyright c 2016, ousttrue"
license "MIT"

dependency "derelict-glfw3" version="~>3.1.0"
dependency "derelict-gl3" version="~>1.0.12"
dependency "derelict-imgui" version="~master" path="submodules/DerelictImgui" # <- これ
dependency "gfm:math" version="~>6.1.2"
sdl形式を使っているのはこっちの方がコンパクトであることもあるが、
jsonをvisualdで開くと何故か死亡するからでもあるw
glfw3.dllとcimgui.dllをビルドするバッチも用意した。
premake5でvisual studioのプロジェクトを生成して、MSBuildでコマンドラインビルドする。
pushd submodules
premake5.exe vs2015
set MSBUILD=C:\Program Files (x86)\MSBuild\14.0\Bin\MSBuild.exe
"%MSBUILD%" _build_premake\SubModules.sln /p:Platform=Win32 /p:Configuration=Release
popd
premakeの定義は割愛。リポジトリのsubmodulesにあります。
最後、VisualDのソリューションを生成する。
> dub generate visuald
準備完了。
実装
https://github.com/Extrawurst/imgui_d_test
をベースにコードを整理してみる。
Glfw(Window管理)とOpenGL(Shader等のリソース管理・描画)とImGui(Glfwからイベントを受け取る、OpenGLの描画命令を生成する)がお互いに参照しないように分けた。
ImGUiを動作させるには2つの面が必要で、
1つが描画(OpenGLの呼び出し)、もうひとつがマウスやキーボード等の入力イベントの受け取り(Glfwが作った値を反映する)になる。
描画
描画関数の呼び出しには、
io.RenderDrawListsFn
にコールバックを指定する方法と、
io.RenderDrawListsFn
にnullを指定して
igRender()
の後で
igGetDrawData()
で取り出した描画命令を使って自分で呼び出す方法がある。後者を使った。
void RenderDrawLists(ImGuiIO *io, IRenderer renderer)
{
	auto data=igGetDrawData();

	renderer.begin(io.DisplaySize.x, io.DisplaySize.y);
    foreach (n; 0..data.CmdListsCount)
    {
        ImDrawList* cmd_list = data.CmdLists[n];

        auto countVertices = ImDrawList_GetVertexBufferSize(cmd_list);
		renderer.setVertices(ImDrawList_GetVertexPtr(cmd_list,0), countVertices * ImDrawVert.sizeof);

        auto countIndices = ImDrawList_GetIndexBufferSize(cmd_list);
		renderer.setIndices(ImDrawList_GetIndexPtr(cmd_list,0), countIndices * ImDrawIdx.sizeof);

        ImDrawIdx* idx_buffer_offset;
        auto cmdCnt = ImDrawList_GetCmdSize(cmd_list);
        foreach(i; 0..cmdCnt)
        {
            auto pcmd = ImDrawList_GetCmdPtr(cmd_list, i);

            if (pcmd.UserCallback)
            {
                pcmd.UserCallback(cmd_list, pcmd);
            }
            else
            {
				renderer.draw(pcmd.TextureId
							  , cast(int)pcmd.ClipRect.x, cast(int)(io.DisplaySize.y - pcmd.ClipRect.w)
								  , cast(int)(pcmd.ClipRect.z - pcmd.ClipRect.x), cast(int)(pcmd.ClipRect.w - pcmd.ClipRect.y)
									  , pcmd.ElemCount, idx_buffer_offset
									  );
            }

            idx_buffer_offset += pcmd.ElemCount;
        }
    }

	renderer.end();
}
インタフェースを定義して、後のVulkan化に備えた。
interface IRenderer
{
	void CreateDeviceObjects(uint vertexSize, uint uvOffset, uint colorOffset);
	void* CreateFonts(ubyte* pixels, int width, int height);
	nothrow void begin(float width, float height);
	nothrow void setVertices(void *vertices, int len);
	nothrow void setIndices(void *indices, int len);
	nothrow void draw(void* textureId
					  , int x, int y, int w, int h
					  , uint count, ushort* offset);
	nothrow void end();
}
入力イベント ~ 構築
ioのメンバを更新してigNewFrame()を呼び出すまでが入力イベント処理で、以降igRenderまでがGUI構築。
struct GuiContext
{
	double       m_time = 0.0f;
	bool[3]      m_mousePressed;
	float        m_mouseWheel = 0.0f;
	bool show_test_window;
	bool show_another_window;
	float[3] clear_color;
}


void updateGui(ImGuiIO *io
			   , ref GuiContext context
			   , double current_time
			   , int[2] size, int[2] windowSize
			   , double[2] pos, bool mouseDown0, bool mouseDown1, bool mouseDown2
			   , bool hasFocus
			   )
{
	// Setup display size (every frame to accommodate for window resizing)
	io.DisplaySize = ImVec2(cast(float)size[0], cast(float)size[1]);

	// Setup time step
	io.DeltaTime = context.m_time > 0.0 ? cast(float)(current_time - context.m_time) : cast(float)(1.0f/60.0f);
	context.m_time = current_time;

	// Setup inputs
	// (we already got mouse wheel, keyboard keys & characters from glfw callbacks polled in glfwPollEvents())
	if (hasFocus)
	{
		// Convert mouse coordinates to pixels
		auto mouse_x = pos[0] * cast(float)size[0] / windowSize[0];
		auto mouse_y = pos[1] * cast(float)size[1] / windowSize[1];
		// Mouse position, in pixels (set to -1,-1 if no mouse / on another screen, etc.)
		io.MousePos = ImVec2(mouse_x, mouse_y);
	}
	else
	{
		io.MousePos = ImVec2(-1,-1);
	}

	{
		io.MouseDown[0] = context.m_mousePressed[0] || mouseDown0;
		context.m_mousePressed[0] = false;
	}
	{
		io.MouseDown[1] = context.m_mousePressed[1] || mouseDown1;
		context.m_mousePressed[1] = false;
	}
	{
		io.MouseDown[2] = context.m_mousePressed[2] || mouseDown2;
		context.m_mousePressed[2] = false;
	}

	io.MouseWheel = context.m_mouseWheel;
	context.m_mouseWheel = 0.0f;

	//
	igNewFrame();
	//

	// 1. Show a simple window
	// Tip: if we don't call ImGui::Begin()/ImGui::End() the widgets appears in a window automatically called "Debug"
	{
		static float f = 0.0f;
		igText("Hello, world!");
		igSliderFloat("float", &f, 0.0f, 1.0f);
		igColorEdit3("clear color", context.clear_color);
		if (igButton("Test Window")) context.show_test_window ^= 1;
		if (igButton("Another Window")) context.show_another_window ^= 1;
		igText("Application average %.3f ms/frame (%.1f FPS)", 1000.0f / igGetIO().Framerate, igGetIO().Framerate);
	}

// 省略

	igRender();
}
参考
UnityのImmediate mode GUIのコンセプトの説明がある。
最近までUnityのImGUIがレガシーな変な設計だと思ってました。すいません。
終わり
ImGuiはよさげ。
よい費用対効果のGUIとなりそうな感じがするのだ。