HTML5に<dialog>なんていう要素がある(?)そうで、Chromeは対応しているようですね。
ということはChromiumを使っているElectronはこれが使えます。
Modal制御とか地味に疲弊するので<dialog>が使えるのは大変助かります。
事前情報
<dialog>要素について参考
https://w3c.github.io/html/interactive-elements.html#the-dialog-element
https://developer.mozilla.org/ja/docs/Web/HTML/Element/dialog
https://reference.hyper-text.org/html5/element/dialog/
使い方はこちらを参考にしました。
https://app.codegrid.net/entry/dialog-1
Electron標準のダイアログ
<dialog>要素を使わなくともElectronには標準でいくつかダイアログを持っています。
簡単なやつはこれで十分だと思いますので参考までに。
http://electron.atom.io/docs/api/dialog/
使い方はこちらが参考になりました。
http://sourcechord.hatenablog.com/entry/2015/11/05/010404
<dialog>要素を使ってModalダイアログ開く
入力を要求するModalダイアログを作ってみることにします。
(入力を要求するダイアログはElectron標準にはなさそうなので。)
作ったものはGitHubに上げています。
<dialog id="sample-dialog">
	<form method="dialog">
		<input id="input" placeholder="text入力"/><br>
		<button type="submit" value="cancel">Cancel</button>
		<button type="submit" value="ok">Ok</button>
	</form>
</dialog>
<button onclick="showModalDialogElement()">dialog showModal</button>
jQueryは使いません。VanillaJSで記述します。
const dlg = document.querySelector('#sample-dialog');
//Escによるキャンセルをさせない
dlg.addEventListener('cancel', (event) => {
	'use strict';
	event.preventDefault();
});
function showModalDialogElement() {
	'use strict';

	return new Promise((resolve, reject) => {
		dlg.showModal();

		function onClose(event) {
			// 2017/2/5現在Chromium:v54のためaddEventListenerの{once: true}は利用できないため自力で解放。v55になれば{once: true}を利用するのが良いと思います。
			dlg.removeEventListener('close', onClose);
			if (dlg.returnValue === 'ok') { //returnValueにvalue属性の値が入る
				const inputValue = document.querySelector('#input').value;//入力値を取得
				alert(inputValue);//テストのためalert
				resolve(inputValue);//入力値をresolve
			} else {
				reject();
			}
		}
		dlg.addEventListener('close', onClose, {once: true});
	});
}
今回は、<form>とsubmitを使って作成しました。
簡単なダイアログであればこのあたりを使うのが簡単かなと個人的には思っています。
<dialog>の中の<form>にmethod="dialog"付けると、submitでModalダイアログ結果を制御できるようです。
<button type="submit" value="ok">とすると、
<button>を押下した際、closeイベント時にdialogオブジェクトのreturnValueにvalue="ok"が入ってくるのでこれでスイッチ制御します。
今回利用していませんが、return new Promiseにして入力の返り値を呼び出し元で使えるようにしておきました。
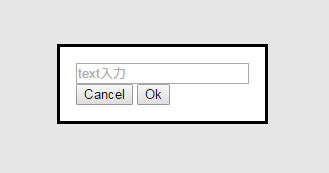
ボタンを押下すると下図のようなModalダイアログが出てきます。
裏がすこしグレーなのはModal状態のグレーです。

スタイル変えてみよう
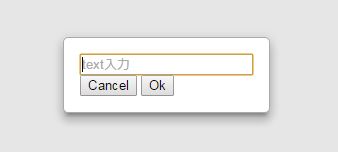
せっかくhtml要素なのでスタイルを変えてみます。
(試してみたかっただけなので難しいことはしません。)
dialog {
    border: solid 1px #aaa;
    border-radius: 5px;
    box-shadow: 0 8px 10px 1px rgba(0,0,0,0.14), 0 3px 14px 2px rgba(0,0,0,0.12), 0 5px 5px -3px rgba(0,0,0,0.3);
}
GitHubに上げています。
cloneしたら
npm install
npm start
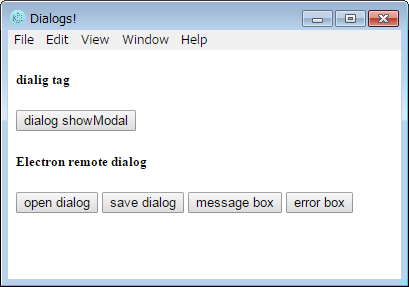
「dialog showModal」ボタンが今回書いた内容です。
他のボタンは
Electronで各種ダイアログ表示を参考に動かしてみただけのものです。

