はじめに
RecyclerViewを使おうとすると、ViewHolderの定義だったり、Adapterの定義だったり、ちょっと面倒ですよね。
そんなときに便利なのがGroupieというライブラリです。
RecyclerViewを扱いやすくするライブラリで、DroidKaigiのアプリや、クックパッドさんなどでも導入されているそうです(2019年4月現在)。
サクっと動く簡単なサンプルを作ってみたので、興味がある方は試してみてください![]()
環境
- macOS: 10.14.1
- Android Studio: 3.4
- kotlin: 1.3.21
- Support Library: AndroidX
手順
Groupieの導入
今回はDataBindingと一緒に使っていくので、下記のようにbuild.gradleに追記します。
android {
...
    dataBinding.enabled = true
}

dependencies {
...
    implementation 'com.xwray:groupie:2.3.0'
    implementation 'com.xwray:groupie-databinding:2.3.0'
...
}
Syncが問題なくできたことを確認したら次へ進みます。
RecyclerViewのセット
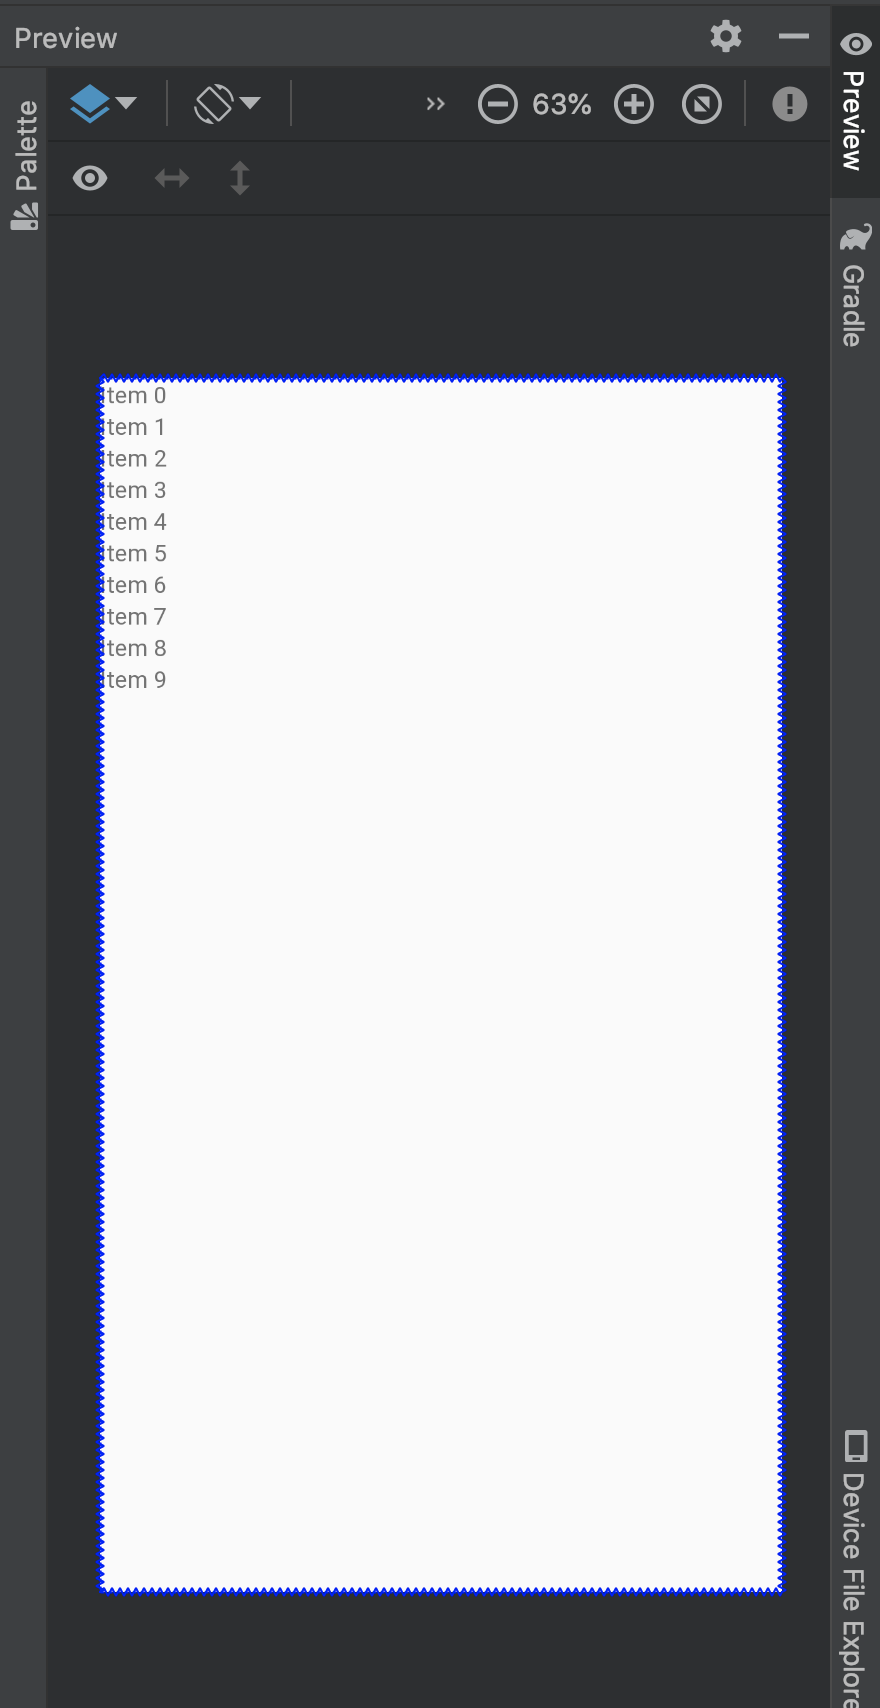
activity_main.xmlにRecyclerViewをセットします。
app:layoutManagerの定義を忘れがちなので注意です。
<?xml version="1.0" encoding="utf-8"?>
<layout
    xmlns:android="http://schemas.android.com/apk/res/android"
    xmlns:app="http://schemas.android.com/apk/res-auto">

        <androidx.constraintlayout.widget.ConstraintLayout
            android:layout_width="match_parent"
            android:layout_height="match_parent">

                <androidx.recyclerview.widget.RecyclerView
                    android:id="@+id/recycler_view"
                    android:layout_width="match_parent"
                    android:layout_height="match_parent"
                    app:layoutManager="androidx.recyclerview.widget.LinearLayoutManager"/>
        </androidx.constraintlayout.widget.ConstraintLayout>
</layout>
Previewで見るとこんな感じになっているかと思います。
Itemの作成
RecyclerViewに表示するItemを作っていきます。
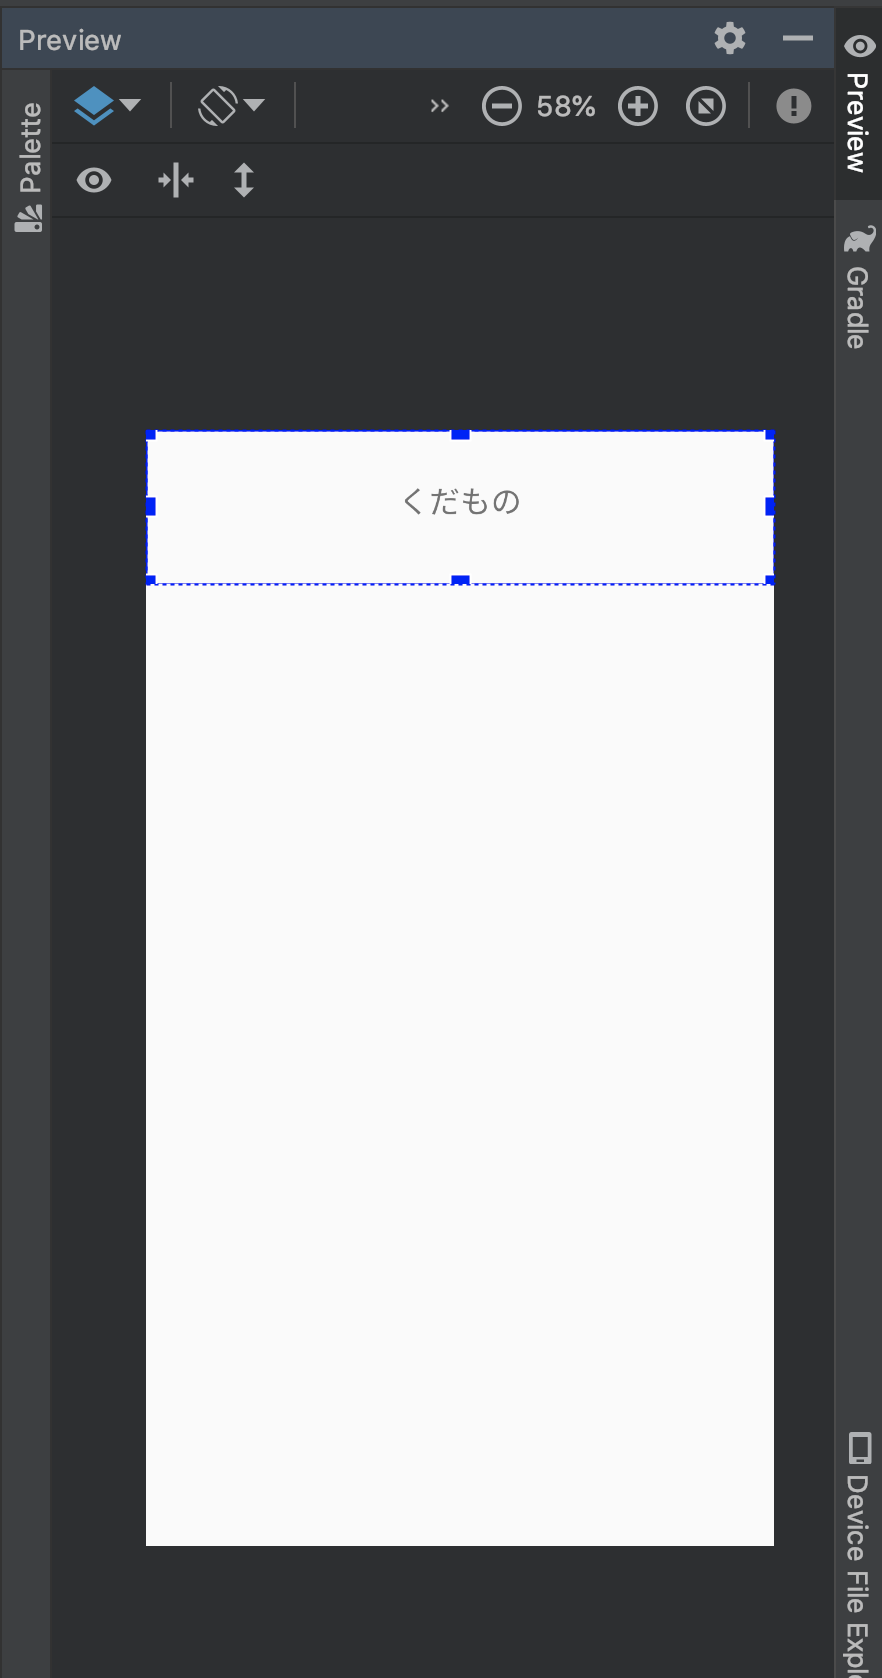
まずはxmlファイルを新規作成し、レイアウトを組みます。
<?xml version="1.0" encoding="utf-8"?>
<layout xmlns:app="http://schemas.android.com/apk/res-auto"
        xmlns:android="http://schemas.android.com/apk/res/android"
        xmlns:tools="http://schemas.android.com/tools">

    <data>
        <variable name="text" type="String"/>
    </data>

    <androidx.constraintlayout.widget.ConstraintLayout
        android:layout_width="match_parent"
        android:layout_height="100dp">

        <TextView
            android:id="@+id/textView"
            android:text="@{text}"
            android:textSize="20sp"
            android:layout_width="wrap_content"
            android:layout_height="wrap_content"
            android:layout_marginStart="8dp"
            android:layout_marginEnd="8dp"
            android:layout_marginBottom="8dp"
            app:layout_constraintStart_toStartOf="parent"
            app:layout_constraintEnd_toEndOf="parent"
            app:layout_constraintTop_toTopOf="parent"
            app:layout_constraintBottom_toBottomOf="parent"
            tools:text="くだもの"/>
    </androidx.constraintlayout.widget.ConstraintLayout>
</layout>
Previewで見るとこんな感じです。TextViewが一つだけある、とても簡単なレイアウトです。
続いてItemのクラスを作ります。
class ListItem(private val text: String) : BindableItem<ItemListBinding>() {
    override fun getLayout(): Int = R.layout.item_list

    override fun bind(viewBinding: ItemListBinding, position: Int) {
        viewBinding.text = text
    }
}
一度ビルドすると、Binding用のクラスItemListBindingが自動生成されるのでそれをimportしましょう。
コードの内容としては、クラス生成のタイミングで受け取ったtextを、xmlの<data>...</data>内で定義したtextへバインドしています。
ItemをRecyclerViewに追加する
最後はMainActivityに記述していきます。
ViewHolderでは複数の選択肢が出てくると思いますが、その中からcom.xwray.groupie.ViewHolderをインポートしてください。
class MainActivity : AppCompatActivity() {
override fun onCreate(savedInstanceState: Bundle?) {
super.onCreate(savedInstanceState)
setContentView(R.layout.activity_main)
val groupAdapter = GroupAdapter<ViewHolder>()
findViewById<RecyclerView>(R.id.recycler_view).adapter = groupAdapter
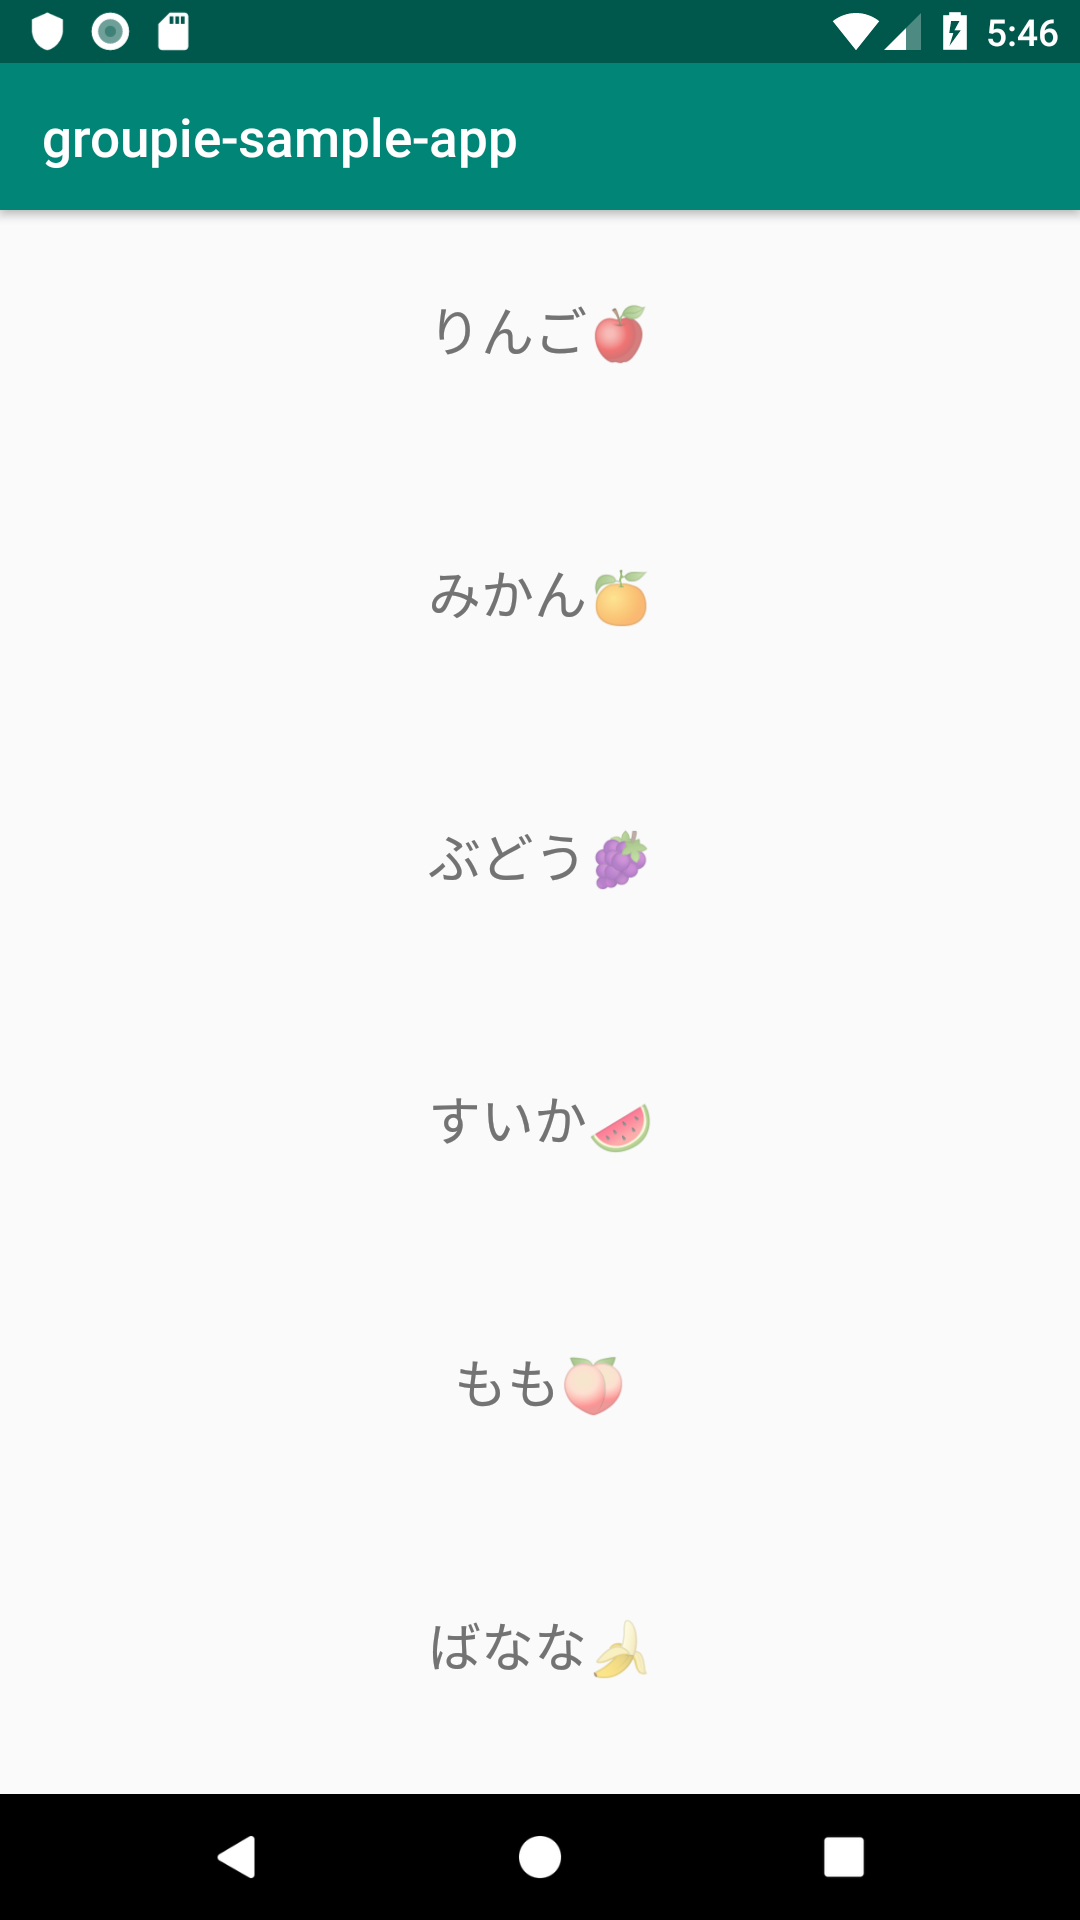
val items = listOf("りんご🍎", "みかん🍊", "ぶどう🍇", "すいか🍉", "もも🍑", "ばなな🍌")
items.forEach { item ->
groupAdapter.add(ListItem(item))
}
}
}
これでItemListが一つずつgroupAdapterに渡され、RecyclerViewに表示されるようになりました。
お疲れ様でした!
さいごに
全てのコードはGithubに載せていますので、必要に応じてお使いください![]()
https://github.com/orimomo/groupie-sample-app