はじめに
本記事ではLaravelでフォーム送信されたデータをスプレッドシートに書き込む手順をご紹介します。先日仕事で触れた内容でしたので、忘れないうちに備忘録として残しておきます。使用環境は以下です。
- Laravel11系
- PHP8.2系
- mac
- docker(sailコマンドを使用)
手順
スプレッドシートへの書き込みは以下の手順で実装していきます。
- google APIでスプレッドシートを有効化
- スプレッドシートAPIの認証ファイルを取得
- 書き込み用のスプレッドシートを作成
- laravelでライブラリをインストール
- 書き込み処理を実装
google APIでスプレッドシートを有効化
まずはご自身のgoogleアカウントからGoogle Cloudのコンソールへログインします。私の場合はすでにプロジェクトを作成しているので、最近使用したプロジェクトが開かれた状態になってます。上部にプロジェクト選択メニューがあるので開きましょう。
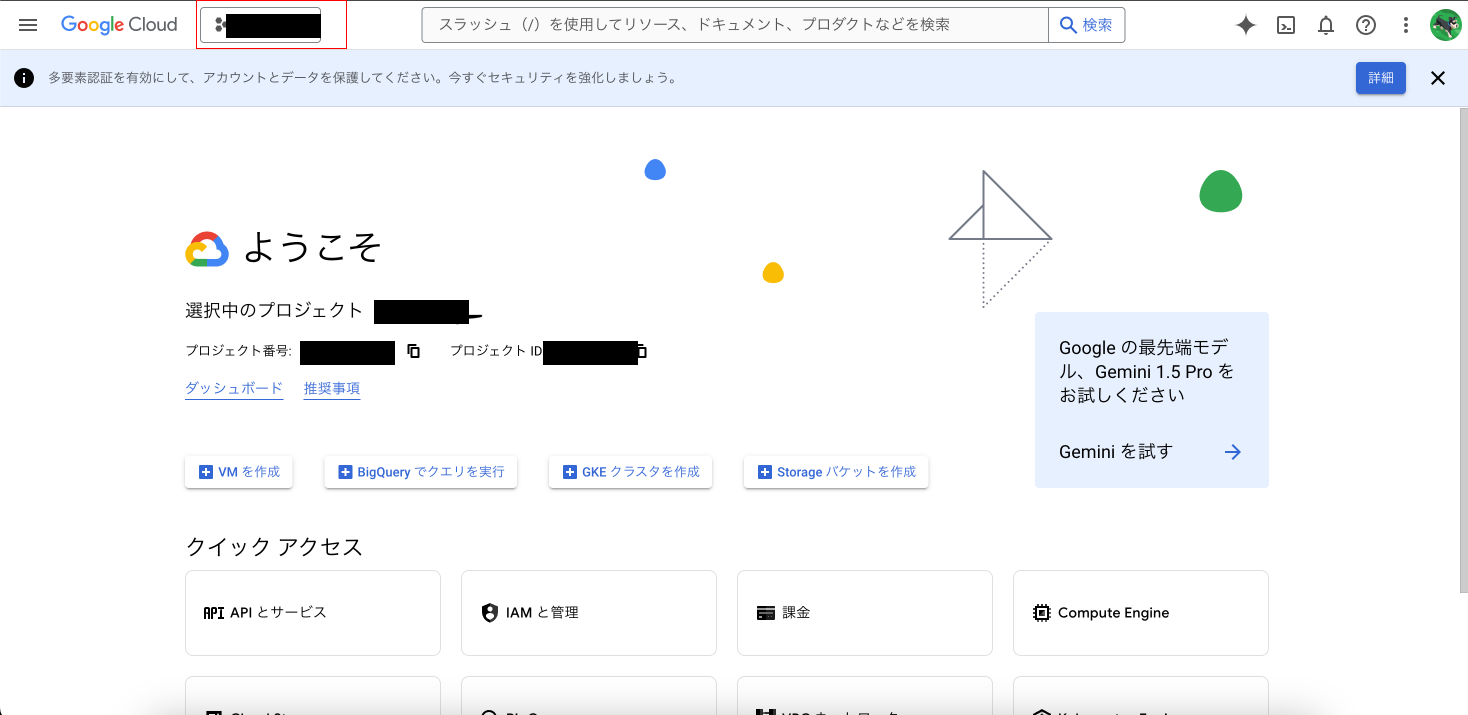
「新しいプロジェクト」をクリックして適当なプロジェクト名で作成します。


プロジェクトが作成されたら、そのプロジェクトを選択した状態でAPIのメニューを開きます。

setts APIを有効化します。


スプレッドシートAPIの認証ファイルを取得
APIの有効化ができましたので、認証情報を作成します。

アクセスするデータ種類はアプリケーションデータを選択してください。サービスアカウント名はお好みで

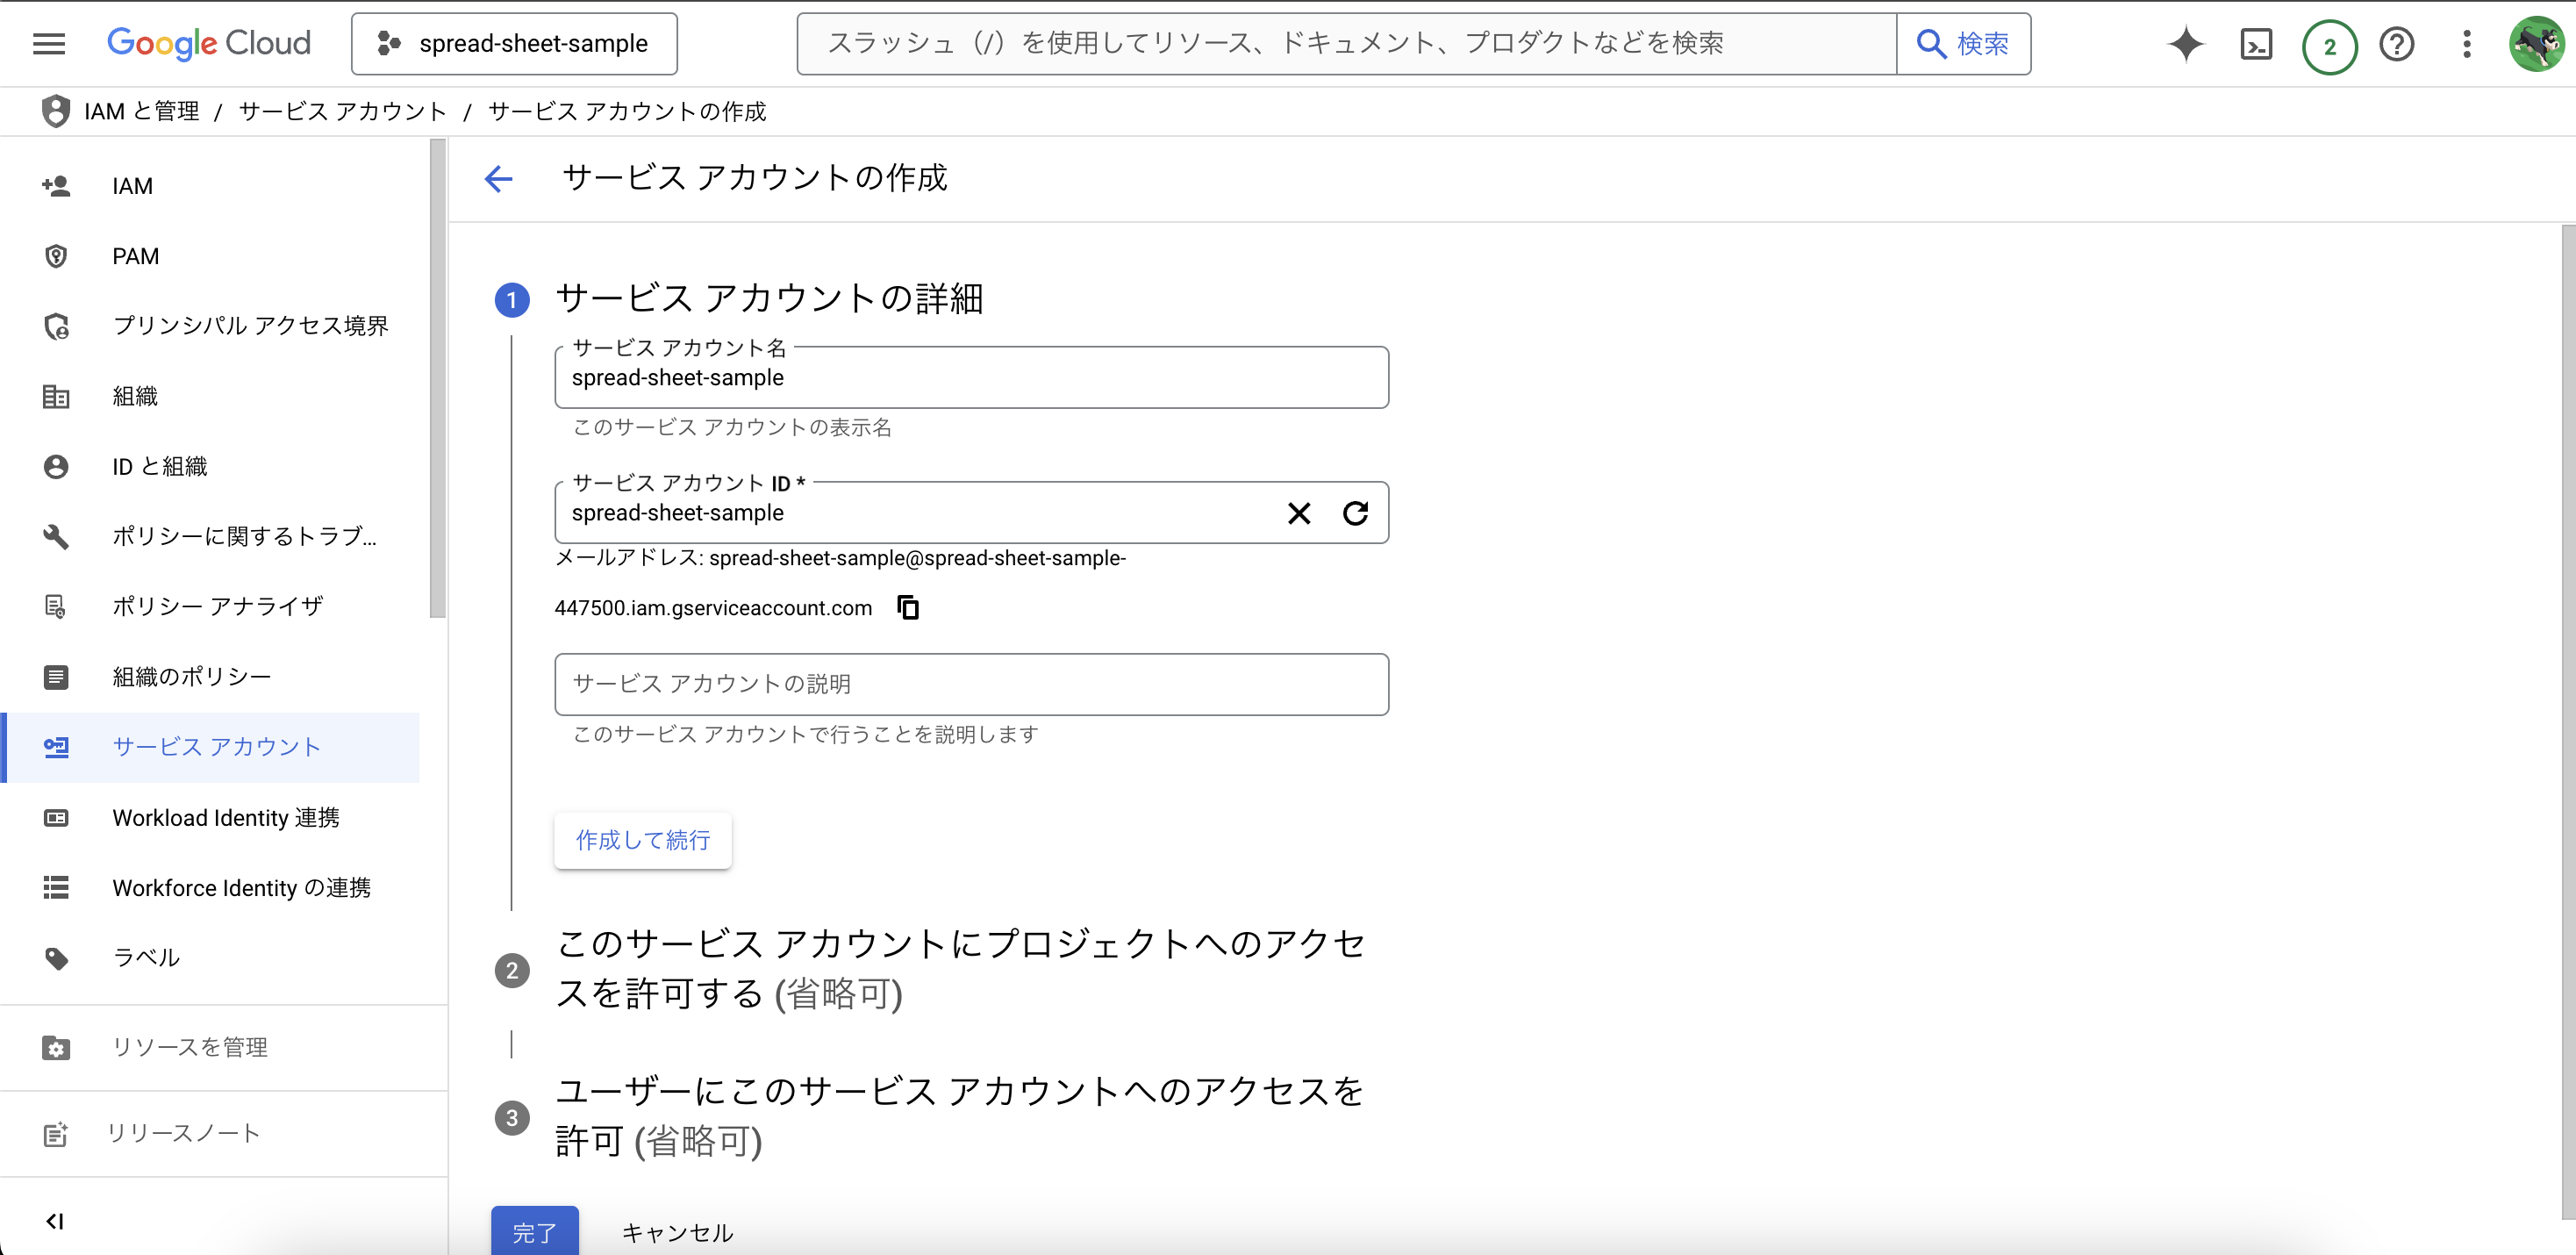
ロールは今回はオーナーにします。実務ではプロジェクトに応じて適切な権限を設定してください。
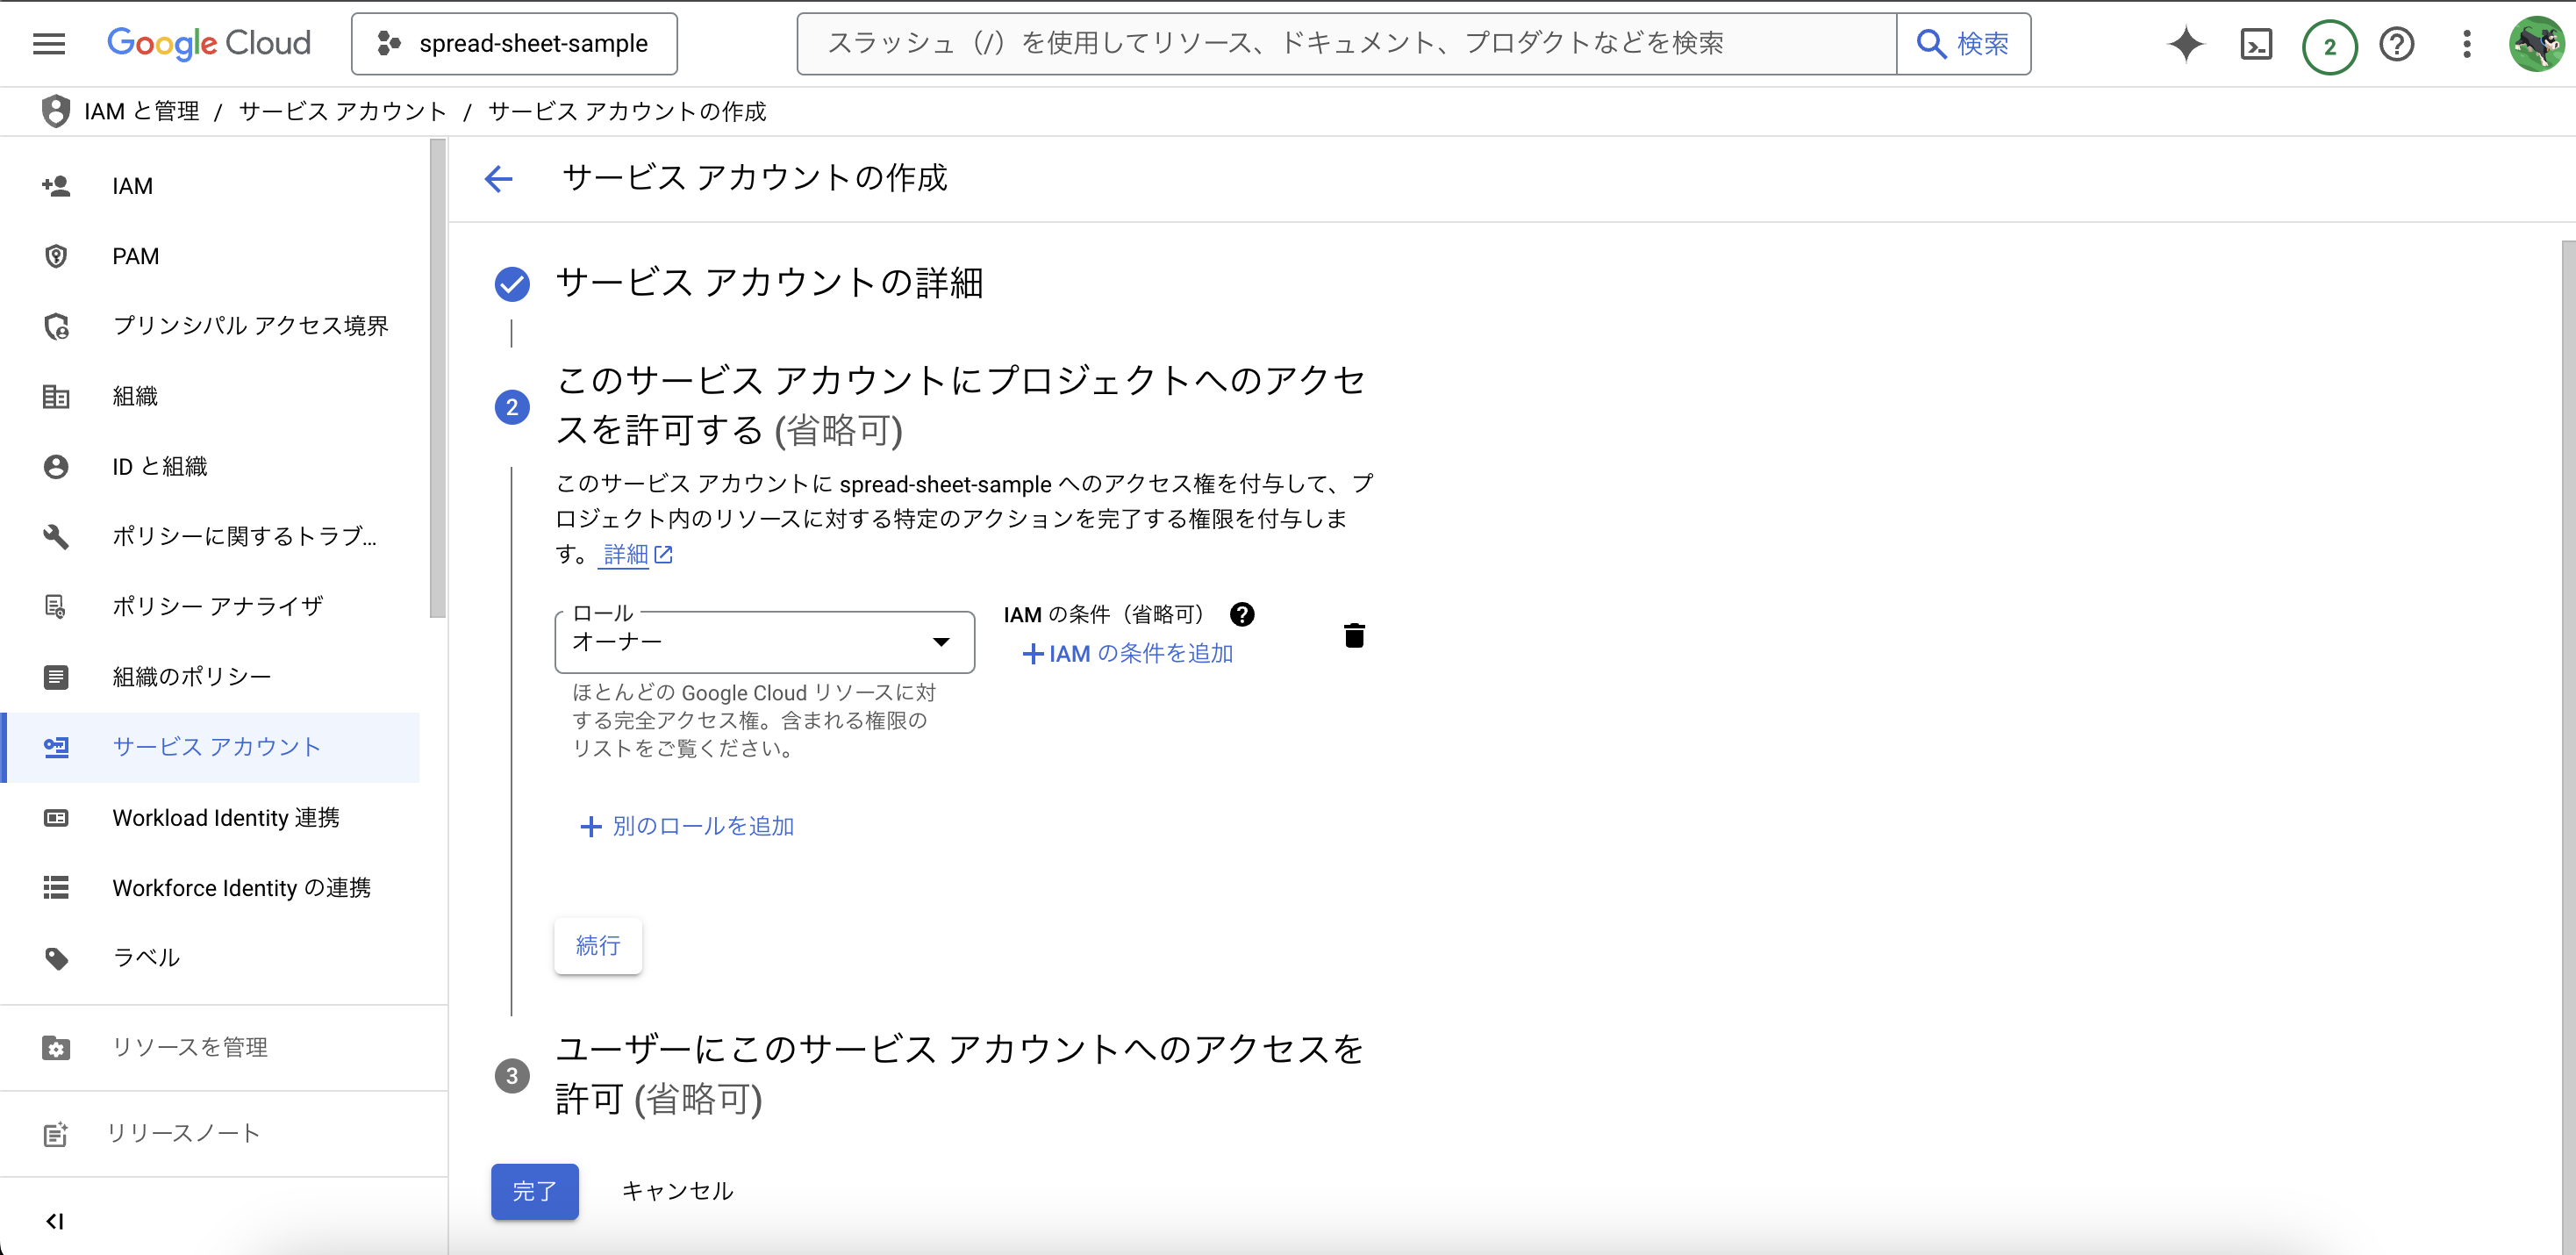
サービスアカウントの許可はスキップします。

サービスアカウントが発行されたので、次はアプリケーション側で必要な認証ファイルを作成します。
認証情報メニューから先ほど発行したアカウントを選択してください。

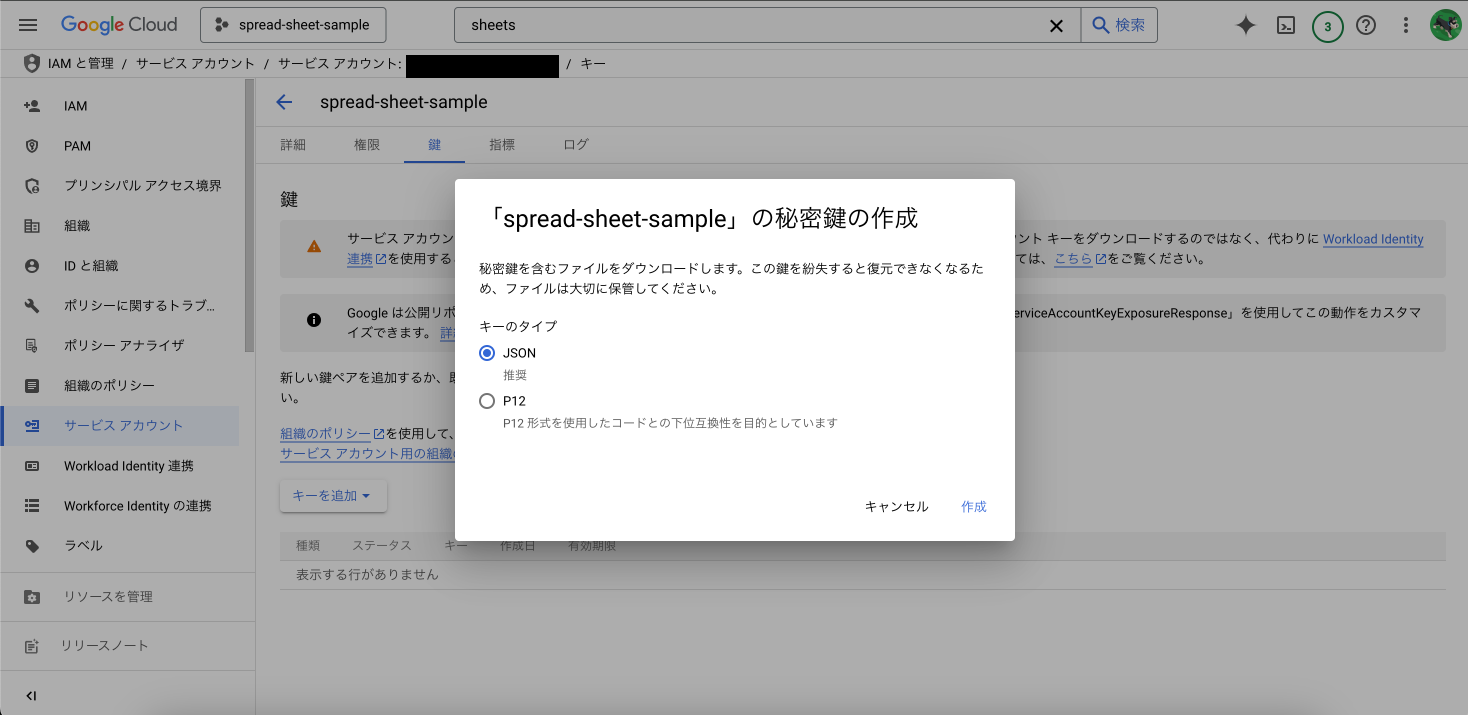
「鍵」タブからキーを追加し、jsonファイルをダウンロードしてください。これでGCP側の設定は完了です。

書き込み用のスプレッドシートを作成
ここはスプレッドシートを新規作成するだけなのでサクサクっと!
新規でスプレッドシートを作成し、先ほどのサービスアカウントのメールアドレスを編集者に追加してあげるだけです
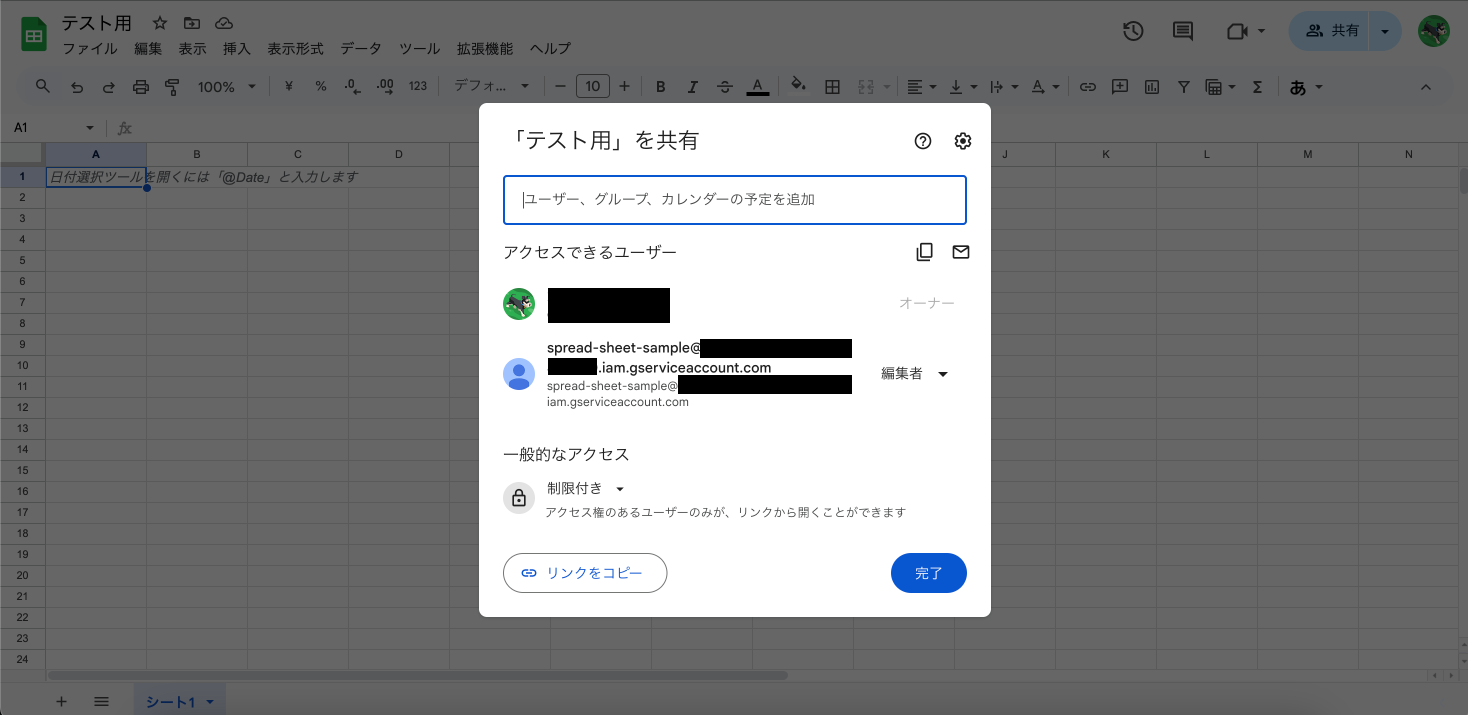
今回は名前、メールアドレス書き込むとしましょう。

laravelでライブラリをインストール
ではここからはLaravel側の作業です。プロジェクトを作成されている前提です。
まずはgoogle API用のライブラリをインストールします。ライブラリの詳細はこちらを参照してください。
composer require google/apiclient
書き込み処理を実装
.envとconfigにSPREADSHEET_IDを追加します。SPREADSHEET_IDはスプレッドシートのURLのhttps://docs.google.com/spreadsheets/d/(スプレッドシートのID)/edit#gid=0の部分です。
SPREADSHEET_ID=ご自身のスプレッドシートID
<?php

return [

    //...省略
    'spreadsheet' => [
        'sheet_id' => env('SPREADSHEET_ID'),
    ],

];
スプレッドシート書き込む用のサービスクラスを定義します。このクラスのインスタンスをコントローラーで使用してスプレッドシートに書き込んでいきます。
<?php

namespace App\Services;

class GoogleSheetService
{
    public static function instance()
    {
        $credentials_path = storage_path('app/private/jsonファイル名');
        $client = new \Google_Client();
        $client->setScopes([\Google_Service_Sheets::SPREADSHEETS]);
        $client->setAuthConfig($credentials_path);

        return new \Google_Service_Sheets($client);
    }
}
また、こちらの記述にてダウンロードしたjsonファイルを使用します。ファイルパスは適切な設定をすればどこでもいのですが、セキュアなファイルなので私はstogrageのprivateフォルダに格納します。
jsonファイルを複数人で共有する場合、git管理は避けた方がいいでしょう。理由は上述の通り、セキュアなファイルだからです。
書き込み処理のコントローラーを定義します。今回は簡易的にするためバリデーションチェックは省略します。また、Userモデルを想定してリクエストを処理します。
モデル、コントローラー、ビューは以下です。
<?php

namespace App\Http\Controllers;

use App\Models\User;
use Illuminate\Http\Request;
use App\Http\Controllers\Controller;

class SpreadSheetController extends Controller
{
    public function index()
    {
        return view('index');
    }

    public function store(Request $request)
    {
        $user = new User([
            'name' => $request->name,
            'email' => $request->email,
        ]);

        $user->writeSpreadSheet();

        return to_route('spreadsheet.index');
    }
}
<?php

namespace App\Models;

// use Illuminate\Contracts\Auth\MustVerifyEmail;
use Illuminate\Database\Eloquent\Factories\HasFactory;
use Illuminate\Foundation\Auth\User as Authenticatable;
use Illuminate\Notifications\Notifiable;
use App\Models\GoogleSheet;
use App\Services\GoogleSheetService;

class User extends Authenticatable
{
    /** @use HasFactory<\Database\Factories\UserFactory> */
    use HasFactory, Notifiable;

    /**
     * The attributes that are mass assignable.
     *
     * @var list<string>
     */
    protected $fillable = [
        'name',
        'email',
        'password',
    ];

    /**
     * The attributes that should be hidden for serialization.
     *
     * @var list<string>
     */
    protected $hidden = [
        'password',
        'remember_token',
    ];

    /**
     * Get the attributes that should be cast.
     *
     * @return array<string, string>
     */
    protected function casts(): array
    {
        return [
            'email_verified_at' => 'datetime',
            'password' => 'hashed',
        ];
    }

    public function writeSpreadSheet()
    {
        $sheets = GoogleSheetService::instance();
        $sheet_id = config('services.spreadsheet.sheet_id');

        $output = [
            $this->name,
            $this->email,
        ];

        $values = new \Google_Service_Sheets_ValueRange();
        $values->setValues([
            'values' => $output,
        ]);
        $params = ['valueInputOption' => 'USER_ENTERED'];
        $sheets->spreadsheets_values->append(
            $sheet_id,
            'A1',
            $values,
            $params
        );

    }
}
<form action="{{ route('spreadsheet.store') }}" method="post">
    <input type="text" name="name" placeholder="Name">
    <input type="email" name="email" placeholder="Email">
    <button type="submit">Submit</button>
</form>
一応ルーティングも載せておきます。
<?php

use Illuminate\Support\Facades\Route;
use App\Http\Controllers\SpreadSheetController;

Route::resource('spreadsheet', SpreadSheetController::class)->only(['index', 'store']);
では動かしてみます。http://localhost/spreadsheetにアクセスし、適用な値を入力して送信!

書き込み成功です!あとはご自身のすきな値にカスタマイズしてください!

まとめ
最後までご覧いただきありがとうございます!DBを使用するほどではないから、スプレッドシートにデータを貯めておきたい場合などに使えるのではないかなと思います。もし本記事に誤りがございましたらご教示いただけますと幸いです。最後になりますが、こちらの記事にて私が普段どんな心構えで仕事に臨んでいるかを書いていますので、よければ覗いてみてください!また、本記事で取り扱ったソースコードの全量はgithubをご覧いただければと思います。