今回作るもの
Segueとpresentで画面遷移を実行します。
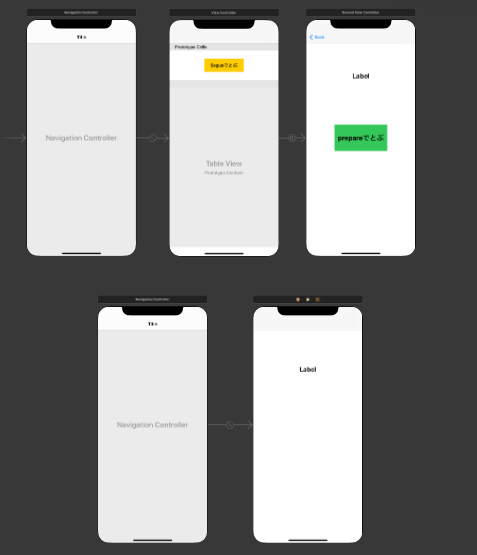
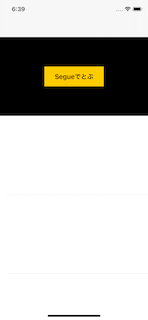
はじめの画面(ViewController)の「Segueでとぶ」ボタンを押したら、2枚目の画面(SecondViewController)へ遷移し
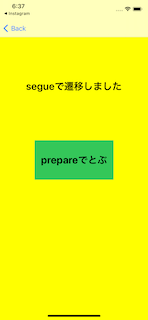
2枚目の「presentでとぶ」ボタンを押したら、3枚目の画面(ThirdViewController)へ遷移します。
色はそれぞれボタンの色と遷移先の背景色を揃えています。
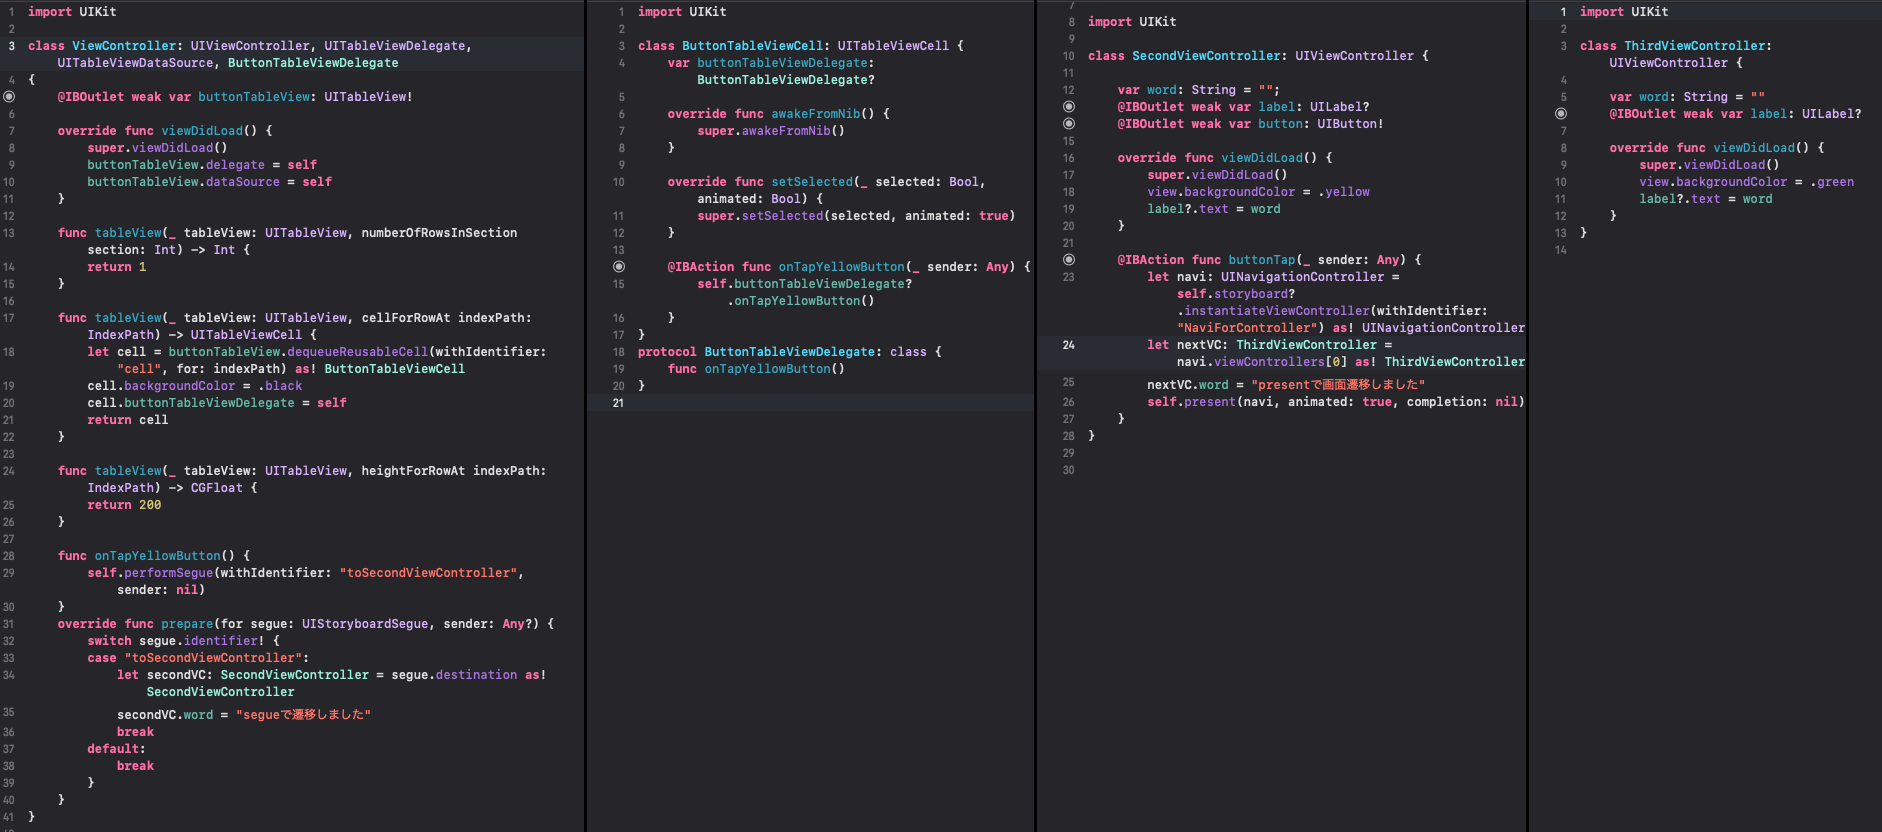
. . ViewController . . SecondViewController . . ThirdViewController . .
前に[Swift] Delegateが分からない初心者のための最後の受け皿で作ったコードを使用しています。(詳しいdelegateの説明はそちらを参照してください)
Segueを使用した画面遷移


- IdentiferとsegueのwithIdentifierを一致させます。
- ここでは「segueで遷移しました」と遷移先(SecondViewController)で表示させたいので、prepareを使用して先に情報を入れます。segueで遷移する前にprepareが走るので、prepareで値渡しをする
    func onTapYellowButton() {
        // SecondViewControllerへ画面遷移をする
        self.performSegue(withIdentifier: "toSecondViewController", sender: nil) // storyboadと同じIdentifierを使用
    }
    override func prepare(for segue: UIStoryboardSegue, sender: Any?) {
        switch segue.identifier! {
        case "toSecondViewController": // SegueのIdentifier
            let secondVC: SecondViewController = segue.destination as! SecondViewController
            secondVC.word = "segueで遷移しました" // SecondViewControllerに値を渡す
            break
        default:
            break
        }
    }
    var word: String = "";
    @IBOutlet weak var label: UILabel?
    @IBOutlet weak var button: UIButton!

    override func viewDidLoad() {
        super.viewDidLoad()
        view.backgroundColor = .yellow // 背景色を黄色にする
        label?.text = word // prepareによりwordに"segueで遷移しました"が入っている
    }
presentを使用した画面遷移
Segueだと画面遷移する際繋がないといけませんが、presentだとその必要がありません。よって、別のNavigationControllerにも画面遷移できるのです。
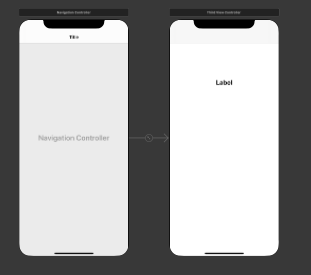
ちなみにNavigationControllerって何?っていう方のために補足ですが、NavigationControllerとは枠のようなものです。その上のTableViewを乗せていることになります。
イメージはこんな感じです。
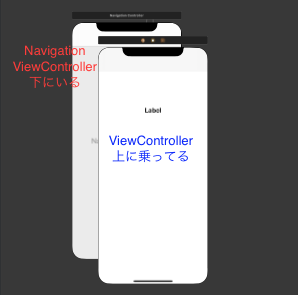
なのでNavigationControllerを使用すると、上に枠がついているように見えます。
余談はおいといて、実装の方に入っていきます。
- NavigationControllerのIdentifierとコード上のwithIdentifierを合わせます。

- present前に値をThirdViewControllerに渡します
@IBAction func buttonTap(_ sender: Any) {
let navi: UINavigationController = self.storyboard?.instantiateViewController(withIdentifier: "NaviForController") as! UINavigationController
let nextVC: ThirdViewController = navi.viewControllers[0] as! ThirdViewController
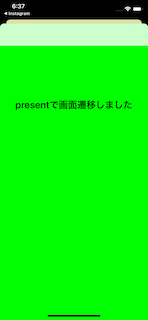
nextVC.word = "presentで画面遷移しました" // ThirdViewControllerのwordに値を渡す
self.present(navi, animated: true, completion: nil) // ThirdViewControllerへ画面遷移
}
    var word: String = ""
    @IBOutlet weak var label: UILabel?

    override func viewDidLoad() {
        super.viewDidLoad()
        view.backgroundColor = .green // 背景色を緑にする
        label?.text = word // SecondViewControllerのnextVC.word = "presentで画面遷移しました"により入っている
    }
最後に
いかがだったでしょうか?個人的にSegueの時に使用する際にprepareを必ず通ることを初めて知ったときは衝撃でした。
今回は明記していませんが、storyboardのclassをコードのclassと一致させることも忘れがちなので忘れないようにしなくてはいけません。
ご参考程度にStoryboardと全てのコードです