初めに
Aurora を使う機会があったので自分なりに触ってみたことのメモです。
データベースの作成
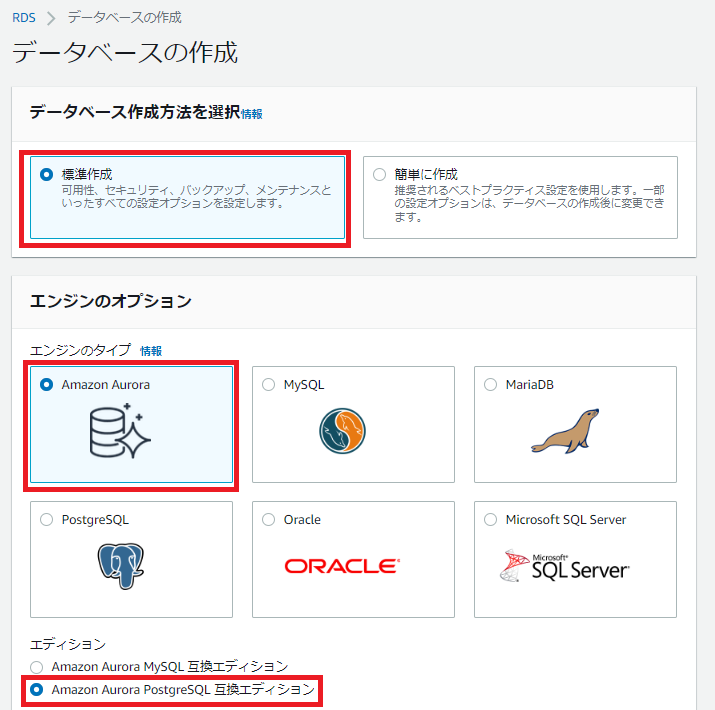
マネジメントコンソールから「データベースの作成」をクリックし、作成方法とエンジンのタイプを選択します。エディションは PostgreSQL 互換を選択します。
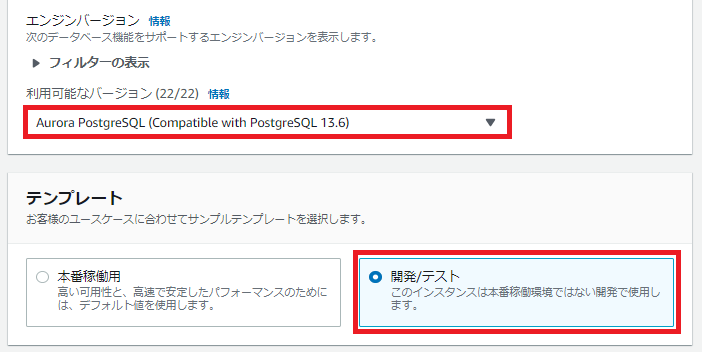
エンジンバージョンは最新の 13.6 を選択します。検証用なのでテンプレートは「開発/テスト」を選択します。
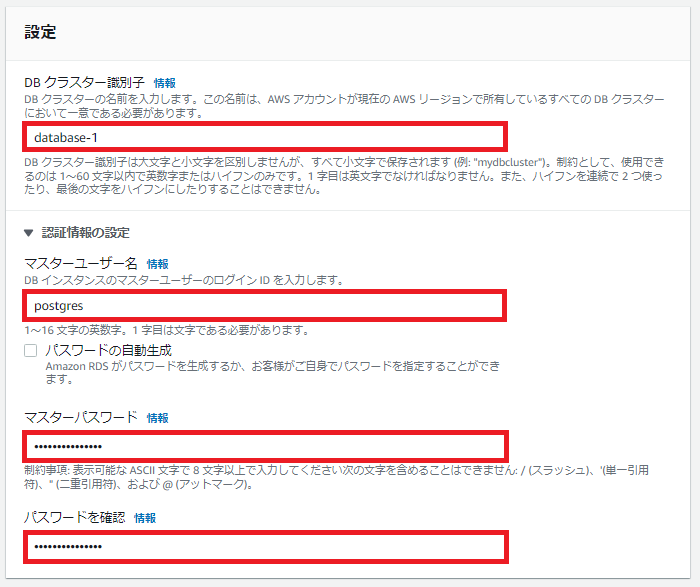
以下、必要な情報を入力します。認証情報はログイン時に必要になります。
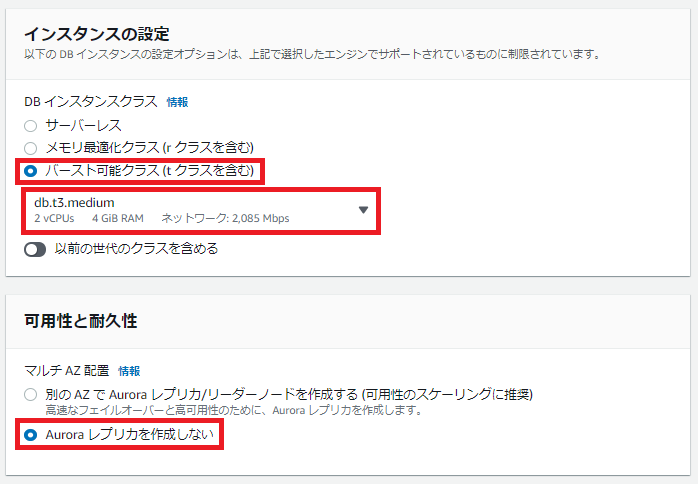
検証用のため、汎用の小さいインスタンスタイプを選択します。
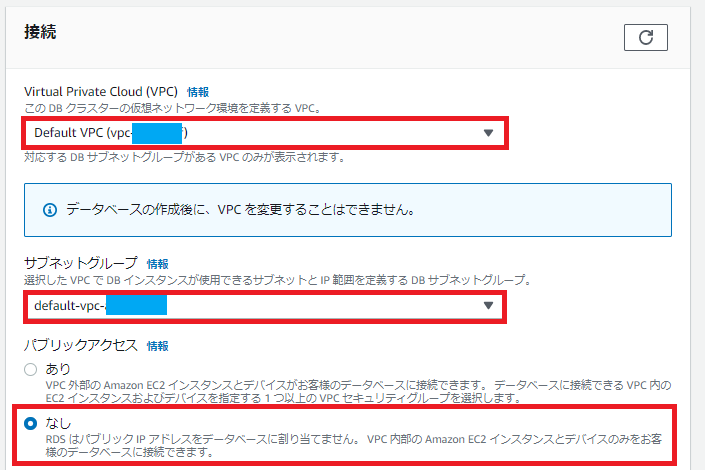
VPC などは適切なものを選択します。
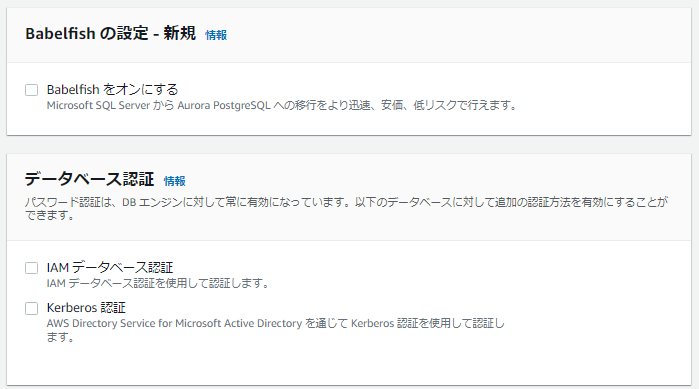
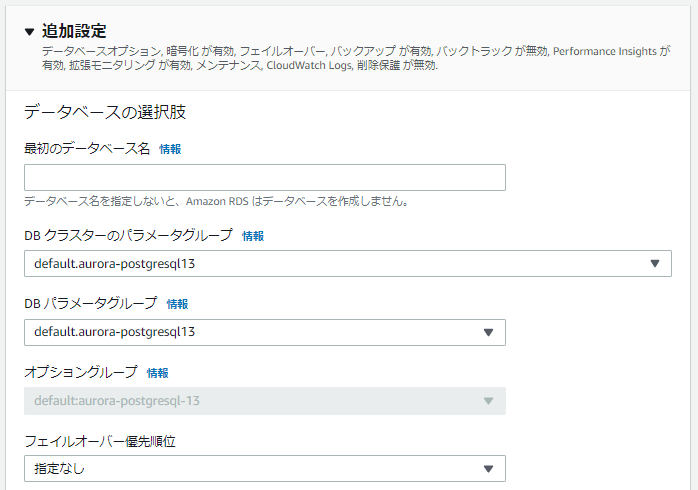
以下はデフォルトのまま進めます。
データベース名はデフォルトで作成されるデータベースです。空欄にすると作成されません。ログイン後、手動で作成するので空欄にします。
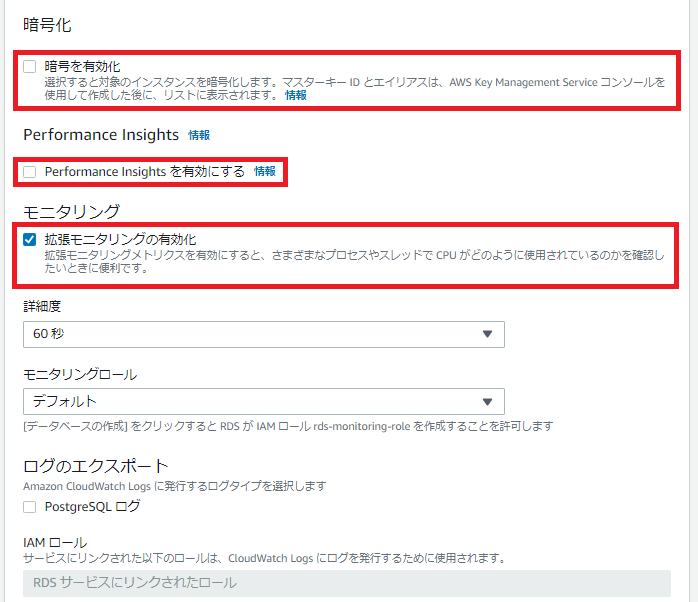
検証用ため、暗号化や Perfomance Insight や無効化しておきます。
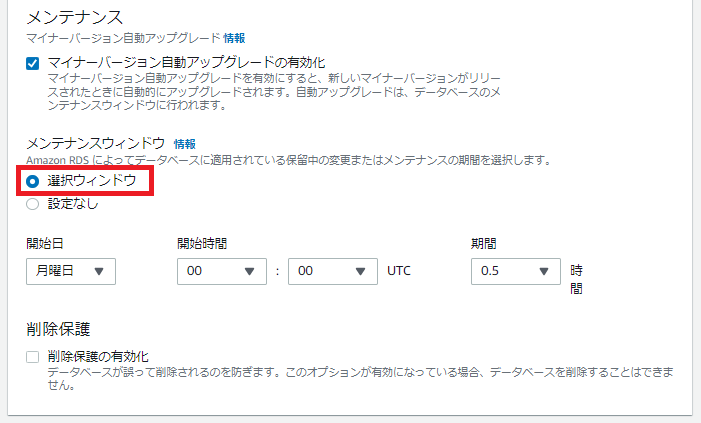
メンテナンスウィンドウを「選択ウィンドウ」にすると、メンテナンス期間をカスタマイズできます。
「データベースの作成」をクリックします。
Aurora データベース に接続する
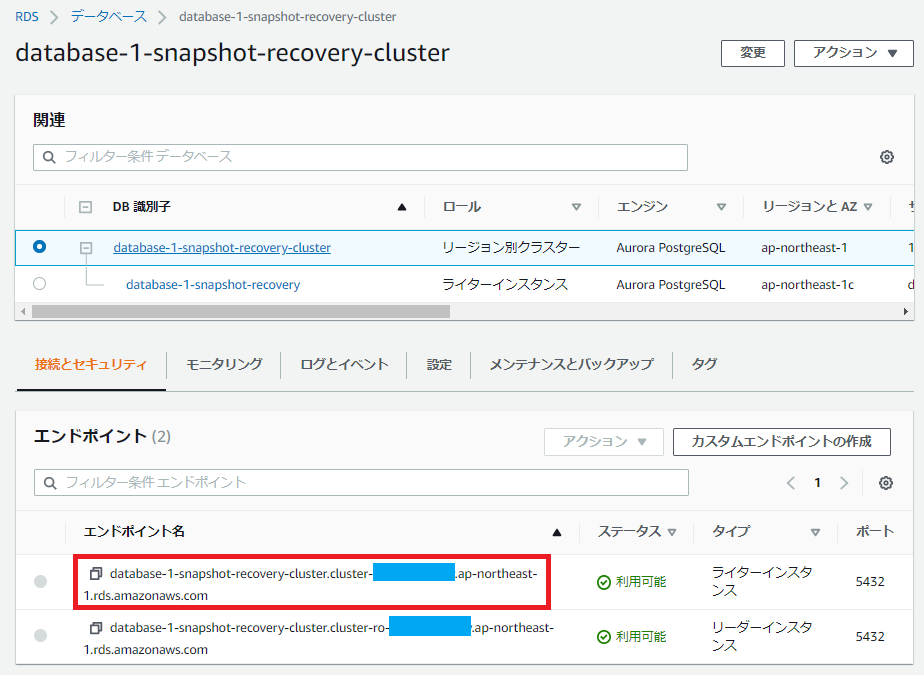
Aurora クラスターのエンドポイントを取得する
ライターインスタンスのエンドポイントをコピーします。
PostgreSQL クライアントのインストール
- PostgreSQL クライアントをインストールする
sudo amazon-linux-extras install -y postgresql13
なお、特定のバージョンでインストールし直したいときは以下の手順で行います。postgresql13 をアンインストールし、postgresql12 をインストールします。
-
postgresql13クライアントをアンインストールする
sudo yum remove $(yum list installed | grep amzn2extra-postgresql13 | awk '{ print $1 }')
- アンインストールされたことを確認する
[ec2-user@ip-172-31-8-7 ~]$ psql
-bash: /usr/bin/psql: No such file or directory
-
amazon-linux-extrasでインストール可能なトピックを確認する
[ec2-user@ip-172-31-8-7 ~]$ amazon-linux-extras list | grep 'postgresql'
  5  postgresql9.6            available    \
  6  postgresql10             available    [ =10  =stable ]
 41  postgresql11             available    [ =11  =stable ]
 58  postgresql12             available    [ =stable ]
 59  postgresql13=latest      enabled      [ =stable ]
-
postgresql13トピックを非有効化する
sudo amazon-linux-extras disable postgresql13
-
postgresql12クライアントをインストールする
sudo amazon-linux-extras install -y postgresql12
※非有効化しない状態で postgresql12 をインストールしても、postgresql13 がインストールされます。
[ec2-user@ip-172-31-8-7 ~]$ psql --version
psql (PostgreSQL) 13.3
サーバにログインする
-
psqlコマンドでサーバにログインする。パスワードを聞かれるので入力する。- psql
-
-h・・・ サーバのホスト名 -
-p・・・ ポート番号 -
-U・・・ ログインユーザー名 -
-d・・・ 接続先データベース
psql -h database-1-instance-1.xxxxxxxx.ap-northeast-1.rds.amazonaws.com -p 5432 -U postgres -d postgres
CRUD - 例
- DB を作成する
postgres=> CREATE DATABASE mydb;
CREATE DATABASE
postgres=> \l
                                  List of databases
   Name    |  Owner   | Encoding |   Collate   |    Ctype    |   Access privileges
-----------+----------+----------+-------------+-------------+-----------------------
 mydb      | postgres | UTF8     | en_US.UTF-8 | en_US.UTF-8 |
 postgres  | postgres | UTF8     | en_US.UTF-8 | en_US.UTF-8 |
 rdsadmin  | rdsadmin | UTF8     | en_US.UTF-8 | en_US.UTF-8 | rdsadmin=CTc/rdsadmin
 template0 | rdsadmin | UTF8     | en_US.UTF-8 | en_US.UTF-8 | =c/rdsadmin          +
           |          |          |             |             | rdsadmin=CTc/rdsadmin
 template1 | postgres | UTF8     | en_US.UTF-8 | en_US.UTF-8 | =c/postgres          +
           |          |          |             |             | postgres=CTc/postgres
(5 rows)
- DB を切り替える
postgres=> \c mydb
- テーブルを作成する。(大文字でテーブル名を作成したい場合、ダブルクォーテーションで囲う)
- CREATE TABLE
- 作成した後、
\dでテーブル一覧を表示する。
mydb=> CREATE TABLE "movies" (
  title  varchar(100) PRIMARY KEY,
  year   integer
);
CREATE TABLE
mydb=> \d
         List of relations
 Schema |  Name  | Type  |  Owner
--------+--------+-------+----------
 public | movies | table | postgres
(1 row)
- 行を挿入する
mydb=> INSERT INTO movies (title, year) VALUES ('Fight Club', 1999);
INSERT 0 1
mydb=> INSERT INTO movies VALUES ('Frozen', 2013);
INSERT 0 1
- テーブルの全データを表示する
mydb=> SELECT * FROM movies;
   title    | year
------------+------
 Fight Club | 1999
 Frozen     | 2013
(2 rows)
- テーブルの全行を削除する
mydb=> DELETE FROM movies;
DELETE 2
- テーブルを削除する
mydb=> DROP TABLE movies;
DROP TABLE
mydb=> \d
Did not find any relations.
- ログアウト
mydb=> \q
スナップショットの取得・復元
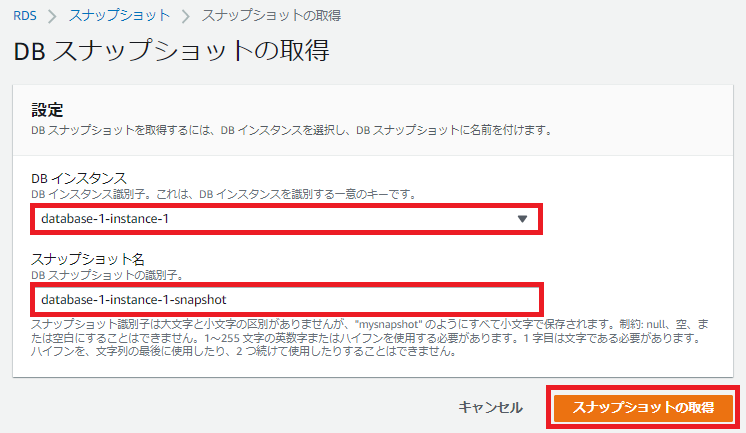
「スナップショットの取得」をクリックします。
必要な情報を入力し、「スナップショットの取得」をクリックします。
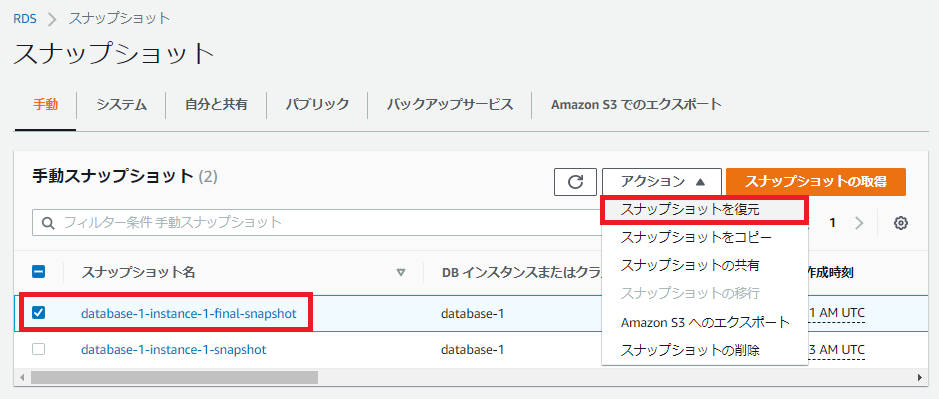
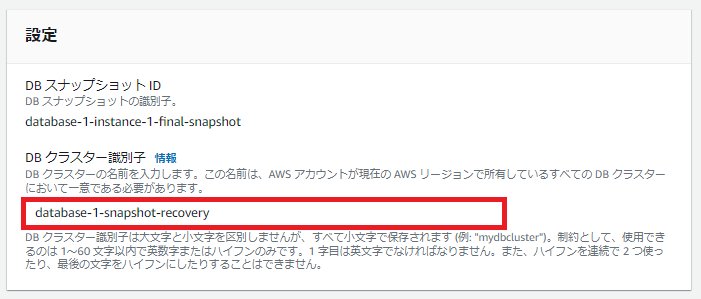
復元する場合は、復元したいスナップショットを選択し、「スナップショットを復元」をクリックします。
識別子を入力します。
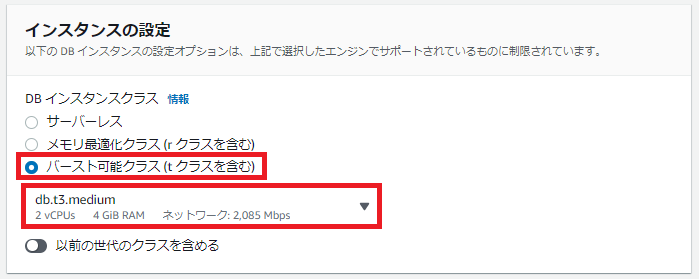
インスタンスタイプを選択します。
最後に「DB クラスターを復元」をクリックします。
CloudFormation で Aurora PostgreSQl を作成
CloudFormation で Aurora PostreSQL を作成しました。
AWSTemplateFormatVersion: 2010-09-09
Resources:
  AuroraCluster:
    Type: 'AWS::RDS::DBCluster'
    Properties:
      Engine: aurora-postgresql
      EngineMode: provisioned
      EngineVersion: '13.6'
      MasterUsername: postgres
      MasterUserPassword: PostgresAdmin1!
  AuroraInstance:
    Type: 'AWS::RDS::DBInstance'
    Properties:
      Engine: aurora-postgresql
      DBInstanceClass: db.t3.medium
      DBClusterIdentifier: !Ref AuroraCluster
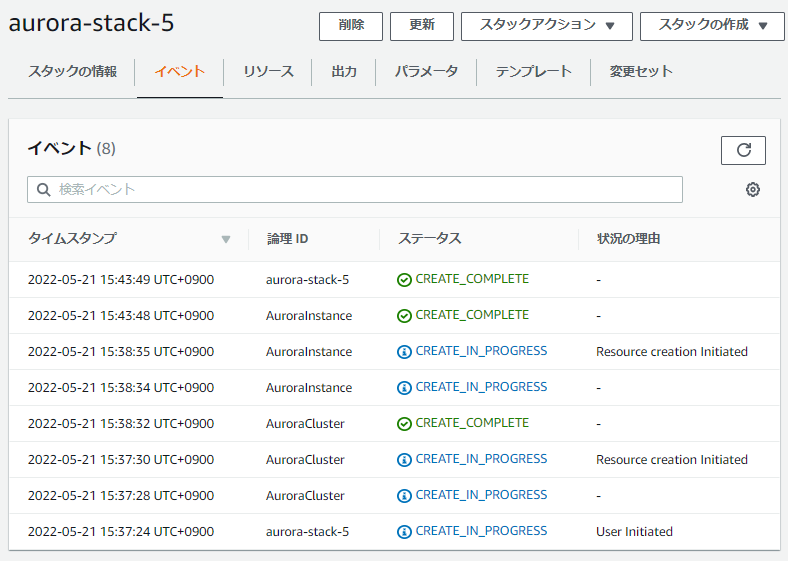
以下はテンプレートの実行結果です。
参考記事
