初めに
API Gateway で作成した API の URL は、
https://api-id.execute-api.region.amazonaws.com/stage
という形式です。これをカスタマイズしてわかりやすい URL にしたいことがあります。
以下のドキュメントを参考にやってみました。
手順
1. ACM にサーバ証明書をインポートする
途中で聞かれる Common Name にドメイン名を入力します。(e.g. example-20210811.com)
openssl genrsa -out server.key 2048
openssl req -new -sha256 -key server.key -out server.csr
openssl x509 -req -in server.csr -signkey server.key \
> -set_serial 01 -out server.crt -days 3650 -sha256
aws acm import-certificate --region us-east-1 \
> --certificate fileb://server.crt \
> --private-key fileb://server.key \
> --certificate-chain fileb://server.crt
openssl コマンドよりも、OpenVPN の easy-rsa の方が慣れていればこちらでもよいです。
git clone https://github.com/OpenVPN/easy-rsa
cd easy-rsa/easyrsa3/
./easyrsa init-pki
./easyrsa build-ca nopass
./easyrsa build-server-full example-20210811.com nopass
mkdir custom_folder
cp pki/ca.crt pki/issued/example-20210811.com.crt \
> pki/private/example-20210811.com.key custom_folder/
cd custom_folder/
aws acm import-certificate --region us-east-1 \
> --certificate fileb://example-20210811.com.crt \
> --private-key fileb://example-20210811.com.key \
> --certificate-chain fileb://ca.crt
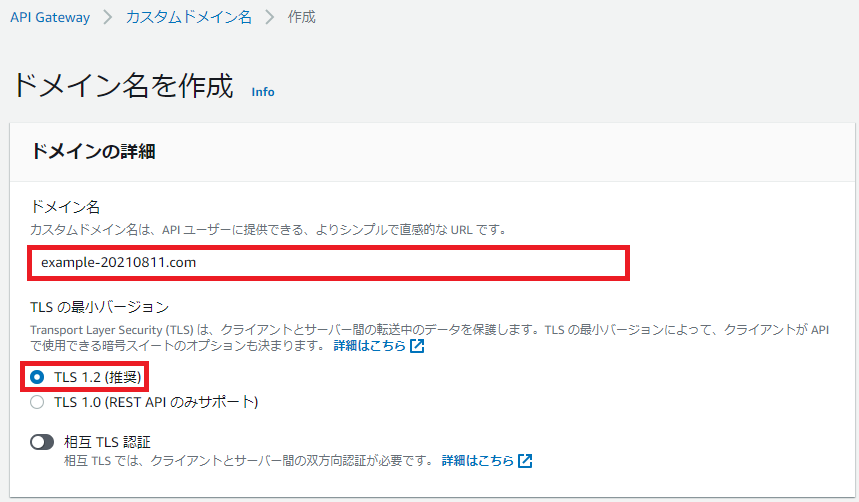
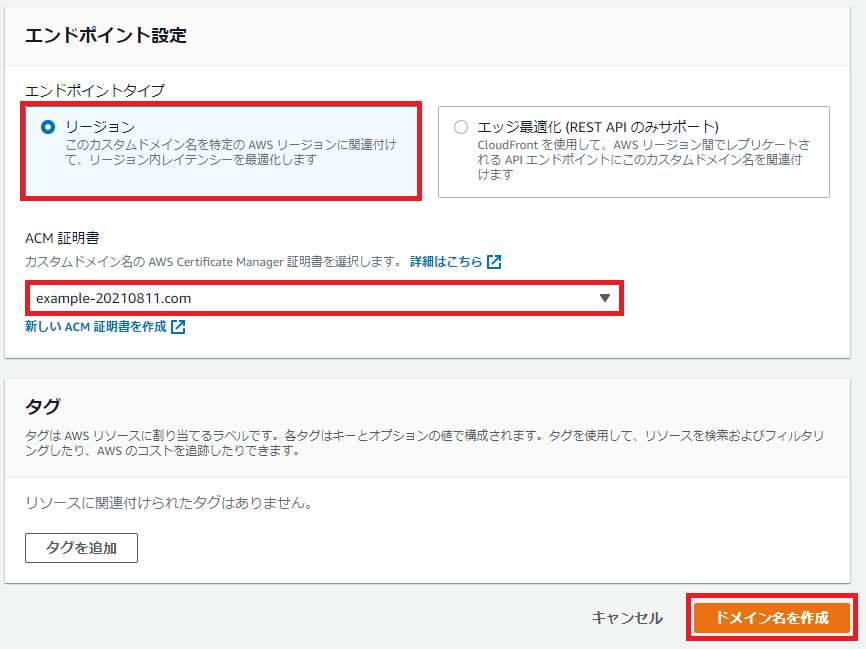
2. カスタムドメインを作成する
ドメイン名を入力します。Route 53 で取得したドメイン名にします。
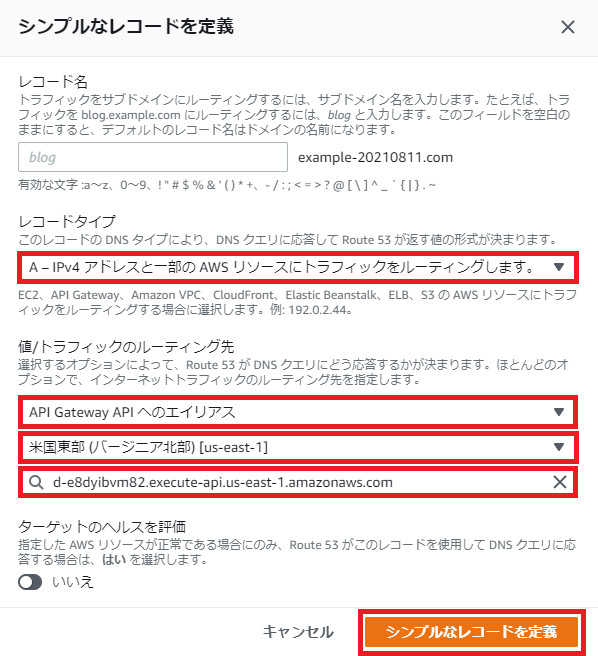
3. Route 53 でレコードを作成する
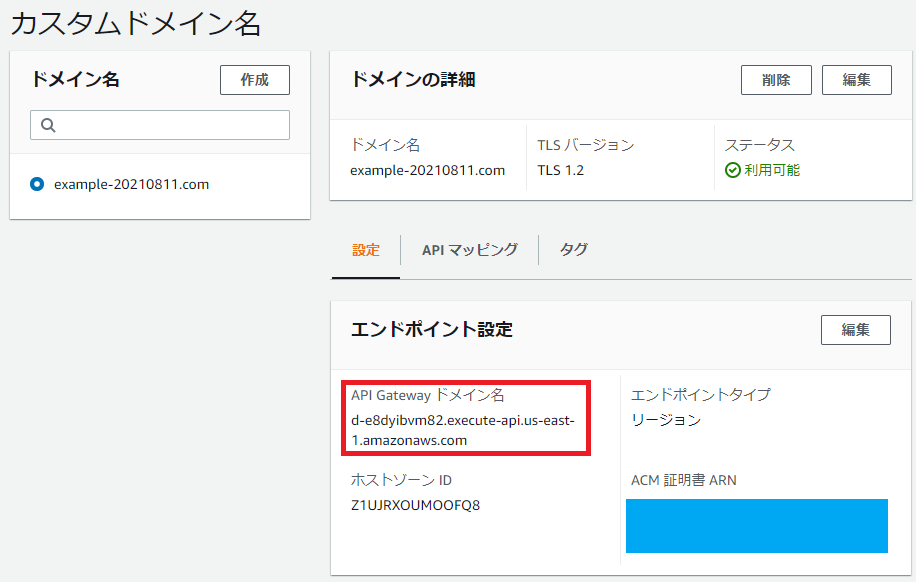
シンプルルーティングを選択し、作成した API Gateway のカスタムドメイン名を設定します。
ここで「カスタムドメイン名」とは、以下のことです。
4. バックエンドを作成する
「custom-domain-api」という Lambda 関数を作成します。ソースコードはデフォルトのまま進めます。
index.js
exports.handler = async (event) => {
    const response = {
        statusCode: 200,
        body: JSON.stringify('Hello from Lambda!'),
    };
    return response;
};
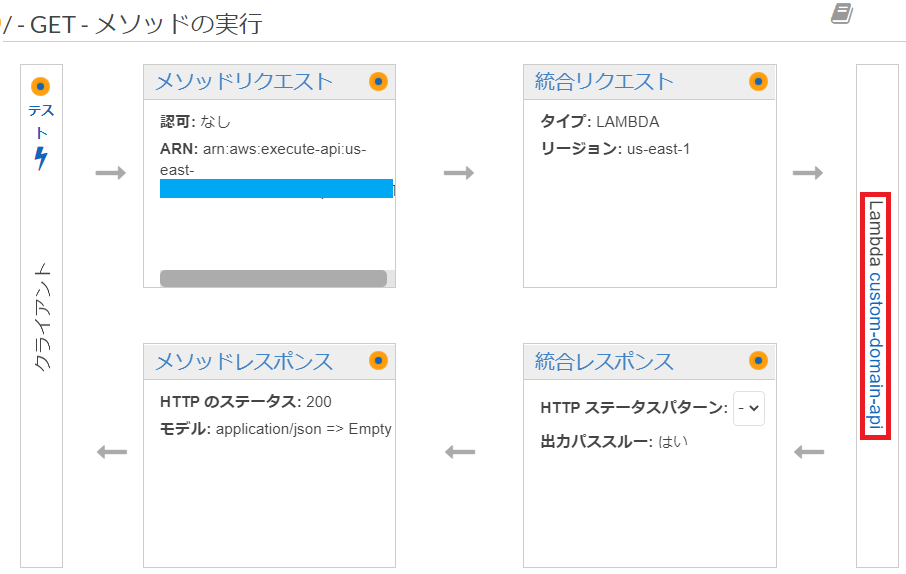
5. REST API を作成する
GET メソッドを作成し、4 で作成した Lambda 関数を統合します。
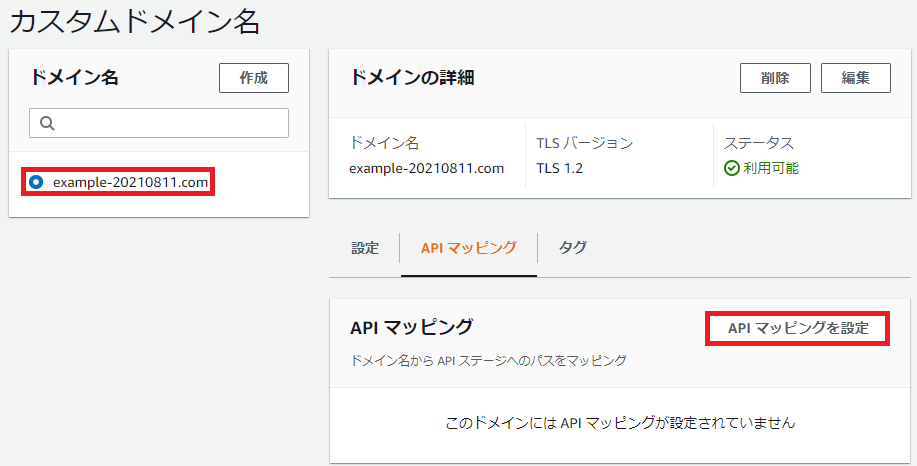
6. API マッピングを作成する
以下の「API マッピングを設定」をクリックします。
REST API と、ステージ変数を選択します。その後「保存」をクリックします。
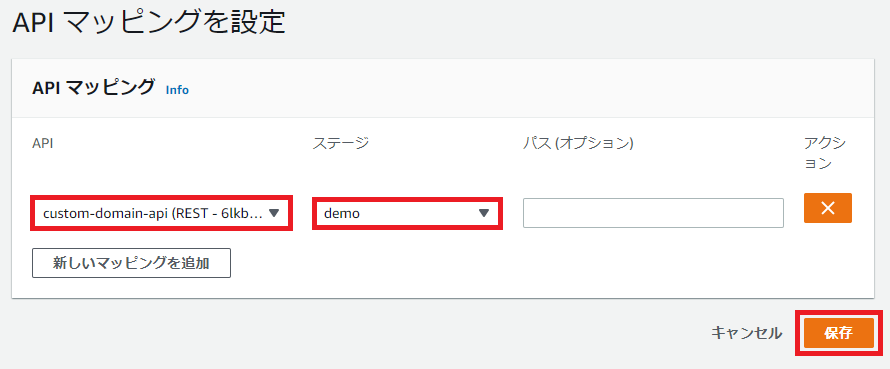
新しいリソースができたら、「新しいマッピングを追加」をクリックし、ここに追加していきます。
7. 確認
$ curl -k https://example-20210811.com
{"statusCode":200,"body":"\"Hello from Lambda!\""}
またはブラウザにカスタムドメインを開き、レスポンスが返ってくることを確認します。
なお、オプション -k で以下のエラーを無視します。
$ curl https://example-20210811.com
curl: (60) SSL certificate problem: self signed certificate
More details here: https://curl.se/docs/sslcerts.html

curl failed to verify the legitimacy of the server and therefore could not
establish a secure connection to it. To learn more about this situation and
how to fix it, please visit the web page mentioned above.
オプション -k についてはこちらを参考にさせていただきました。
トラブルシューティング
"message":"Forbidden"
API マッピングが設定されていない場合、このエラーが発生しました。
$ curl -k https://example-20210811.com
{"message":"Forbidden"}
参考記事