Android の Camera2 API を使って カメラのプレビュー画面を表示する
の続きです。
Camera2 API の顔検出
顔検出 (Face Detection)に関して、下記のような解説記事やサンプルコードが公開されています。
[Camera2 APIを使ってFront CameraでFace Detectionさせるだけのかなりシンプルなサンプル]
(https://qiita.com/fezrestia/items/5f8ce3c63925b3d84662)
Android-Camera2-Front-with-Face-Detection
それらを参考に、顔検出する。
顔検出のサポートモード
端末が 顔検出サポートしているか調べる
characteristics.get(CameraCharacteristics.STATISTICS_INFO_AVAILABLE_FACE_DETECT_MODES);
サポートモードには、FACE_DETECT_MODE_SIMPLE とFACE_DETECT_MODE_FULL の2種類ある。
MODE_SIMPLEは、顔の周りの長方形の位置とその信頼度を示すスコアのみ。
MODE_FULLは、MODE_SIMPLEに加えて目や口などのランドマーク。
Nexux5 の背面カメラでは、MODE_SIMPLE です。
顔検出を要求する
captureRequest.Builder.set(CaptureRequest.STATISTICS_FACE_DETECT_MODE,  CameraMetadata.STATISTICS_FACE_DETECT_MODE_SIMPLE; );
cameraCaptureSession.capture(captureRequest.Builder.build(), captureCallback, handler);
顔検出の結果
CaptureCallback の CaptureResult として取得できる。
captureCallback =
new CameraCaptureSession.CaptureCallback(() {
    @Override
    public void onCaptureProgressed( CameraCaptureSession session,
                                         CaptureRequest request,
                                         CaptureResult result) {
    }
    @Override
    public void onCaptureCompleted( CameraCaptureSession session,
                                        CaptureRequest request,
                                       TotalCaptureResult result) {
    }
}
顔の周りの長方形
検出した顔の周りの長方形 (rectangle)は、CaptureResult から取得できる。
Face[] faces = result.get(CaptureResult.STATISTICS_FACES);
    Rect rect = faces[0].getBounds() ;
この長方形の xy 座標はセンサーの右上が基準です。
A rectangle relative to the sensor's CameraCharacteristics#SENSOR_INFO_ACTIVE_ARRAY_SIZE, with (0,0) representing the top-left corner of the active array rectangle.
ここからが、面倒です。
下記を参考にした。
-
[Androidデバイスのカメラの向き]
(https://qiita.com/cattaka/items/330321cb8c258c535e07) -
[Display#getRotation() の罠]
(https://qiita.com/hideaki_sago/items/b226c80ddbe90734b237)
センサーの大きさと回転角度
// センサーの大きさ
CameraCharacteristics#get(CameraCharacteristics.SENSOR_INFO_ACTIVE_ARRAY_SIZE);

// センサーの回転角度
CameraCharacteristics#get(CameraCharacteristics.SENSOR_ORIENTATION);
Nexux5 の背面カメラでは、センサーの大きさは 3284x2464です。
センサーの回転角度は 90度です。
センサーの大きさは、物理センサ(SENSOR_INFO_PIXEL_ARRAY_SIZE, SENSOR_INFO_PHYSICAL_SIZE) に対する長方形 (rectangle) の座標として得られるが、今回は関係ないので、先に進む。
This rectangle is defined relative to the full pixel array; (0,0) is the top-left of the full pixel array, and the size of the full pixel array is given by CameraCharacteristics#SENSOR_INFO_PIXEL_ARRAY_SIZE.
センサーの回転角度は、本来の向き(its native orientation) を基準に時計回りです。
Clockwise angle through which the output image needs to be rotated to be upright on the device screen in its native orientation
本来の向きは、端末や端末の向きにより異なります。
ハンドセットを縦長 (portrait mode) にしたときは、上側です。
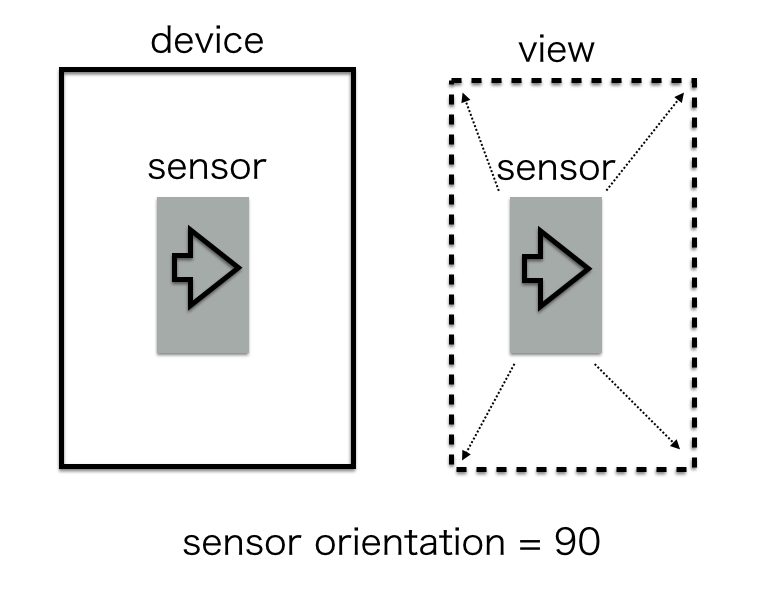
センサーは横長で端末に対して回転しているが、
縦長のビューに対しては縦長になるので、
センサーの画像を回転せずに投影しているようです。
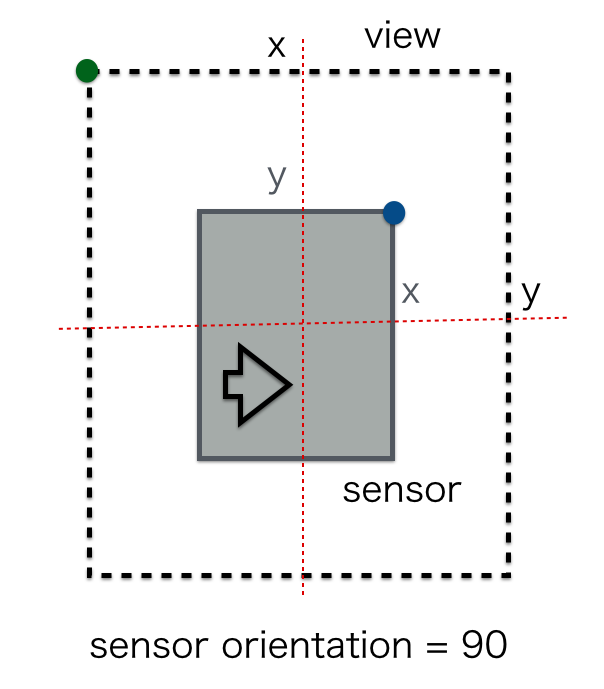
しかし、ビューに対してセンサーの xy 軸は回転しているようです。
模式的には、下図のようになる。

センサーの xy 座標をビューの xy 座標に変換する式は下記のようになる。
xy 座標はそれぞれの辺に対する比率
viewX = 1- sensorY
viewY = sensorX
さらに、正面カメラでは、左右が反転する鏡像になるのでそれも考慮する。
以上で、ビューに表示する長方形の xy 座標が得られる。
顔の周りに長方形を表示する
簡潔に考え方だけ。
ViewGroup を継承した CameraSourcePreview を作成する。
CameraSourcePreview の子のビューとして、カメラのプレビュー画面を表示する TextureView と長方形を表示するオーバーレイ用の View を作成する。
public class FaceOverlay extends GraphicOverlay.Graphic {

public void draw(Canvas canvas) {
        Rect bounds = face.getBounds() ;
        Rect rect = convBounds(canvas, bounds);
		canvas.drawRect(rect, paint);
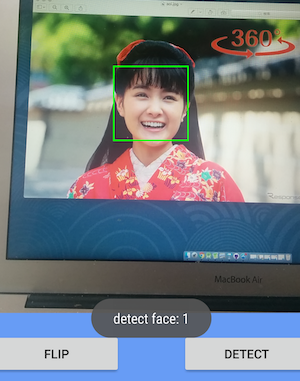
スクリーンショット
サンプルコードをgithub に公開した。
https://github.com/ohwada/Android_Samples/tree/master/Camera28
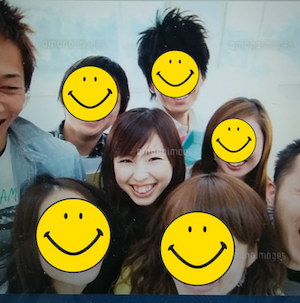
おまけ : 顔に画像を重ねる
public void draw(Canvas canvas) {
        canvas.drawBitmap( bitmap, null, rect, null );
サンプルコードはこちら
https://github.com/ohwada/Android_Samples/tree/master/Camera225


