これの続きです。
これをIaC管理したいよねって話です。
AzureだとBicepよりTerraformで管理する方がメジャーらしい?のでそっちで管理していきます。
環境イメージ
今まで手動でポチポチして作ったWordpress環境をTerraformでIaC(Infrastructure as Code)として管理・デプロイしていきたいと思います。

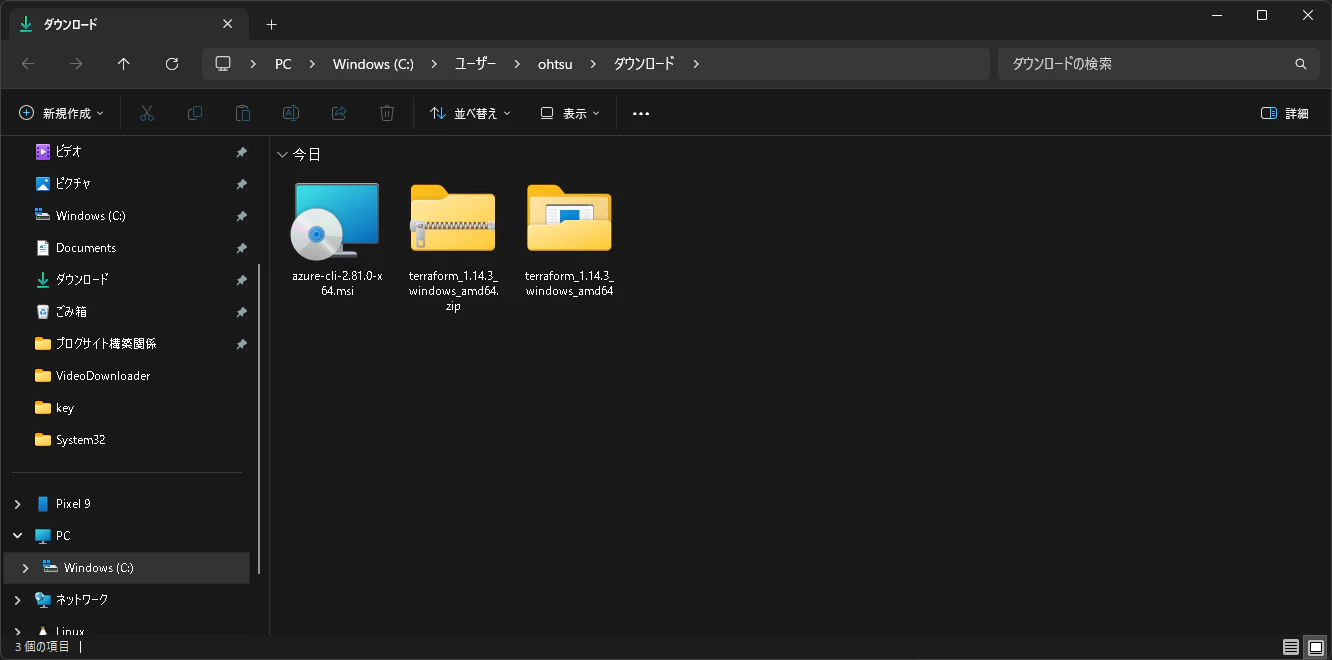
Terraformのインストール
だいぶ前に作った手順でWindows 11にTerraformをインストールします。
2026/01現在だと以下のバージョンが最新っぽいです。
C:\Users\ohtsu>terraform -v
Terraform v1.14.3
on windows_amd64
Azure CLIのインストール
以下にアクセスしてMSIを使ってインストールします。
Azure CLIの最新のMSI(64ビット)を押下してMSIをダウンロードします。
ダウンロードしたmsiファイルをダブルクリックして、Azure CLIをインストールします。
起動したらInstallボタンを押します。普通の環境であれば特段問題なくインストールが完了するはずです。
powershellを起動して、以下のコマンドを実行してみると何らかの出力があるはずです。
Azure CLIがインストール出来ていることが確認できました。
PS C:\Users\ohtsu> az --version
azure-cli                         2.81.0

core                              2.81.0
telemetry                          1.1.0

Dependencies:
msal                            1.34.0b1
azure-mgmt-resource               23.3.0

Python location 'C:\Program Files\Microsoft SDKs\Azure\CLI2\python.exe'
Config directory 'C:\Users\ohtsu\.azure'
Extensions directory 'C:\Users\ohtsu\.azure\cliextensions'

Python (Windows) 3.13.9 (tags/v3.13.9:8183fa5, Oct 14 2025, 14:09:13) [MSC v.1944 64 bit (AMD64)]

Legal docs and information: aka.ms/AzureCliLegal


Your CLI is up-to-date.
以下のコマンドを使ってAzure CLIでAzureにログインします。
Microsoftアカウントを指定して、Azureにログインしているメールアドレスを入力して認証を完了させます。
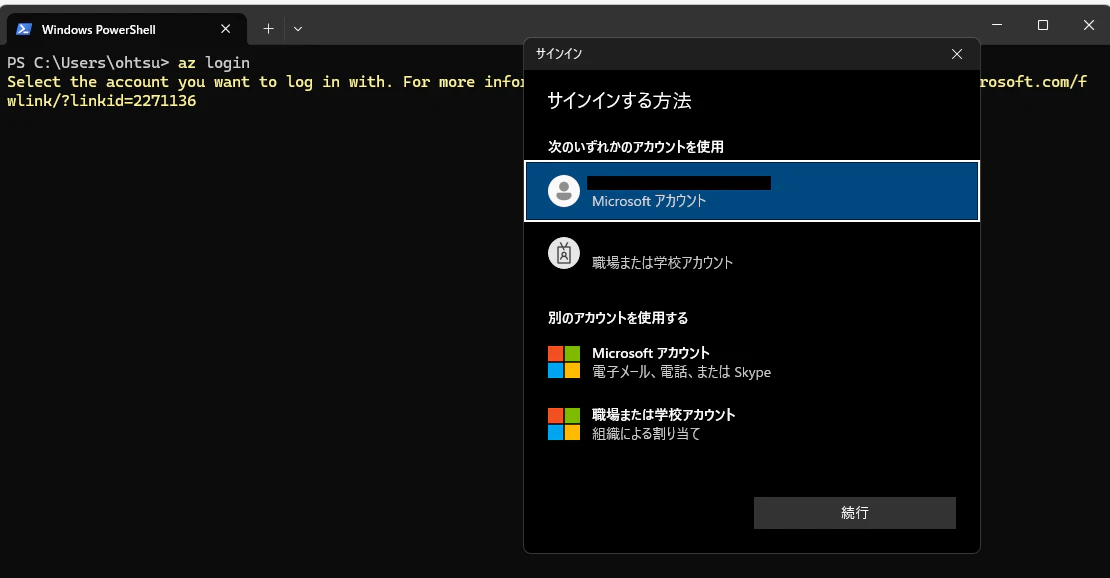
上手く認証が出来るとサブスクリプションのリストが表示されるので、指定してあげます。
PS C:\Users\ohtsu> az login
Select the account you want to log in with. For more information on login with Azure CLI, see https://go.microsoft.com/fwlink/?linkid=2271136

Retrieving tenants and subscriptions for the selection...

[Tenant and subscription selection]

No     Subscription name     Subscription ID                       Tenant
-----  --------------------  ------------------------------------  -----------------
[1] *  Azure subscription 1  xxxxxxxx-xxxx-xxxx-xxxx-xxxxxxxxxxxx  Default Directory

The default is marked with an *; the default tenant is 'Default Directory' and subscription is 'Azure subscription 1' (xxxxxxxx-xxxx-xxxx-xxxx-xxxxxxxxxxxx).

Select a subscription and tenant (Type a number or Enter for no changes): 1

Tenant: Default Directory
Subscription: Azure subscription 1 (xxxxxxxx-xxxx-xxxx-xxxx-xxxxxxxxxxxx)
Terraformでの環境デプロイ
TFの設定とAzureプロバイダ定義のデプロイ
TerraformでAzureにリソースをデプロイする準備が出来ました。
まずTerraformの設定とAzureプロバイダの定義をTerraformでデプロイします。
ここでAzureを指定してあげることでAzureのリソースを操作することが出来ます。AWSを指定すればAWSのリソースを操作することが出来るようになるようです。
01_provider.tf
terraform {
  required_providers {
    azurerm = {
      source  = "hashicorp/azurerm"
      version = "~> 3.0"
    }
  }
}

provider "azurerm" {
  features {}
}
- azurerm
プロバイダ名。Azure Resource Manager (AzureRM) を操作するプロバイダです。 - source = "hashicorp/azurerm"
どこからプロバイダを取得するか。Terraform Registry の HashiCorp 公式の azurerm を使う、という意味です。 - version = "~> 3.0"
バージョン制約です。~> 3.0 は 3.0以上 4.0未満 を許可します(3.x 系の範囲で更新可)。
例: 3.0.0 や 3.99.0 はOK、4.0.0 はNG。 - provider "azurerm"
「この構成では azurerm プロバイダを使う」と宣言し、設定を与える場所です。 - features {}
AzureRM Provider v2以降で必須のブロックで、プロバイダの細かい機能フラグ/挙動を設定するための入れ物です。何も指定しない場合はデフォルト挙動になります(空でも “必須なので置いている” ことが多いです)。
デプロイします。
まずはterraform initコマンドで初期化します。
PS C:\Users\ohtsu\Documents\Azure\terraform> terraform init
Initializing the backend...
Initializing provider plugins...
- Finding hashicorp/azurerm versions matching "~> 3.0"...
- Installing hashicorp/azurerm v3.117.1...
- Installed hashicorp/azurerm v3.117.1 (signed by HashiCorp)
Terraform has created a lock file .terraform.lock.hcl to record the provider
selections it made above. Include this file in your version control repository
so that Terraform can guarantee to make the same selections by default when
you run "terraform init" in the future.

Terraform has been successfully initialized!

You may now begin working with Terraform. Try running "terraform plan" to see
any changes that are required for your infrastructure. All Terraform commands
should now work.

If you ever set or change modules or backend configuration for Terraform,
rerun this command to reinitialize your working directory. If you forget, other
commands will detect it and remind you to do so if necessary.
このコマンドを実行すると以下のようにファイルが作成されます。


- .terraform.lock.hcl:使用するプロバイダのバージョンとハッシュを固定して、毎回同じものを取得・再現できるようにするロックファイル。
- terraform-provider-azurerm_v3.117.1_x5.exe:Terraform が Azure(azurerm)を操作するために使うプロバイダ本体の実行ファイル(Windows用)。
共通で使用する値(リージョンやリソースグループ名)を変数化
今回用意したコードは以下。
管理を簡略化します。これは各TFファイルをデプロイする時に自動で読み込まれるものになるので、デプロイなどの作業は不要です。
02_variables.tf
variable "location" {
  description = "リソースを作成するリージョン"
  default     = "Japan East"
}

variable "rg_name" {
  description = "リソースグループ名"
  default     = "private-study"
}

variable "tags" {
  description = "リソースに付与するタグ"
  type        = map(string)
  default = {
    env = "study"
  }
}
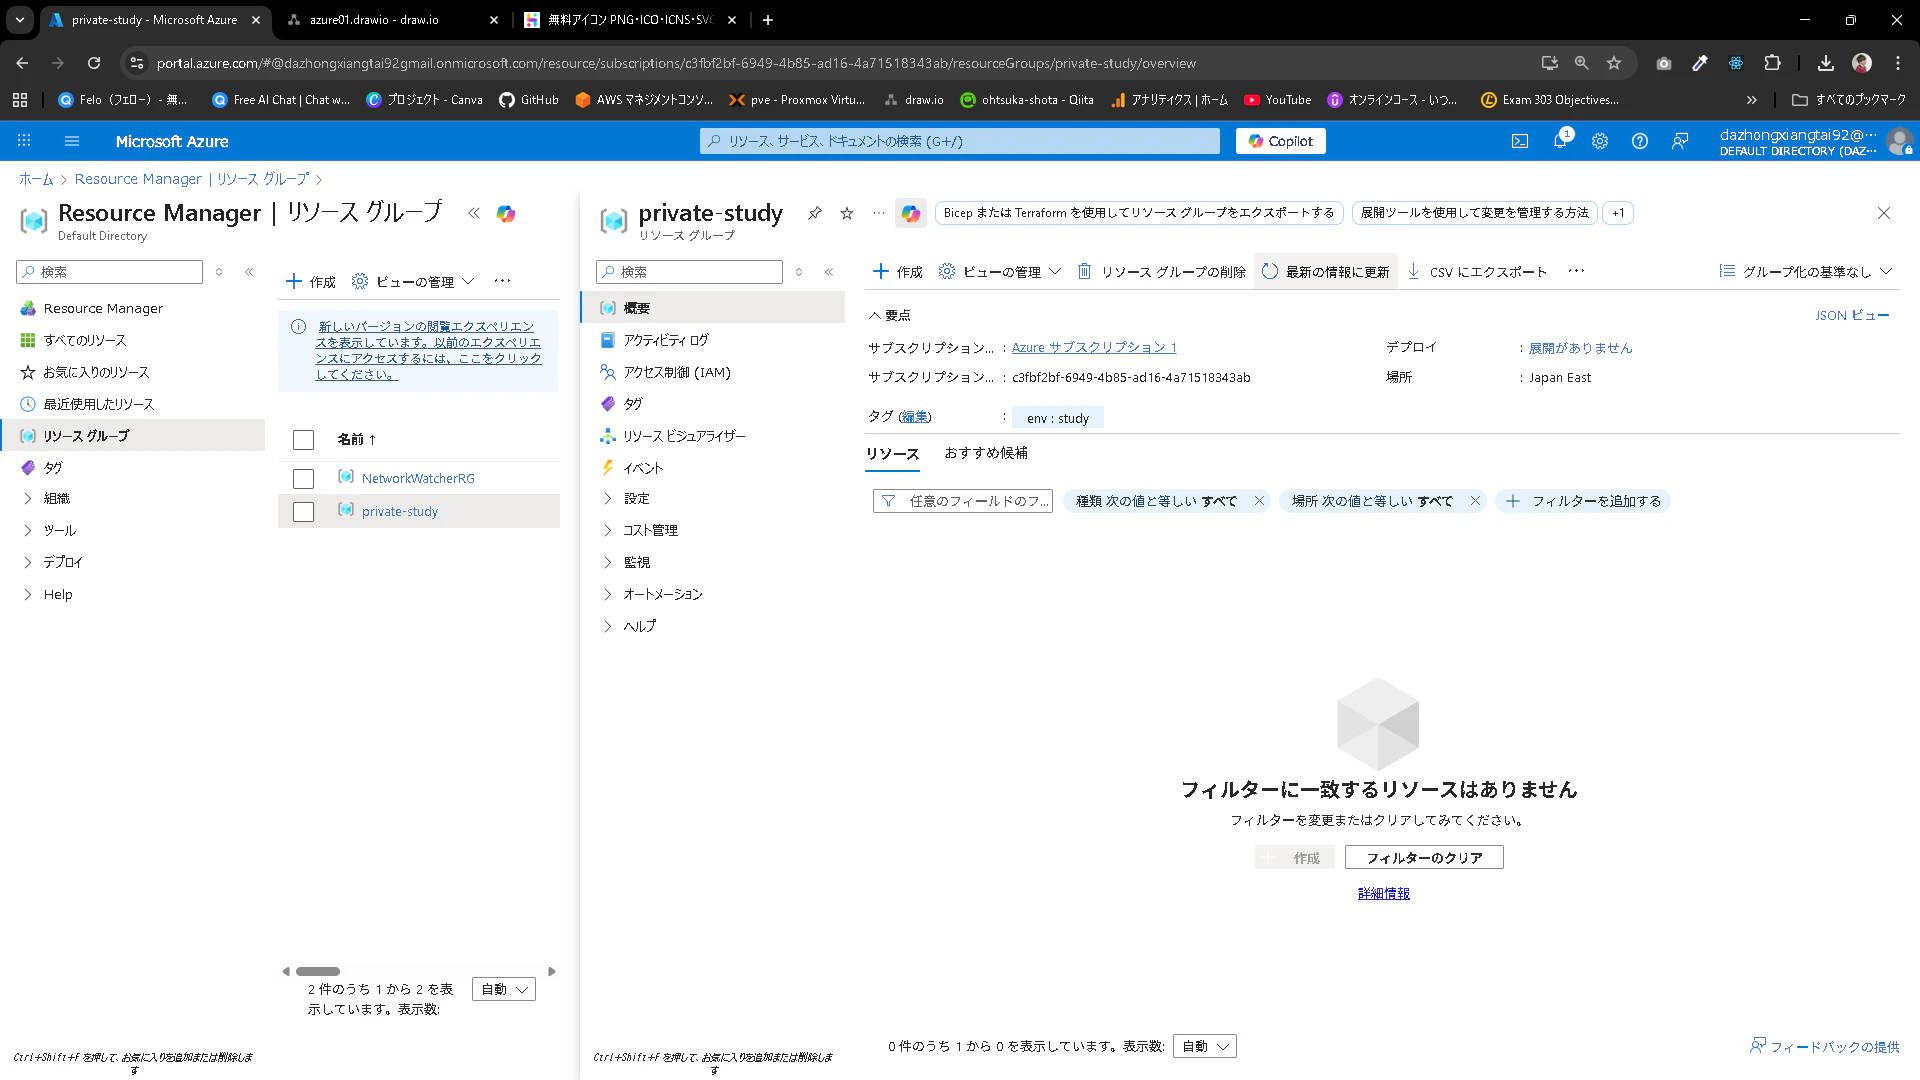
リソースグループのデプロイ
Azureのリソースグループを作成します。
03_resource-group.tf
# リソースグループ作成
resource "azurerm_resource_group" "rg" {
  name     = var.rg_name
  location = var.location
  tags     = var.tags
}
これをデプロイするにはterraform planとapplyを実行していく必要があります。
オプションとして-out=ファイル名とすることで、planの内容をファイルに保存します。
コマンドの出力内容を確認すると、リソースグループが追加されることがわかります。
PS C:\Users\ohtsu\Documents\Azure\terraform> terraform plan -out=resource-group-tfplan

Terraform used the selected providers to generate the following execution plan. Resource actions are indicated with the following symbols:
  + create

Terraform will perform the following actions:

  # azurerm_resource_group.rg will be created
  + resource "azurerm_resource_group" "rg" {
      + id       = (known after apply)
      + location = "japaneast"
      + name     = "private-study"
      + tags     = {
          + "env" = "study"
        }
    }

Plan: 1 to add, 0 to change, 0 to destroy.

───────────────────────────────────────────────────────────────────────────────────────────────────────────────────────────────────────────────────────────────────────────────────────────────

Saved the plan to: resource-group-tfplan

To perform exactly these actions, run the following command to apply:
    terraform apply "resource-group-tfplan"
以下のコマンドを実行して、planの内容を実際のAzure環境にデプロイします。
PS C:\Users\ohtsu\Documents\Azure\terraform> terraform apply .\resource-group-tfplan
azurerm_resource_group.rg: Creating...
azurerm_resource_group.rg: Still creating... [00m10s elapsed]
azurerm_resource_group.rg: Creation complete after 11s [id=/subscriptions/c3fbf2bf-6949-4b85-ad16-4a71518343ab/resourceGroups/private-study]

Apply complete! Resources: 1 added, 0 changed, 0 destroyed.
Azure Portalを確認すると作成されていることがわかります。

VnetとSubnetのデプロイ
VnetやSubnetをデプロイしていきます。
04_vnet-subnet.tf
# VNet作成
resource "azurerm_virtual_network" "vnet" {
  name                = "study-vnet"
  location            = azurerm_resource_group.rg.location
  resource_group_name = azurerm_resource_group.rg.name
  address_space       = ["192.168.0.0/16"]
  tags                = var.tags
}

# パブリックサブネット
resource "azurerm_subnet" "public" {
  name                 = "public-subnet-01"
  resource_group_name  = azurerm_resource_group.rg.name
  virtual_network_name = azurerm_virtual_network.vnet.name
  address_prefixes     = ["192.168.1.0/24"]
}

# プライベートサブネット
resource "azurerm_subnet" "private" {
  name                 = "private-subnet-01"
  resource_group_name  = azurerm_resource_group.rg.name
  virtual_network_name = azurerm_virtual_network.vnet.name
  address_prefixes     = ["192.168.10.0/24"]
}
これをterraformでAzureにデプロイします。
PS C:\Users\ohtsu\Documents\Azure\terraform> terraform plan -out=vnet-subnet-tfplan
azurerm_resource_group.rg: Refreshing state... [id=/subscriptions/c3fbf2bf-6949-4b85-ad16-4a71518343ab/resourceGroups/private-study]

Terraform used the selected providers to generate the following execution plan. Resource actions are indicated with the following symbols:
  + create

Terraform will perform the following actions:

  # azurerm_subnet.private will be created
  + resource "azurerm_subnet" "private" {
      + address_prefixes                               = [
          + "192.168.10.0/24",
        ]
      + default_outbound_access_enabled                = true
      + enforce_private_link_endpoint_network_policies = (known after apply)
      + enforce_private_link_service_network_policies  = (known after apply)
      + id                                             = (known after apply)
      + name                                           = "private-subnet-01"
      + private_endpoint_network_policies              = (known after apply)
      + private_endpoint_network_policies_enabled      = (known after apply)
      + private_link_service_network_policies_enabled  = (known after apply)
      + resource_group_name                            = "private-study"
      + virtual_network_name                           = "study-vnet"
    }

  # azurerm_subnet.public will be created
  + resource "azurerm_subnet" "public" {
      + address_prefixes                               = [
          + "192.168.1.0/24",
        ]
      + default_outbound_access_enabled                = true
      + enforce_private_link_endpoint_network_policies = (known after apply)
      + enforce_private_link_service_network_policies  = (known after apply)
      + id                                             = (known after apply)
      + name                                           = "public-subnet-01"
      + private_endpoint_network_policies              = (known after apply)
      + private_endpoint_network_policies_enabled      = (known after apply)
      + private_link_service_network_policies_enabled  = (known after apply)
      + resource_group_name                            = "private-study"
      + virtual_network_name                           = "study-vnet"
    }

  # azurerm_virtual_network.vnet will be created
  + resource "azurerm_virtual_network" "vnet" {
      + address_space       = [
          + "192.168.0.0/16",
        ]
      + dns_servers         = (known after apply)
      + guid                = (known after apply)
      + id                  = (known after apply)
      + location            = "japaneast"
      + name                = "study-vnet"
      + resource_group_name = "private-study"
      + subnet              = (known after apply)
      + tags                = {
          + "env" = "study"
        }
    }

Plan: 3 to add, 0 to change, 0 to destroy.

───────────────────────────────────────────────────────────────────────────────────────────────────────────────────────────────────────────────────────────────────────────────────────────────

Saved the plan to: vnet-subnet-tfplan

To perform exactly these actions, run the following command to apply:
    terraform apply "vnet-subnet-tfplan"


PS C:\Users\ohtsu\Documents\Azure\terraform> terraform apply .\vnet-subnet-tfplan
azurerm_virtual_network.vnet: Creating...
azurerm_virtual_network.vnet: Creation complete after 4s [id=/subscriptions/c3fbf2bf-6949-4b85-ad16-4a71518343ab/resourceGroups/private-study/providers/Microsoft.Network/virtualNetworks/study-vnet]
azurerm_subnet.private: Creating...
azurerm_subnet.public: Creating...
azurerm_subnet.private: Creation complete after 4s [id=/subscriptions/c3fbf2bf-6949-4b85-ad16-4a71518343ab/resourceGroups/private-study/providers/Microsoft.Network/virtualNetworks/study-vnet/subnets/private-subnet-01]
azurerm_subnet.public: Creation complete after 8s [id=/subscriptions/c3fbf2bf-6949-4b85-ad16-4a71518343ab/resourceGroups/private-study/providers/Microsoft.Network/virtualNetworks/study-vnet/subnets/public-subnet-01]

Apply complete! Resources: 3 added, 0 changed, 0 destroyed.
Azure Portalでデプロイされていることを確認します。

NSGのデプロイ
Subnetに紐づけるNSGをデプロイしていきます。
05_NSG.tf
##################################################################
### Public Subnet NSG
##################################################################

# Public-Subnet用NSG
resource "azurerm_network_security_group" "public_nsg" {
  name                = "public-subnet-01-sg"
  location            = azurerm_resource_group.rg.location
  resource_group_name = azurerm_resource_group.rg.name
  tags                = var.tags
}

# HTTP (Port 80) 許可
resource "azurerm_network_security_rule" "allow_http" {
  name                        = "Allow-HTTP"
  priority                    = 100
  direction                   = "Inbound"
  access                      = "Allow"
  protocol                    = "Tcp"
  source_port_range           = "*"
  destination_port_range      = "80"
  source_address_prefix       = "*"
  destination_address_prefix  = "*"
  resource_group_name         = azurerm_resource_group.rg.name
  network_security_group_name = azurerm_network_security_group.public_nsg.name
}

# SSH (Port 22) 許可
resource "azurerm_network_security_rule" "allow_ssh" {
  name                        = "Allow-SSH"
  priority                    = 110
  direction                   = "Inbound"
  access                      = "Allow"
  protocol                    = "Tcp"
  source_port_range           = "*"
  destination_port_range      = "22"
  source_address_prefix       = "*"
  destination_address_prefix  = "*"
  resource_group_name         = azurerm_resource_group.rg.name
  network_security_group_name = azurerm_network_security_group.public_nsg.name
}

# NSG と Public-Subnetの紐付け
resource "azurerm_subnet_network_security_group_association" "public_nsg_assoc" {
  subnet_id                 = azurerm_subnet.public.id
  network_security_group_id = azurerm_network_security_group.public_nsg.id
}


##################################################################
### Private Subnet NSG
##################################################################

# Private-Subnet用NSG
resource "azurerm_network_security_group" "private_nsg" {
  name                = "private-subnet-01-sg"
  location            = azurerm_resource_group.rg.location
  resource_group_name = azurerm_resource_group.rg.name
  tags                = var.tags
}

# MySQL (Port 3306) 許可
resource "azurerm_network_security_rule" "allow_mysql" {
  name                        = "Allow-MySQL"
  priority                    = 100
  direction                   = "Inbound"
  access                      = "Allow"
  protocol                    = "Tcp"
  source_port_range           = "*"
  destination_port_range      = "3306"
  source_address_prefix       = "*"
  destination_address_prefix  = "*"
  resource_group_name         = azurerm_resource_group.rg.name
  network_security_group_name = azurerm_network_security_group.private_nsg.name
}

# NSG と Private-Subnetの紐付け
resource "azurerm_subnet_network_security_group_association" "private_nsg_assoc" {
  subnet_id                 = azurerm_subnet.private.id
  network_security_group_id = azurerm_network_security_group.private_nsg.id
}
デプロイしていきます。
PS C:\Users\ohtsu\Documents\Azure\terraform> terraform plan -out=NSG-tfplan

出力内容は省略

PS C:\Users\ohtsu\Documents\Azure\terraform> terraform apply .\NSG-tfplan
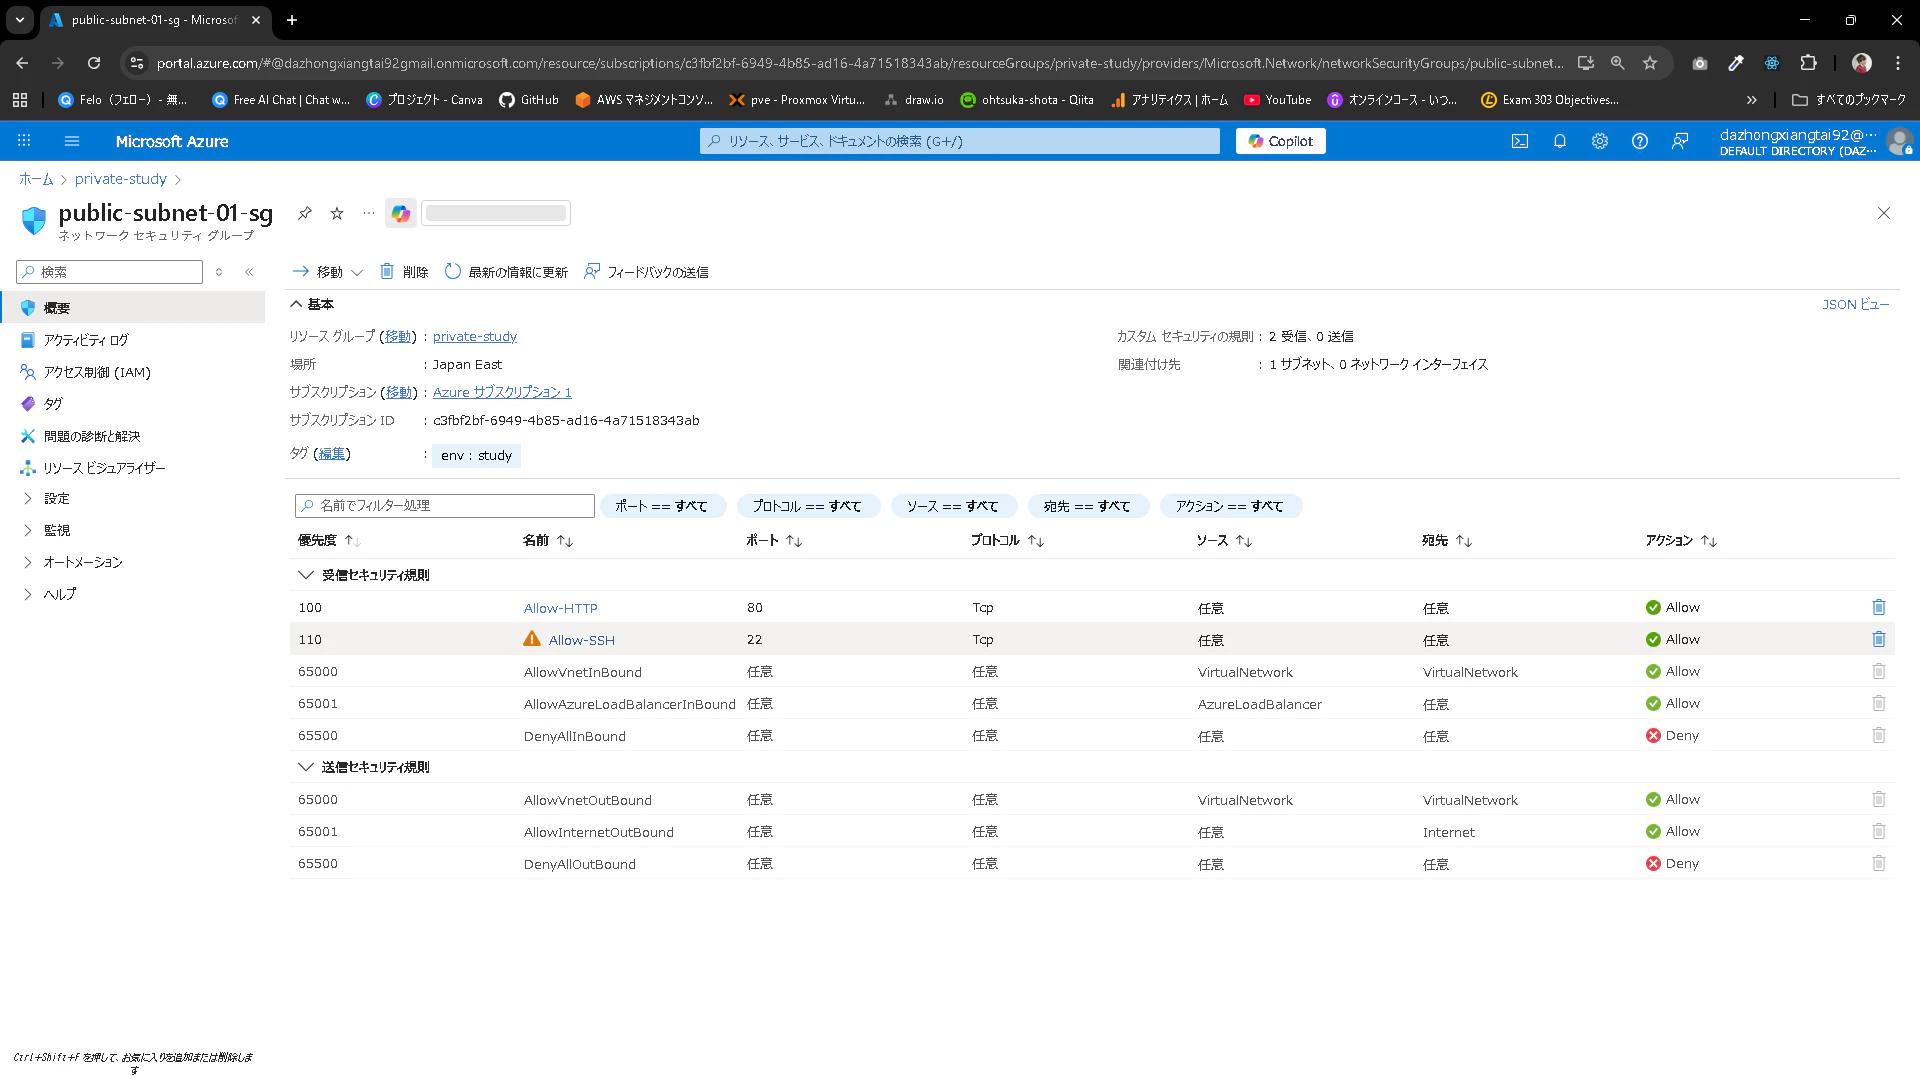
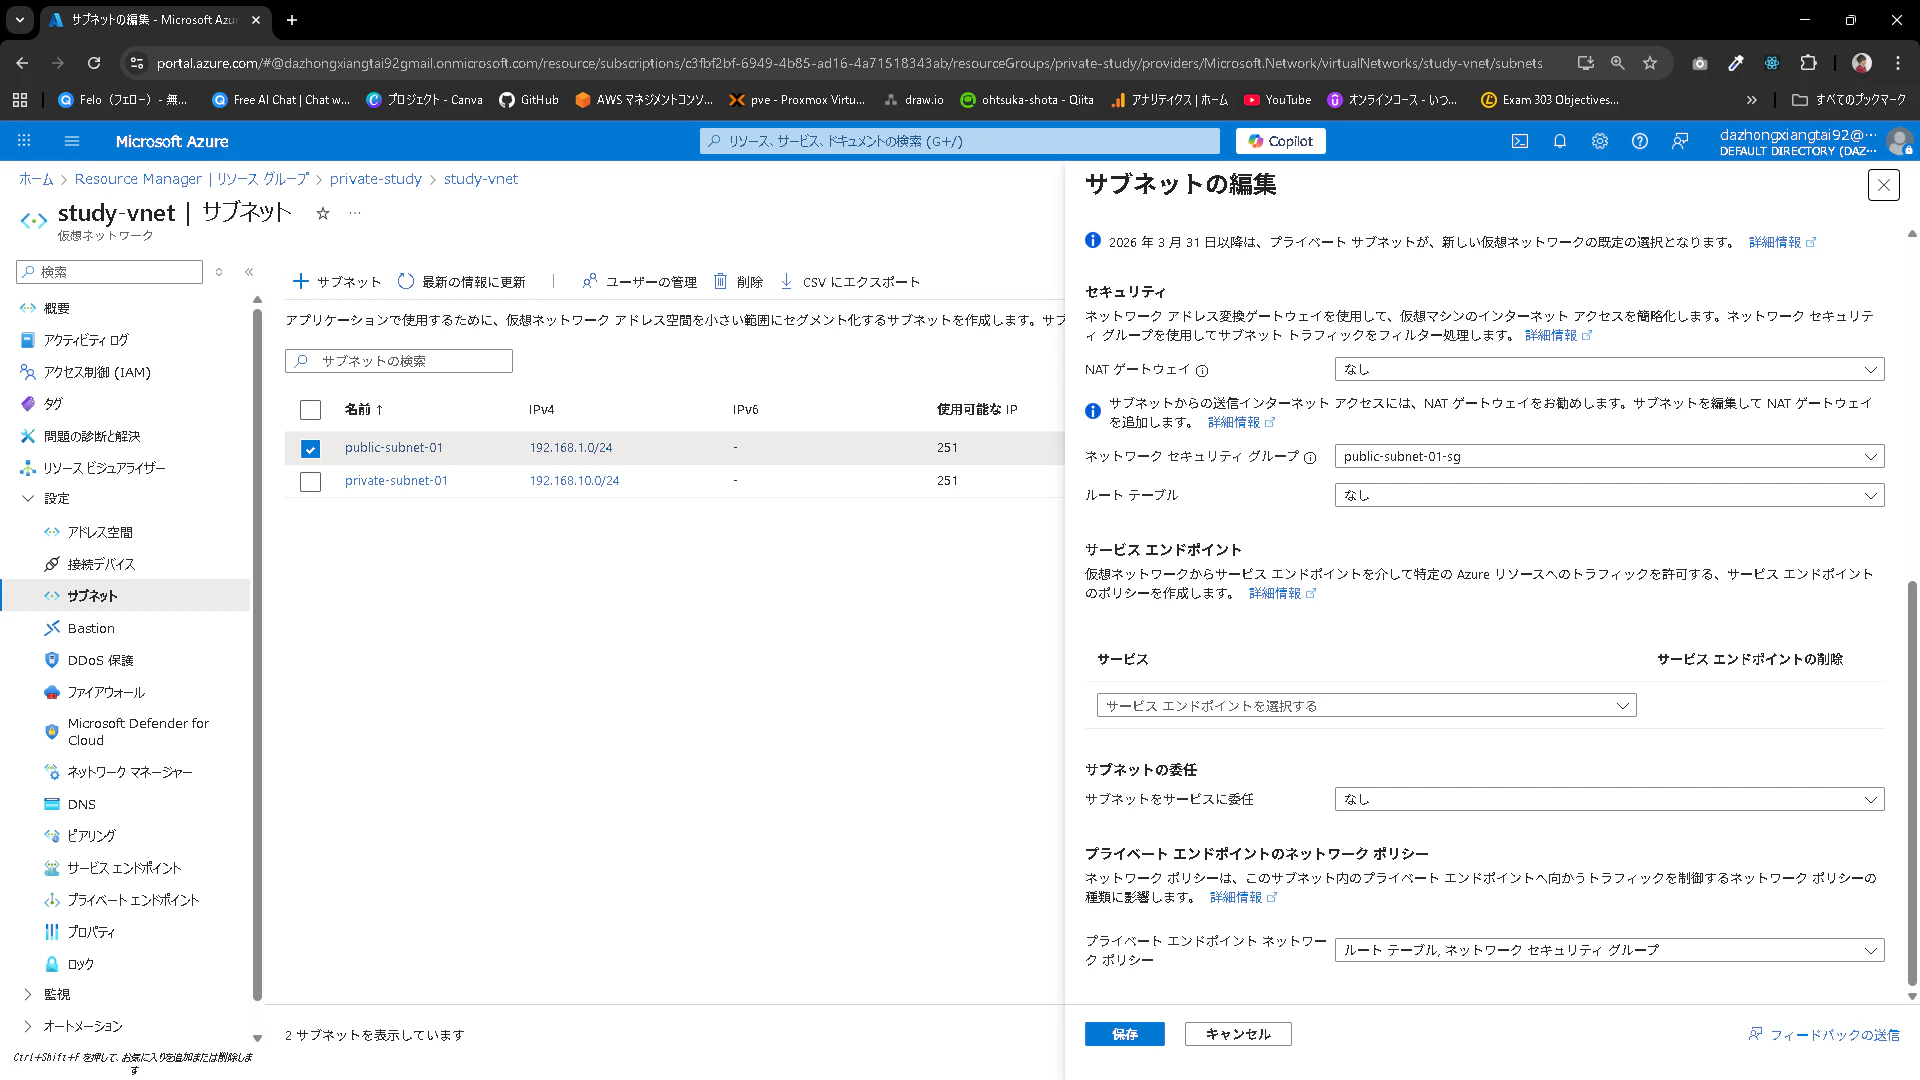
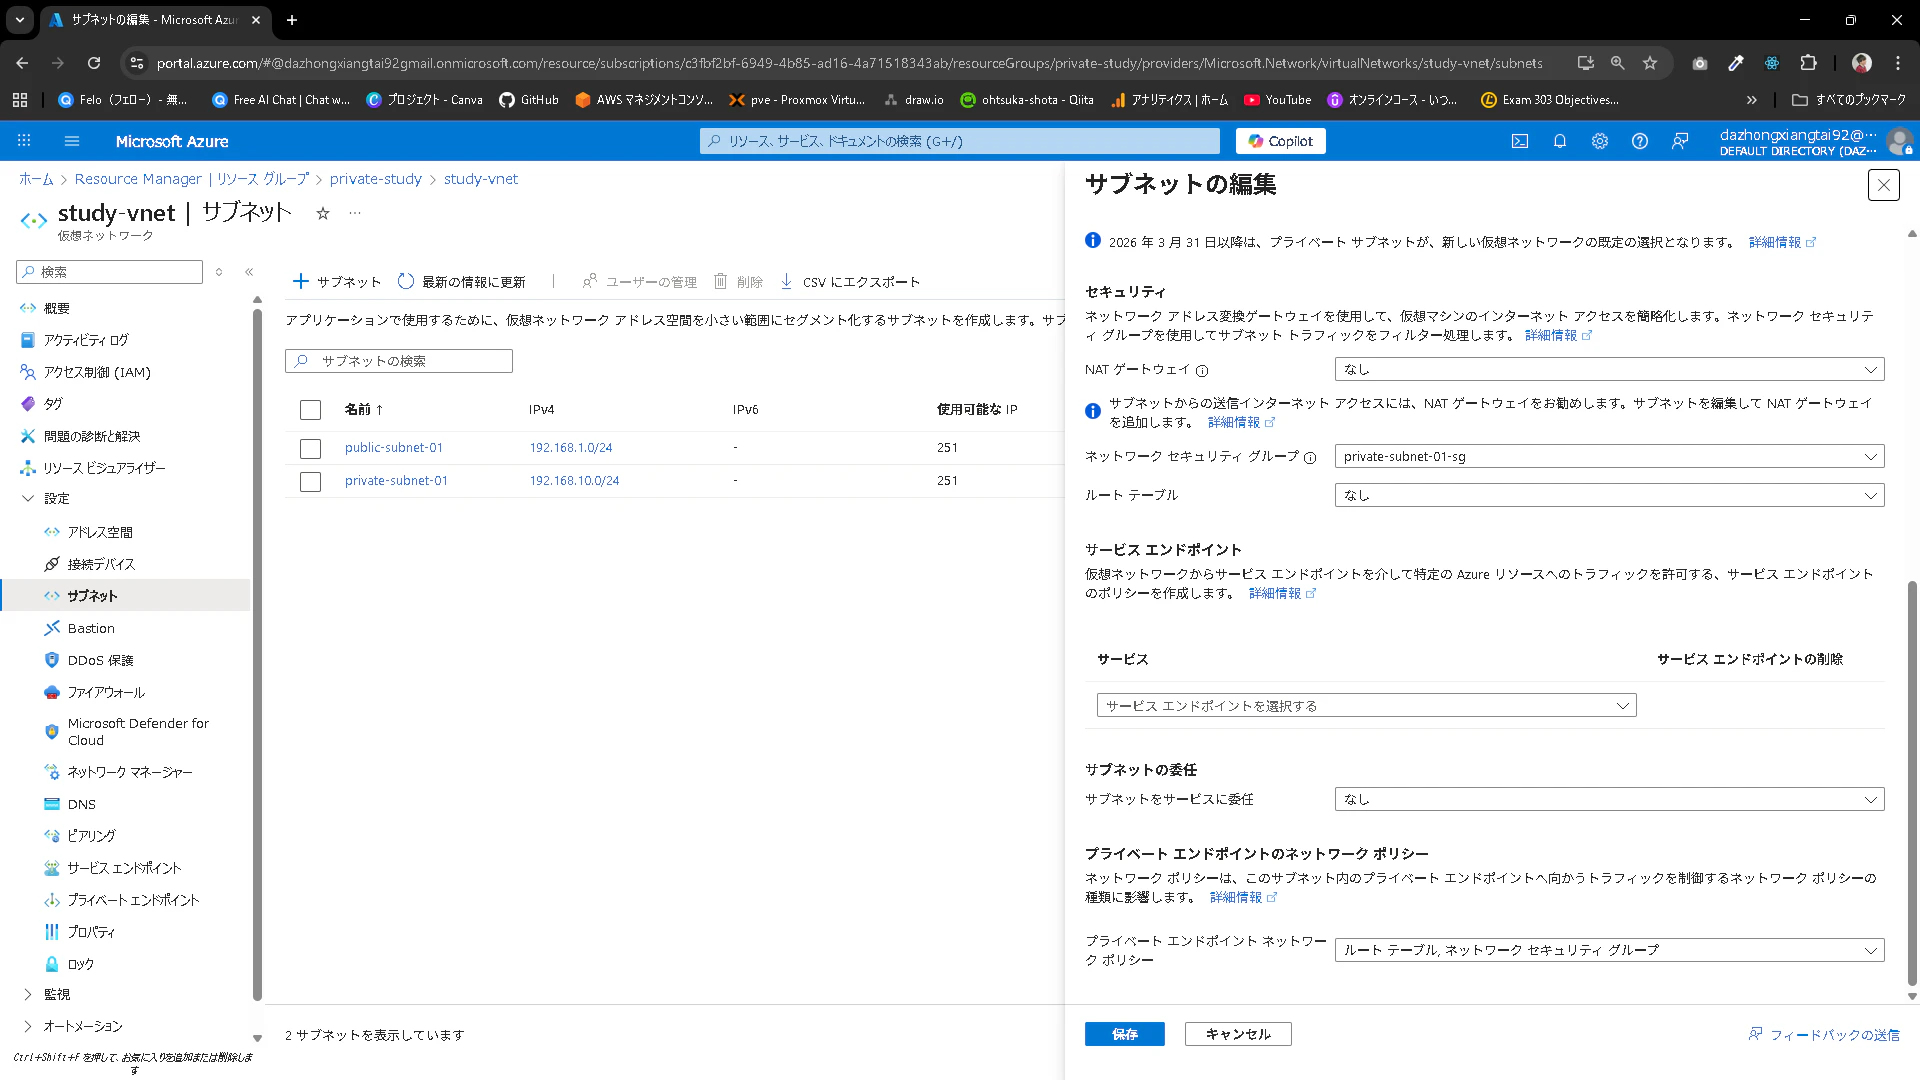
Azure Portalを確認して、NGSが作成されていることと、Subnetに紐づいていることを確認しましょう。
Public-Subnet用NSG
Private-Subnet用NSG

VirtualMachinesのデプロイ
仮想マシンをデプロイします。
仮想マシンを構築するのとともに、この仮想マシンにアクセスする用の鍵も作成します。
06_compute.tf
# ---------------------------------------------
# 1. SSH鍵の自動生成
# ---------------------------------------------
resource "tls_private_key" "ssh" {
  algorithm = "RSA"
  rsa_bits  = 4096
}

resource "local_file" "private_key" {
  content         = tls_private_key.ssh.private_key_pem
  filename        = "tf_wordpress_key.pem"
  file_permission = "0600"
}

# ---------------------------------------------
# 2. NIC設定
# ---------------------------------------------
resource "azurerm_network_interface" "nic" {
  name                = "wordpress-nic"
  location            = azurerm_resource_group.rg.location
  resource_group_name = azurerm_resource_group.rg.name

  ip_configuration {
    name                          = "internal"
    subnet_id                     = azurerm_subnet.public.id
    private_ip_address_allocation = "Dynamic"
    public_ip_address_id          = azurerm_public_ip.pip.id
  }
  tags = var.tags
}

# ---------------------------------------------
# 3. VM設定
# ---------------------------------------------
resource "azurerm_linux_virtual_machine" "vm" {
  name                = "wordpress"
  resource_group_name = azurerm_resource_group.rg.name
  location            = azurerm_resource_group.rg.location
  size                = "Standard_D2s_v3"

  admin_username      = "azureuser"
  disable_password_authentication = true

  admin_ssh_key {
    username   = "azureuser"
    public_key = tls_private_key.ssh.public_key_openssh
  }

  network_interface_ids = [
    azurerm_network_interface.nic.id,
  ]

  os_disk {
    caching              = "ReadWrite"
    storage_account_type = "Standard_LRS"
  }

  source_image_reference {
    publisher = "Canonical"
    offer     = "ubuntu-24_04-lts"
    sku       = "server"
    version   = "latest"
  }

  tags = var.tags
}

resource "azurerm_public_ip" "pip" {
  name                = "study-vm-pip"
  location            = azurerm_resource_group.rg.location
  resource_group_name = azurerm_resource_group.rg.name
  allocation_method   = "Dynamic"
  sku                 = "Basic"
  tags                = var.tags
}
デプロイしていきます。この時実行しようとしたらupgradeしろと言われたのでinit upgradeをまずは実行します。
PS C:\Users\ohtsu\Documents\Azure\terraform> terraform init -upgrade
PS C:\Users\ohtsu\Documents\Azure\terraform> terraform plan -out=compute-tfplan
PS C:\Users\ohtsu\Documents\Azure\terraform> terraform apply .\compute-tfplan
デプロイが上手くいくと、ローカルに鍵が存在していると思います。

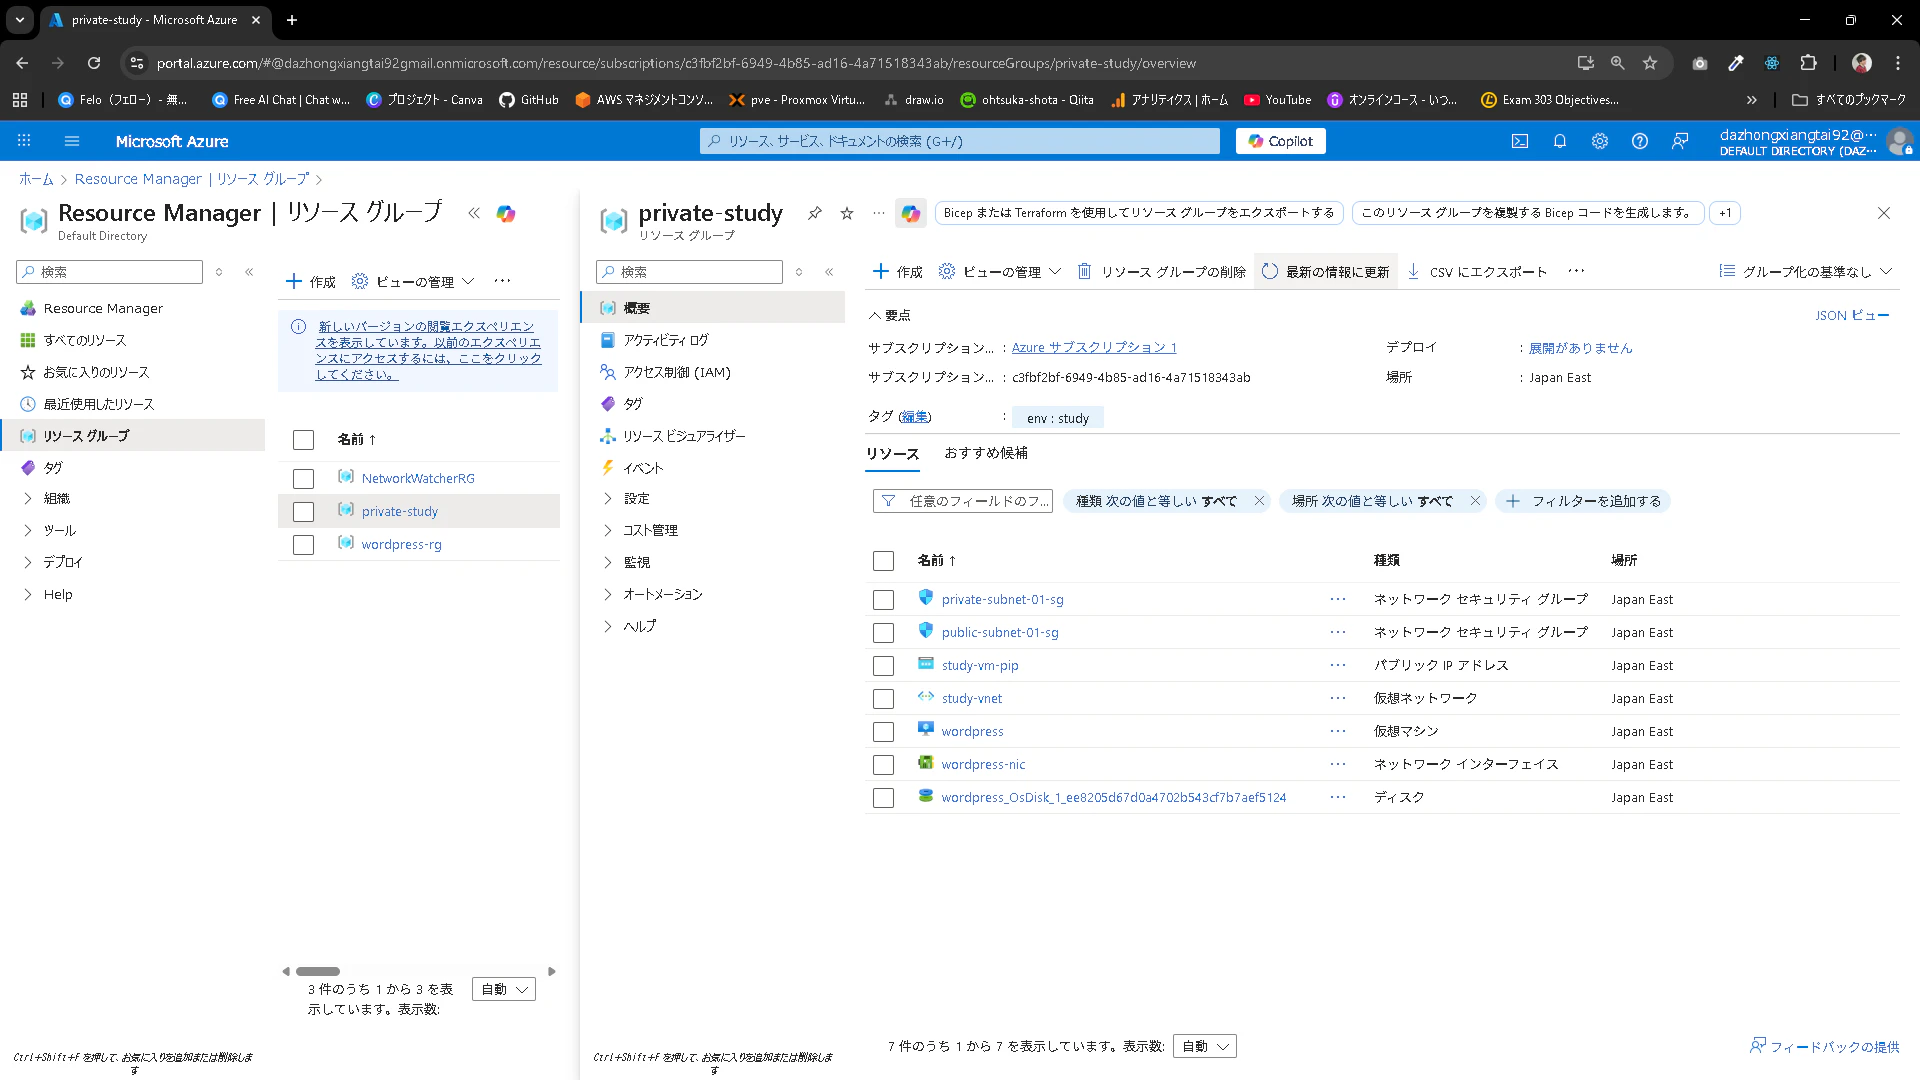
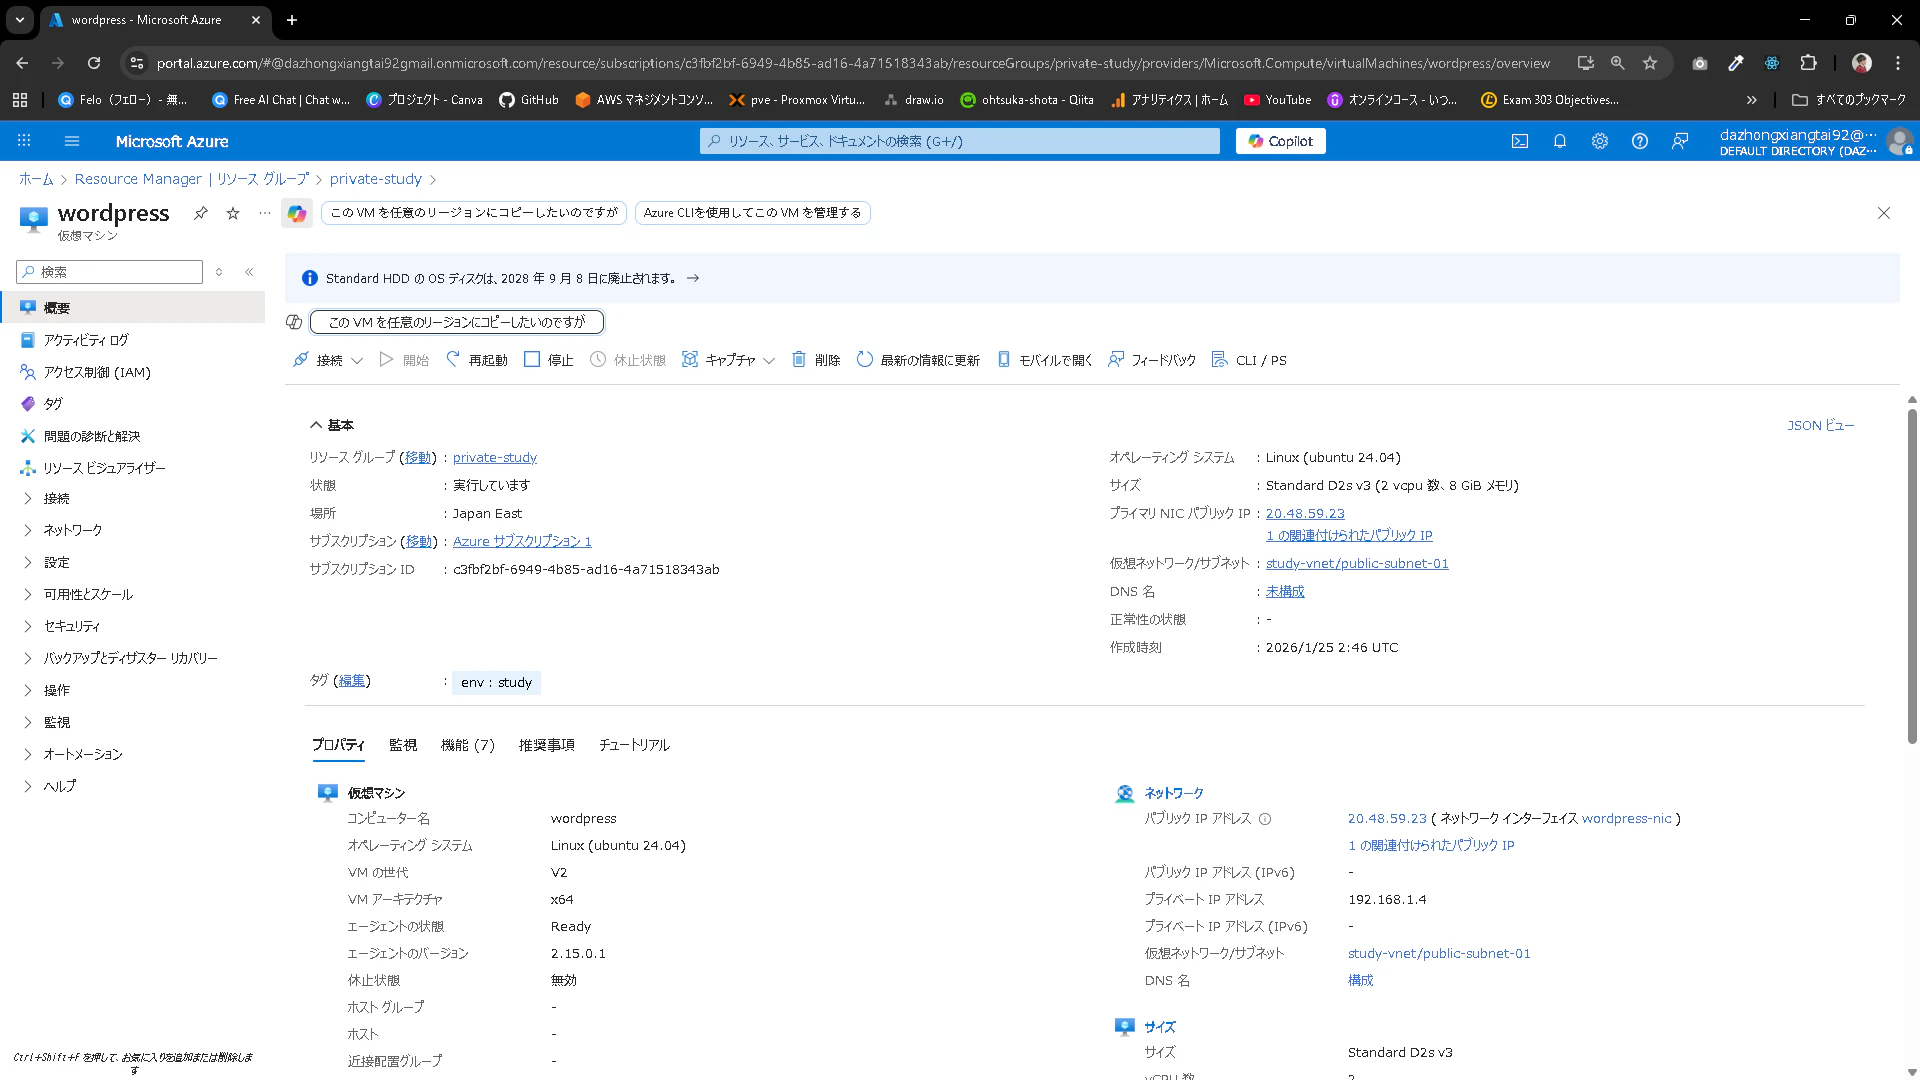
Azure PortalでCompute系のリソースが存在していることを確認します。
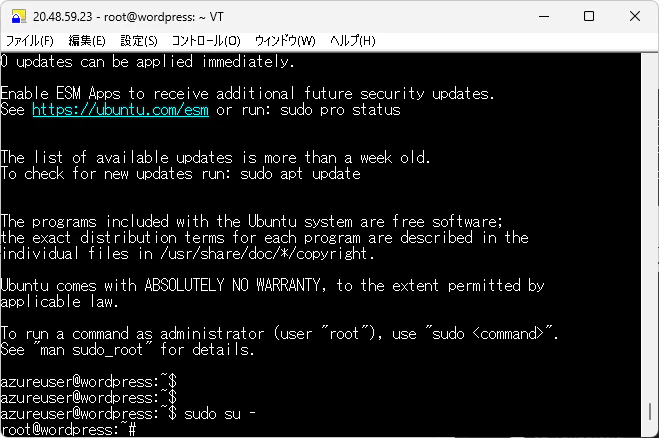
仮想マシンに鍵でアクセスできることを確認しましょう。
Azure Database for MySQLのデプロイ
Databaseを追加するために、vnet-subnet.tfを更新する必要があります。
勉強がてら更新をしてみます。
04_vnet-subnet.tf
# VNet作成
resource "azurerm_virtual_network" "vnet" {
  name                = "study-vnet"
  location            = azurerm_resource_group.rg.location
  resource_group_name = azurerm_resource_group.rg.name
  address_space       = ["192.168.0.0/16"]
  tags                = var.tags
}

# パブリックサブネット
resource "azurerm_subnet" "public" {
  name                 = "public-subnet-01"
  resource_group_name  = azurerm_resource_group.rg.name
  virtual_network_name = azurerm_virtual_network.vnet.name
  address_prefixes     = ["192.168.1.0/24"]
}

# プライベートサブネット
resource "azurerm_subnet" "private" {
  name                 = "private-subnet-01"
  resource_group_name  = azurerm_resource_group.rg.name
  virtual_network_name = azurerm_virtual_network.vnet.name
  address_prefixes     = ["192.168.10.0/24"]

  # Azure Database for MySQLの委任設定
  delegation {
    name = "fs-delegation"
    service_delegation {
      name    = "Microsoft.DBforMySQL/flexibleServers"
      actions = ["Microsoft.Network/virtualNetworks/subnets/join/action"]
    }
  }
}
更新を掛けます
PS C:\Users\ohtsu\Documents\Azure\terraform> terraform plan -out=vnet-subnet-02-tfplan
PS C:\Users\ohtsu\Documents\Azure\terraform> terraform apply .\vnet-subnet-02-tfplan
db.tf
# ---------------------------------------------
# 1. プライベートDNSゾーン (VNet内での名前解決用)
# ---------------------------------------------
resource "azurerm_private_dns_zone" "mysql_dns" {
  name                = "study.mysql.database.azure.com"
  resource_group_name = azurerm_resource_group.rg.name
  tags                = var.tags
}

# DNSゾーンとVNetのリンク
resource "azurerm_private_dns_zone_virtual_network_link" "mysql_link" {
  name                  = "mysql-dns-link"
  private_dns_zone_name = azurerm_private_dns_zone.mysql_dns.name
  virtual_network_id    = azurerm_virtual_network.vnet.id
  resource_group_name   = azurerm_resource_group.rg.name
}

# ---------------------------------------------
# 2. Azure Database for MySQL (Flexible Server)
# ---------------------------------------------
resource "azurerm_mysql_flexible_server" "mysql" {
  name                   = "tf-wp-db-server"
  resource_group_name    = azurerm_resource_group.rg.name
  location               = azurerm_resource_group.rg.location

  # 管理者アカウント設定
  administrator_login    = "wpadmin"
  administrator_password = "P@ssw0rd!"
  sku_name               = "B_Standard_B1ms"

  # MySQLバージョン
  version                = "8.0.21"

  # ネットワーク設定 (プライベートアクセス)
  delegated_subnet_id    = azurerm_subnet.private.id
  private_dns_zone_id    = azurerm_private_dns_zone.mysql_dns.id

  # ストレージ設定 (20GB)
  storage {
    size_gb = 20
    auto_grow_enabled = true
  }

  # バックアップ保持期間 (日)
  backup_retention_days  = 7

  # 依存関係
  depends_on = [azurerm_private_dns_zone_virtual_network_link.mysql_link]

  tags = var.tags
}

# ---------------------------------------------
# 3. データベース作成 (WordPress用)
# ---------------------------------------------
resource "azurerm_mysql_flexible_database" "wp_db" {
  name                = "wordpress_db"
  resource_group_name = azurerm_resource_group.rg.name
  server_name         = azurerm_mysql_flexible_server.mysql.name
  charset             = "utf8mb4"
  collation           = "utf8mb4_unicode_ci"
}
デプロイします。
これは5分程度かかると思います。
PS C:\Users\ohtsu\Documents\Azure\terraform> terraform plan -out=db-tfplan
PS C:\Users\ohtsu\Documents\Azure\terraform> terraform apply .\db-tfplan
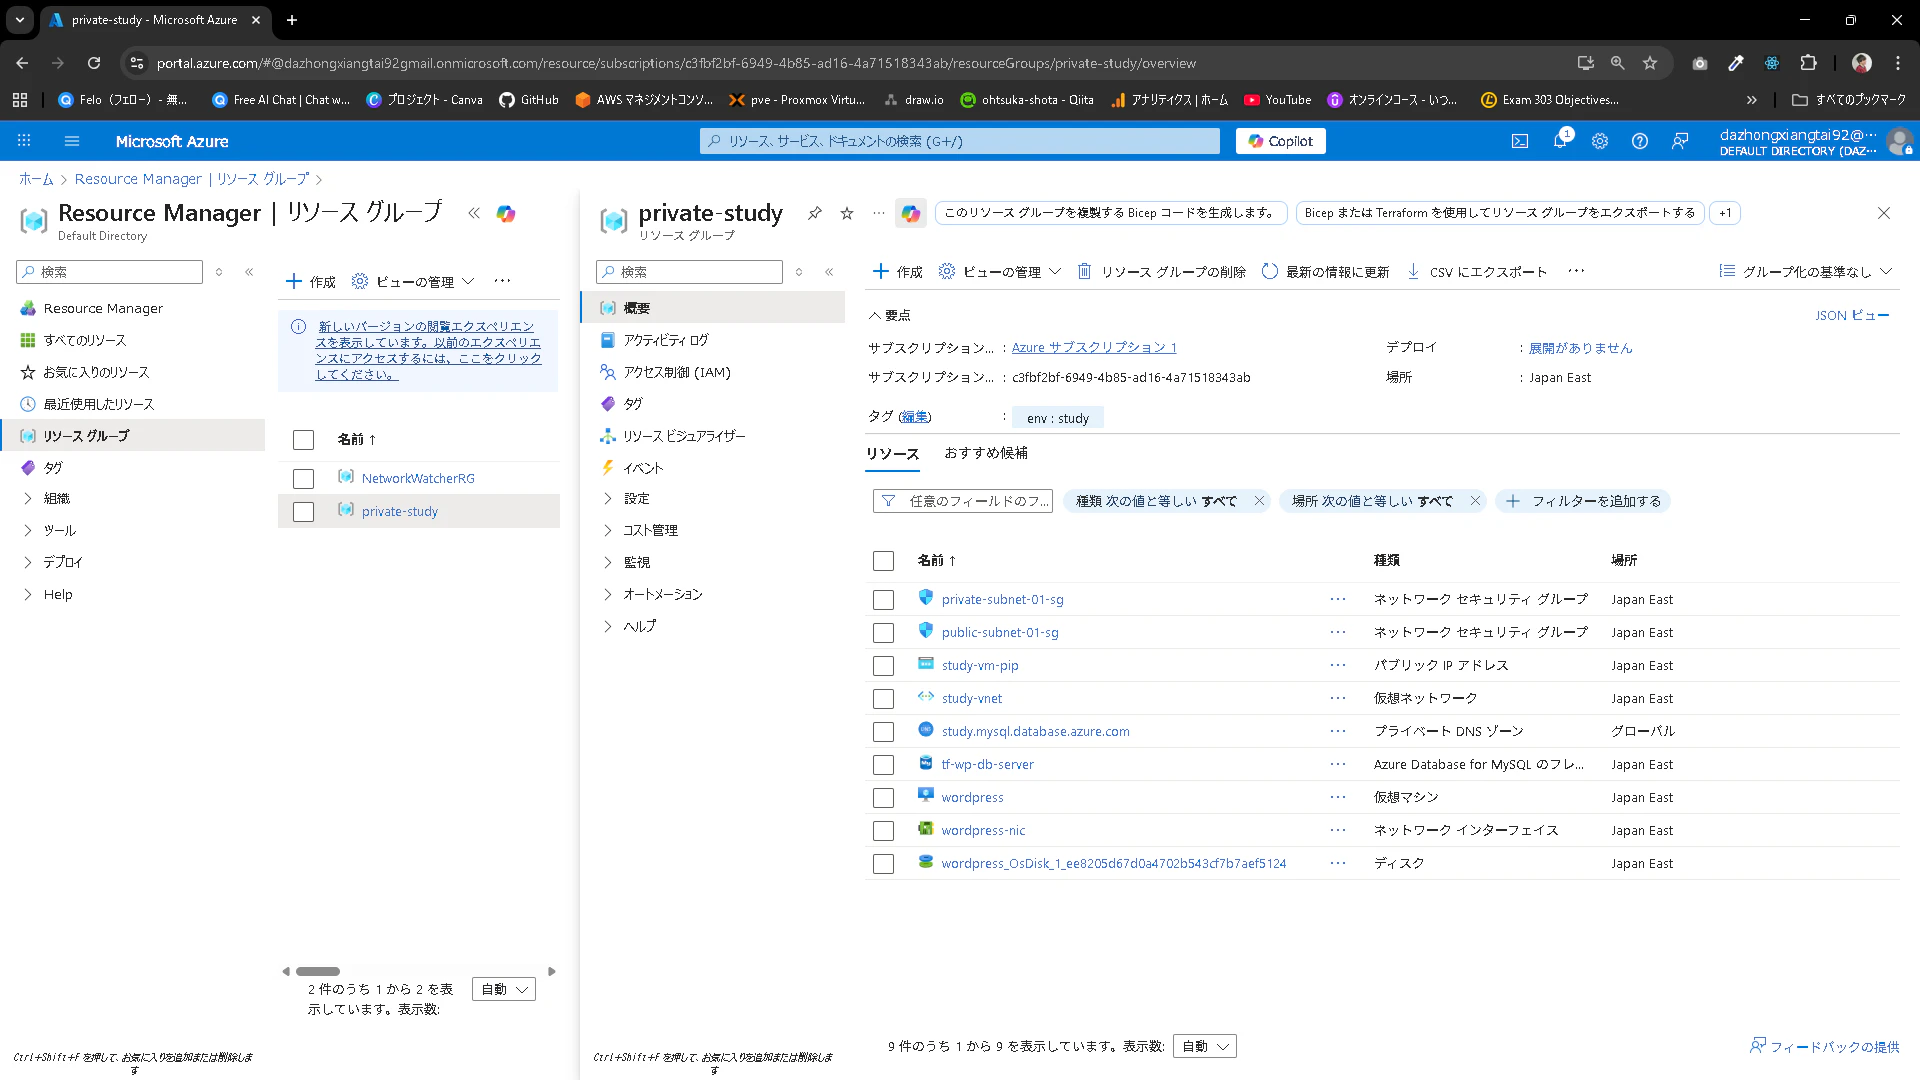
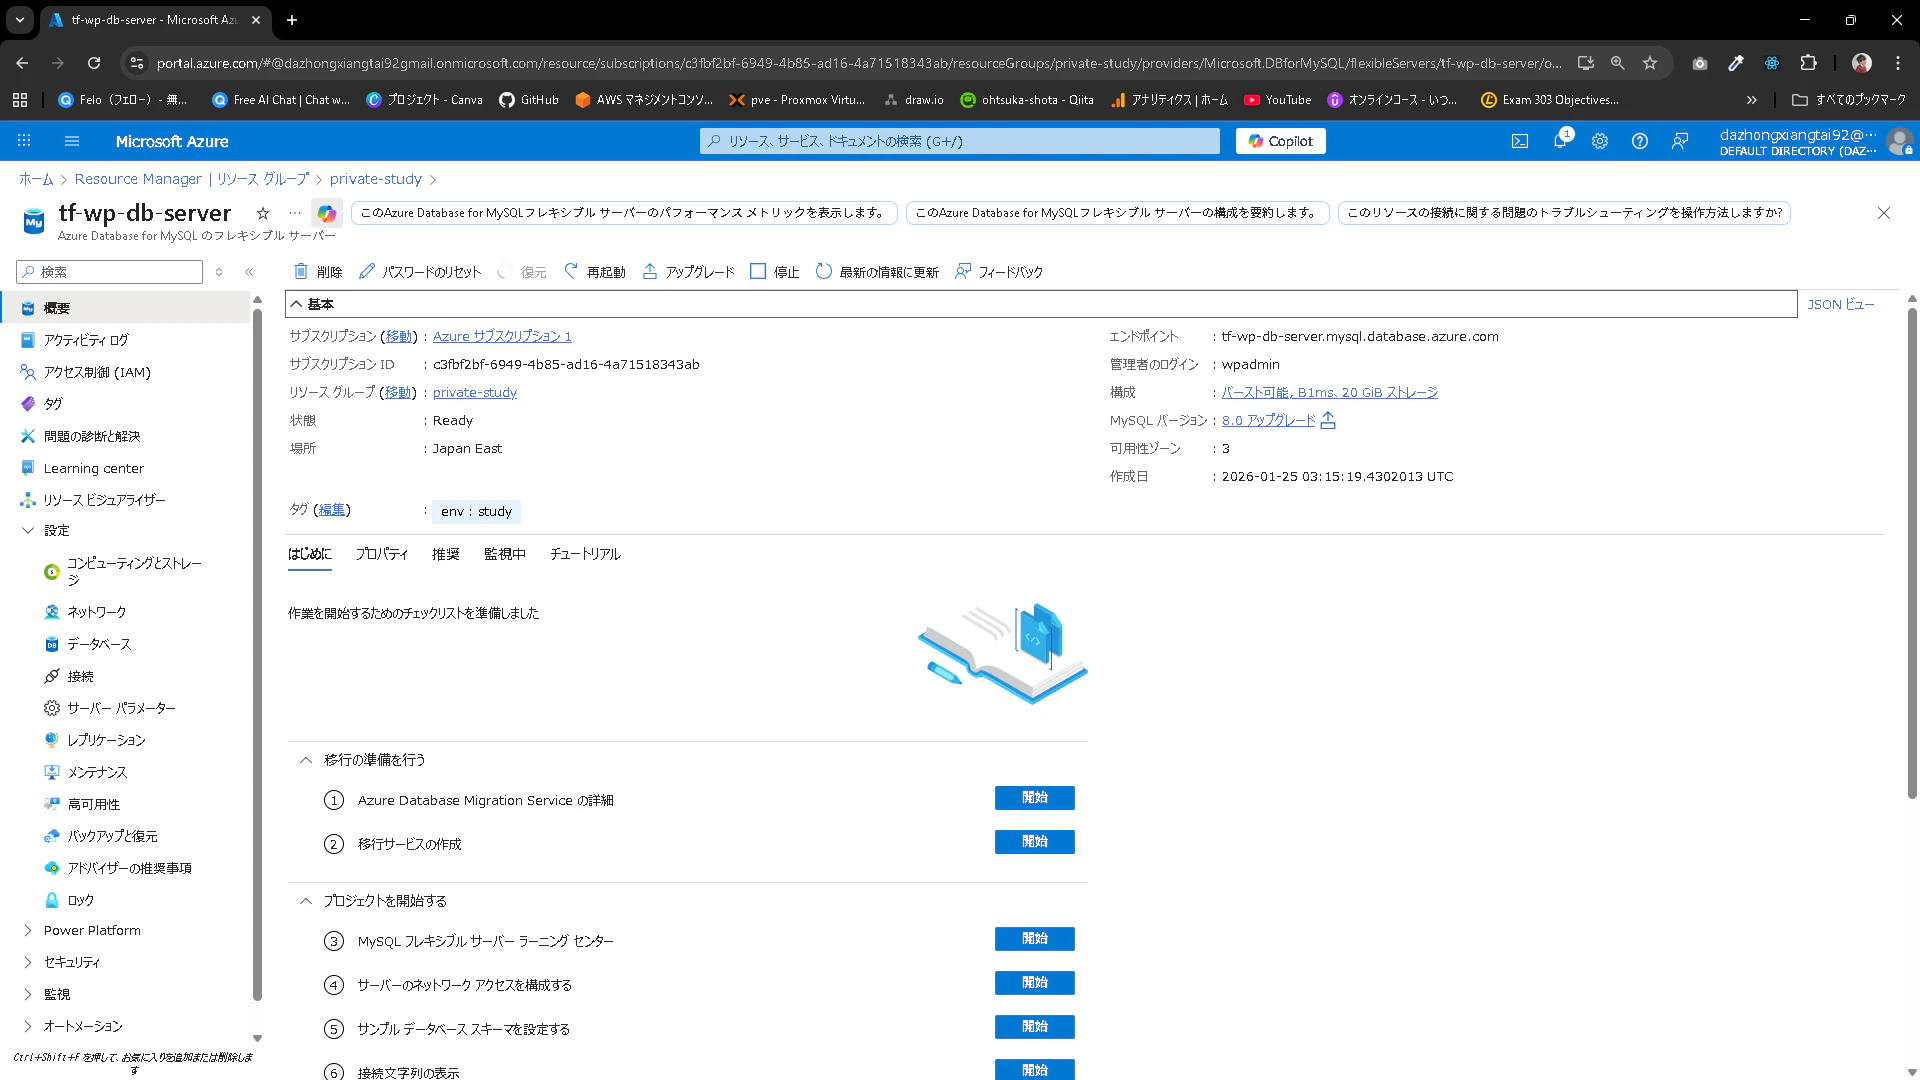
Azure Portalを見てみます。

動作確認
Wordpressの構築手順を使ってWordpressの環境を作れるかを確認してみます。※パスワード等微妙な差分はあるので、それはTFの設定に合わせます。
設定内容は省略しますが、問題なくWordpressを動作させることが出来ました。

terraform.tfstateとterraform.tfstate.backup
terraformでデプロイをしているといつの間にかtfstateとtfstate.backupファイルが作成されています。

それぞれの意味です。
- terraform.tfstate:Terraformが管理対象リソースの現在の状態(作成済みリソースIDや属性など)を記録する状態ファイル。
- terraform.tfstate.backup:terraform.tfstate を更新する直前に自動作成される、ひとつ前の状態を残すバックアップファイル。
削除
Terraformで作成したリソースを削除します。
以下のコマンドを実行します。これを実行すると「全てのリソースを削除する?」と聞かれるのでyesと返してあげましょう。
PS C:\Users\ohtsu\Documents\Azure\terraform> terraform destroy
削除が完了したらAzure Portalを見てみましょう。
リソースグループごと消えていればOKです。
ローカルからも鍵が削除されます。