概要
Kubeflow Pipelines SDK(a.k.a KFP)を使ってパイプラインを構築する方法は主に3つある。微妙に書き方が異なる。
公式ドキュメント的に言うと以下の3つ。
後述するが2つ目の方法はDeprecatedになっているので、実質方法は2つである。
- Creating components from existing application code
- Creating components within your application code
- Creating lightweight components
また今回の環境は以下。
| ツール | バージョン |
|---|---|
| GKEクラスタ | 1.14 |
| gcloud | 290.0.1 |
| Notebooks内のPython | 3.7.6 |
| kfp | 0.5.0 |
前提
kubeflow pipelines とは
kubeflow pipelinesは、kubernetesのクラスタ上で動く機械学習のためのツールセットであるkubeflowのひとつの、所謂「パイプラインツール」である。
パイプラインは基本的にワークフローになっており、かのTFXも踏襲することが出来る。
ワークフローはバックエンドがArgoというkubernetes製のワークフローエンジンになっており、ワークフローのいちステップがPodになっている。

例えば上の図はkubeflow pipelinesの公式のチュートリアルに登場するものである。
パイプラインではあるが、同時にこの1つの図自体はワークフローとして表現されており、extract_dataやgenerate_statsなどがステップとしてのPodであり、Kubeflow pipelinesの世界ではコンポーネント(Component)と呼ばれている。
What's for KFP ?
KFPとはKubeflow Pipelines のためのPython SDKである。
公式ではこのように説明されている。
The Kubeflow Pipelines SDK provides a set of Python packages that you can use to specify and run your machine learning (ML) workflows. A pipeline is a description of an ML workflow, including all of the components that make up the steps in the workflow and how the components interact with each other.
kubernetes製のものを構成する言語・フォーマットといえばYAMLではあるが、上記のTXFの図にあるパイプラインを作成しようとすると1023行のYAMLを書く必要がある(kubeflow pipelinesのチュートリアルで確認できます)。
またkubeflow Pipelinesはデータサイエンティストとデータエンジニアの役割の垣根を超えて、EDAからデプロイを一貫して実行することを目的にしており、Pythonに慣れ親しんでいるデータサイエンティストが書けるようにPythonで提供されている。
そのため(きちんと検証していないが)1023行のYAMLもPythonで書けば、可読性の高い数百行程度のコードになるはずである。
前置きが長くなってしまったが実際にKFPでパイプラインを構築していく。
KFPを使ってパイプラインを構築する
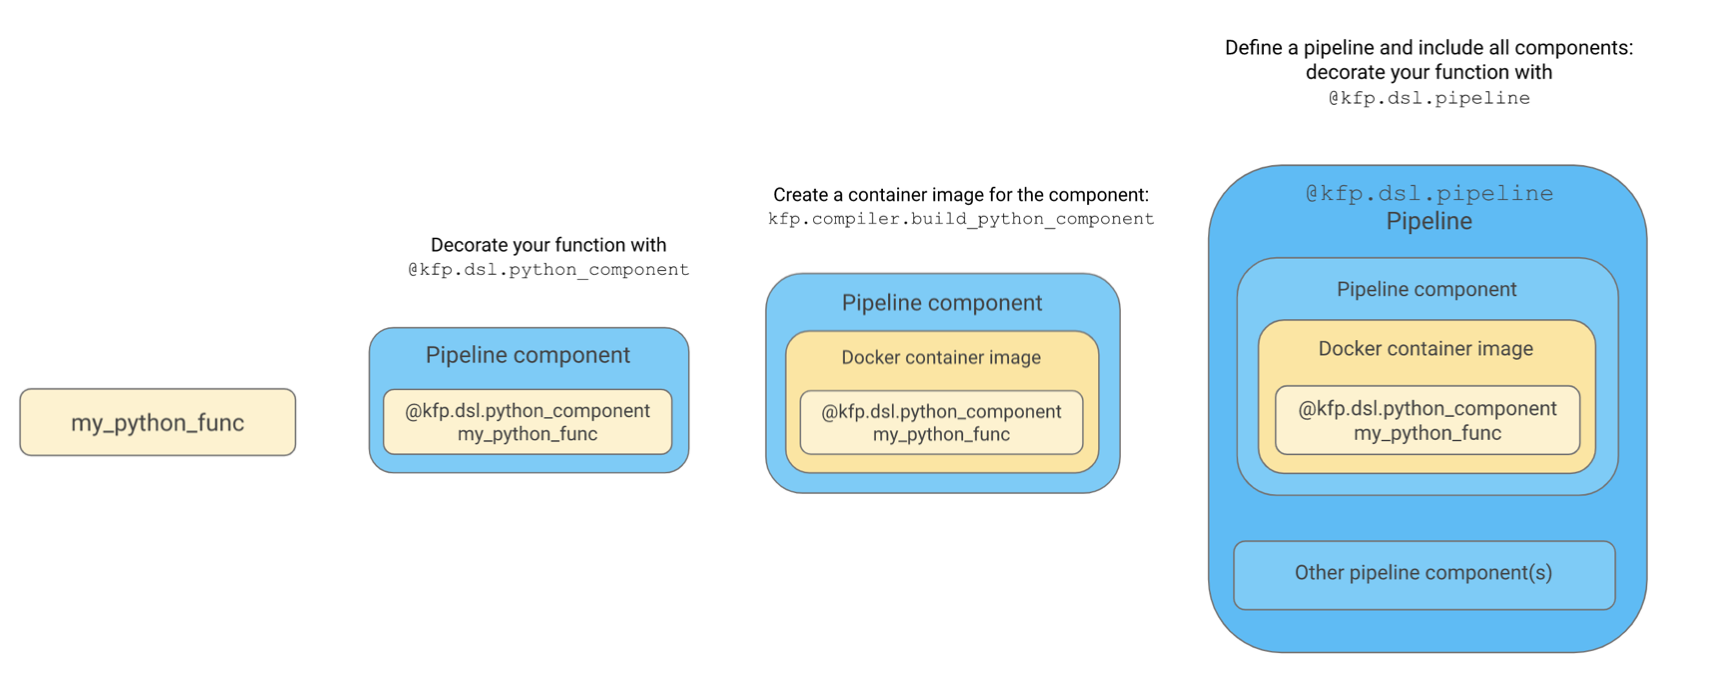
どの3つの方法をとったとしても、
- コンポーネントとなるコードを書き、
- Dockerコンテナにした上でコンポーネントにし、
- それらのコンポーネントを統合してパイプラインにし、
- コンパイルして実行する。
ということは共通している。
コンポーネントの作り方が異なるので、ご自身のやりたいことと状況に合わせて選択していただきたい。
Creating components from existing application code
この方法は、既存で機能として出来上がっているTFXなどのプログラムをコンテナにすることでコンポーネントにする方法である。
 (以降更に2つの図が出てくるが、いずれも[公式](https://www.kubeflow.org/docs/pipelines/sdk/sdk-overview/)を加工したものである)
まずはkfpをインストール。
$ pip3 install kfp
必要なモジュールをインストールする。
import kfp
import kfp.dsl as dsl
from kfp.dsl import ContainerOp
from kfp.compiler import Compiler
この方法の前提は、my-app-code.py を含んだコードのDockerイメージがあることである。事前にGCRなどに登録しておく。今回は簡略化のために、echoするだけのイメージを作成した。
作成したイメージを kfp.dsl.ContainerOp の引数である image に渡す。
@kfp.dsl.componentをくっつけることでコンポーネントであることを明示的にする。またこのコンポーネントの返り値は kfp.dsl.ContainerOp であることが求められる。
# Create Components using component decorator.
@kfp.dsl.component
def echo_op():
    return kfp.dsl.ContainerOp(name='echo',
                               image='asia.gcr.io/[project_id]/[app]:[tag]')
コンポーネントをもとにパイプラインを定義する。
# Define Pipeline with Components defined above.
@kfp.dsl.pipeline(
  name='CreatingComponentsFromExistingApplicationCode',
  description='Creating components from existing application code.'
)
def creating_from_existing_app_code():
    echo_task = echo_op()
最後にパイプラインをYAMLにコンパイルして実行する。
# Compile your pipeline.
kfp.compiler.Compiler().compile(creating_from_existing_app_code, 'creating_from_existing
_app_code.zip')

experiment = client.create_experiment(name='creating_from_existing_app_code')

run = client.run_pipeline(experiment_id = experiment.id,
                             job_name = 'creating_from_existing_app_code',
                             pipeline_package_path = 'creating_from_existing_app_code.zip')
Notebook内で実行すると、セルの下にリンクが発行される。
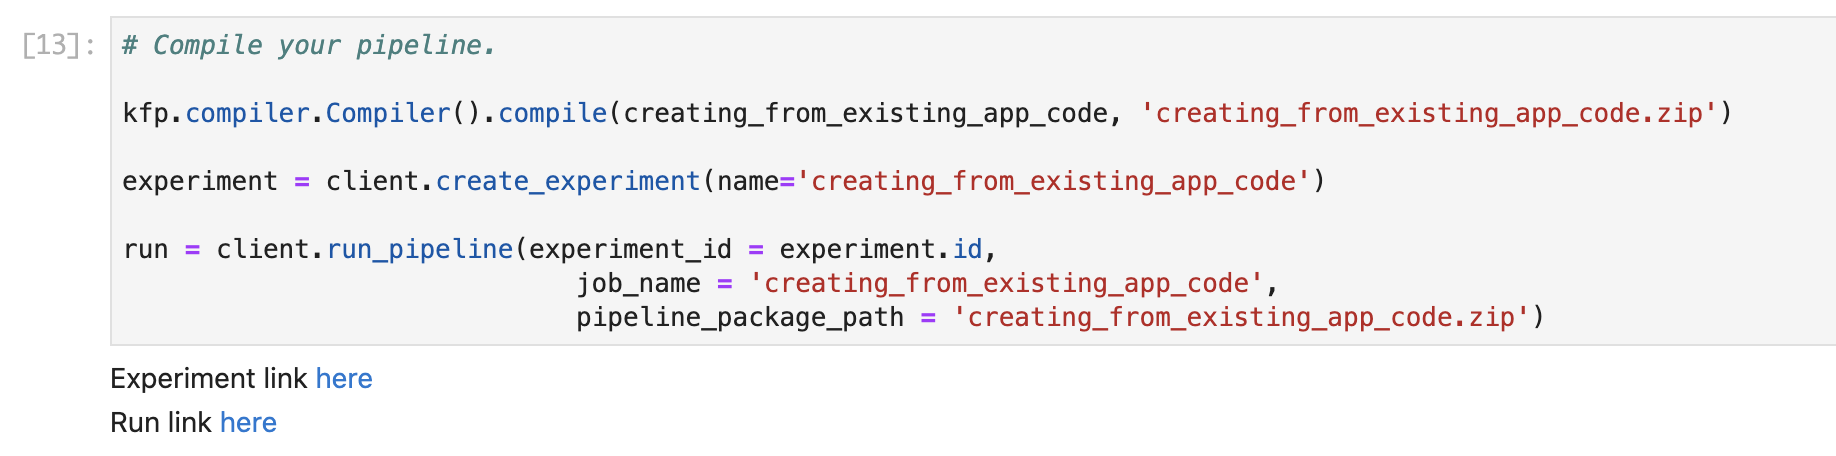
Run link here をクリックすると、実行したパイプラインが表示される。今回は1ステップのみで質素ではあるが、挙動は確認できた。

Creating components within your application code
この方法は、Jupyter Notebookなどで記述している関数などを指定する形でDockerイメージのコンポーネントにする方法である。そして2つ目と書いているが、この使い方は公式ではすでにサポートされていない。
公式では
Use the kfp.dsl.python_component decorator to convert your Python function into a pipeline component.
とあるようにkfp.dsl.python_componentというデコレータを関数にくっつけてやるとのことだが、実行するとDeprecationErrorに…。ちなみに私のKFPは0.5.0だった。
DeprecationWarning: Call to deprecated function (or staticmethod) python_component.
(This decorator does not seem to be used, so we deprecate it. If you need this decorator,
please create an issue at https://github.com/kubeflow/pipelines/issues) -- Deprecated since version 0.2.6.
エラーメッセージにもある通り、このデコレータはほとんど使われなかったらしく、また3つ目で紹介するCreating lightweight componentsに登場するfunc_to_container_opというモジュールの引数としてDockerイメージを指定できる。そのため公式で紹介されている2つ目のCreating components within your application codeは紹介しない。
Creating lightweight components
この方法はコンポーネントを作る際に、Dokcerのビルドを必要としない軽量かつ高速なパイプラインを作る方法である。Notebooksで書いたスクリプトをそのままコンポーネントにすることができる。

まずは必要なモジュールのインポート。
func_to_container_opを使うことでDockerビルドをインラインで実行しコンポーネントを作成する。
ドキュメントはこちら。
import kfp
import kfp.dsl as dsl
from kfp.compiler import Compiler
from kfp.components import func_to_container_op
次にNotebook内でPythonの関数を定義。
そしてfunc_to_container_opでラップする。
ちなみに返り値はpipeline task instance (ContainerOp)とのこと。
# Defile your functions first.
def add(a: float, b: float) -> float:
    print("Adding two values %s and %s" %(a, b))
    return a + b

def say(what: str):
    print(what)

# Create lightweight components, converting functions defined.
add_op = kfp.components.func_to_container_op(func = add,
                                             base_image = "python:alpine")

say_op = kfp.components.func_to_container_op(func = say,
                                             base_image = "python:alpine")
そしてパイプラインを定義する。
パイプラインの定義にはデコレータ@kfp.dsl.pipelineを使う。
afterを使うことで依存関係を表現することが出来る。
# Define Pipeline with Components defined above.
@kfp.dsl.pipeline(
name='CreatingLightWeightComponents',
description='Creating lightweight components.'
)
def creating_lightweight_components(
a='1',
b='2',
c='3',
d='4',
what='Completed!',
):
# Passing pipeline parameter and a constant value as operation arguments
add_task_1 = add_op(a, b) #Returns a dsl.ContainerOp class instance.
add_task_2 = add_op(b, c)
add_task_3 = add_op(c, d)
add_task_4 = add_op(add_task_2.output, add_task_3.output)
say_task = say_op(what)
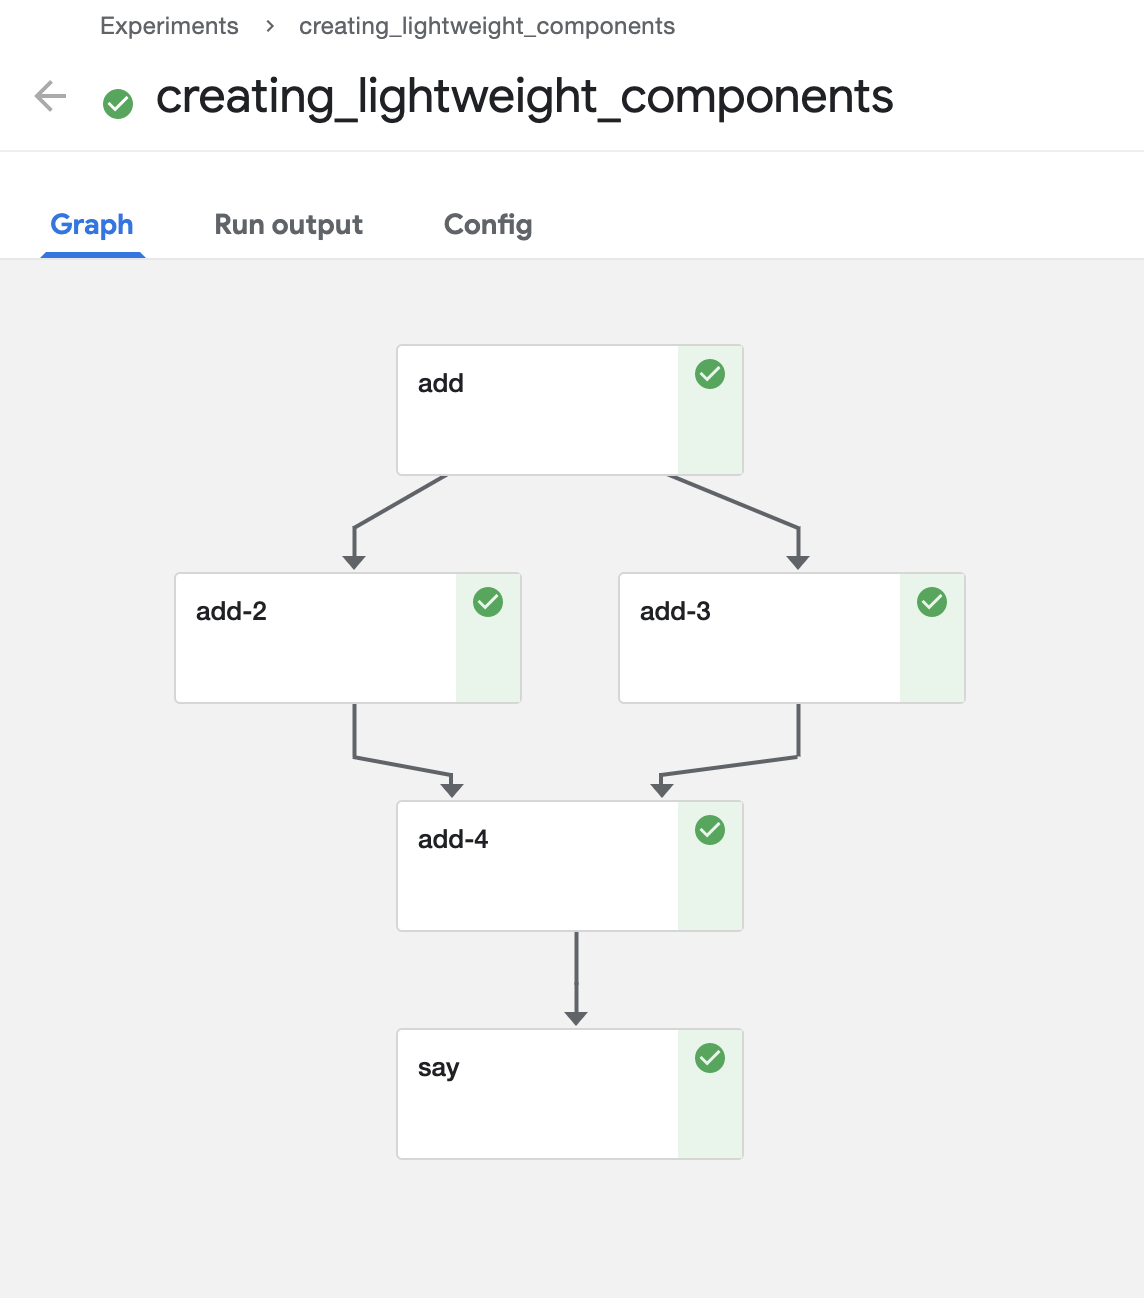
# You can create explicit dependancy between the tasks using xyz_task.after(abc_task)
add_task_2.after(add_task_1)
add_task_3.after(add_task_1)
add_task_4.after(add_task_2, add_task_3)
say_task.after(add_task_4)
パイプラインが定義できたらコンパイルして実行する。
# Compile your pipeline.
client = kfp.Client()

kfp.compiler.Compiler().compile(creating_lightweight_components, 'creating_lightweight_components.zip')

experiment = client.create_experiment(name='creating_lightweight_components')

run = client.run_pipeline(experiment_id = experiment.id,
                             job_name = 'creating_lightweight_components',
                             pipeline_package_path = 'creating_lightweight_components.zip')
以下が実行結果である。
最後に
実験管理の場として便利なkubeflow pipelinesではあるが、YAMLのつらさを克服するためにPython SDKを習得する必要がある。もちろん愚直にYAML書くのもなくはない。
公式のドキュメントを読んで手を動かしていると意外とdeprecatedなものが多くあるので注意が必要である。もちろんそれだけ進化が早いということでもある。
もしデータサイエンティストがDockerの存在を意識したりPython SDKの書き方を習得したりすればパイプラインを高速で実行しデプロイまで一人で持っていけるだろうという確信もある。もちろんエンジニアとの役割分担をどうするかは組織次第ではあるが、その垣根を超えるポテンシャルがあるツールであることもわかる。
またKaleを使えばPythonすら書かずにメタデータの操作だけでパイプラインの作成が可能になる。Kaleはまた別の機会で記事を書ければと思う。