プログラミングのツールやサービスは便利なものが揃っているので Ruby の gem を作りながら紹介します。
- Docker なので OS X, Windows, Linux で動作します。
- gem は Ruby の外部ライブラリです。
すること、できること
- Docker の Ruby で gem をテスト駆動開発で作ります。
- CircleCI や CodeClimate のサービスで自動テストをします。
- GitHub や RubyGems にリリースした gem を使います。
GitHub の利用
- GitHub はソースコードを管理するサービスです。
- 今回は my_gems という名前の gem を作るので my_gems のリポジトリを作ります。
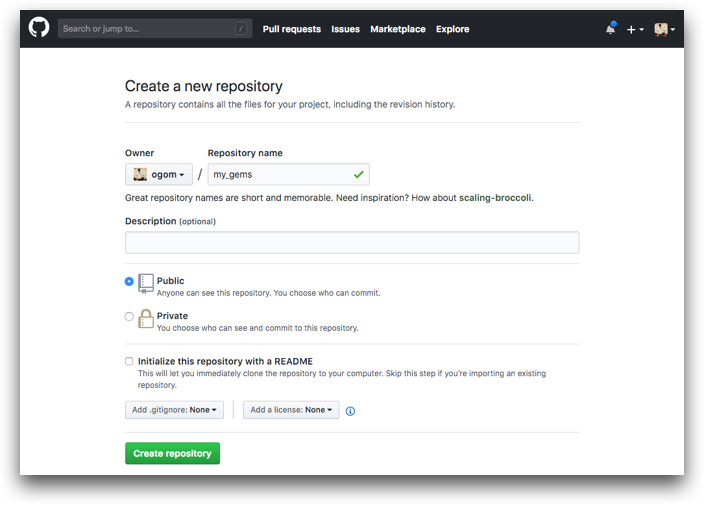
- リポジトリを作ると続きはターミナルでコマンドラインを使います。
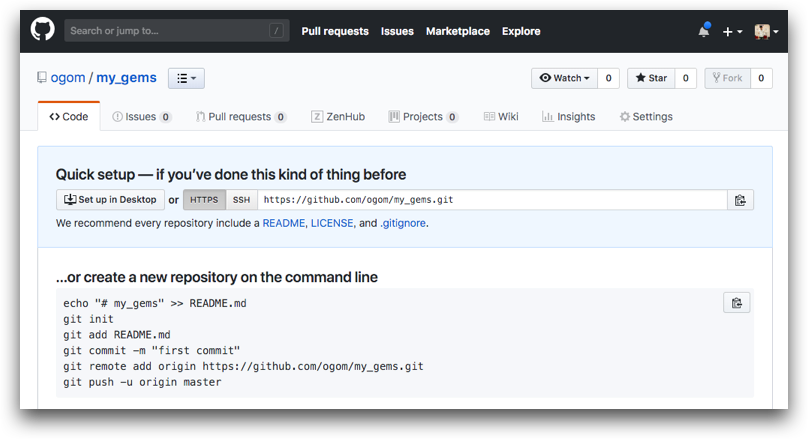
-
git initコマンドで空の README を追加をして、git configコマンドでユーザ情報を設定します。 -
git commitコマンドでコミットができたら、git logコマンドでログを確認しましょう。
$ mkdir my_gems
$ cd my_gems/
$ git init && touch README.md && git add README.md
$ git config --local user.name "your-name"
$ git config --local user.email "your-name@example.com"
$ git commit -m "Initial commit" && rm README.md
$ git log --pretty=format:"%an <%ae> : %s"
your-name <your-name@example.com> : Initial commit
-
git remote addコマンドで GitHub の URL を設定します。 -
git pushコマンドで GitHub にソースコードがアップロードされます。
$ git remote add origin https://github.com/your-name/my_gems.git
$ git push -u origin master
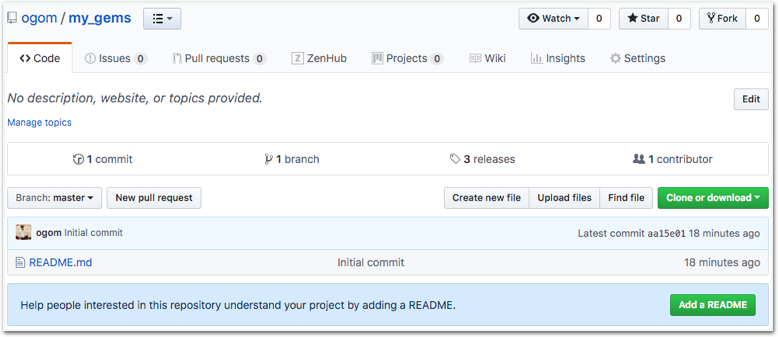
- README だけのリポジトリができました!
-
.netrcファイルにgit pushコマンドで要求されるユーザ情報を登録することができます。- ユーザ情報は暗号化することもできます。
machine github.com
login your-name@example.com
password your-password
Docker と Bundler で gem の作成
- Docker はコンテナ型の仮想環境を操作するツールです。
- Bundler は gem の依存を管理したり gem の作成をサポートするツールです。
-
docker run -v $(pwd):/my_gems ruby:2.5.1コマンドは Ruby が使える仮想環境でコマンドを実行します。-
-v $(pwd):/my_gemsのオプションで仮想環境のボリューム(フォルダ)をホストとマウントします。-
$(pwd)は絶対パスが設定されます。任意で変更してください。
-
-
-
bundle gem my_gems --test=rspec --mit --no-cocコマンドで gem の雛形を作ります。-
--test=rspecのオプションで Test Framework の RSpec を利用します。 -
--mit --no-cocのオプションで license は MIT、Contributor Code of Conduct の出力は不要にします。
-
$ docker run -v $(pwd):/my_gems ruby:2.5.1 bundle gem my_gems --test=rspec --mit --no-coc
Creating gem 'my_gems'...
MIT License enabled in config
      create  my_gems.Gemfile
      create  my_gems.lib.my_gems.rb
      create  my_gems.lib.my_gems.version.rb
      create  my_gems.my_gems.gemspec
      create  my_gems.Rakefile
      create  my_gems.README.md
      create  my_gems.bin.console
      create  my_gems.bin.setup
      create  my_gems..gitignore
      create  my_gems..travis.yml
      create  my_gems..rspec
      create  my_gems.spec.spec_helper.rb
      create  my_gems.spec.my_gems_spec.rb
      create  my_gems.LICENSE.txt
Initializing git repo in /my_gems
Gem 'my_gems' was successfully created. For more information on making a RubyGem visit https://bundler.io/guides/creating_gem.html
-
my_gems.gemspecファイルの TODO の箇所を修正します。
-  spec.authors       = ["TODO: Write your name"]
-  spec.email         = ["TODO: Write your email address"]
+  spec.authors       = ["your-name"]
+  spec.email         = ["your-name@example.com"]

-  spec.summary       = %q{TODO: Write a short summary, because RubyGems requires one.}
-  spec.description   = %q{TODO: Write a longer description or delete this line.}
-  spec.homepage      = "TODO: Put your gem's website or public repo URL here."
+  spec.summary       = %q{my gems of short summary.}
+  spec.description   = %q{my gems of longer description.}
+  spec.homepage      = "https://github.com/your-name/my_gems.git"
-
Gemfileファイルに開発で使う gem を追加します。
gem 'guard-rspec', require: false, group: %i[development test]
gem 'rspec', group: :test
gem 'rspec_junit_formatter', group: :test
gem 'rubocop', require: false, group: %i[development test]
gem 'simplecov', require: false, group: :test
-
git commitコマンドでコミットします。
$ git add --all && git commit -m "Bundler New gem"
Docker Compose で Docker の構築
- Docker Compose は複数の Docker を管理するツールです。
-
touchコマンドで空ファイルを作成します。
$ touch Dockerfile && touch docker-compose.yml
-
Dockerfileファイルに仮想環境で使う Ruby のバージョンを設定します。-
locale-genで日本語の対応をしています。
-
FROM ruby:2.5.1
RUN apt-get update -qq && apt-get install -y locales
RUN sed -i 's/#.*ja_JP\.UTF/ja_JP\.UTF/' /etc/locale.gen
RUN locale-gen && update-locale LANG=ja_JP.UTF-8
RUN mkdir /my_app
WORKDIR /my_app
COPY . /my_app
RUN bundle install
-
docker-compose.ymlファイルに仮想環境のボリューム(フォルダ)とホストのマウントを設定します。
version: "3"
services:
  app:
    build: .
    volumes:
      - .:/my_app
    environment:
      - LANG=ja_JP.UTF-8
      - LC_CTYPE=ja_JP.UTF-8
-
docker-compose buildコマンドで仮想環境を構築するとrake -Tコマンドでタスクを確認できます。
$ docker-compose build
$ docker-compose run app rake -T
rake build            # Build my_gems-0.1.0.gem into the pkg directory
rake clean            # Remove any temporary products
rake clobber          # Remove any generated files
rake install          # Build and install my_gems-0.1.0.gem into system gems
rake install:local    # Build and install my_gems-0.1.0.gem into system gems without network access
rake release[remote]  # Create tag v0.1.0 and build and push my_gems-0.1.0.gem to TODO: Set to 'http://mygemserver.com'
rake spec             # Run RSpec code examples
-
git commitコマンドでコミットします。
$ git add --all && git commit -m "Docker Compose build"
CircleCI の利用
- CircleCI は自動でテストやデプロイを実行するサービスです。
-
touchコマンドで空ファイルを作成します。
$ mkdir .circleci/
$ touch .circleci/config.yml
-
.circleci/config.ymlファイルにテストの実行とレポートの送信を設定します。
version: 2
jobs:
  build:
    docker:
      - image: circleci/ruby:2.5.1-node-browsers
    working_directory: ~/repo
    steps:
      - checkout
      - restore_cache:
          keys:
            - v1-dependencies-{{ checksum "Gemfile.lock" }}
            - v1-dependencies-
      - run:
          name: Install Dependencies
          command: |
            bundle install --jobs=4 --retry=3 --path vendor/bundle
      - run:
          name: Setup Code Climate test-reporter
          command: |
            curl -L https://codeclimate.com/downloads/test-reporter/test-reporter-latest-linux-amd64 > ./cc-test-reporter
            chmod +x ./cc-test-reporter
      - save_cache:
          paths:
            - ./vendor/bundle
          key: v1-dependencies-{{ checksum "Gemfile.lock" }}
      - run:
          name: Run Tests
          command: |
            mkdir /tmp/test-results
            TEST_FILES="$(circleci tests glob "spec/**/*_spec.rb" | circleci tests split --split-by=timings)"
            ./cc-test-reporter before-build
            bundle exec rspec --format progress \
                            --format RspecJunitFormatter \
                            --out /tmp/test-results/rspec.xml \
                            --format progress \
                            $TEST_FILES
            ./cc-test-reporter after-build --coverage-input-type simplecov --exit-code $?
      - store_test_results:
          path: /tmp/test-results
      - store_artifacts:
          path: /tmp/test-results
          destination: test-results
-
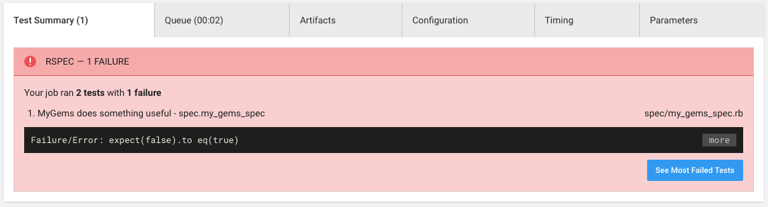
circleci buildコマンドでテストを実行することができます。- Bundler で作成した RSpec の雛形はテストが失敗します。
$ circleci build
Error: runner failed
Task failed
-
git commitコマンドでコミットして、git pushコマンドでアップロードします。
$ git add --all && git commit -m "CircleCI config"
$ git push origin master
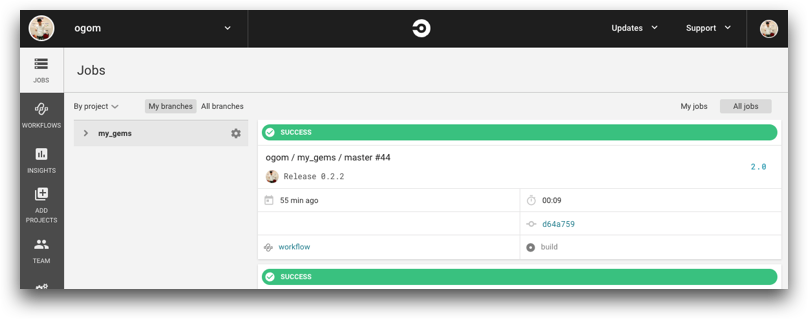
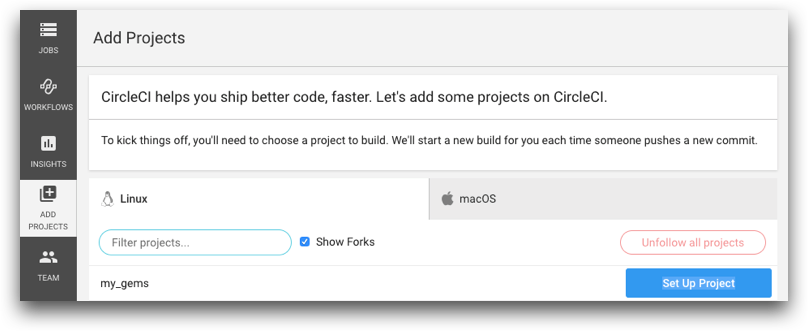
- CircleCI の
Add Projectsから my_gems でSet Up Projectをクリックします。
- CircleCI で
Start buildingをクリックするとテストが実行されます。- 今回はテストに失敗したことがレポートされています。
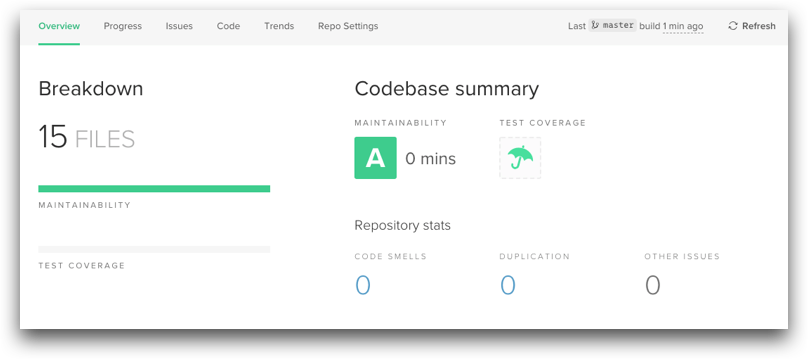
Code Climate の利用
- Code Climate は自動でコードの品質をチェックするサービスです。
- Code Climate で
Add a repositoryをクリックして my_gems を追加します。
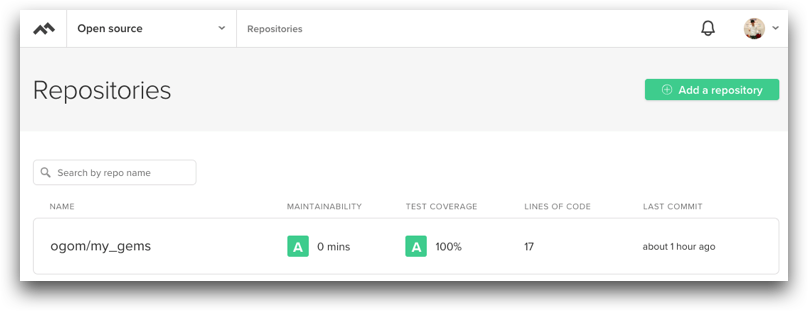
- カバレッジは未対応なので傘のアイコンが表示されています。
-
touchコマンドで空ファイルを作成します。
$ touch .codeclimate.yml
-
.codeclimate.ymlファイルに Rubocop の利用を設定します。
version: "2"
plugins:
  rubocop:
    enabled: true
-
git commitコマンドでコミットして、git pushコマンドでアップロードします。
$ git add --all && git commit -m "Code Climate config"
$ git push origin master
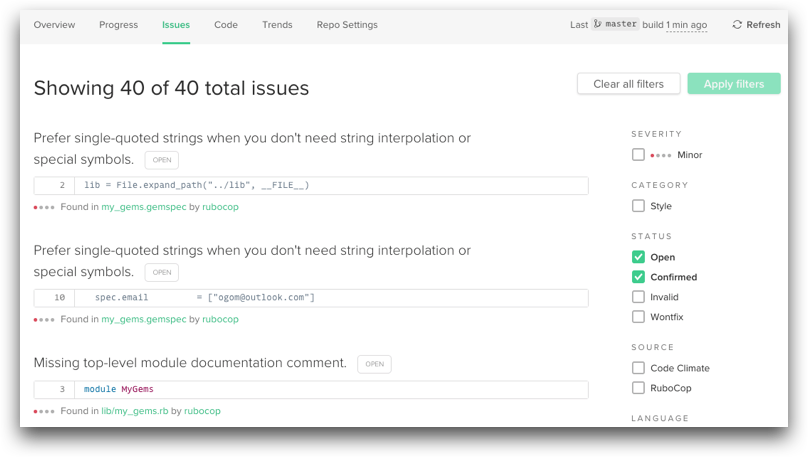
- Code Climate で品質に問題があることを指摘されています。
Rubocop の利用
- Rubocop はコーディング規約のツールです。
-
touchコマンドで空ファイルを作成します。
$ touch .rubocop.yml
-
.rubocop.ymlファイルに Rubocop のコーディング規約を設定します。
AllCops:
  Exclude:
    - "bin/*"
    - "spec/spec_helper.rb"
    - "Guardfile"
    - "Gemfile"
    - "*.gemspec"
    - "Rakefile"

Style/Documentation:
  Enabled: false

Metrics/BlockLength:
  Exclude:
    - "spec/**/*"
-
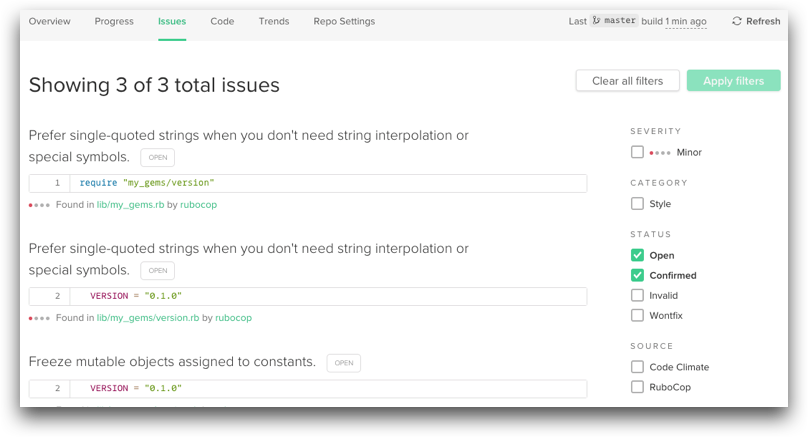
bundle exec rubocopコマンドで規約違反を確認することができます。
$ docker-compose run app bundle exec rubocop
Inspecting 3 files
CCC
-
git commitコマンドでコミットして、git pushコマンドでアップロードします。
$ git add --all && git commit -m "Rubocop config"
$ git push origin master
- Code Climate も同じ結果になります。
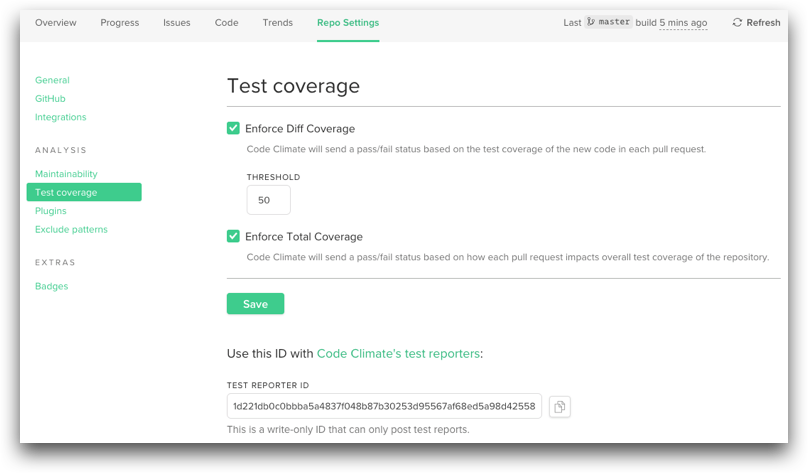
SimpleCov の利用
- SimpleCov はテストのカバレッジをサポートするツールです。
- Code Climate の
Test coverageでTEST REPORTER IDの値を CircleCI に設定します。
- CircleCI で Environment の
Add VariableをクリックしてCC_TEST_REPORTER_IDを追加します。 - Code Climate Enterprise は
CC_TEST_REPORTER_COVERAGE_ENDPOINTも追加します。- https://[your-domain]/api/v1/test_reports

-
spec/spec_helper.rbファイルに SimpleCov の設定をします。
require "bundler/setup"
require "simplecov"
SimpleCov.start do
  add_filter "/spec/"
end
require "my_gems"

RSpec.configure do |config|
  # Enable flags like --only-failures and --next-failure
  config.example_status_persistence_file_path = ".rspec_status"

  # Disable RSpec exposing methods globally on `Module` and `main`
  config.disable_monkey_patching!

  config.expect_with :rspec do |c|
    c.syntax = :expect
  end
end
-
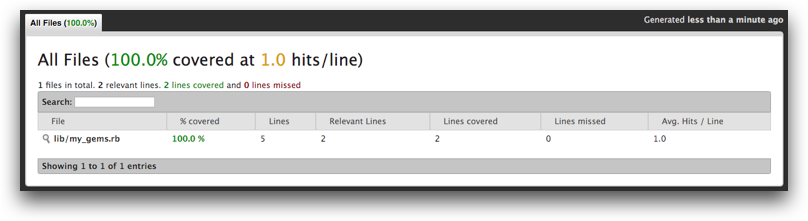
bundle exec rake specコマンドでテストを実行します。 -
coverage/index.htmlファイルにカバレッジが出力されます。
$ docker-compose run app bundle exec rake spec
$ open coverage/index.html
-
git commitコマンドでコミットして、git pushコマンドでアップロードします。
$ git commit -am "SimpleCov config"
テスト駆動開発
- テスト駆動開発 はプログラミングの開発手法で、最初にテストから記述(テストファースト)します。
- テスト駆動開発は Red Green Refactor のサイクルを繰り返します。
- まず、テストから書いて
Red(Assert First) - すぐ、テストを成功させて
Green(Fake It) - テストが成功の状態で
Refactor(Refactoring)
- まず、テストから書いて
Guard RSpec の利用
- Guard はテストの実行をサポートするツールです。
-
bundle exec guard initコマンドで Guardfile を出力します。 -
bundle exec guardコマンドで自動テストの準備をします。
$ docker-compose run app bundle exec guard init
$ docker-compose run app bundle exec guard
[1] guard(main)>
- FizzBuzz のプログラムを作ります。
-
spec/my_gems_spec.rbファイルに FizzBuzz クラスの仕様を書きます。
require 'spec_helper'

RSpec.describe MyGems do
  describe MyGems::FizzBuzz do
    context '3で割り切れる場合' do
      example 'Fizz という'
    end

    context '5で割り切れる場合' do
      example 'Buzz という'
    end

    context '15で割り切れる場合' do
      example 'FizzBuzz という'
    end

    context '3や15で割り切れない場合' do
      example 'その 数字 をいう'
    end
  end
end
-
lib/my_gems.rbファイルに FizzBuzz のクラスを仮実装します。
require 'my_gems/version'

module MyGems
  class FizzBuzz
    def initialize(number)
      @number = number
    end

    def say
      ''
    end
  end
end
- ファイルが保存されると自動でテストが実行されます。
MyGems
  MyGems::FizzBuzz
    3で割り切れる場合
      Fizz という (PENDING: Not yet implemented)
    5で割り切れる場合
      Buzz という (PENDING: Not yet implemented)
    15で割り切れる場合
      FizzBuzz という (PENDING: Not yet implemented)
    3や15で割り切れない場合
      その 数字 をいう (PENDING: Not yet implemented)
-
git commitコマンドでコミットして、git pushコマンドでアップロードします。
$ git add --all && git commit -m "Guard config"
$ git push origin master
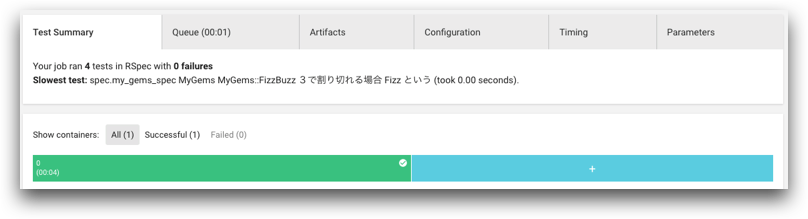
- CircleCI は全てペンディングなので成功が表示されます。
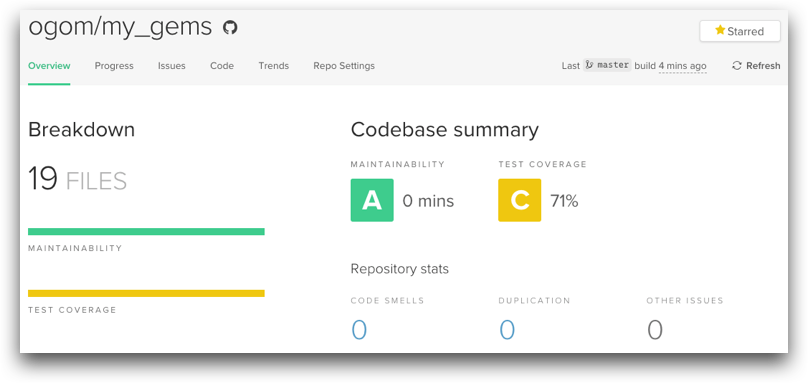
- Code Climate はカバレッジが表示されます。
Pull request
- Pull request は GitHub Flow という開発フローのプロセスの一つです。
-
git checkoutコマンドで開発のブランチを作成します。 -
bundle exec guardコマンドで Guard RSpec を実行します。
$ git checkout -b develop
$ docker-compose run app bundle exec guard
-
spec/my_gems_spec.rbファイルに say メソッドの仕様を記述します。
require 'spec_helper'

RSpec.describe MyGems do
  describe MyGems::FizzBuzz do
    describe '#say' do
      let(:fizz_buzz) { described_class.new(number) }
      subject { fizz_buzz.say }

      context '3で割り切れる場合' do
        let(:number) { 3 }
        example 'Fizz という' do
          expect(subject).to eq 'Fizz'
        end
      end

      context '5で割り切れる場合' do
        let(:number) { 5 }
        example 'Buzz という' do
          expect(subject).to eq 'Buzz'
        end
      end

      context '15で割り切れる場合' do
        let(:number) { 15 }
        example 'FizzBuzz という' do
          expect(subject).to eq 'FizzBuzz'
        end
      end

      context '3や15で割り切れない場合' do
        let(:number) { 1 }
        example 'その 数字 をいう' do
          expect(subject).to eq '1'
        end
      end
    end
  end
end
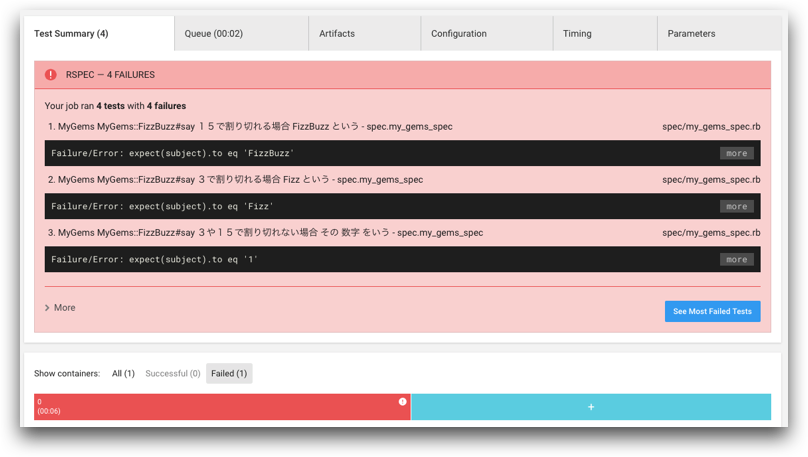
- say メソッドは
Fizzの戻り値を期待しているが、違う値なのでエラーになります。
Failures:

  1) MyGems MyGems::FizzBuzz#say 3で割り切れる場合 Fizz という
     Failure/Error: expect(subject).to eq 'Fizz'

       expected: "Fizz"
            got: ""
-
git commitコマンドでコミットして、git pushコマンドでアップロードします。
$ git commit -am "Test example"
$ git push origin develop
- GitHub に Pull request を登録すると CircleCI と Code Climate の状態が表示されます。
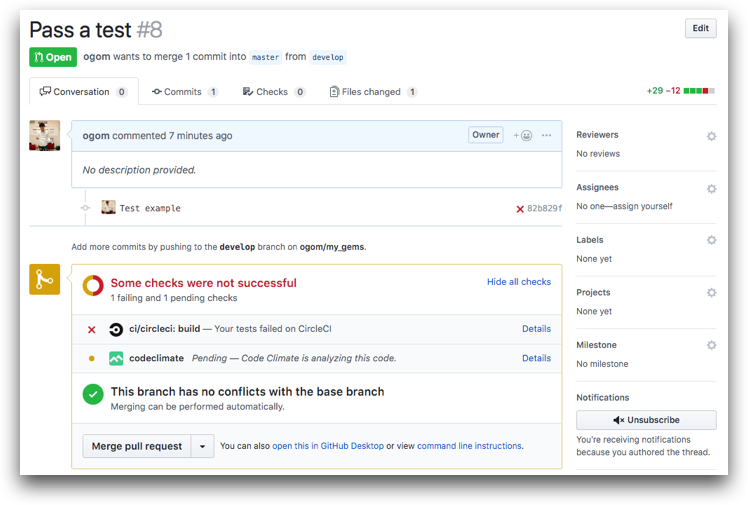
- CircleCI は失敗が表示されます。
-
lib/my_gems.rbファイルに何かテストが成功するように実装します。(Fake It)
require 'my_gems/version'

module MyGems
  class FizzBuzz
    def initialize(number)
      @number = number
    end

    def say
      'Fizz'
    end
  end
end
-
lib/my_gems.rbファイルにいくつかのテストが成功するように実装します。(Refactoring)
require 'my_gems/version'

module MyGems
  class FizzBuzz
    def initialize(number)
      @number = number
    end

    def say
      @number == 3 ? 'Fizz' : 'Buzz'
    end
  end
end
-
lib/my_gems.rbファイルにリファクタリングを繰り返して、全てのテストが成功するように実装します。
require 'my_gems/version'

module MyGems
  class FizzBuzz
    def initialize(number)
      @number = number
    end

    def say
      return 'FizzBuzz' if (@number % 15).zero?
      return 'Buzz' if (@number % 5).zero?
      return 'Fizz' if (@number % 3).zero?

      @number.to_s
    end
  end
end
-
git commitコマンドでコミットして、git pushコマンドでアップロードします。
$ git commit -am "Pass a test"
$ git push origin develop
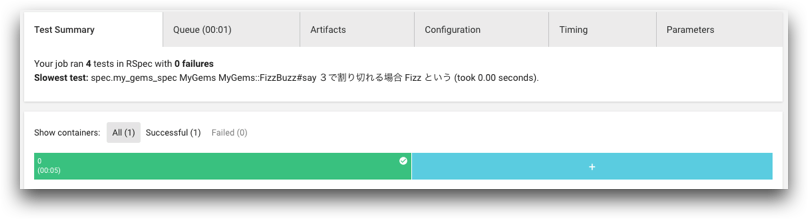
- GitHub の Pull request は自動で CircleCI と Code Climate の状態が更新されます。
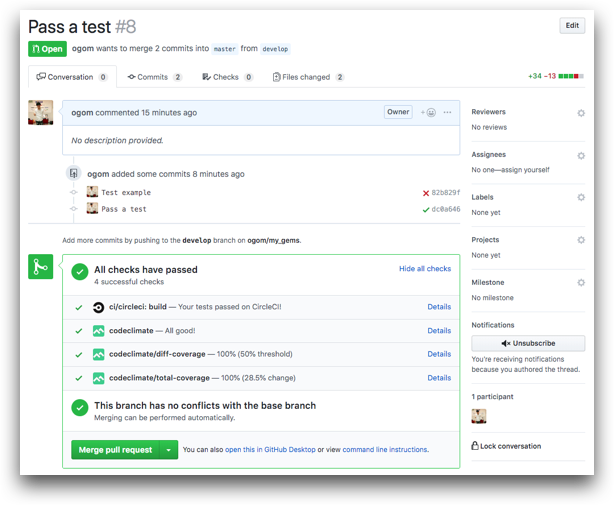
- CircleCI がテストを成功しています。
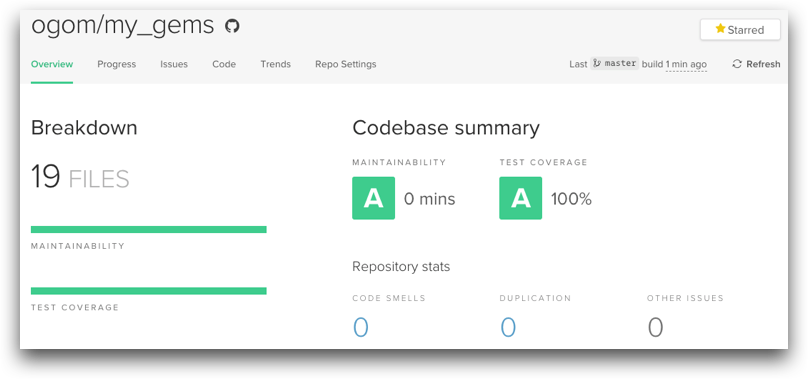
- Github で
Merge pull requestをクリックすると Code Climate のカバレッジが更新されます。
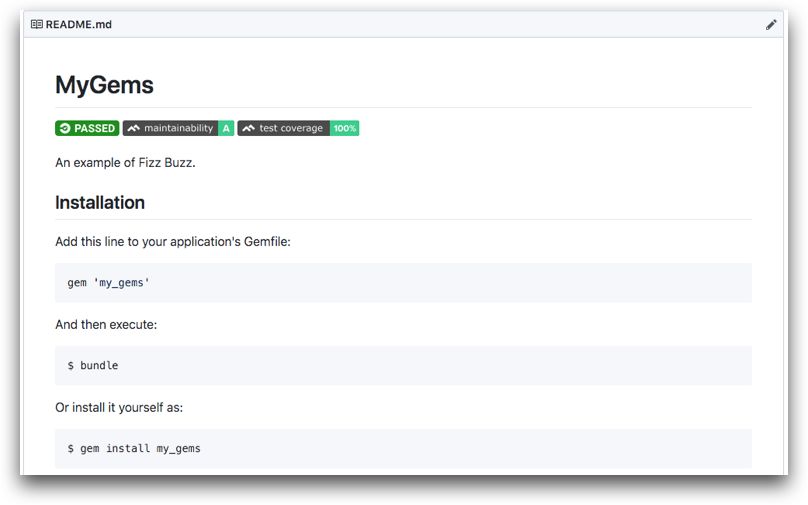
- README に CircleCI と Code Climate の状態をバッジを表示することができます。
GitHub の gem を利用
- GitHub にアップロードされた gem は別のプログラムから読み込むことができます。
-
touchコマンドで空ファイルを作成します。
$ mkdir my_app
$ cd my_app/
$ touch app.rb && touch Gemfile && touch Gemfile.lock
$ touch Dockerfile && touch docker-compose.yml
-
app.rbファイルに FizzBuzz を使うコードを記述します。
require 'my_gems'

fizz_buzz = MyGems::FizzBuzz.new(3)
puts fizz_buzz.say
-
Gemfileファイルに GitHub のパスを設定します。
gem 'my_gems', git: "https://github.com/your-name/my_gems.git", branch: :master
-
Dockerfileファイルに仮想環境で使う Ruby のバージョンを設定します。-
Gemfileファイルを仮想環境にコピーします。
-
FROM ruby:2.5.1
RUN mkdir /my_app
WORKDIR /my_app
COPY Gemfile /my_app/Gemfile
COPY Gemfile.lock /my_app/Gemfile.lock
RUN bundle install
COPY . /my_app
-
docker-compose.ymlファイルに仮想環境のボリューム(フォルダ)とホストのマウントを設定します。
version: "3"
services:
  app:
    build: .
    volumes:
      - .:/my_app
-
bundle exec ruby app.rbコマンドで Fizz が出力されます。
$ docker-compose run app bundle exec ruby app.rb
Fizz
-
Gemfile.lockファイルのremoteは GitHub を参照しています。
GIT
  remote: https://github.com/your-name/my_gems.git
  revision: aa1f28a6c59e09892340d32d8cad76bc5b2154a4
  branch: master
  specs:
    my_gems (0.1.0)
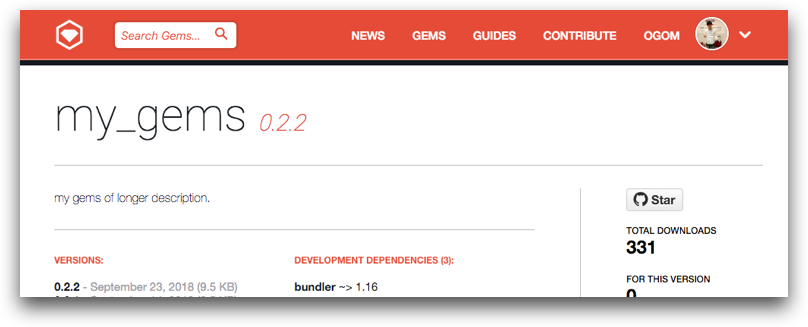
RubyGems の gem を利用
- RubyGems にアップロードされた gem は別のプログラムから読み込むことができます。
-
Gemfileファイルに RubyGems のパスを設定します。
source "https://rubygems.org"

gem 'my_gems'
-
my_gems.gemspecファイルの allowed_push_host に URL を設定します。
spec.metadata["allowed_push_host"] = "https://rubygems.org/"
-
rake releaseコマンドで gem を RubyGems にアップロードします。
$ rake release
my_gems 0.1.0 built to pkg/my_gems-0.1.0.gem.
Tagged v0.1.0.
Pushed git commits and tags.
Pushed my_gems 0.1.0 to rubygems.org
-
bundle exec ruby app.rbコマンドで Fizz が出力されます。
$ docker-compose run app bundle
$ docker-compose build
$ docker-compose run app bundle exec ruby app.rb
Fizz
-
Gemfile.lockファイルのremoteは RubyGems を参照しています。
GEM
  remote: https://rubygems.org/
  specs:
    my_gems (0.1.0)
-
lib/my_gems/version.rbファイルの0.1.0の値が gem のバージョンです。- gem の内容を変更してバージョンアップするにはこのファイルを修正します。
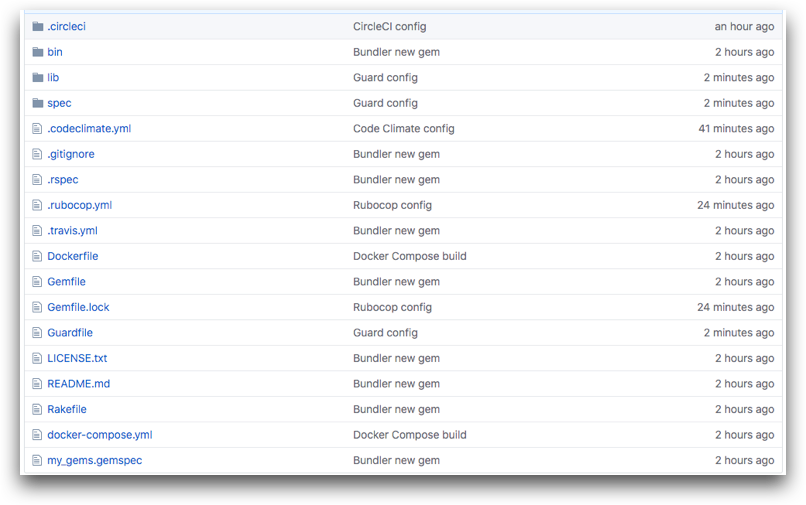
完成したコード
- GitHub に my_gems のコードを公開しています。
参考
-
プロを目指す人のための Ruby 入門
- FizzBuzz プログラムの例題が掲載されています。