LCMを活用してリアルタイムのアバターサービス作成
AI生成技術の進化により、リアルタイムでアバターを動かすサービスの実現が現実味を帯びてきました。その鍵となるのが**LCM(Latent Consistency Models)**です。本記事では、LCMの仕組みから実際のサービス実装まで、実践的な内容を解説します。
📘 LCMとは
従来の拡散モデルの課題
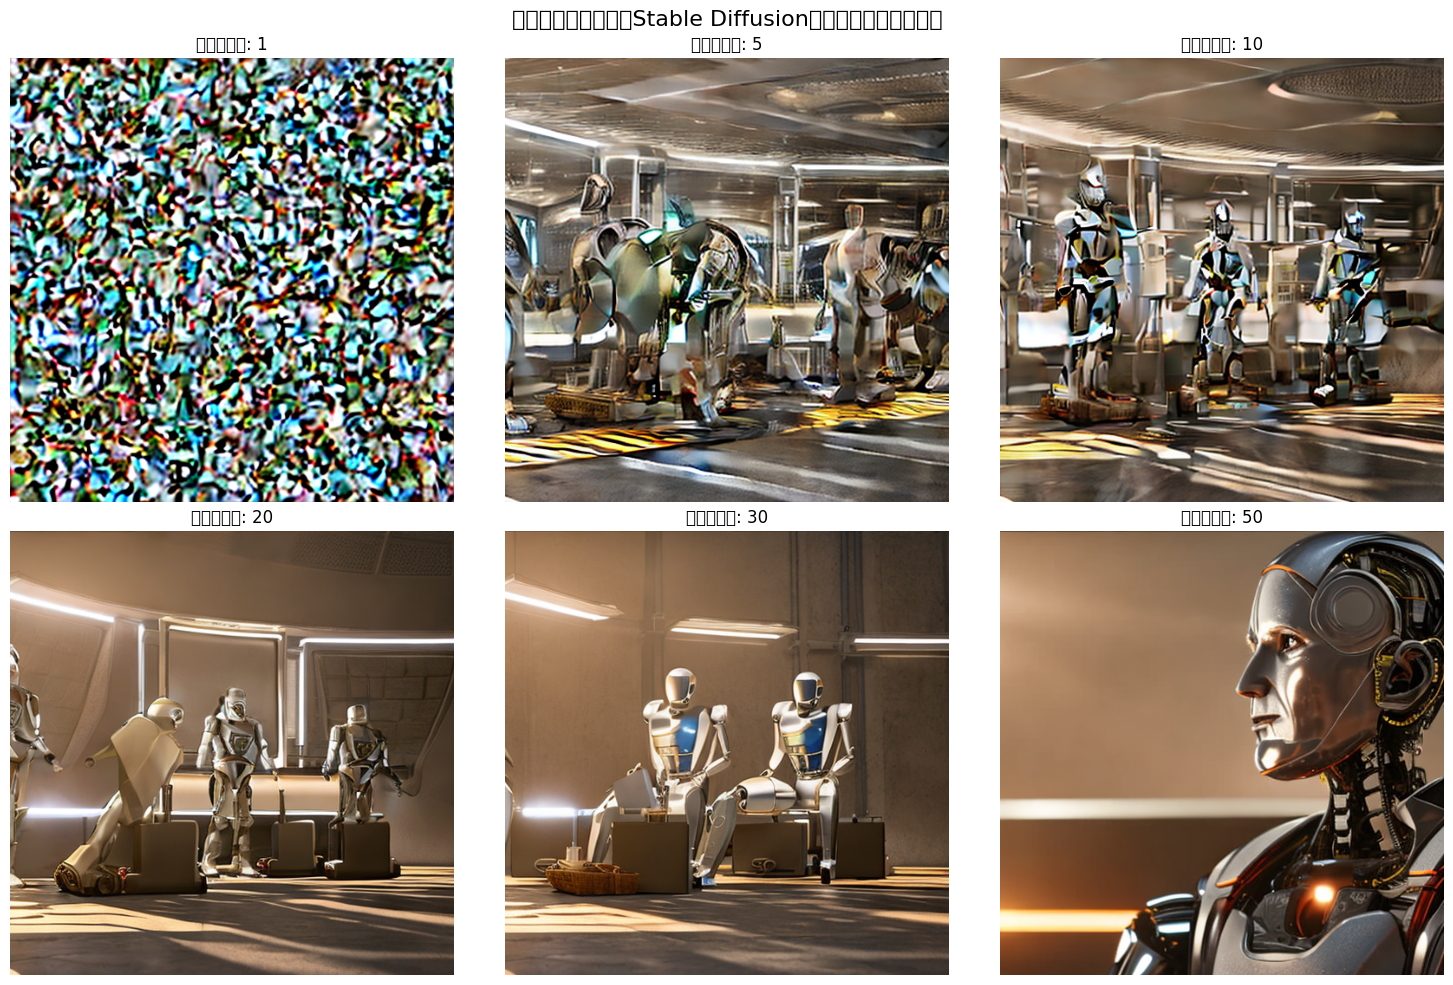
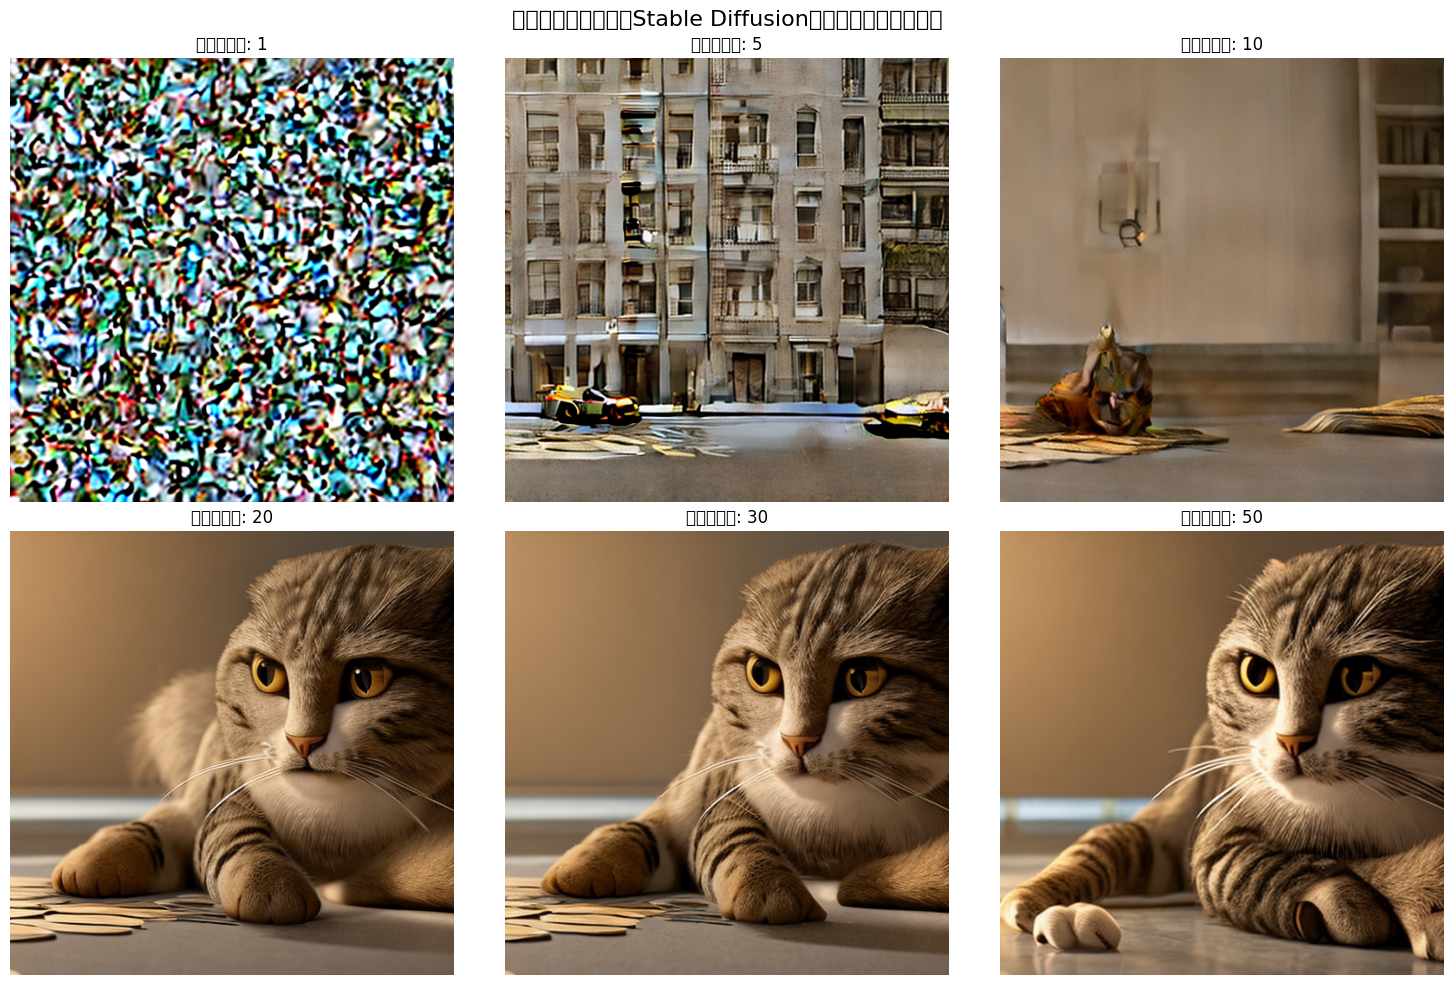
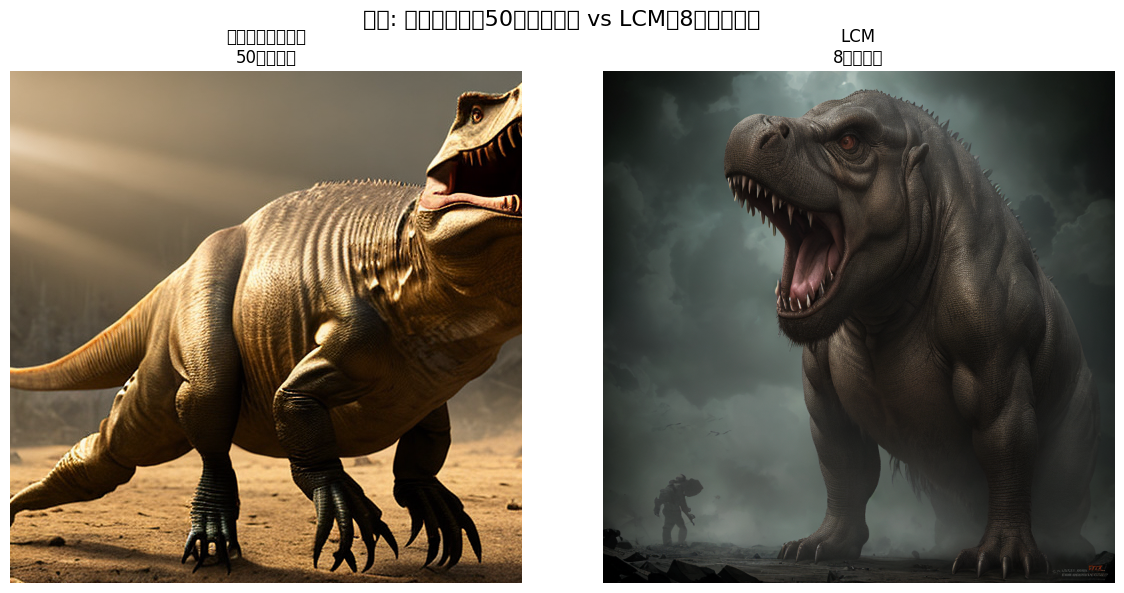
Stable Diffusionに代表される拡散モデルは、高品質な画像生成が可能ですが、生成に時間がかかるという致命的な弱点がありました。
ノイズ画像 → ステップ1 → ステップ2 → ... → ステップ50 → 完成画像
⏱️ 生成時間: 10〜30秒
なぜこんなに時間がかかるのか?拡散モデルは「ノイズだらけの画像から少しずつノイズを取り除く」プロセスを50〜100回繰り返す必要があるからです。
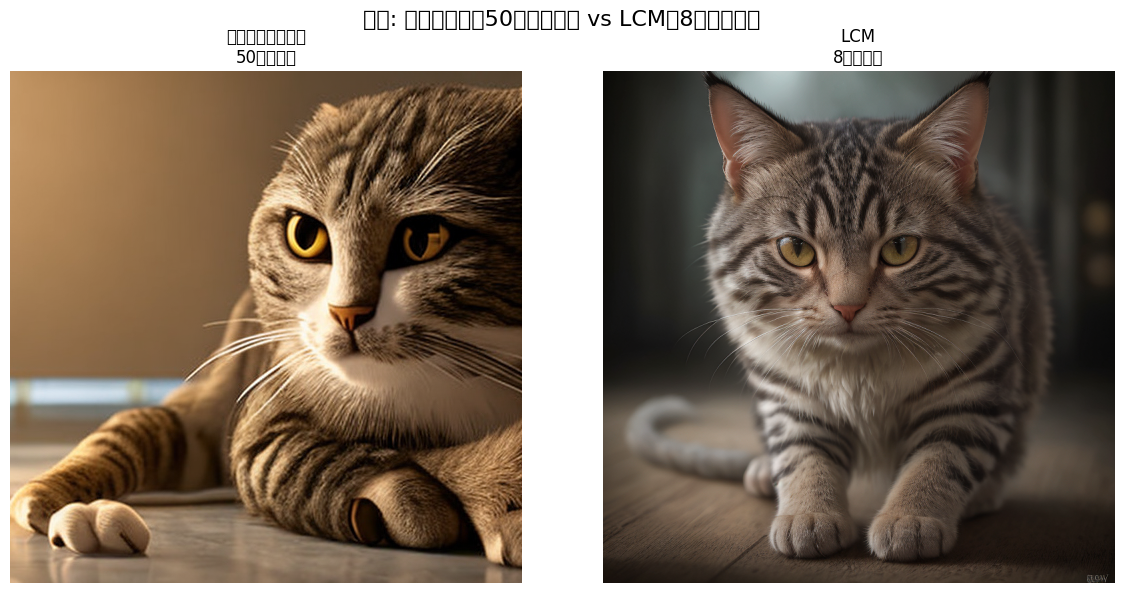
LCMの革命的アプローチ
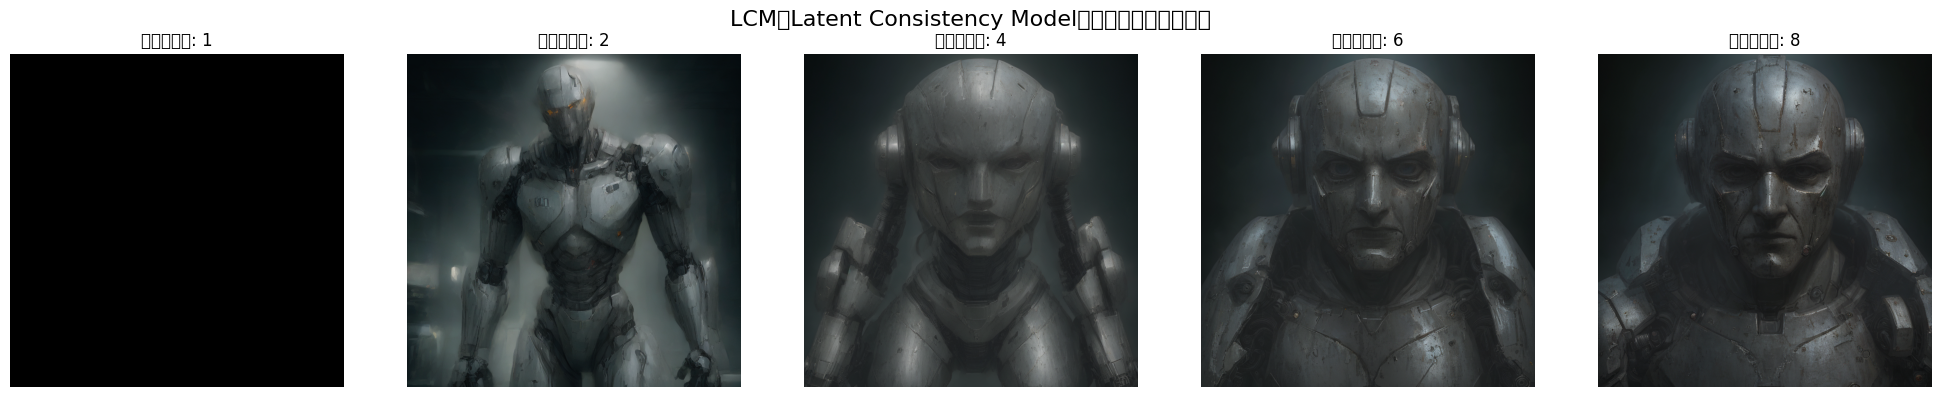
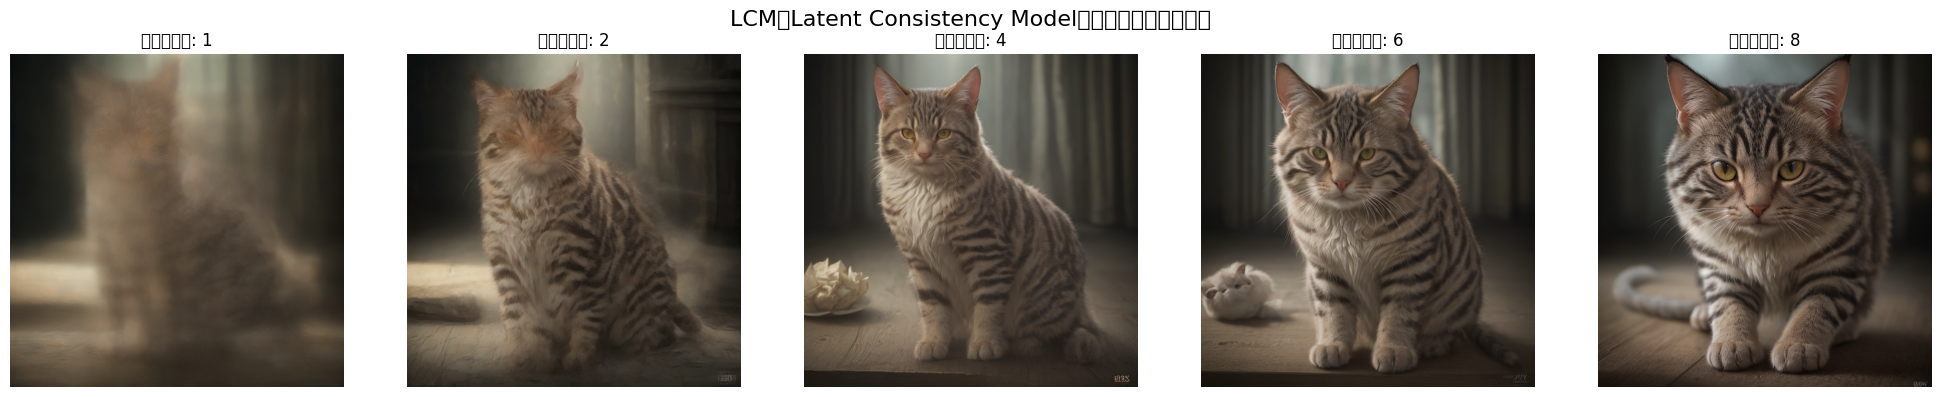
LCMは知識蒸留(Distillation)という技術を使い、50ステップの処理を4〜8ステップに圧縮します。
ノイズ画像 → 大ジャンプ → 大ジャンプ → 完成画像
⏱️ 生成時間: 1〜3秒
どうやって実現?
- Teacher(先生)モデル: 従来の50ステップモデル(高品質だが遅い)
- Student(生徒)モデル: LCM(速いが学習が必要)
# 学習フェーズ
teacher_output = teacher_model.generate(50_steps)  # 正解画像
student_output = student_model.generate(4_steps)   # 生徒の回答

# 生徒は「4ステップで先生と同じ結果」を目指して学習
loss = MSE(teacher_output, student_output)
生徒モデルは「近道」を学習することで、少ないステップで高品質な画像を生成できるようになります。
⚡ LCMの特徴
速度比較
| モデル | ステップ数 | 生成時間 | 速度比 |
|---|---|---|---|
| Stable Diffusion v1.5 | 50 | 20秒 | 1x |
| SDXL | 50 | 30秒 | 0.67x |
| LCM | 4 | 2秒 | 10x |
| LCM (最適化) | 4 | 0.5秒 | 40x |
パラメータの違い
従来モデルとLCMでは、最適なパラメータが大きく異なります。
Stable Diffusion(従来型)
guidance_scale = 7.5  # プロンプトへの忠実度
num_inference_steps = 50
LCM
guidance_scale = 1.5  # 低い値で十分
num_inference_steps = 4  # 劇的に少ない
なぜguidance_scaleが低いのか?
- 従来モデル: 50回の曲がり角 → 強い誘導が必要
- LCM: 4回の直線コース → 弱い誘導で十分
guidance_scaleを高くしすぎると、逆に画像が破綻します。

メリット・デメリット
✅ メリット
- 10倍以上の高速化: リアルタイム生成が可能に
- メモリ効率: 少ないステップで省メモリ
- 反復試行: 高速なので何度も試せる
- ライブ生成: ストリーミング配信に対応可能
❌ デメリット
- 品質の若干の低下: 50ステップには少し劣る
- 複雑なプロンプトに弱い: 細かい指示が伝わりにくい
- 学習コスト: Teacherモデルからの蒸留が必要
💻 コード比較
通常のStable Diffusion
from diffusers import StableDiffusionPipeline
import torch

# モデルロード
pipe = StableDiffusionPipeline.from_pretrained(
    "runwayml/stable-diffusion-v1-5",
    torch_dtype=torch.float16
).to("cuda")

# 画像生成
image = pipe(
    prompt="a professional portrait photo of a smiling woman",
    negative_prompt="blurry, low quality",
    num_inference_steps=50,  # ⏱️ 遅い
    guidance_scale=7.5,
    height=512,
    width=512
).images[0]

# 生成時間: 約20秒
image.save("output_sd.png")
LCMで高速化
from diffusers import DiffusionPipeline, LCMScheduler
import torch

# LCMモデルロード
pipe = DiffusionPipeline.from_pretrained(
    "SimianLuo/LCM_Dreamshaper_v7",
    torch_dtype=torch.float16
).to("cuda")

# LCMスケジューラーに変更(重要!)
pipe.scheduler = LCMScheduler.from_config(pipe.scheduler.config)

# 画像生成
image = pipe(
    prompt="a professional portrait photo of a smiling woman",
    negative_prompt="blurry, low quality",
    num_inference_steps=4,   # 🚀 速い!
    guidance_scale=1.5,      # 低い値
    height=512,
    width=512
).images[0]

# 生成時間: 約2秒
image.save("output_lcm.png")
AnimateDiffでの動画生成比較
通常のAnimateDiff
from diffusers import MotionAdapter, AnimateDiffPipeline
import torch

adapter = MotionAdapter.from_pretrained("guoyww/animatediff-motion-adapter-v1-5-2")
pipe = AnimateDiffPipeline.from_pretrained(
    "emilianJR/epiCRealism",
    motion_adapter=adapter,
    torch_dtype=torch.float16
).to("cuda")

# 動画生成
output = pipe(
    prompt="a woman smiling and waving",
    num_frames=16,
    num_inference_steps=50,  # ⏱️ 16フレーム × 50ステップ = 遅い
    guidance_scale=7.5
)

# 生成時間: 約6分
AnimateDiff + LCM
from diffusers import MotionAdapter, AnimateDiffPipeline, LCMScheduler
import torch

# LCM対応のMotion Adapter
adapter = MotionAdapter.from_pretrained(
    "wangfuyun/AnimateLCM",
    torch_dtype=torch.float16
).to("cuda")

pipe = AnimateDiffPipeline.from_pretrained(
    "emilianJR/epiCRealism",
    motion_adapter=adapter,
    torch_dtype=torch.float16
).to("cuda")

# LCMスケジューラーに変更
pipe.scheduler = LCMScheduler.from_config(
    pipe.scheduler.config,
    beta_schedule="linear"
)

# メモリ最適化
pipe.enable_vae_slicing()
pipe.enable_model_cpu_offload()

# 動画生成
output = pipe(
    prompt="a woman smiling and waving",
    num_frames=16,
    num_inference_steps=4,   # 🚀 16フレーム × 4ステップ = 速い
    guidance_scale=1.5
)

# 生成時間: 約30秒(12倍速!)
🎭 具体的なサービス実装方法
サービスアーキテクチャ
リアルタイムアバターサービスを構築するための全体像です。
┌─────────────┐
│   ユーザー   │
│ (Webブラウザ)│
└──────┬──────┘
       │ WebSocket
       │
┌──────▼──────────────────────────┐
│   バックエンドサーバー (FastAPI)  │
│  ┌──────────────────────────┐  │
│  │  音声入力 → テキスト変換  │  │
│  └────────┬─────────────────┘  │
│           │                      │
│  ┌────────▼─────────────────┐  │
│  │  LCMアバター生成エンジン  │  │
│  │  - 表情生成              │  │
│  │  - リップシンク          │  │
│  └────────┬─────────────────┘  │
│           │                      │
│  ┌────────▼─────────────────┐  │
│  │  動画フレーム配信         │  │
│  └──────────────────────────┘  │
└─────────────────────────────────┘
実装例1: リアルタイム顔アニメーション
from fastapi import FastAPI, WebSocket
from diffusers import AnimateDiffPipeline, LCMScheduler, MotionAdapter
import torch
import asyncio
import base64
from io import BytesIO

app = FastAPI()

# グローバルでパイプライン初期化(起動時に1回だけ)
pipe = None

@app.on_event("startup")
async def load_model():
    global pipe

    # LCM対応のAnimateDiffパイプライン
    adapter = MotionAdapter.from_pretrained(
        "wangfuyun/AnimateLCM",
        torch_dtype=torch.float16
    ).to("cuda")

    pipe = AnimateDiffPipeline.from_pretrained(
        "emilianJR/epiCRealism",
        motion_adapter=adapter,
        torch_dtype=torch.float16
    ).to("cuda")

    pipe.scheduler = LCMScheduler.from_config(
        pipe.scheduler.config,
        beta_schedule="linear"
    )

    pipe.enable_vae_slicing()
    pipe.enable_model_cpu_offload()

    print("✅ モデルロード完了")

@app.websocket("/ws/avatar")
async def avatar_stream(websocket: WebSocket):
    await websocket.accept()

    try:
        while True:
            # クライアントからメッセージ受信
            data = await websocket.receive_json()
            emotion = data.get("emotion", "neutral")  # 感情
            speech_text = data.get("text", "")  # 話す内容

            # プロンプト生成
            prompt = f"a person with {emotion} expression, talking, photorealistic, high quality"

            # LCMで高速生成(4ステップ)
            output = pipe(
                prompt=prompt,
                num_frames=8,  # 短いフレーム数でレイテンシ削減
                num_inference_steps=4,
                guidance_scale=1.5,
                height=512,
                width=512
            )

            # フレームをBase64エンコードして送信
            frames_base64 = []
            for frame in output.frames[0]:
                buffered = BytesIO()
                frame.save(buffered, format="JPEG", quality=85)
                img_str = base64.b64encode(buffered.getvalue()).decode()
                frames_base64.append(img_str)

            # WebSocketで送信
            await websocket.send_json({
                "frames": frames_base64,
                "fps": 8
            })

    except Exception as e:
        print(f"Error: {e}")
    finally:
        await websocket.close()

if __name__ == "__main__":
    import uvicorn
    uvicorn.run(app, host="0.0.0.0", port=8000)
実装例2: 音声駆動アバター
音声入力からリップシンクするアバターを生成します。
import torch
from diffusers import AnimateDiffPipeline, LCMScheduler, MotionAdapter
from transformers import Wav2Vec2Processor, Wav2Vec2ForCTC
import librosa
import numpy as np

class AudioDrivenAvatar:
    def __init__(self):
        # LCM動画生成パイプライン
        adapter = MotionAdapter.from_pretrained(
            "wangfuyun/AnimateLCM",
            torch_dtype=torch.float16
        ).to("cuda")

        self.pipe = AnimateDiffPipeline.from_pretrained(
            "emilianJR/epiCRealism",
            motion_adapter=adapter,
            torch_dtype=torch.float16
        ).to("cuda")

        self.pipe.scheduler = LCMScheduler.from_config(
            self.pipe.scheduler.config,
            beta_schedule="linear"
        )

        # 音声認識モデル
        self.audio_processor = Wav2Vec2Processor.from_pretrained(
            "facebook/wav2vec2-base-960h"
        )
        self.audio_model = Wav2Vec2ForCTC.from_pretrained(
            "facebook/wav2vec2-base-960h"
        ).to("cuda")

    def extract_phonemes(self, audio_path):
        """音声から音素を抽出"""
        # 音声読み込み
        audio, sr = librosa.load(audio_path, sr=16000)

        # 音素認識
        inputs = self.audio_processor(
            audio,
            sampling_rate=16000,
            return_tensors="pt"
        ).to("cuda")

        with torch.no_grad():
            logits = self.audio_model(**inputs).logits

        # 音素IDを取得
        predicted_ids = torch.argmax(logits, dim=-1)
        transcription = self.audio_processor.batch_decode(predicted_ids)[0]

        return transcription

    def generate_lipsync_video(self, audio_path, avatar_image):
        """音声に合わせたリップシンク動画を生成"""
        # 音素抽出
        phonemes = self.extract_phonemes(audio_path)

        # 音声の長さに応じてフレーム数を計算
        audio, sr = librosa.load(audio_path, sr=16000)
        duration = len(audio) / sr
        num_frames = int(duration * 24)  # 24fps

        # プロンプト生成(音素情報を含める)
        prompt = f"a person talking, saying '{phonemes}', realistic lip movement, photorealistic, high quality"

        # LCMで生成(複数回に分割)
        all_frames = []
        frames_per_batch = 16

        for i in range(0, num_frames, frames_per_batch):
            batch_frames = min(frames_per_batch, num_frames - i)

            output = self.pipe(
                prompt=prompt,
                image=avatar_image,  # 初期画像
                num_frames=batch_frames,
                num_inference_steps=4,  # LCMで高速化
                guidance_scale=1.5
            )

            all_frames.extend(output.frames[0])

        return all_frames

# 使用例
avatar = AudioDrivenAvatar()

# アバター画像と音声を用意
from PIL import Image
avatar_image = Image.open("avatar_base.jpg")
audio_path = "speech.wav"

# リップシンク動画生成
frames = avatar.generate_lipsync_video(audio_path, avatar_image)

# 動画として保存
import imageio
writer = imageio.get_writer("avatar_output.mp4", fps=24)
for frame in frames:
    writer.append_data(np.array(frame))
writer.close()

print("✅ リップシンク動画生成完了")
実装例3: ストリーミング配信対応
フレームごとに逐次生成してストリーミング配信します。
from diffusers import AnimateDiffPipeline, LCMScheduler
import torch
from queue import Queue
from threading import Thread

class StreamingAvatarGenerator:
    def __init__(self):
        # パイプライン初期化
        self.pipe = self._setup_pipeline()
        self.frame_queue = Queue(maxsize=10)
        self.is_generating = False

    def _setup_pipeline(self):
        adapter = MotionAdapter.from_pretrained(
            "wangfuyun/AnimateLCM",
            torch_dtype=torch.float16
        ).to("cuda")

        pipe = AnimateDiffPipeline.from_pretrained(
            "emilianJR/epiCRealism",
            motion_adapter=adapter,
            torch_dtype=torch.float16
        ).to("cuda")

        pipe.scheduler = LCMScheduler.from_config(
            pipe.scheduler.config,
            beta_schedule="linear"
        )

        return pipe

    def generate_frame_stream(self, prompt, initial_image=None):
        """フレームをストリーミング生成"""
        self.is_generating = True
        previous_frame = initial_image

        while self.is_generating:
            # 1フレームずつ生成
            output = self.pipe(
                prompt=prompt,
                image=previous_frame,
                num_frames=1,  # 1フレームのみ
                num_inference_steps=4,
                guidance_scale=1.5,
                height=512,
                width=512
            )

            frame = output.frames[0][0]

            # キューに追加(配信用)
            if not self.frame_queue.full():
                self.frame_queue.put(frame)

            # 次のフレームの入力として使用
            previous_frame = frame

            # レイテンシ: 約0.5秒/フレーム = 2fps
            # さらなる最適化で5-10fps可能

    def start_streaming(self, prompt, initial_image=None):
        """ストリーミング開始"""
        thread = Thread(
            target=self.generate_frame_stream,
            args=(prompt, initial_image)
        )
        thread.start()

    def get_next_frame(self):
        """次のフレームを取得"""
        if not self.frame_queue.empty():
            return self.frame_queue.get()
        return None

    def stop_streaming(self):
        """ストリーミング停止"""
        self.is_generating = False

# 使用例
generator = StreamingAvatarGenerator()

# ストリーミング開始
from PIL import Image
initial_image = Image.open("avatar_base.jpg")
generator.start_streaming(
    prompt="a person smiling and talking",
    initial_image=initial_image
)

# フレームを取得して配信
import time
for i in range(100):
    frame = generator.get_next_frame()
    if frame:
        # WebRTCなどで配信
        print(f"フレーム {i} 配信")
    time.sleep(0.04)  # 25fps想定

generator.stop_streaming()
パフォーマンス最適化のポイント
1. モデルの量子化
# INT8量子化でメモリ使用量を半減
from optimum.quanto import quantize, freeze

quantize(pipe.unet, weights=torch.int8)
freeze(pipe.unet)
2. コンパイル最適化(PyTorch 2.0+)
# TorchCompileで推論を高速化
pipe.unet = torch.compile(pipe.unet, mode="reduce-overhead")
3. バッチ処理
# 複数フレームをまとめて生成
output = pipe(
    prompt=[prompt] * 4,  # バッチサイズ4
    num_frames=4,
    num_inference_steps=4
)
4. 解像度の調整
# 低解像度で生成して後でアップスケール
output = pipe(
    prompt=prompt,
    height=256,  # 512→256に削減
    width=256,
    num_inference_steps=4
)

# 後処理でアップスケール(Real-ESRGANなど)
🎯 まとめ
LCMがもたらす変革
LCMの登場により、AIアバター生成は「オフライン処理」から「準リアルタイム」へと大きく前進しました。
実現できること
- インタラクティブなアバター: 数秒以内の応答
- ライブ配信: ストリーミング形式での動画生成
- 低コスト運用: GPU時間を1/10に削減
- スケーラブル: 多数のユーザーを同時処理
今後の展望
さらなる高速化
- LCM-LoRA: 既存モデルに後付け可能な軽量版
- 専用ハードウェア: NPU搭載デバイスでの実行
- エッジ展開: スマートフォン上での動作
品質の向上
- マルチモーダル対応: 音声 + 表情 + ジェスチャー
- 個人化: ユーザーごとのカスタムアバター
- 感情表現: より細かい感情の再現
実用化へのロードマップ
| フェーズ | 目標レイテンシ | 実現方法 |
|---|---|---|
| 現在 | 2秒/フレーム | LCM (4ステップ) |
| 短期 | 0.5秒/フレーム | LCM + 最適化 + バッチ処理 |
| 中期 | 0.1秒/フレーム | 専用モデル + エッジ処理 |
| 長期 | 0.04秒/フレーム (25fps) | ハードウェアアクセラレーション |
始めるための第一歩
- 学習環境の構築: Google ColabやAWS EC2でLCMを試す
- プロトタイプ作成: 本記事のコードをベースに小規模実装
- ユーザーテスト: レイテンシとクオリティのバランスを検証
- スケールアップ: クラウド基盤での本番展開