概要
Open3Dの バージョン 0.14 でTensorBoardとの連携機能が実装され、TensorBoard上で点群やメッシュなどの3Dオブジェクトを可視化できるようになった。TensorFlowはもちろん、PyTorchでも利用できる。
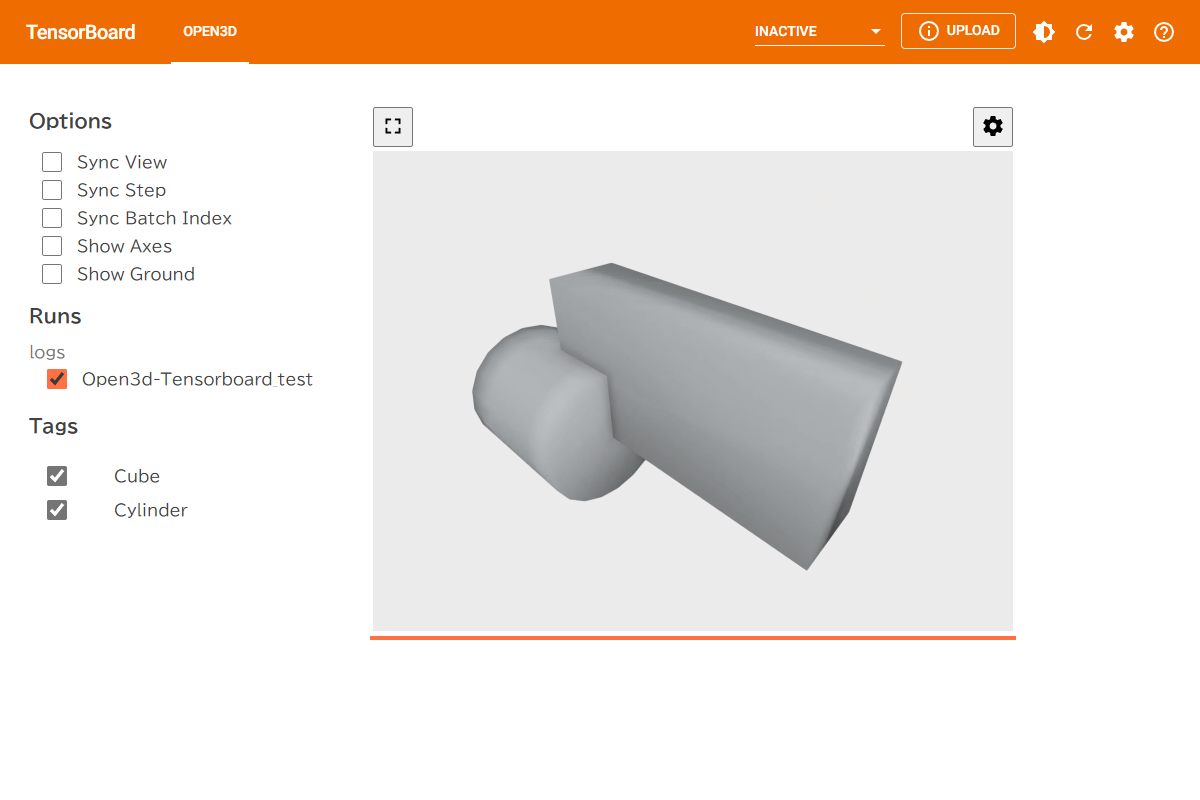
TensorBoardで3Dオブジェクトを可視化する例
Open3D, PyTorch, TensorBoard を使って3Dオブジェクトを可視化する例を紹介する。
実行環境
最低限インストールが必要となるライブラリは以下である。バージョンは本記事の投稿時(2022/06/04)の最新のものを使用している。現状、Open3DおよびPyTorchは Python 3.9 までしかサポートしていないので、Python本体のバージョンは Python 3.9 を利用する。
- Open3D 0.15.1
- PyTorch 1.11.0 (本稿ではCPU版を使用)
- TensorBoard 2.9.0
本記事ではWindows10環境で実行しているが、macOSではTensorBoardの起動に対応していないようなので注意。
Running the tensorboard process is not supported on macOS as yet.
ライブラリのインストール
ライブラリは pip install コマンドによりインストールする。
pip install open3d torch tensorboard protobuf~=3.20
protobufはTensorBoardの依存ライブラリなので直接指定しなくてもインストールされるが、後述するエラー の回避のため、 protobuf~=3.20 とバージョン指定が必要である。
ソースコード
TensorBoardで可視化するために必要な操作は公式ドキュメントで解説されている。
上記のサンプルコードをもとにした実装例を示す。
import open3d as o3d

from open3d.visualization.tensorboard_plugin import summary  # SummaryWriterに対するOpen3Dのパッチ
from open3d.visualization.tensorboard_plugin.util import to_dict_batch  # Open3Dのジオメトリを辞書形式に変換する関数
from torch.utils.tensorboard import SummaryWriter


def main():

    # boxジオメトリの生成
    cube = o3d.geometry.TriangleMesh.create_box(1, 2, 4)
    cube.compute_vertex_normals()

    # cylinderジオメトリの生成
    cylinder = o3d.geometry.TriangleMesh.create_cylinder(radius=1.0, height=2.0, resolution=20, split=4)
    cylinder.compute_vertex_normals()

    logdir = "./logs/open3d-tensorboard_test"
    with SummaryWriter(logdir) as writer:  # この部分はPyTorchでTensorBoardを使用する際の一般的な操作

        # add_3dメソッドによりOpen3Dのジオメトリを追加する。
        # 第二引数には直接ジオメトリのオブジェクトを渡さず、to_dict_batch関数で辞書に変換する。
        writer.add_3d("cube", to_dict_batch([cube]), step=0)
        writer.add_3d("cylinder", to_dict_batch([cylinder]), step=0)


if __name__ == "__main__":
    main()
このソースコードを実行することで、./logs ディレクトリ以下にTensorBoard描画用のファイルが出力される。
python open3d_tensorboard_test.py
TensorBoard上で3Dオブジェクトを表示
次のコマンドにより、TensorBoardをローカルサーバーで起動する。
tensorboard --logdir logs
TensorFlow installation not found - running with reduced feature set.
Serving TensorBoard on localhost; to expose to the network, use a proxy or pass --bind_all
TensorBoard 2.9.0 at http://localhost:6006/ (Press CTRL+C to quit)
標準出力に記載されているように、ブラウザから http://localhost:6006/ にアクセスする。
アクセスすると、通常のTensorBoardでは表示されない OPEN3D というタブが利用できるようになっている。左側のメニューの Runs や Tags のチェックを入れることで、出力した3Dオブジェクトの表示や視点の操作が可能である。
補足:protobufのバージョンによるエラー
ライブラリのインストールの際、protobufに対してバージョン指定を行わずに、下記のようにインストールを行ったとする。
pip install open3d torch tensorboard
この環境で、本記事で紹介した open3d_tensorboard_test.py を実行すると下記のようなエラーが生じる。
TypeError: Descriptors cannot not be created directly.
If this call came from a _pb2.py file, your generated code is out of date and must be regenerated with protoc >= 3.19.0.
If you cannot immediately regenerate your protos, some other possible workarounds are:
 1. Downgrade the protobuf package to 3.20.x or lower.
 2. Set PROTOCOL_BUFFERS_PYTHON_IMPLEMENTATION=python (but this will use pure-Python parsing and will be much slower).

More information: https://developers.google.com/protocol-buffers/docs/news/2022-05-06#python-updates
詳しいエラーの原因はよくわからないが、protobufのバージョンを3.20.x以下にすることが回避策として書かれている。pip install の際にprotobufのバージョンを3.20.x以下に指定 protobuf~=3.20 することで、エラーが発生しなくなる。
pip install open3d torch tensorboard protobuf~=3.20
参考文献