はじめに
(Mac環境の記事ですが、Windows環境も同じ手順になります。環境依存の部分は読み替えてお試しください。)
この記事を最後まで読むと、次のことができるようになります。
- データの引き渡しなど複雑な処理の実装方法について理解する
- JavaScriptを使って実装する
イメージ画像
| Input | Output | |
|---|---|---|
 |
>>> |  |
countUp: function(btn, context) {
    var rowIndex = context.rowIndex;
    var sectionIndex = context.sectionIndex;
    var rowData = context.widgetInfo.data[rowIndex];

    if (Number(rowData.txtCounter.text) + 1 > 20) {
        return;
    }
    rowData.txtCounter.text = Number(rowData.txtCounter.text) + 1;

    context.widgetInfo.setDataAt(rowData, rowIndex, sectionIndex);
}
関連する記事
- Kony AppPlatformを使ってiOS/Androidアプリを作成する
- Kony AppPlatformで作成したiOS/AndroidアプリのAuto Layoutについて学ぶ
- Kony AppPlatformで作成したiOS/AndroidアプリとSalesforceをデータ連携する
実行環境
| 環境 | Ver. |
|---|---|
| macOS Mojave | 10.14.1 |
| Kony Visualizer | 8.3.10 |
ソースコード
実際に実装内容やソースコードを追いながら読むとより理解が深まるかと思います。是非ご活用ください。
Kony AppPlatformの特徴
簡単な処理はプログラミングレスで開発できますが、複雑な処理はコーディングによる実装が必要となります。クロスプラットフォームを採用しているため、iOSアプリ(Swift)やAndroidアプリ(Java)のプログラミング言語を使用せずJavaScriptで実装します。また、Swiftの内部構成と同様に1つの画面(Form)に対して1つのControllerが自動で割り当てられます。
コーディングの方法
画面(Form)を作成するとControllerとControllerActionsが自動生成されます。コードを書く際はこの2つのControllerに実装します。
| 自動生成 | 説明 |
|---|---|
| Controller | 汎用的な処理はControllerにコーディングします。作成したFunctionはActionのInvoke Functionから呼び出して使用します。 |
| ControllerActions | ActionのAdd Snippetなどでコーディングしたものが自動的に追加されます。ControllerActionsに直接コーディングする事はできません。 |
実装サンプル
- ボタンを押してテキストボックスの値をカウントアップする
| 項目名 | オブジェクト | 説明 |
|---|---|---|
| lblTitle | ラベル | タイトル |
| txtCounter | テキストボックス | カウント表示 |
| btnCountUp | ボタン | カウントアップ |
画面イメージ
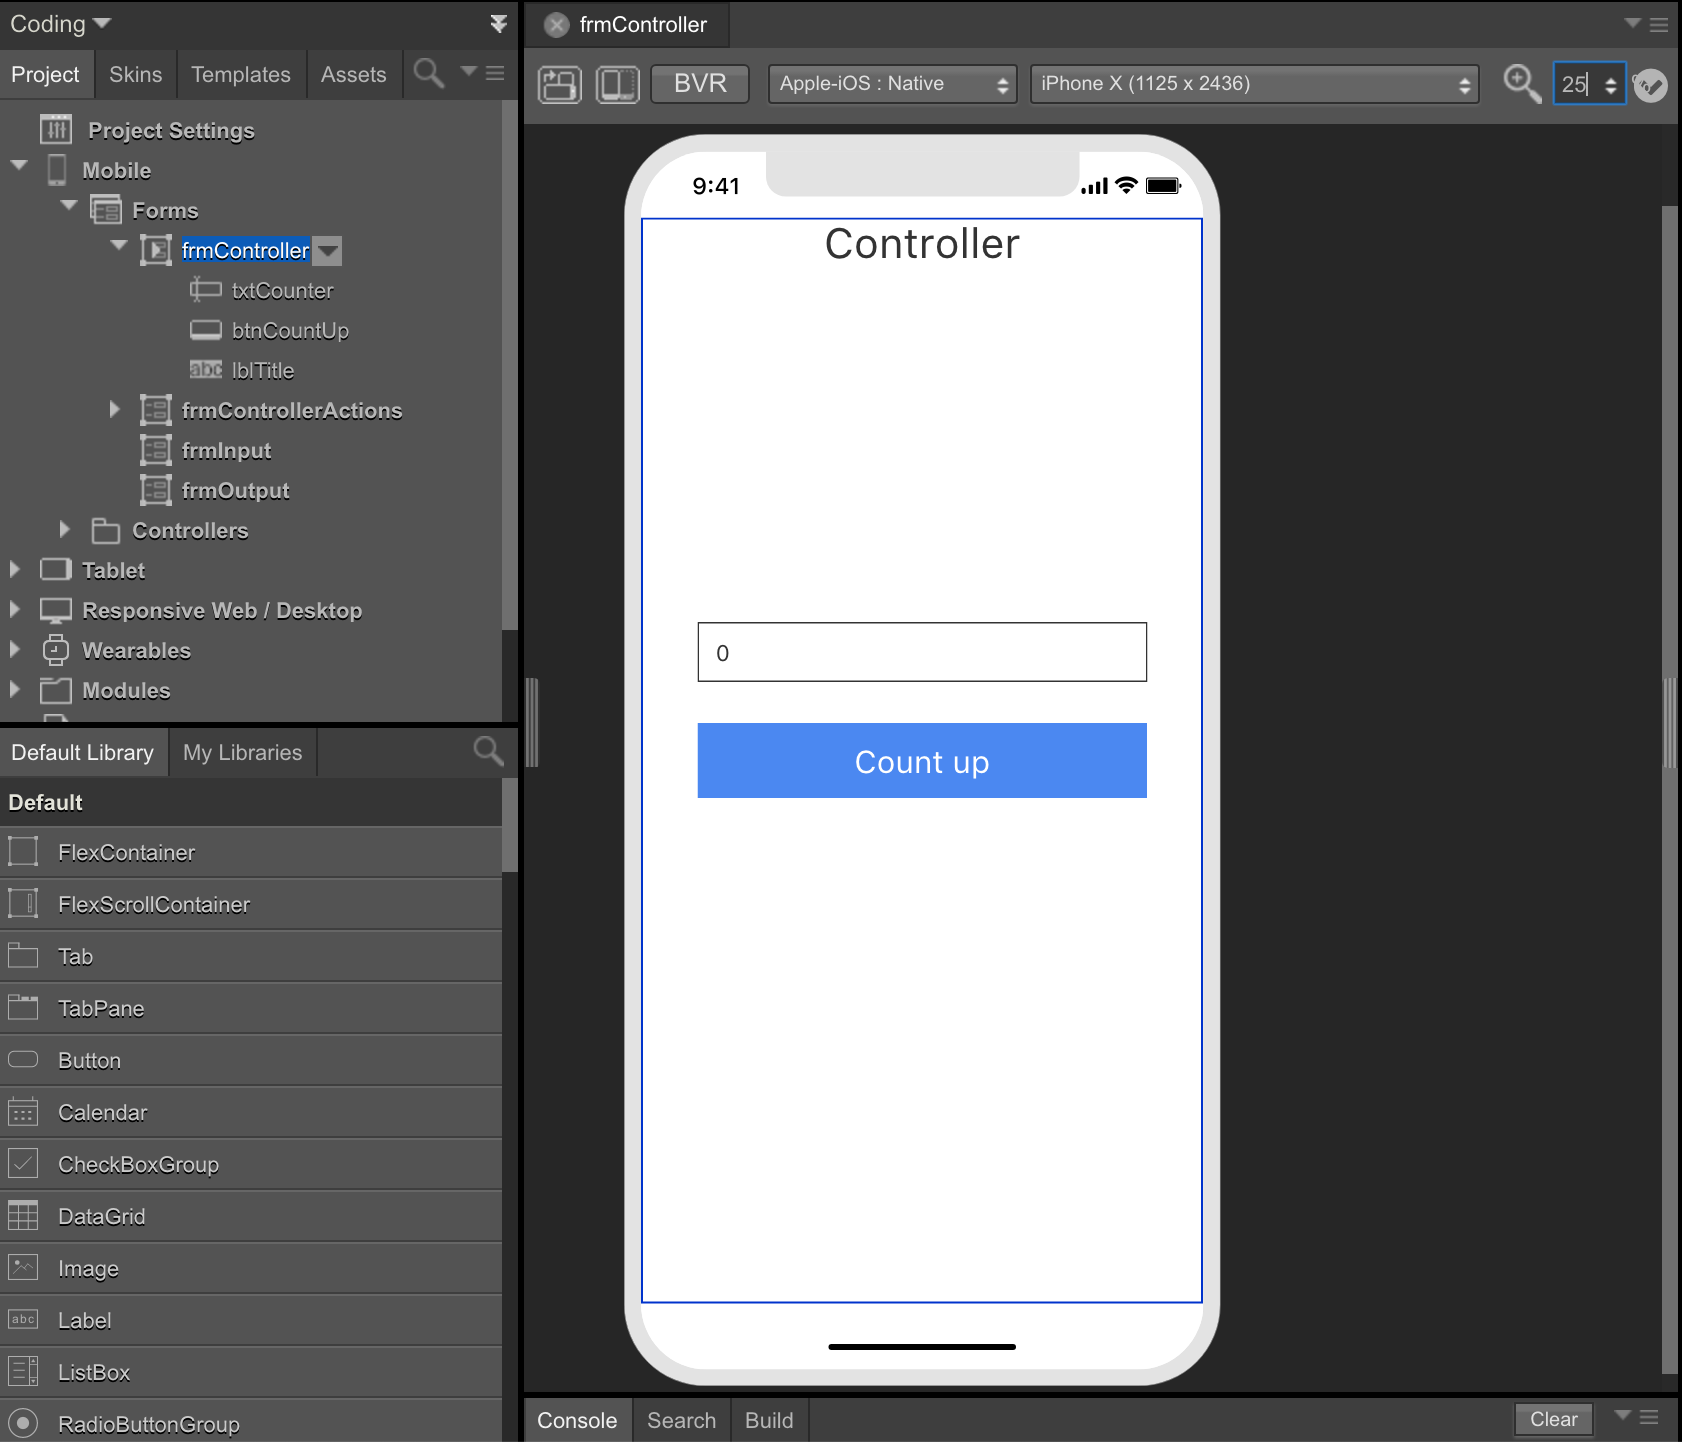
Controllerに実装するケース
Controller画面を作成します。Form名は
frmControllerとします。-
Projectタブ -> Mobile -> Controllers ->
frmControllerControllerをクリックしてdefineの中にカウントアップのコードを書きます。frmControllerController.countUp.jscountUp: function() { this.view.txtCounter.text = Number(this.view.txtCounter.text) + 1; } -
Projectタブ -> Mobile -> Forms -> frmController ->
btnCountUpをクリックします。次にPropertiesタブ -> ActionたタブのonClickのEditをクリックします。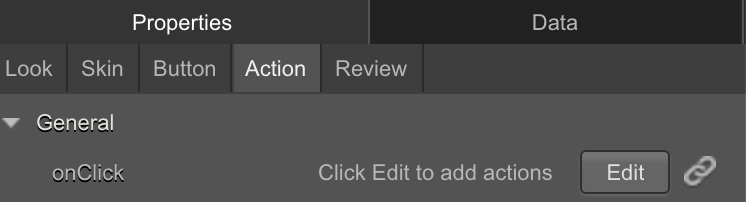
-
Functionsの中から
Invoke Functionをクリックします。次にFunction NameからcountUpを設定します。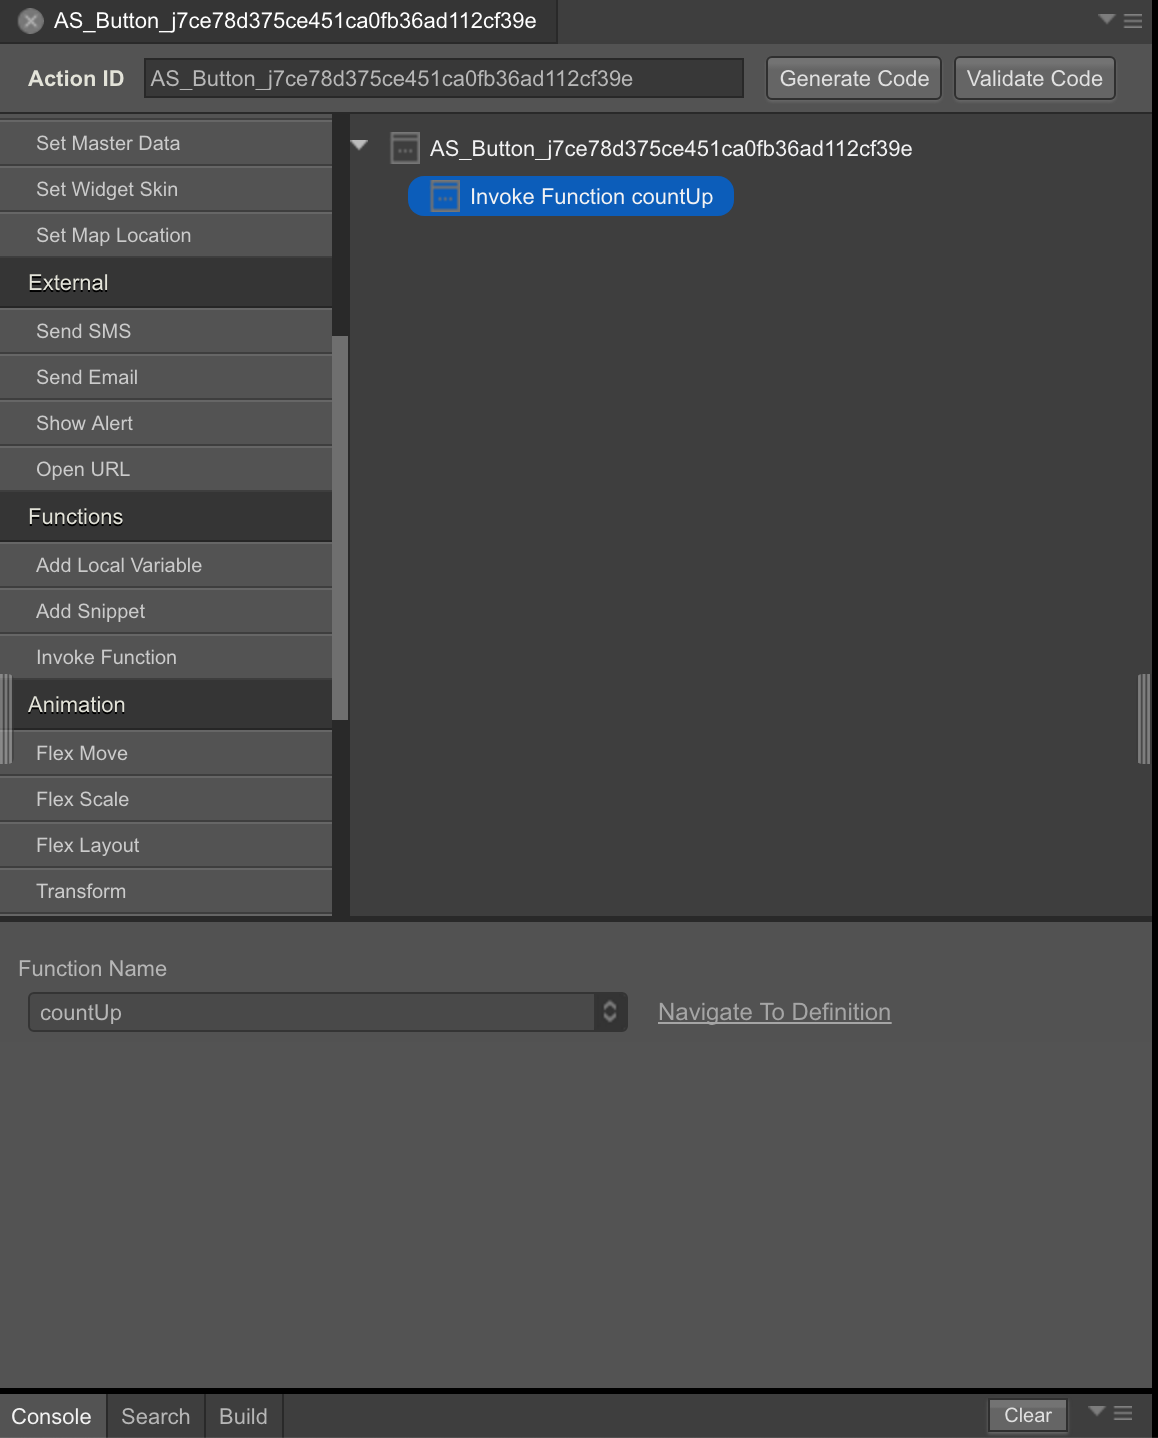
ControllerActionsに実装するケース
ControllerActions画面を作成します。Form名は
frmControllerActionsとします。-
Projectタブ -> Mobile -> Forms -> frmControllerActions ->
btnCountUpをクリックします。次にPropertiesタブ -> ActionたタブのonClickのEditをクリックします。 -
Functionsの中から
Add Snippetをクリックします。次にカウントアップのコードを書きます。frmControllerActionsControllerActions.jsself.view.txtCounter.text = Number(this.view.txtCounter.text) + 1;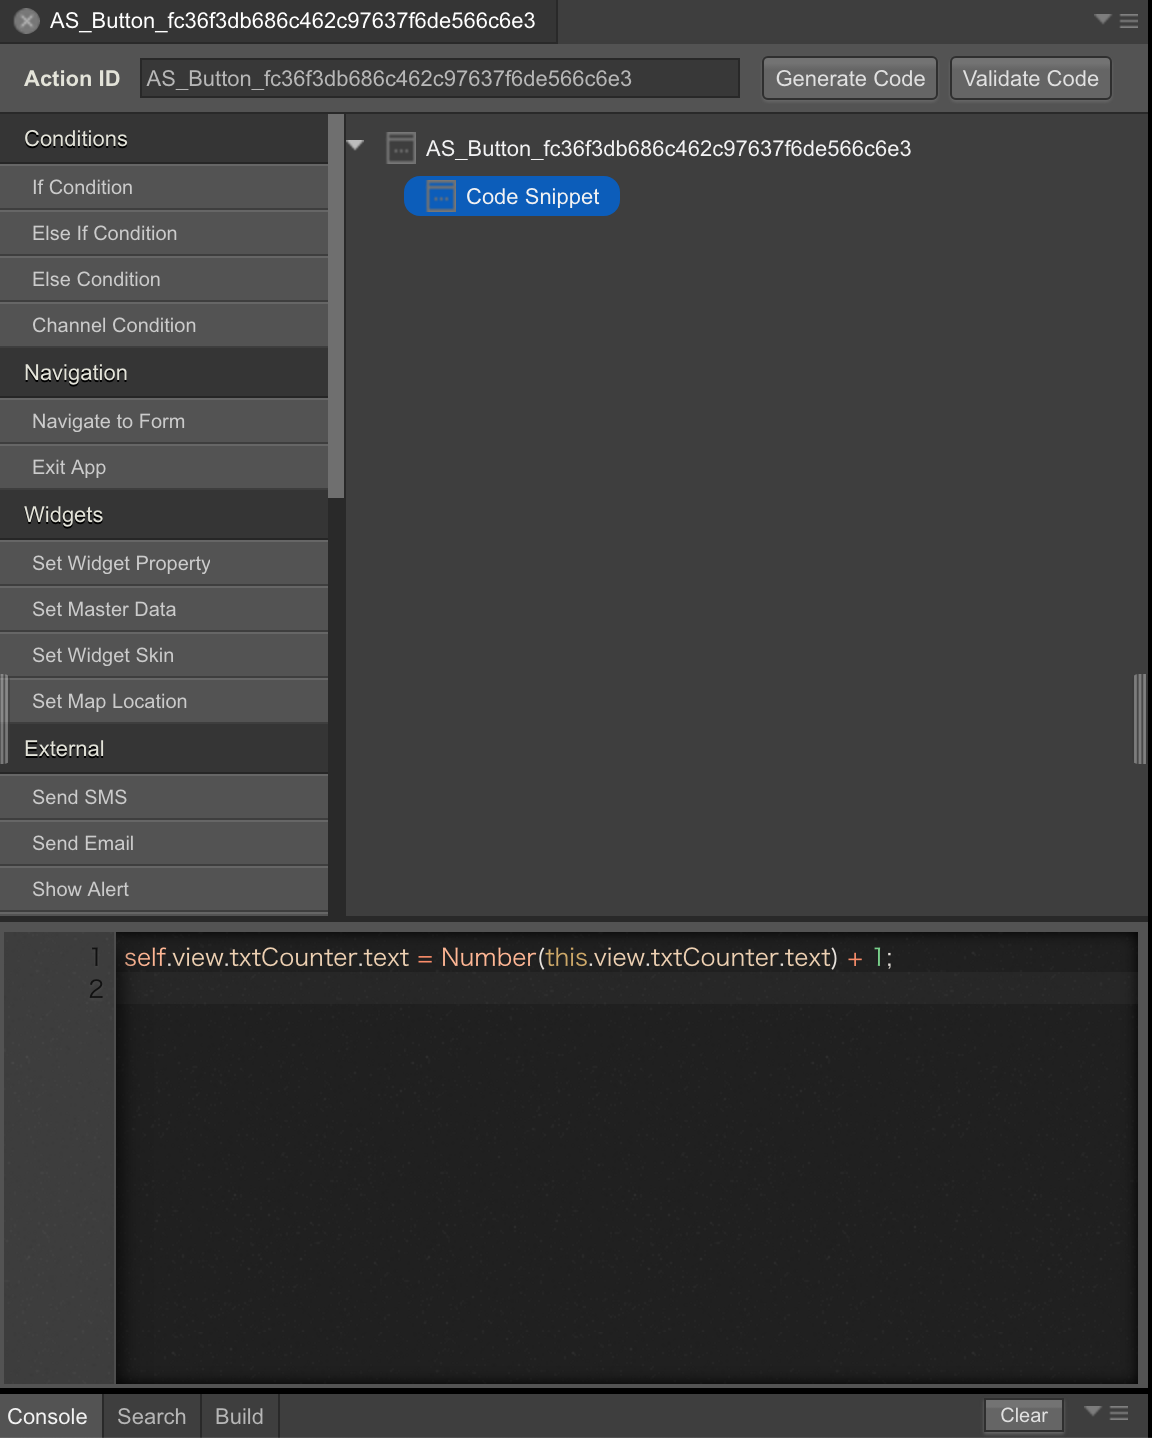
-
Projectタブ -> Mobile -> Controllers ->
frmControllerActionsControllerActionsをクリックしてdefineの中にSnippetのコードが自動で追加されたことを確認します。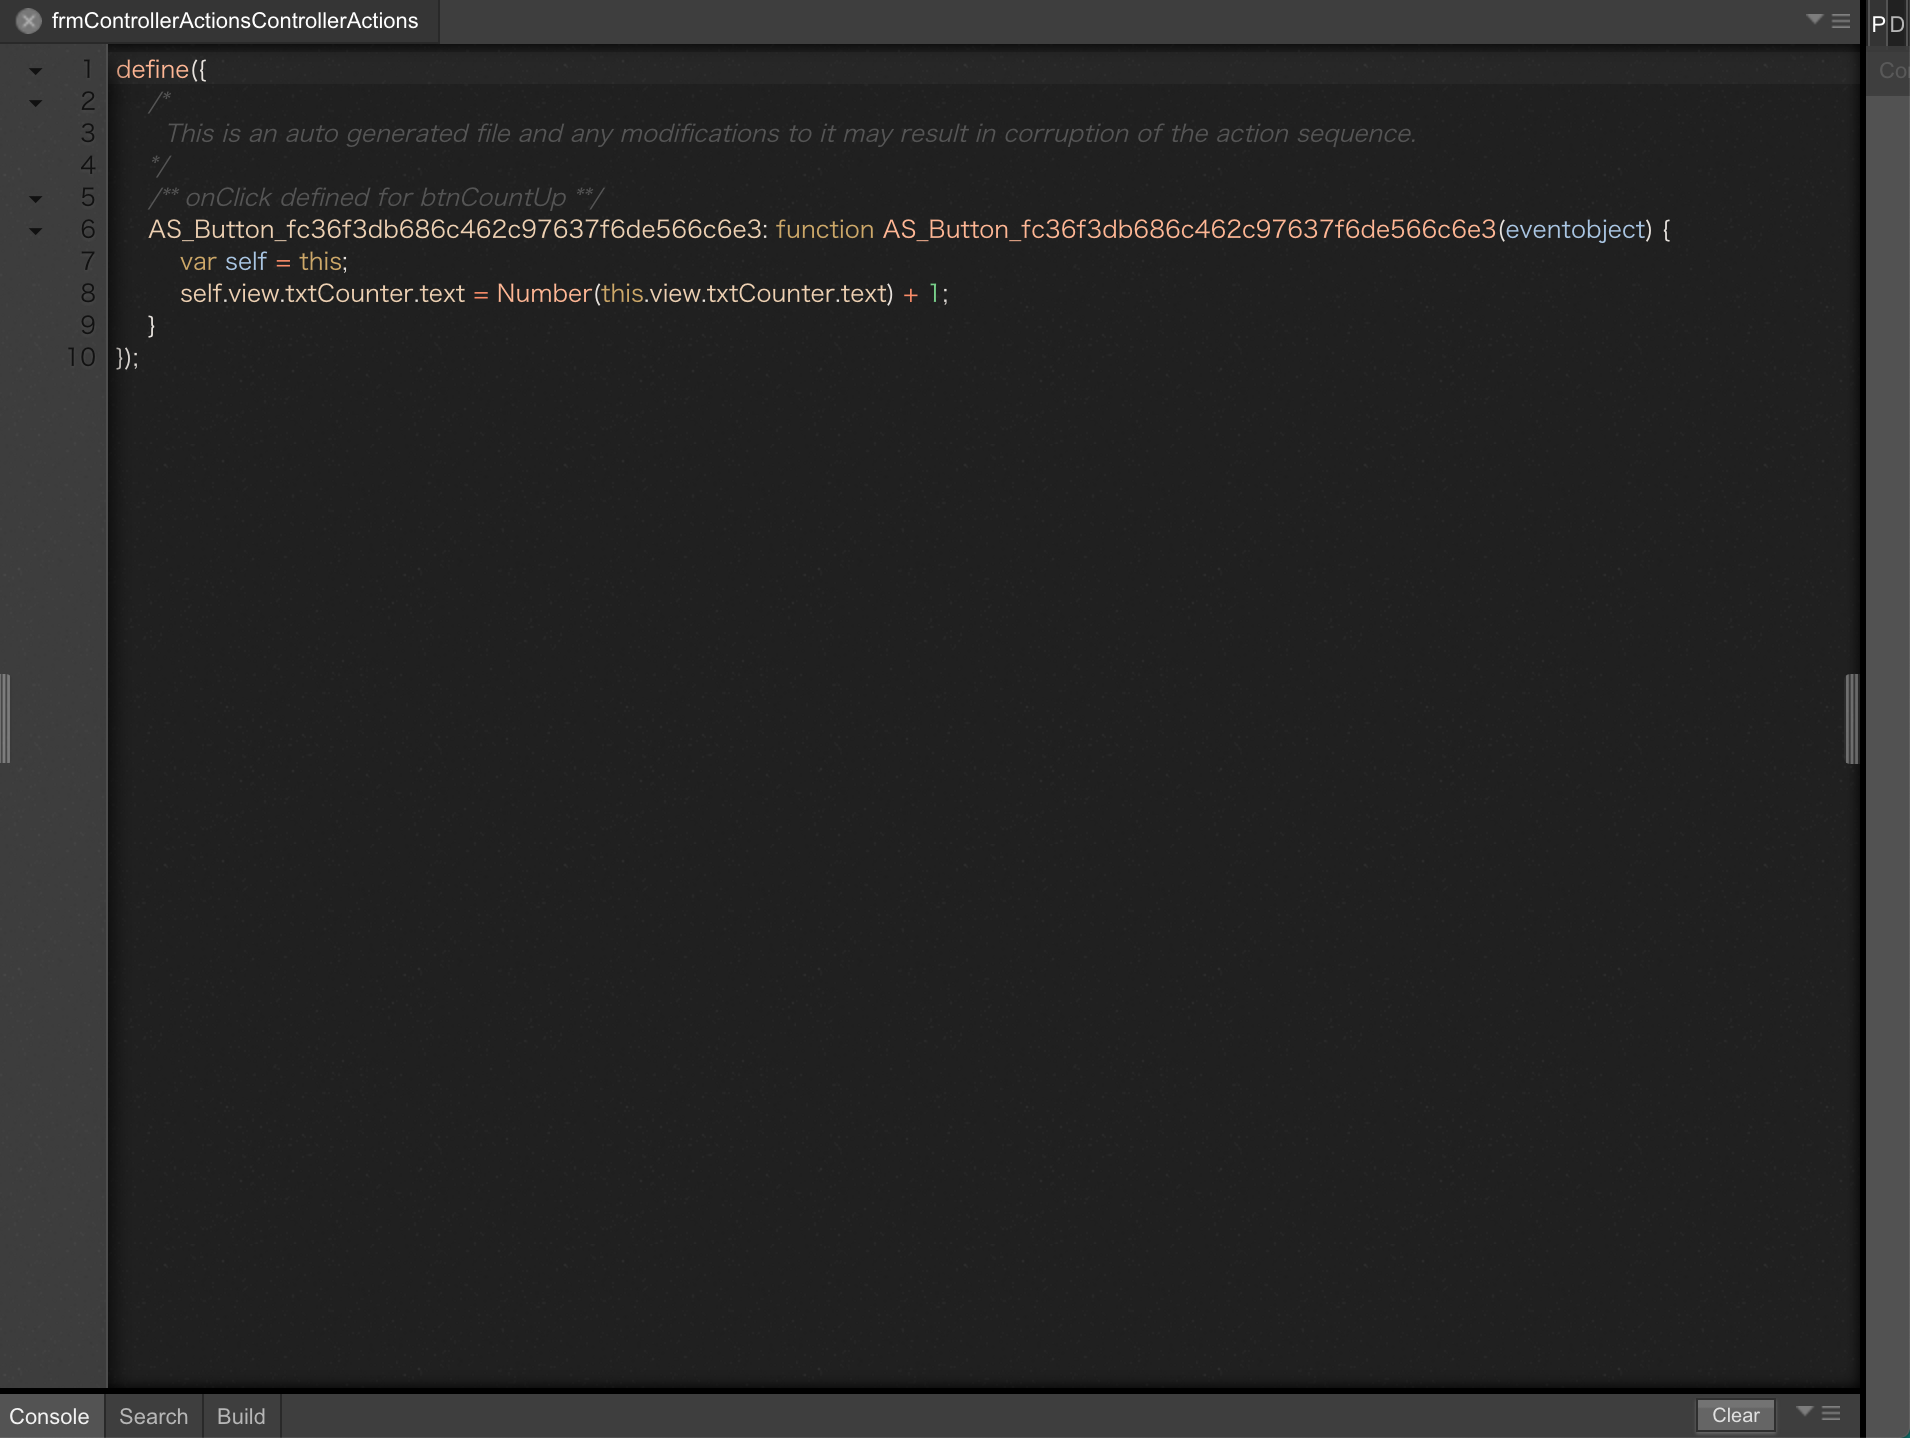
複雑な処理の実装
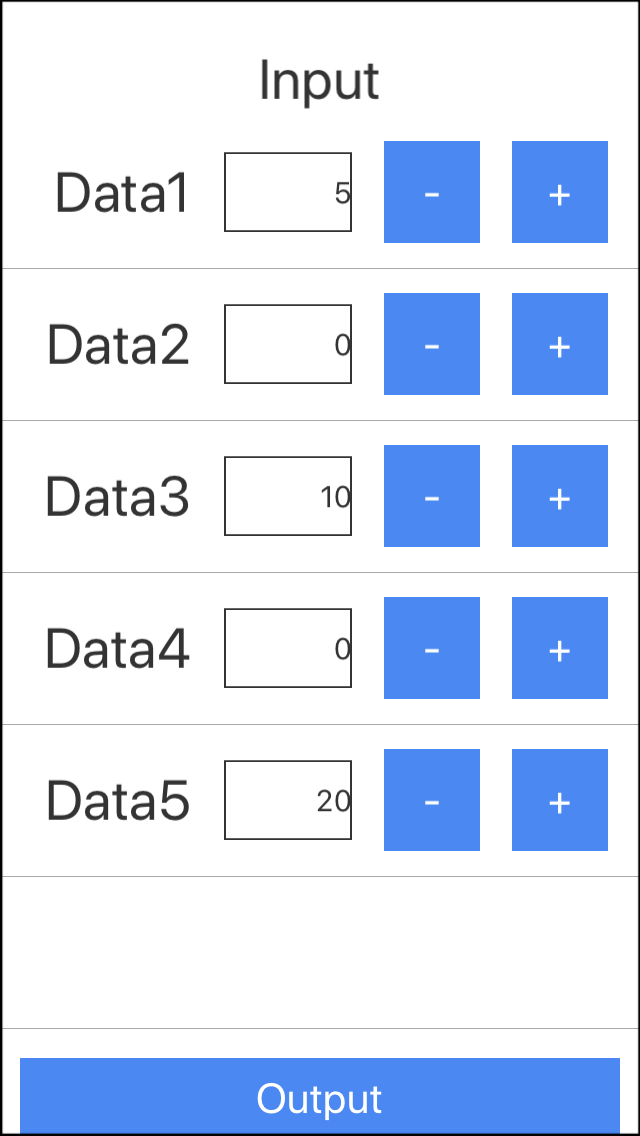
シナリオ
- アプリは入力画面と出力画面の2つで構成する
- 入力画面はリスト一覧を持ち1件ごとに個数のカウントアップ/ダウンを可能とする
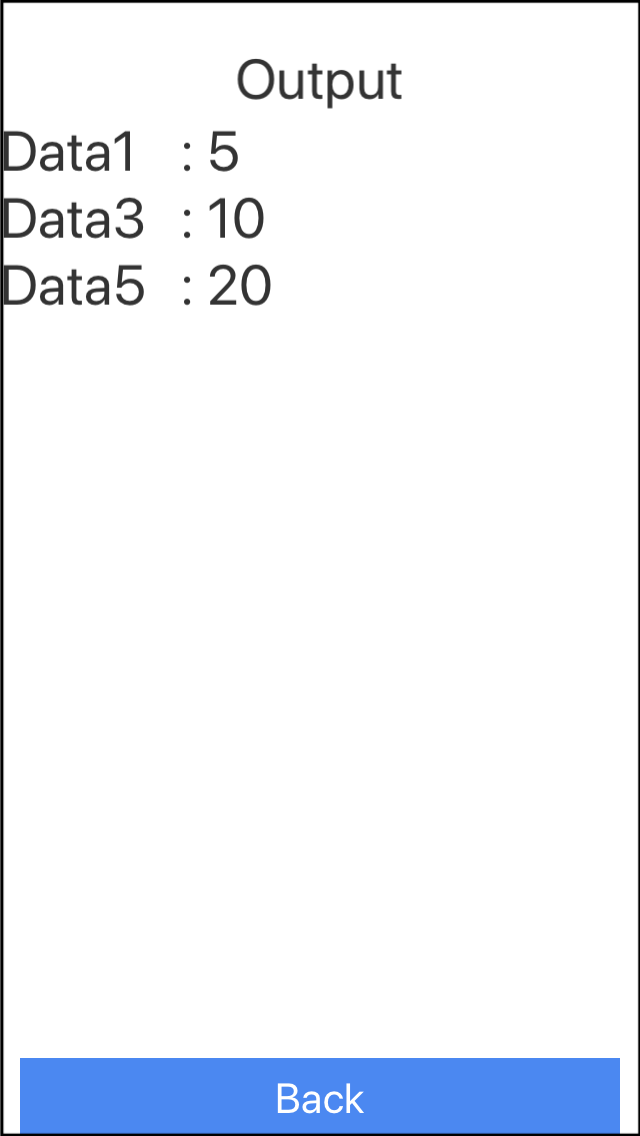
- 出力画面は入力データを引き継ぎデータを結合して表示する
画面イメージ
| Input | Output | |
|---|---|---|
|
>>> | |
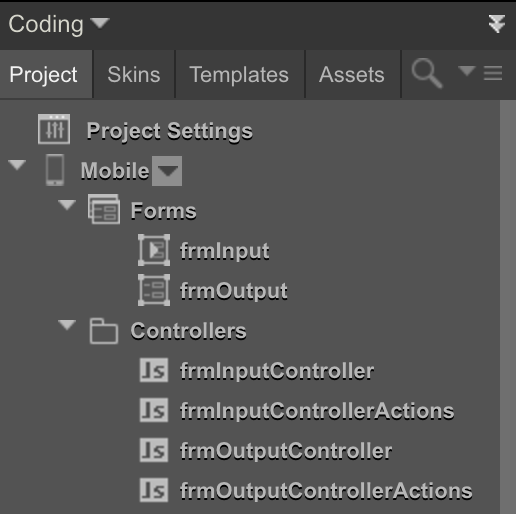
事前準備
各画面を作成してコーディングの準備をします。
-
入力画面
-
リストセクション
項目名 オブジェクト 説明 segSection Template テンプレート flxSection FlexContainer グループ lblName Label タイトル txtCounter TextBox カウンター btnCountDown Button カウントダウン btnCountUp Button カウントアップ 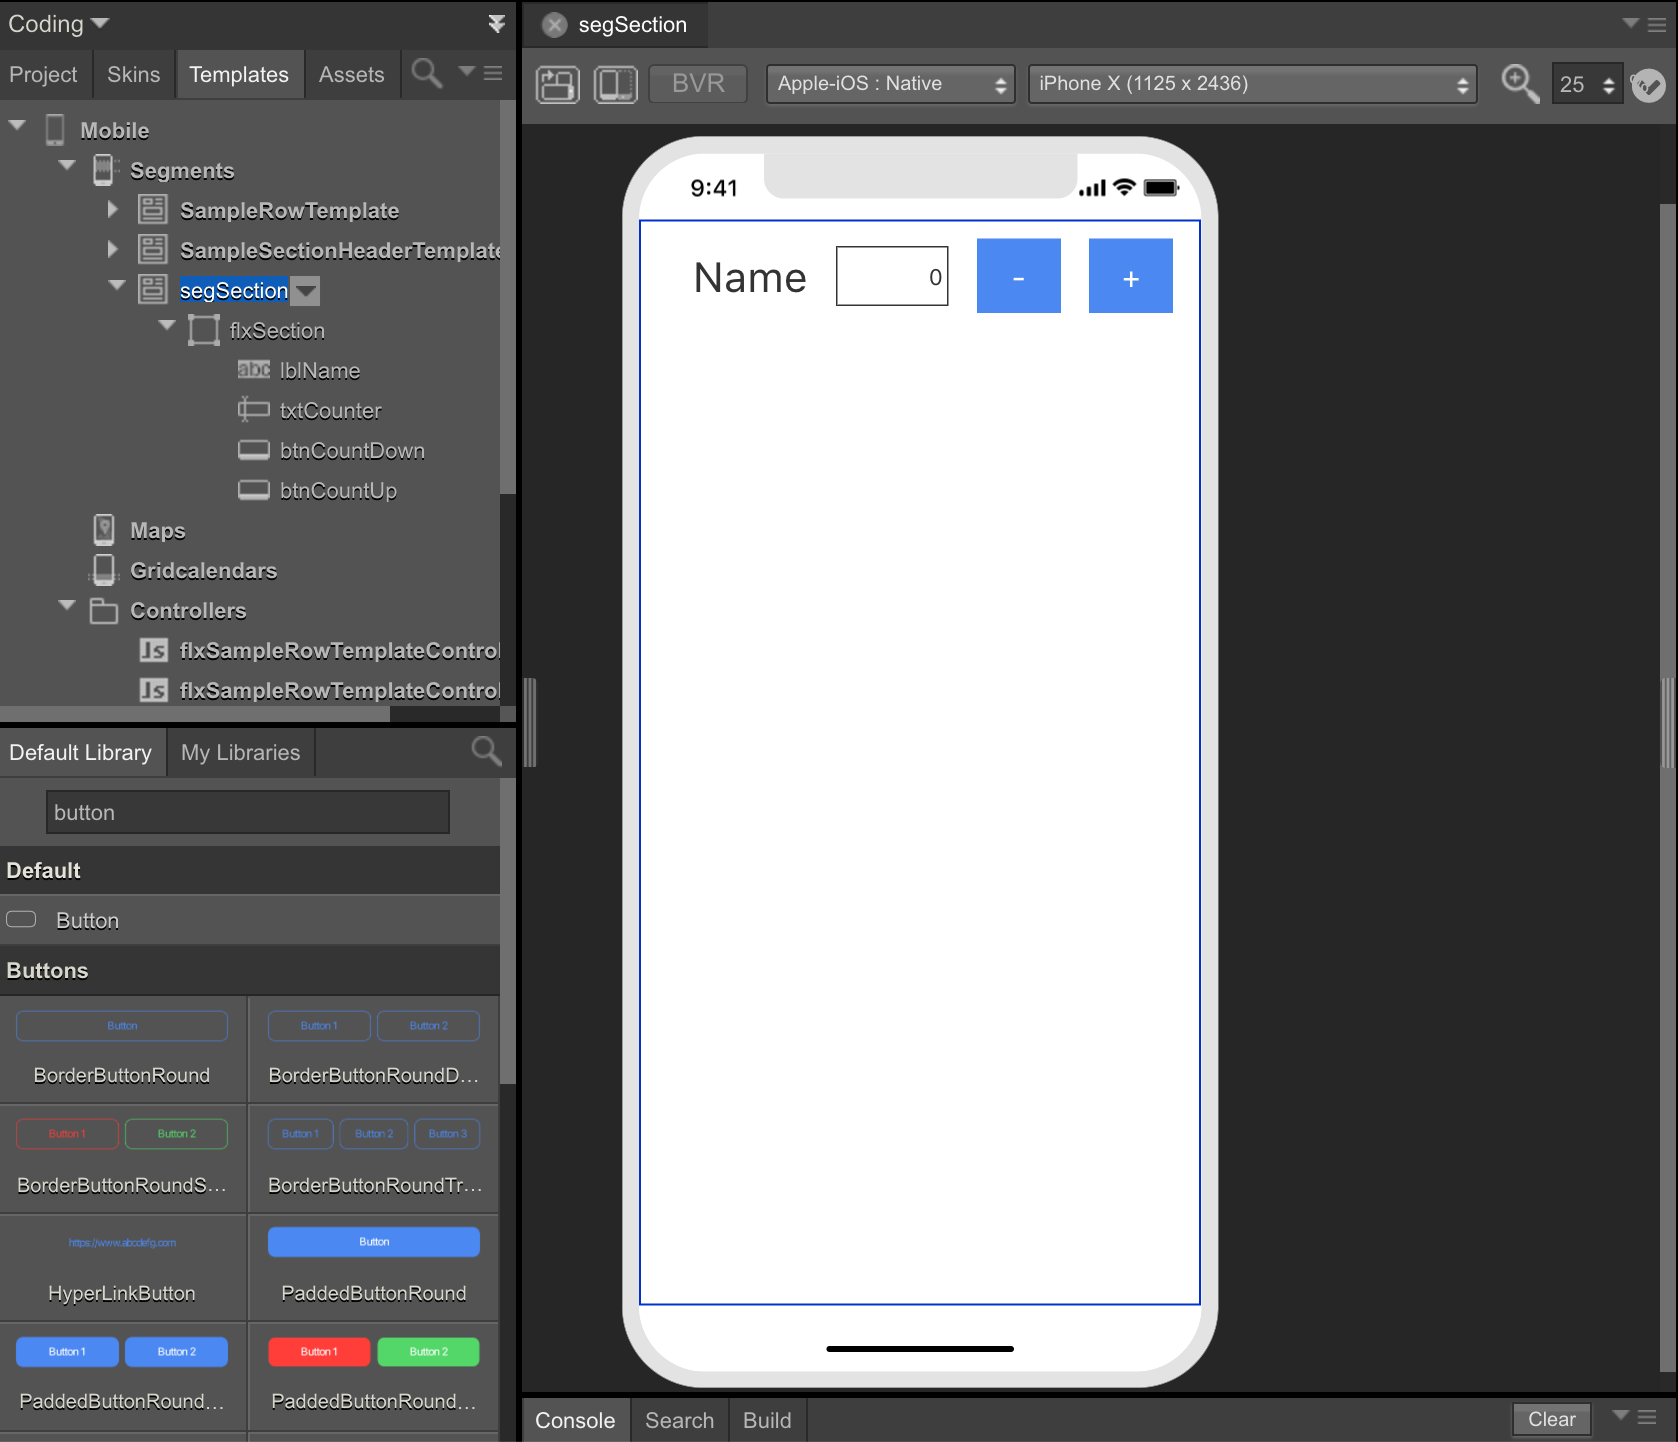
-
入力画面
項目名 オブジェクト 説明 frmInput Form 入力画面 flxInput FlexContainer グループ lblTitle Label タイトル segList Segment リスト btnOutput Button 出力ボタン 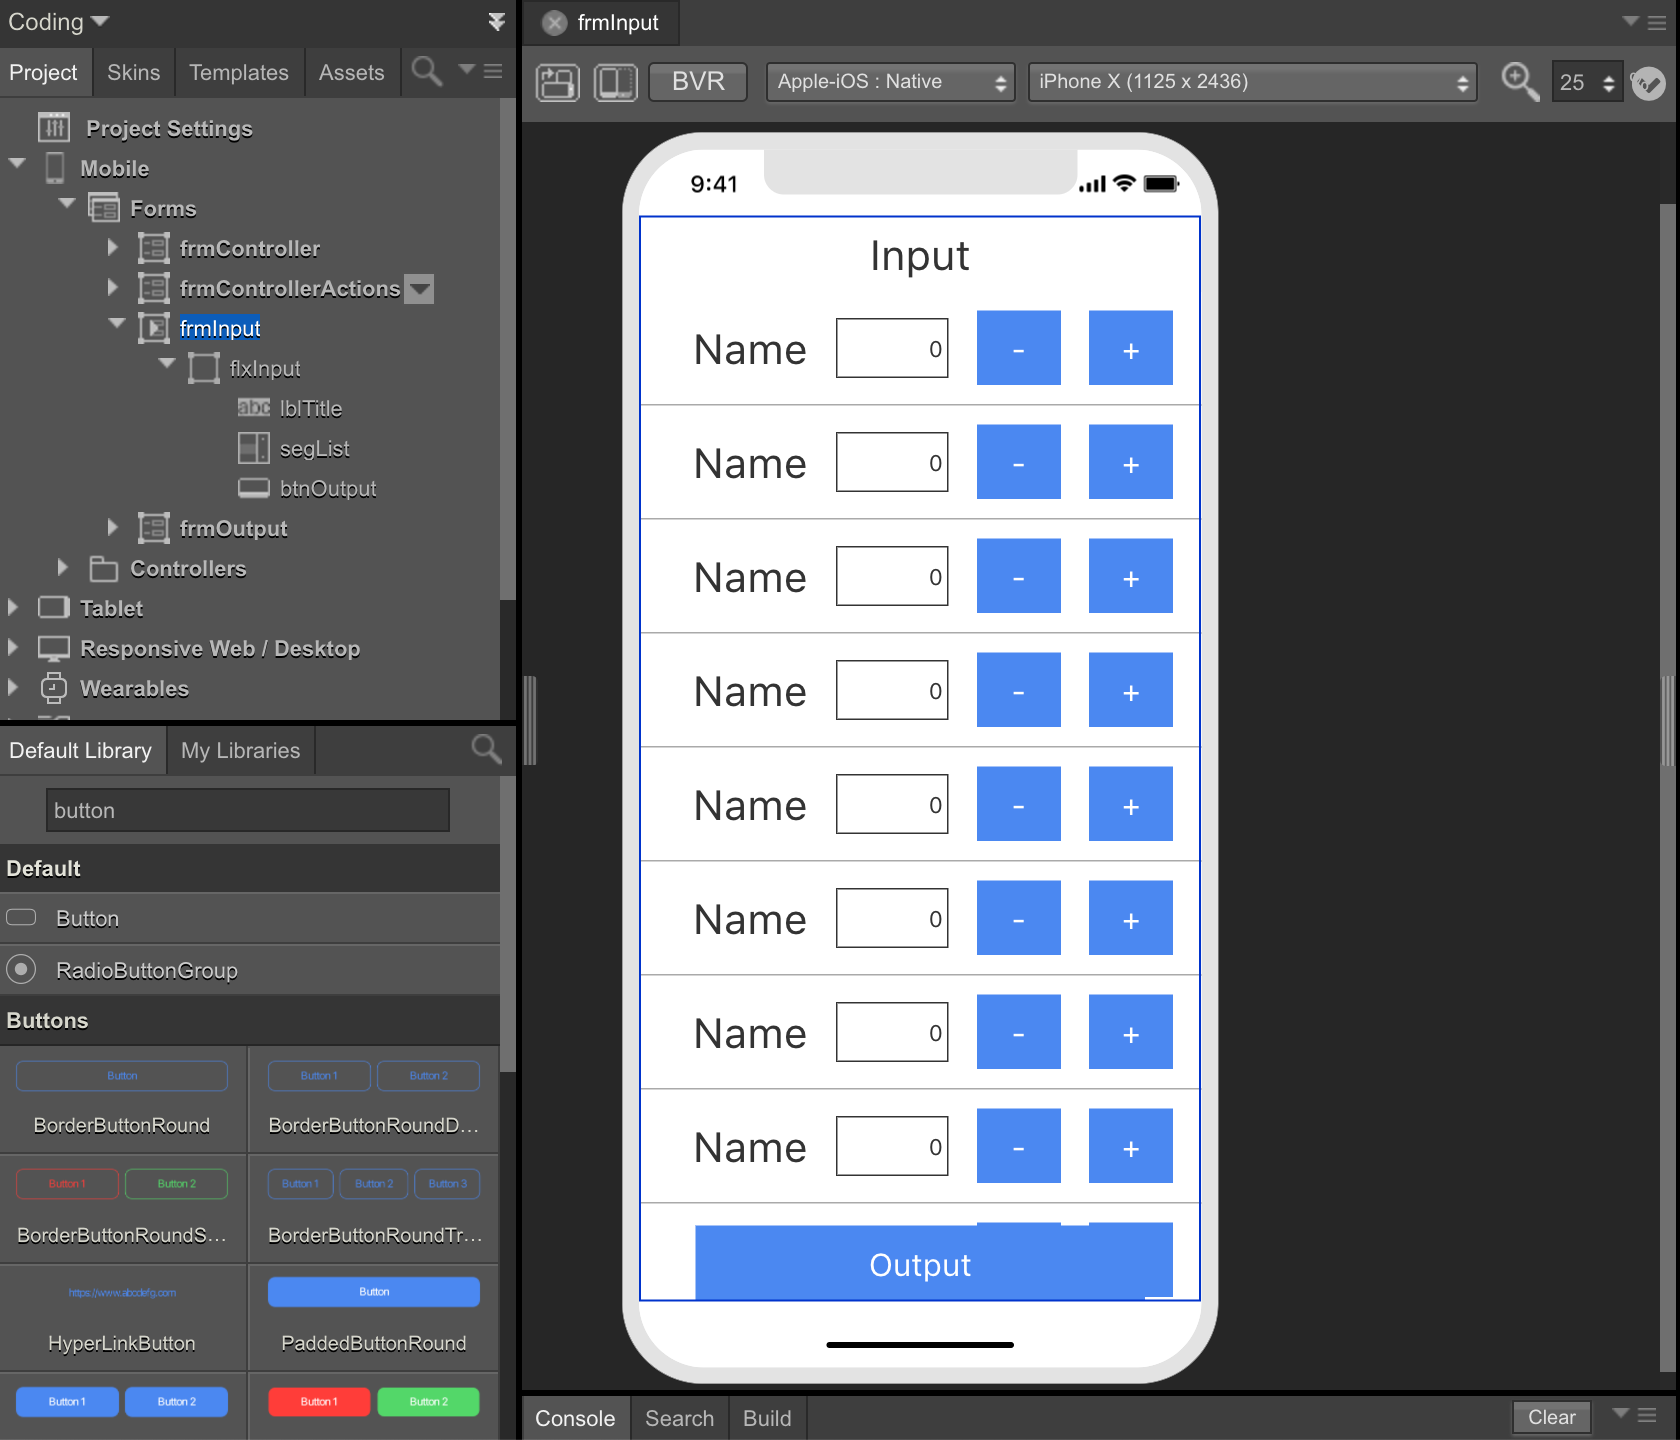
-
-
出力画面
項目名 オブジェクト 説明 frmOutput Form 出力画面 flxOutput FlexContainer グループ lblTitle Label タイトル lblResult Label 結果 btnBack Button 戻るボタン 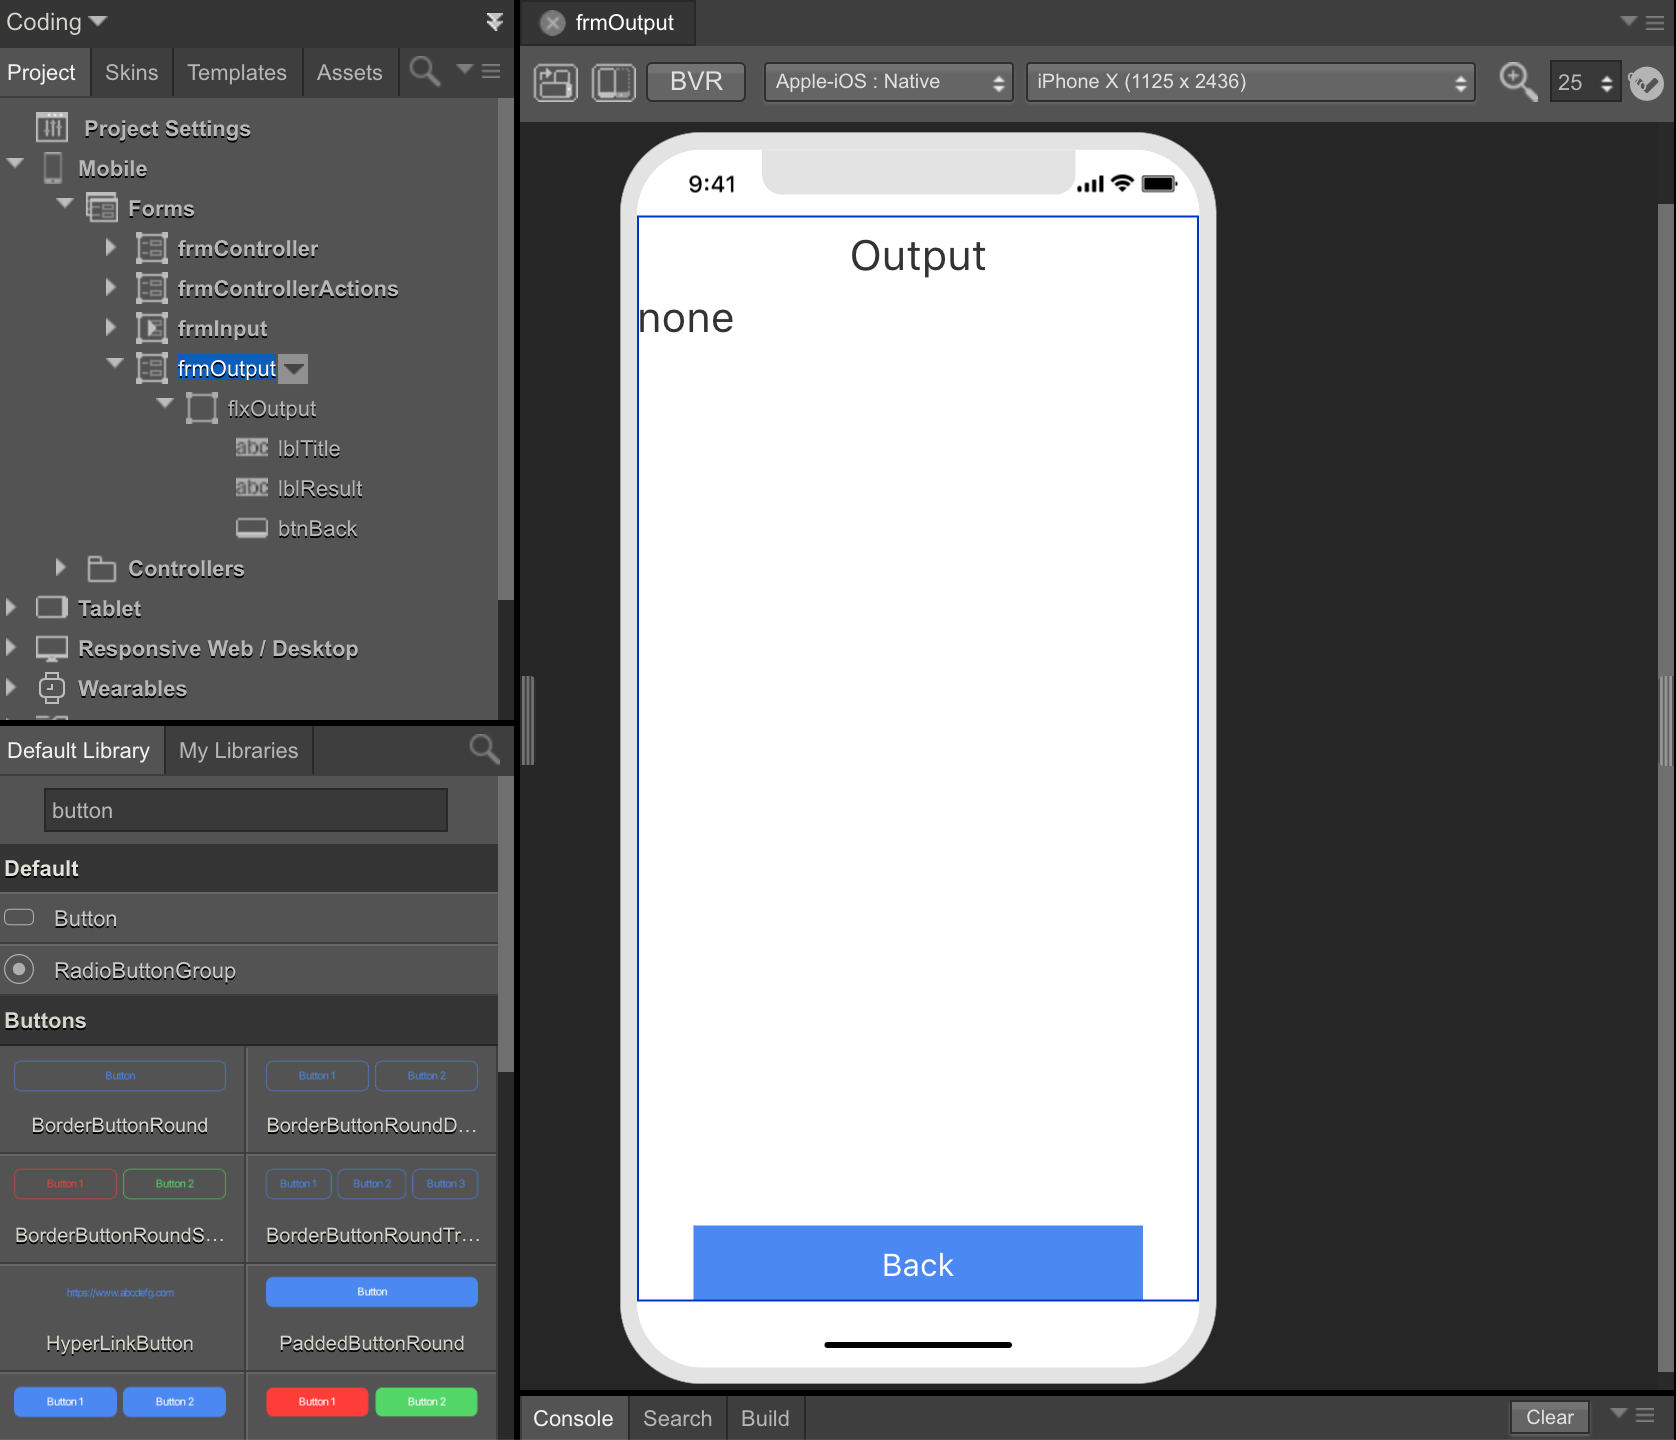
リストデータ初期化
-
Projectタブ -> Mobile -> Controllers ->
frmInputControllerをクリックしてdefineの中にデータを初期化するコードを書きます。frmInputController.initData.jsinitData: function() { this.view.segList.setData([ { lblName: { text: "Data1" }, txtCounter: { text: 0 }, btnCountDown: { onClick: this.countDown.bind(this) }, btnCountUp: { onClick: this.countUp.bind(this) } }, { lblName: { text: "Data2" }, txtCounter: { text: 0 }, btnCountDown: { onClick: this.countDown.bind(this) }, btnCountUp: { onClick: this.countUp.bind(this) } }, { lblName: { text: "Data3" }, txtCounter: { text: 0 }, btnCountDown: { onClick: this.countDown.bind(this) }, btnCountUp: { onClick: this.countUp.bind(this) } }, { lblName: { text: "Data4" }, txtCounter: { text: 0 }, btnCountDown: { onClick: this.countDown.bind(this) }, btnCountUp: { onClick: this.countUp.bind(this) } }, { lblName: { text: "Data5" }, txtCounter: { text: 0 }, btnCountDown: { onClick: this.countDown.bind(this) }, btnCountUp: { onClick: this.countUp.bind(this) } } ]); }, countDown: function(btn, context) { alert("rowIndex=" + context.rowIndex); }, countUp: function(btn, context) { alert("rowIndex=" + context.rowIndex); } -
Projectタブ -> Mobile -> Forms ->
frmInputをクリックします。次にPropertiesタブ -> ActionたタブのinitのEditをクリックします。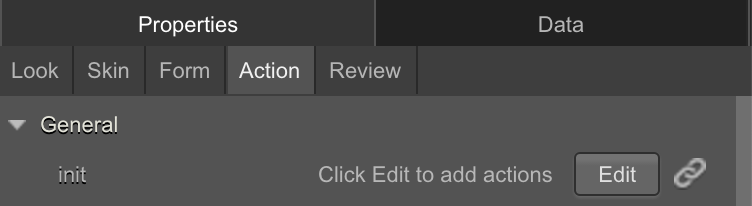
-
Functionsの中から
Invoke Functionをクリックします。次にFunction NameからinitDataを設定します。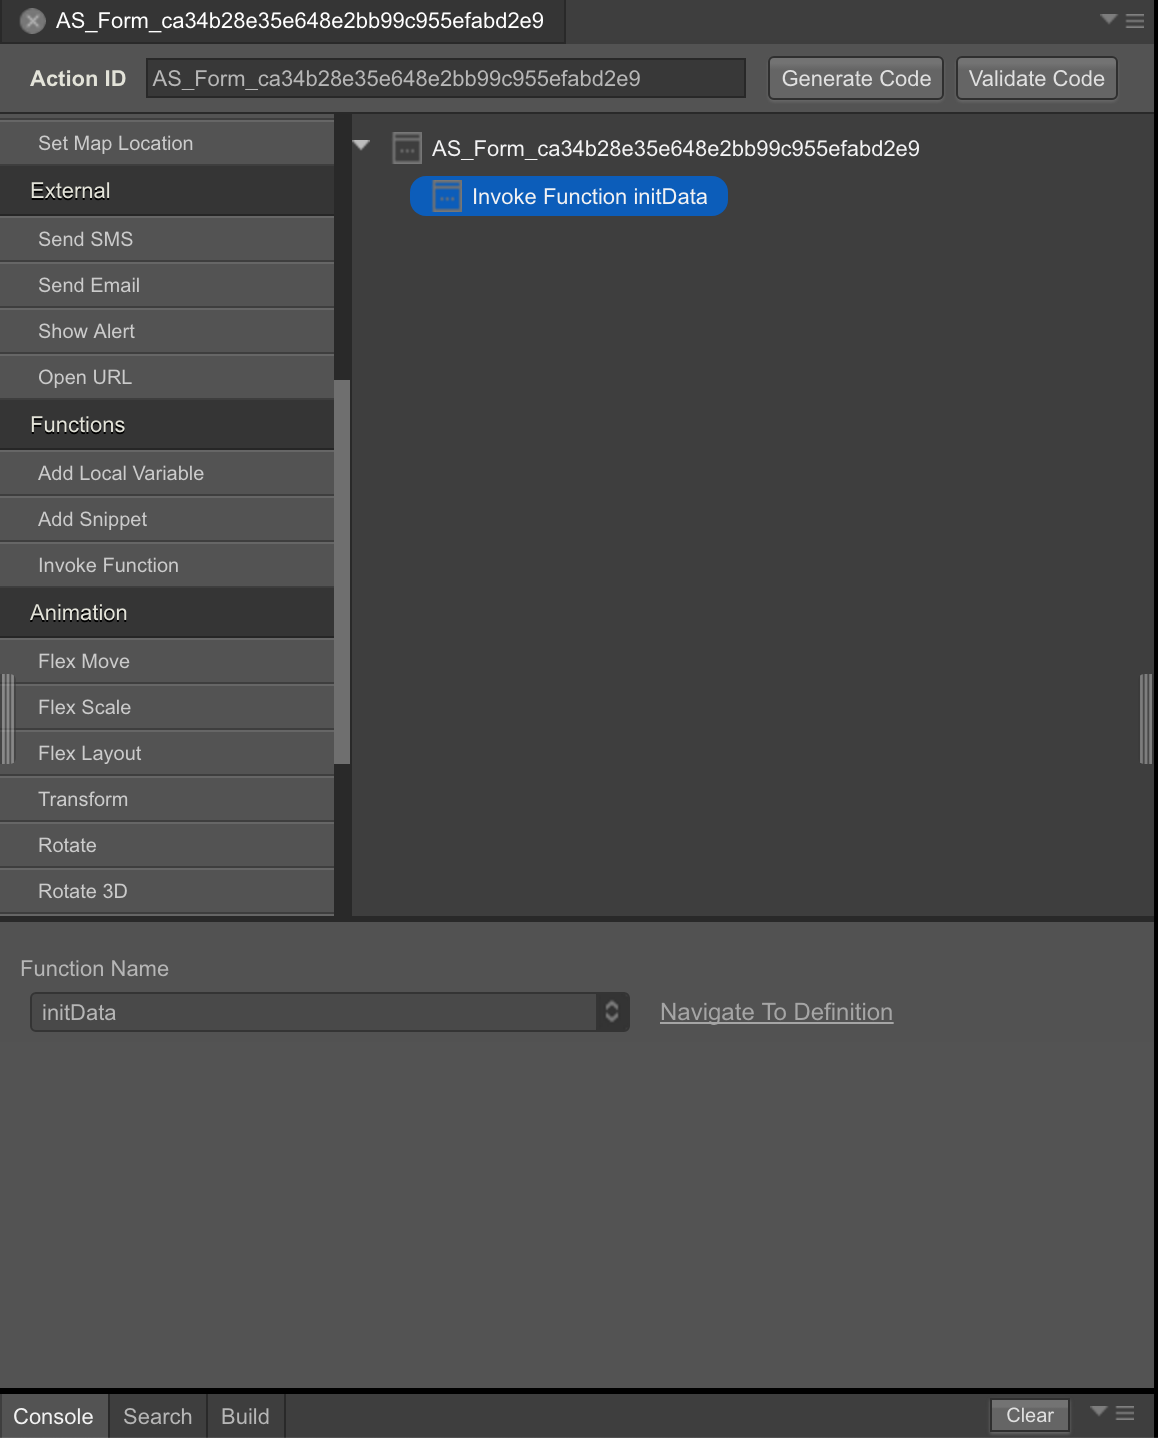
カウント処理
-
Projectタブ -> Mobile -> Controllers ->
frmInputControllerをクリックしてdefineの中にカウントダウンのコードを書きます。frmInputController.countDown.jscountDown: function(btn, context) { var rowIndex = context.rowIndex; var sectionIndex = context.sectionIndex; var rowData = context.widgetInfo.data[rowIndex]; if (Number(rowData.txtCounter.text) - 1 < 0) { return; } rowData.txtCounter.text = Number(rowData.txtCounter.text) - 1; context.widgetInfo.setDataAt(rowData, rowIndex, sectionIndex); } -
同様に
defineの中にカウントアップのコードを書きます。frmInputController.countUp.jscountUp: function(btn, context) { var rowIndex = context.rowIndex; var sectionIndex = context.sectionIndex; var rowData = context.widgetInfo.data[rowIndex]; if (Number(rowData.txtCounter.text) + 1 > 20) { return; } rowData.txtCounter.text = Number(rowData.txtCounter.text) + 1; context.widgetInfo.setDataAt(rowData, rowIndex, sectionIndex); }
出力処理
-
Projectタブ -> Mobile -> Controllers ->
frmInputControllerをクリックしてdefineの中に出力処理のコードを書きます。frmOutputをインスタンス化して、navigateで画面遷移とリストデータ(JSON)の引き渡しを実装します。frmInputController.viewOutput.jsviewOutput: function() { var frmOutput = new kony.mvc.Navigation("frmOutput"); frmOutput.navigate({data: this.view.segList.data}); } -
Projectタブ -> Mobile -> Controllers ->
frmOutputControllerをクリックしてdefineの中に出力処理のコードを書きます。onNavigateで画面遷移のイベントを受け取り、引き渡されたデータ(JSON)を加工して出力します。frmOutputController.onNavigate.jsonNavigate: function(params) { this.view.lblResult.text = "none"; for (var data of params.data) { if (Number(data.txtCounter.text) === 0) { continue; } if (this.view.lblResult.text == "none") { this.view.lblResult.text = data.lblName.text; } else { this.view.lblResult.text += "\n" + data.lblName.text; } this.view.lblResult.text += "\t : " + data.txtCounter.text; } } -
Projectタブ -> Mobile -> Forms -> frmInput ->
btnOutputをクリックします。次にPropertiesタブ -> ActionたタブのonClickのEditをクリックします。 -
Functionsの中から
Invoke Functionをクリックします。次にFunction NameからviewOutputを設定します。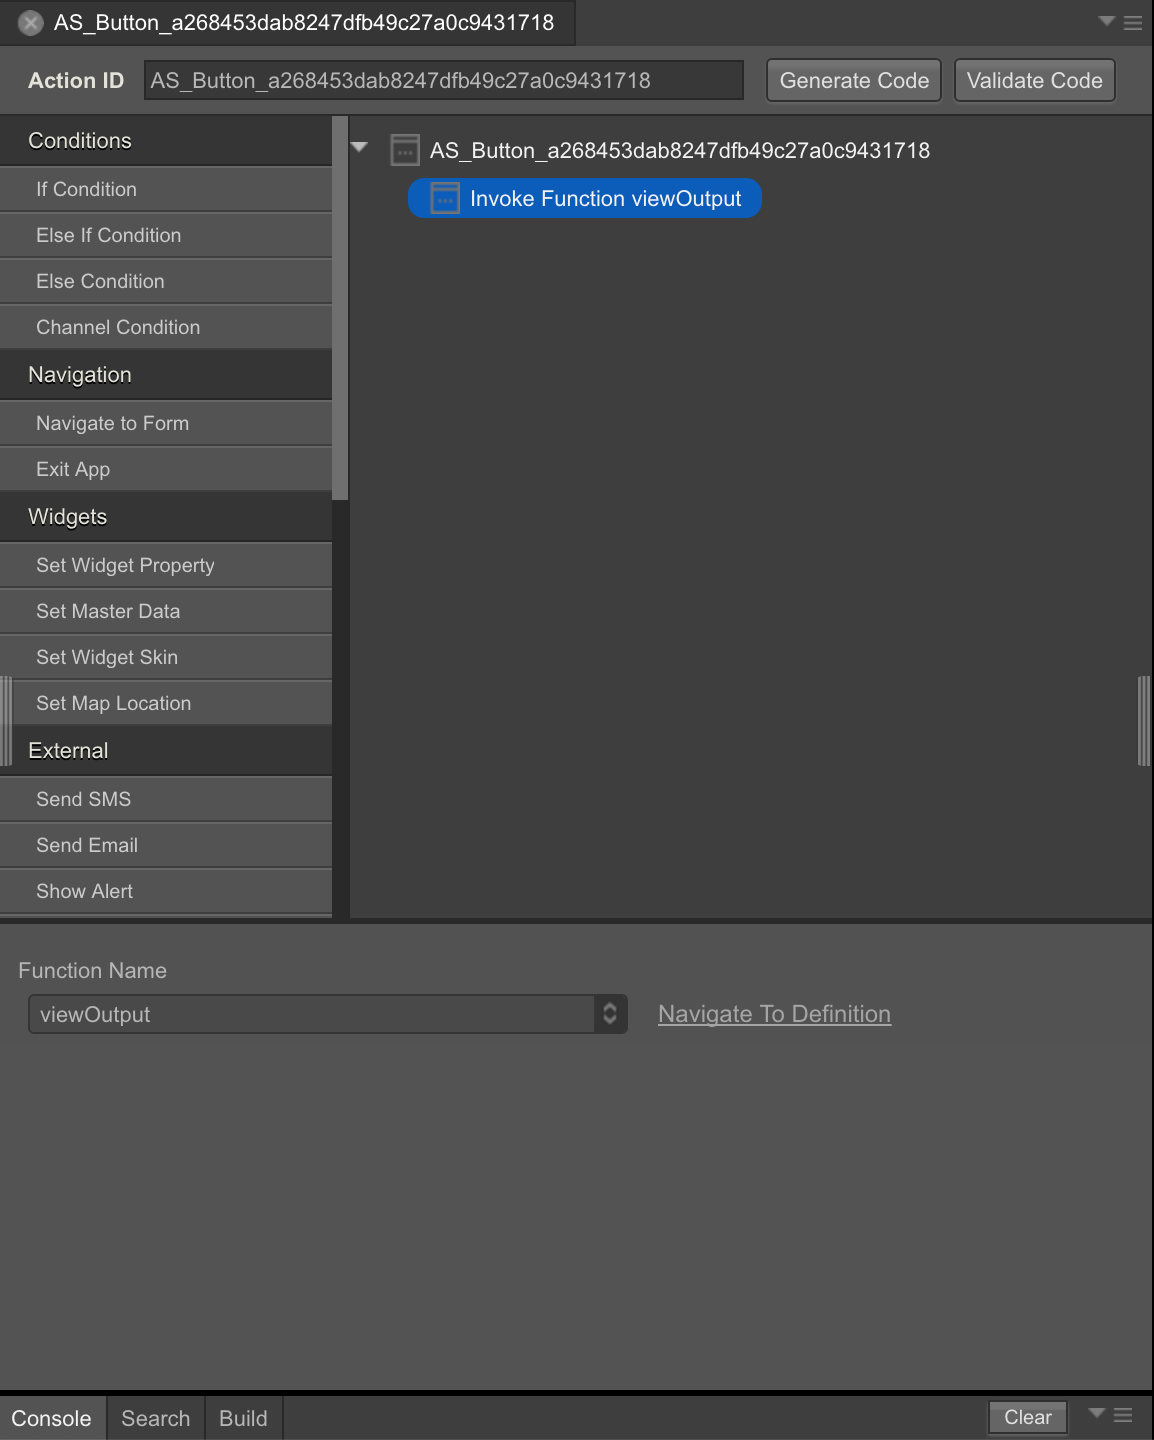
-
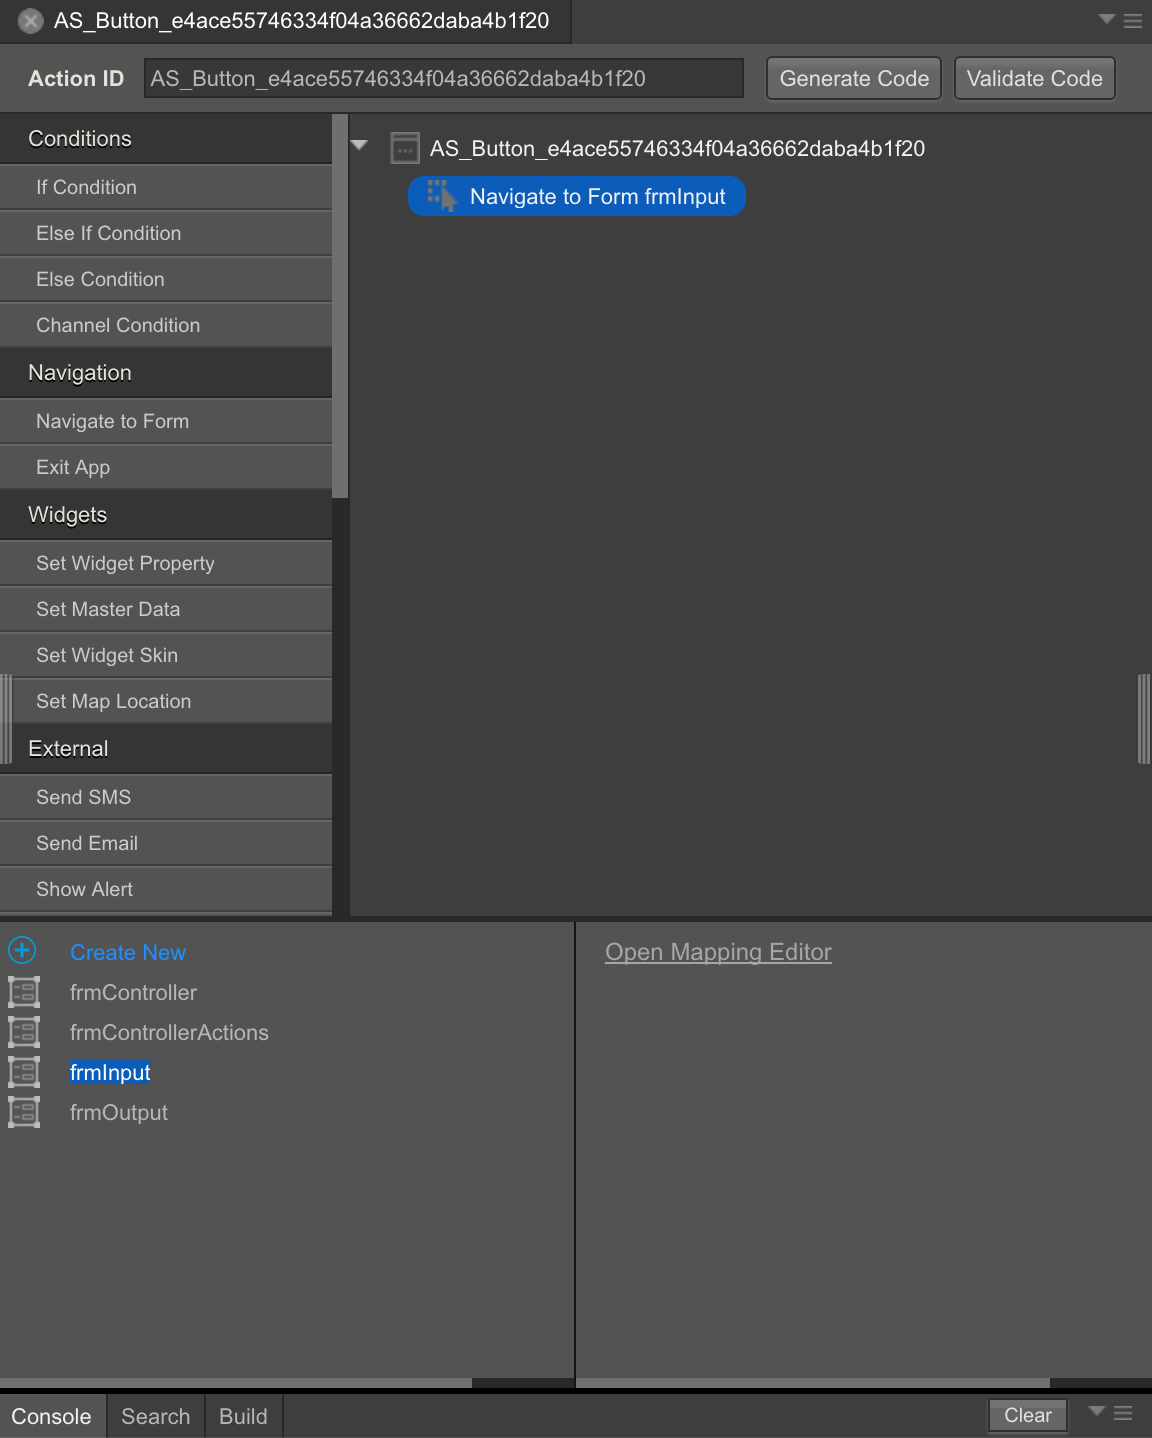
Projectタブ -> Mobile -> Forms -> frmOutput ->
btnBackをクリックします。次にPropertiesタブ -> ActionたタブのonClickのEditをクリックします。 -
Navigationの中から
Navigate to Formをクリックします。次にfrmInputを設定します。