on-host Integrationsを使うと、ApacheやMySQLなどのメトリクスを収集して、ミドルウェアレベルでの問題切り分けやパフォーマンスなどの分析ができるようになります。
on-host Integrationsとは
on-host IntegrationsはNew Relic Infrastructure エージェントをインストールすることで利用でき、多くの3rd Party ソフトウェアの独自のデータをNew Relicに送って、監視することができます。
on-host Integrationsで対応しているサービスは以下サイトでご確認いただけます。
MySQL Integrationのセットアップは以下記事が参考になります。
Infrastructure エージェントのインストール方法は以下Qiitaブログが参考になります。
on-host Integrationsは、Infrastructure エージェントをインストールした後に、統合したい3rd Party ソフトウエアに対応したパッケージをインストール(例えば、Linux環境のApacheを統合する場合は、yum install nri-apacheでインストール)します。
試してみよう
今回はApacheのステータスをon-host Integrationsで取得する設定を試してみます。
インストール前の事前チェック
New Relicの管理画面にログインし、「+ Integrations & Agents」を選択->「Apache」を選択します。

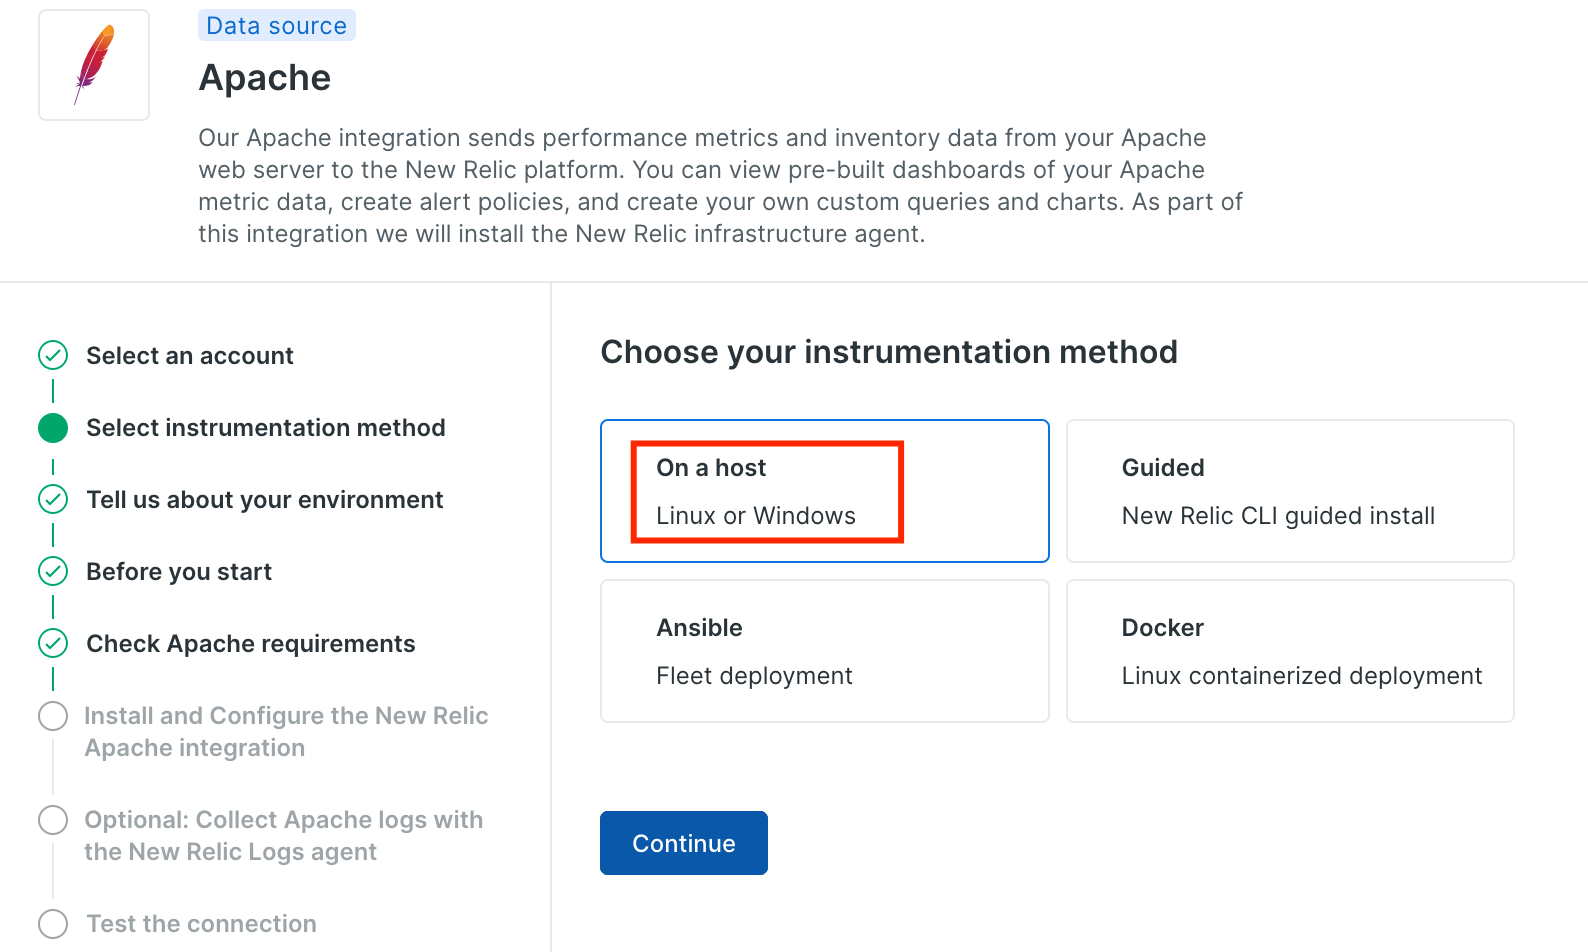
セットアップ方法は今回は「On a host」を選択します。Ansibleでセットアップしたり、New RelicのCLIを使ったセットアップ方法なども選択できます。
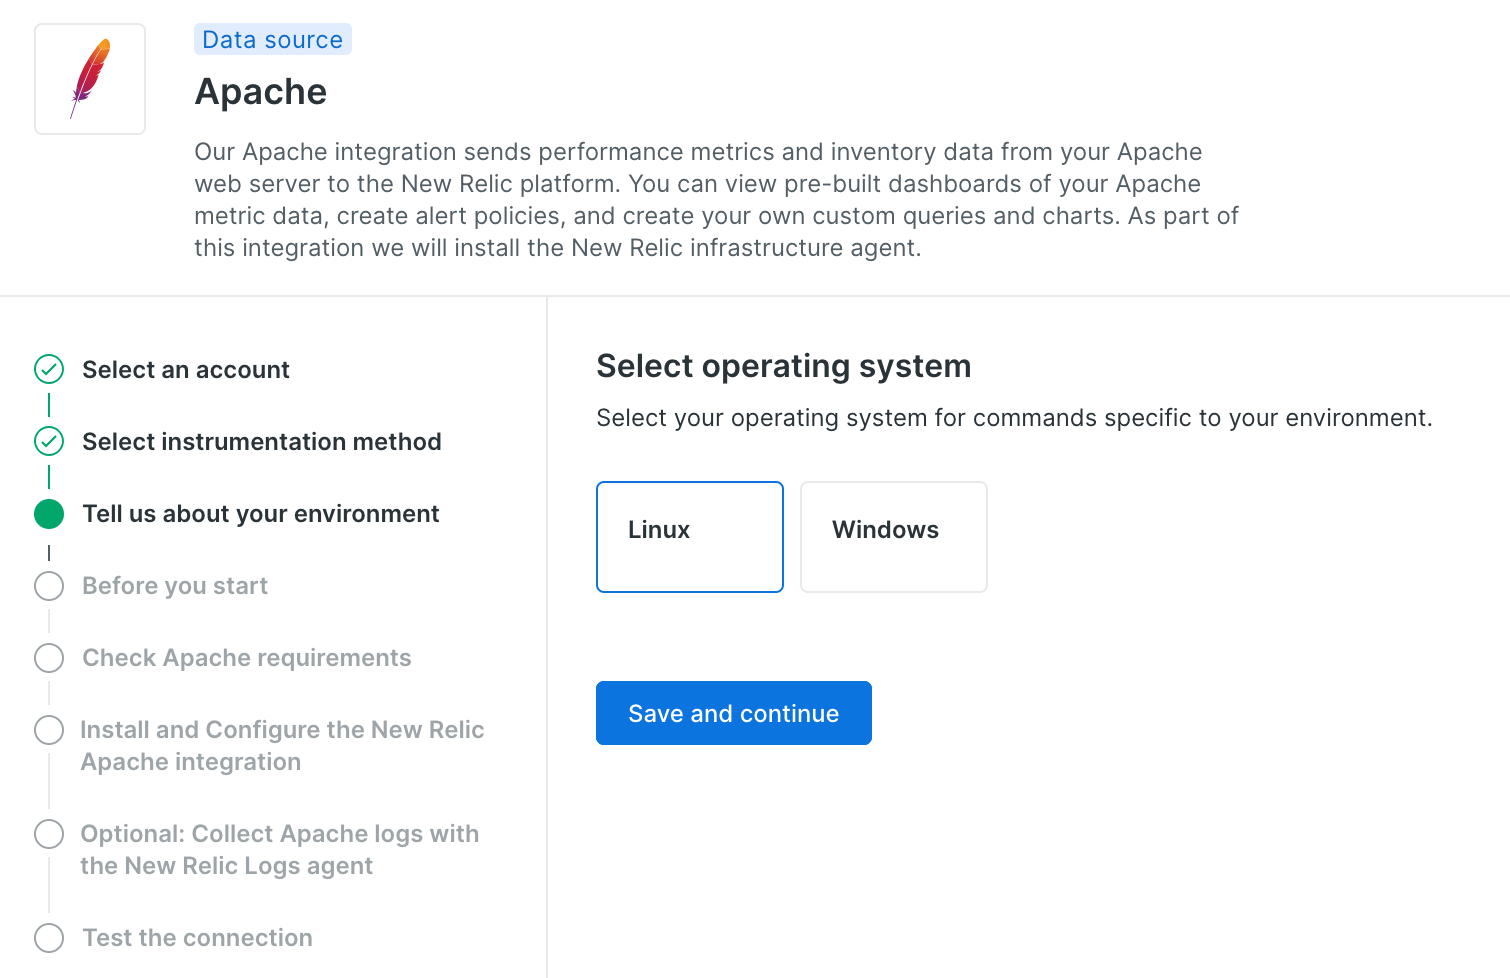
セットアップするOSを選択します。今回はLinuxを選択します。
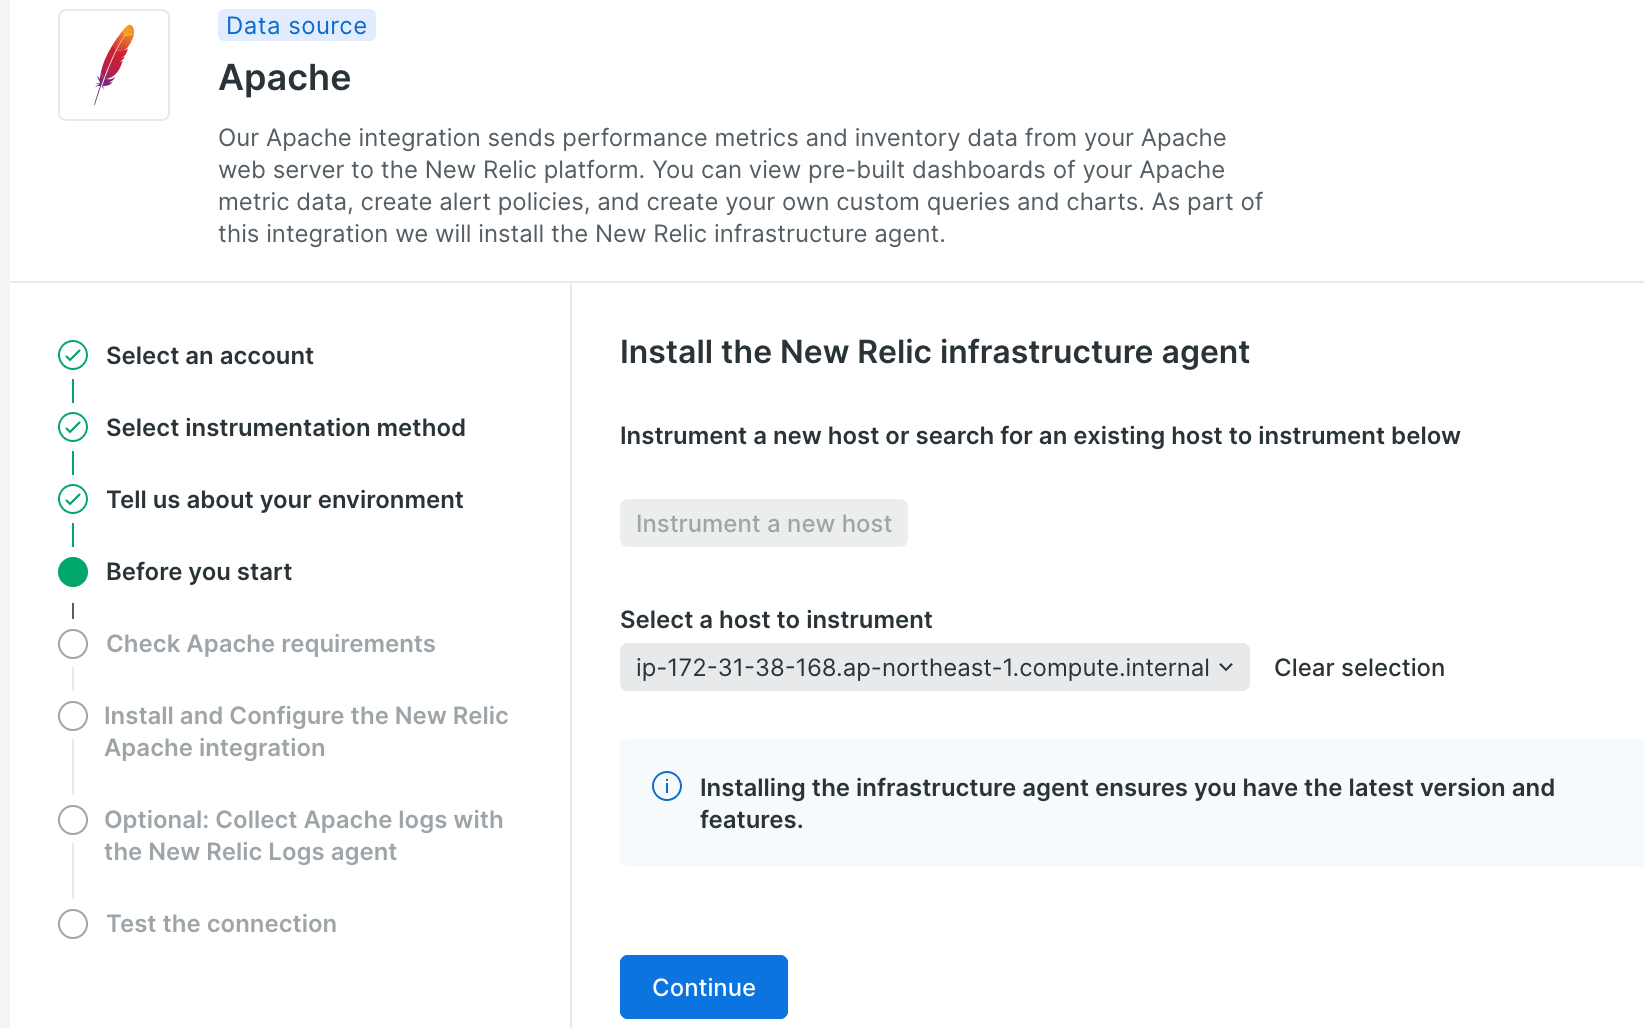
InfraStracture エージェントが入っている対象ホストを選択します。InfraStracture エージェントをインストールする場合、「Instrument a new host」をクリックすると、画面でガイドを受けながらエージェントをインストールすることもできます。
セットアップする環境がセットアップ要件を満たしているか確認していきます。
IntegrationがサポートしているApacheのバージョン(2.2 or 2.4)を使用しているか確認します。

# /usr/sbin/apachectl -v | grep version
Server version: Apache/2.4.62 (Amazon Linux)
OSがTLS1.2以上をサポートしているか確認します。
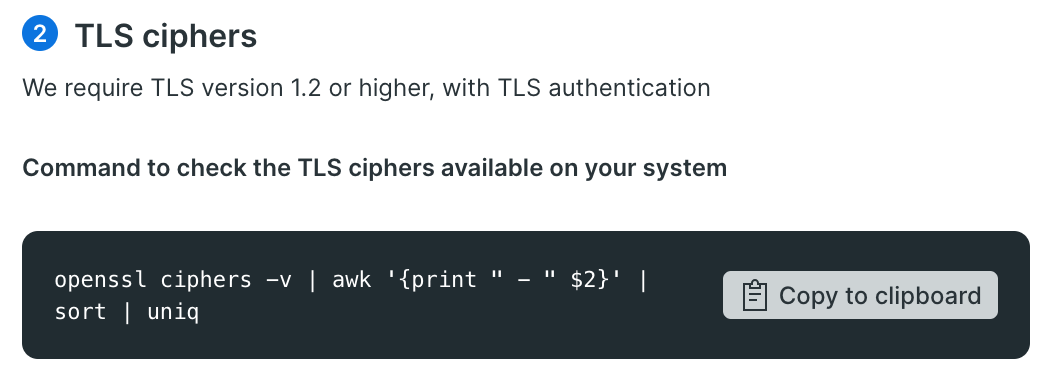
# openssl ciphers -v | awk '{print " - " $2}' | sort | uniq
 - SSLv3
 - TLSv1
 - TLSv1.2
 - TLSv1.3
Apacheのステータスを取得するのに利用するモジュール(mod_status)が有効になっているか確認します。
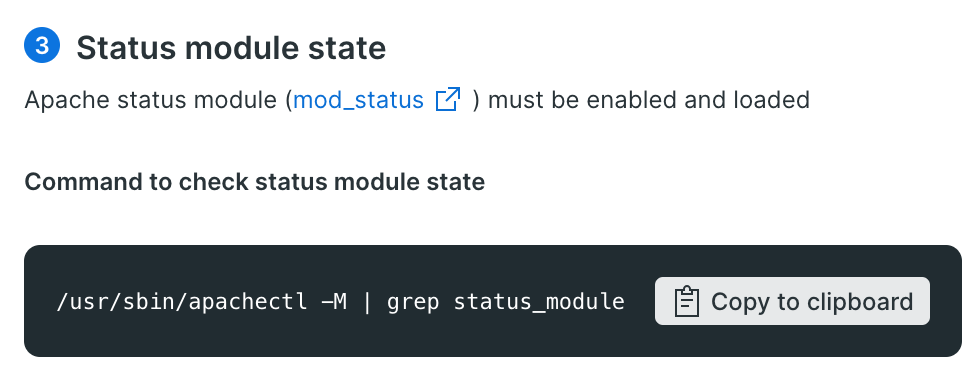
環境によってはガイド画面に出ているapachectlコマンドでモジュール情報を取得できないケースがあるので、環境にあわせて実行するコマンドを変えてください。
# /usr/sbin/httpd -M | grep status_module
 status_module (shared)
# /usr/sbin/apachectl -M | grep status_module
 status_module (shared)
Apacheのon-host IntegrationsはNew Relic InfrastructureエージェントがポーリングでApacheのステータスを取得するエンドポイントにGetリクエストを送ってデータを取得する方式になっています。
④のステップでApacheのステータスを取得できるエンドポイントにon-host IntegrationsをセットアップしているOSからアクセスできるか確認します。
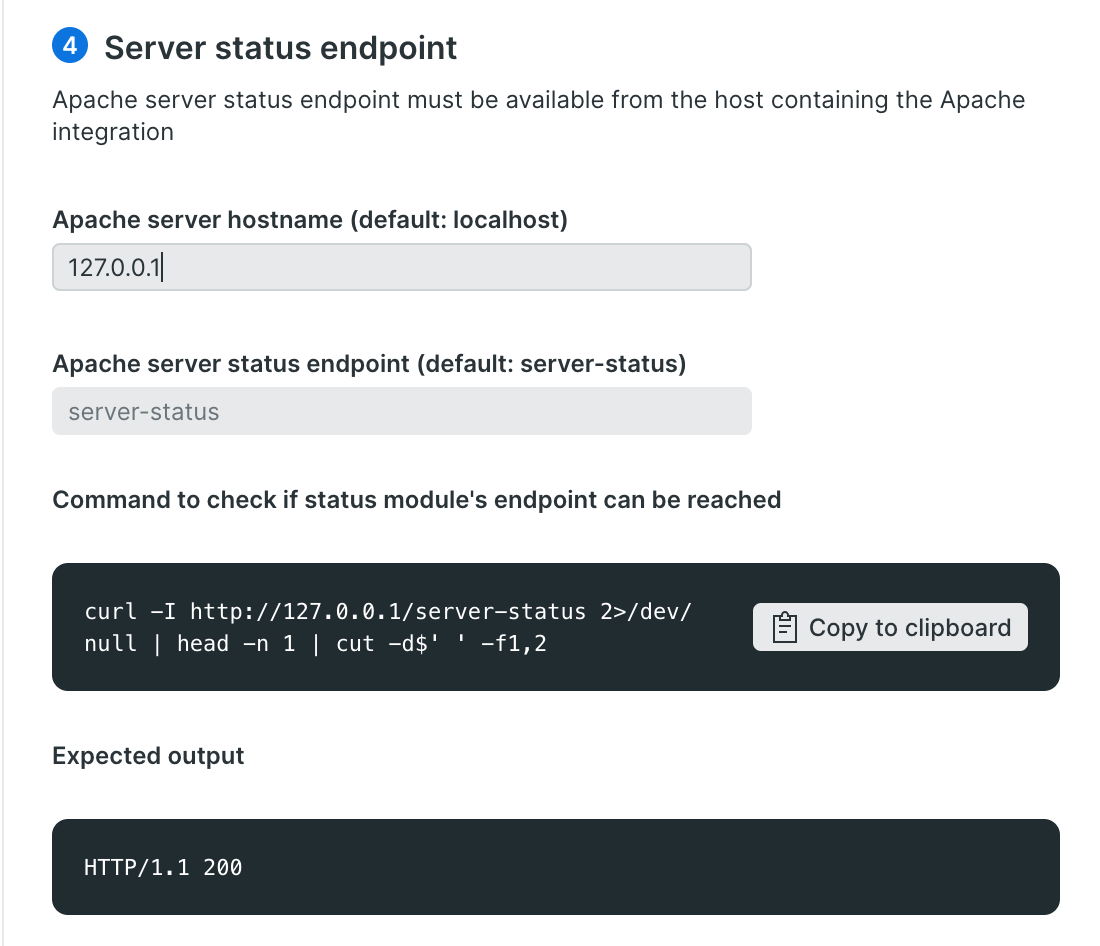
curl -I http://127.0.0.1/server-status 2>/dev/null | head -n 1 | cut -d$' ' -f1,2
HTTP/1.1 200
インストール
Integrationをインストールする環境のOSを選択します。今回はCentOSを選択します。

ガイドで表示されたインストールコマンドをOS内で実行します。

Integrationの構成ファイルを画面上でコピーもしくはDLしてガイドされているサーバーの所定のディレクトリに配置します。Apache Integrationの設定例については公式ドキュメントをご確認ください。今回は画面上で生成されたデフォルト値を設定します。

integrations:
- name: nri-apache
  env:
    METRICS: "true"
    INVENTORY: "true"
    # status_url is used to identify the monitored entity to which the inventory will be attached.
    STATUS_URL: http://127.0.0.1/server-status?auto

    # binary_path is used to specify the path of the apache binary file (i.e. "C:\Apache\bin\httpd.exe").
    # By default the integration automatically discovers the binary on "/usr/sbin/httpd" or "/usr/sbin/apache2ctl". Use this setting for any other location.
    # BINARY_PATH: ""

    # Alternative Certificate Authority bundle directory and file
    # CA_BUNDLE_DIR: ""
    # CA_BUNDLE_FILE: ""
    # Set this to false if you want to avoid certificate validation
    # VALIDATE_CERTS: true

    # New users should leave this property as `true`, to identify the
    # monitored entities as `remote`. Setting this property to `false` (the
    # default value) is deprecated and will be removed soon, disallowing
    # entities that are identified as `local`.
    # Please check the documentation to get more information about local
    # versus remote entities:
    # https://github.com/newrelic/infra-integrations-sdk/blob/master/docs/entity-definition.md
    REMOTE_MONITORING: true
  interval: 15s
  labels:
    env: production
    role: load_balancer
  inventory_source: config/apache
構成ファイルを配置後、正しく設定されているかコマンドで確認します。
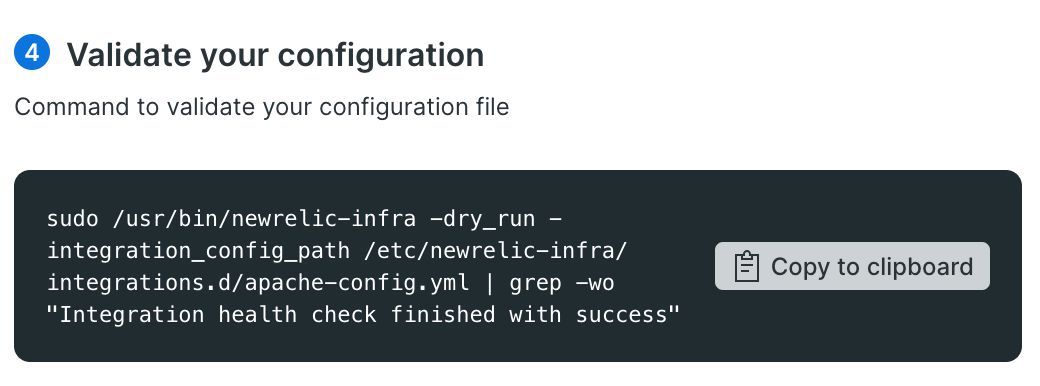
sudo /usr/bin/newrelic-infra -dry_run -integration_config_path /etc/newrelic-infra/integrations.d/apache-config.yml | grep -wo "Integration health check finished with success"
Integration health check finished with success
「Integration health check finished with success」が返ってくればOKです。
オプションでApacheのログを転送する設定を行います。

# Log forwarder configuration for Apache logs.
# Apache installations can vary. Use the appropriate
# log file location for your environment / installation
#
# Once data is being collected, logs can be seen at:
#   1) https://one.newrelic.com > Explorer or Infrastructure > Hosts > (select an entity) > Logs
#   2) https://one.newrelic.com/launcher/logger.log-launcher
logs:
  - name: apache_access
    file: /var/log/httpd/access_log
    # file: /var/log/apache/access.log
    # file: /var/log/apache2/access.log
    # file: /etc/httpd/log/access_log
    attributes:
      logtype: apache

  - name: apache_error
    file: /var/log/httpd/error_log
    # file: /var/log/apache/error.log
    # file: /var/log/apache2/error.log
    # file: /etc/httpd/log/error_log
    attributes:
      logtype: apache_error
「Test connection」を選択して、データがNew Relicに届いていることを確認します。これでセットアップ完了です!

データを確認しよう
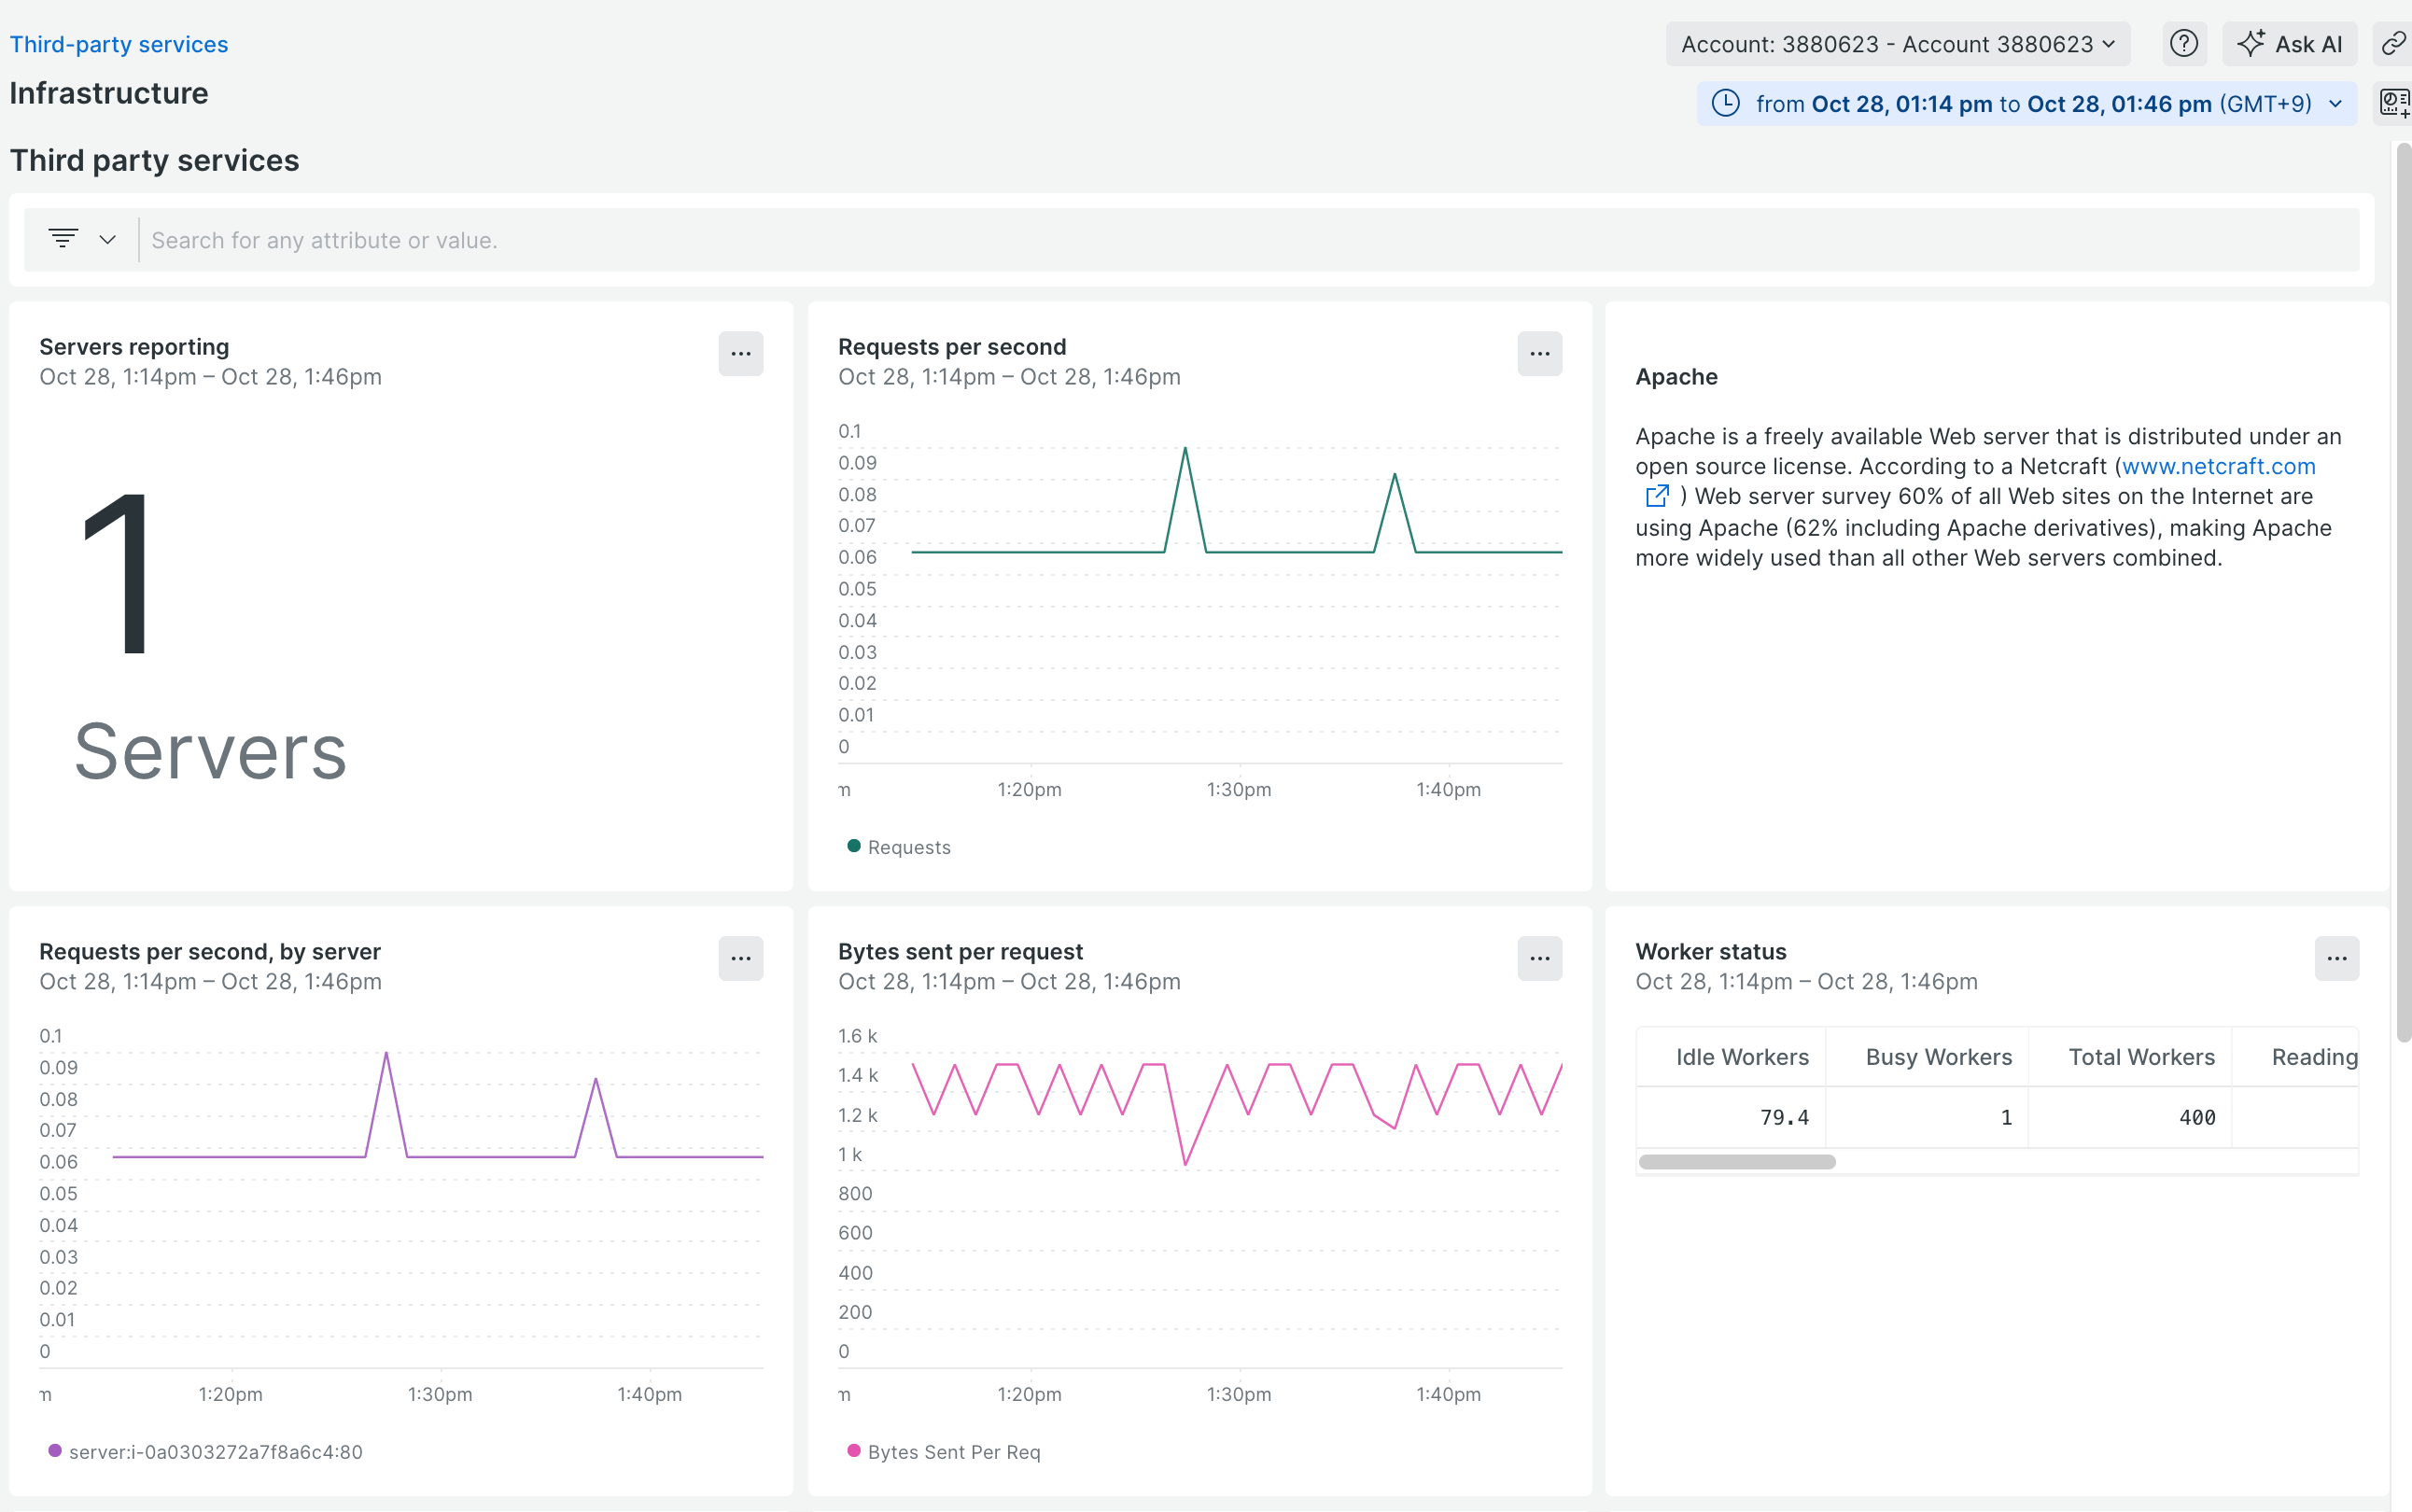
「Infrastructure」→「Third-party services」→「Apache Dashboard」を選択します。
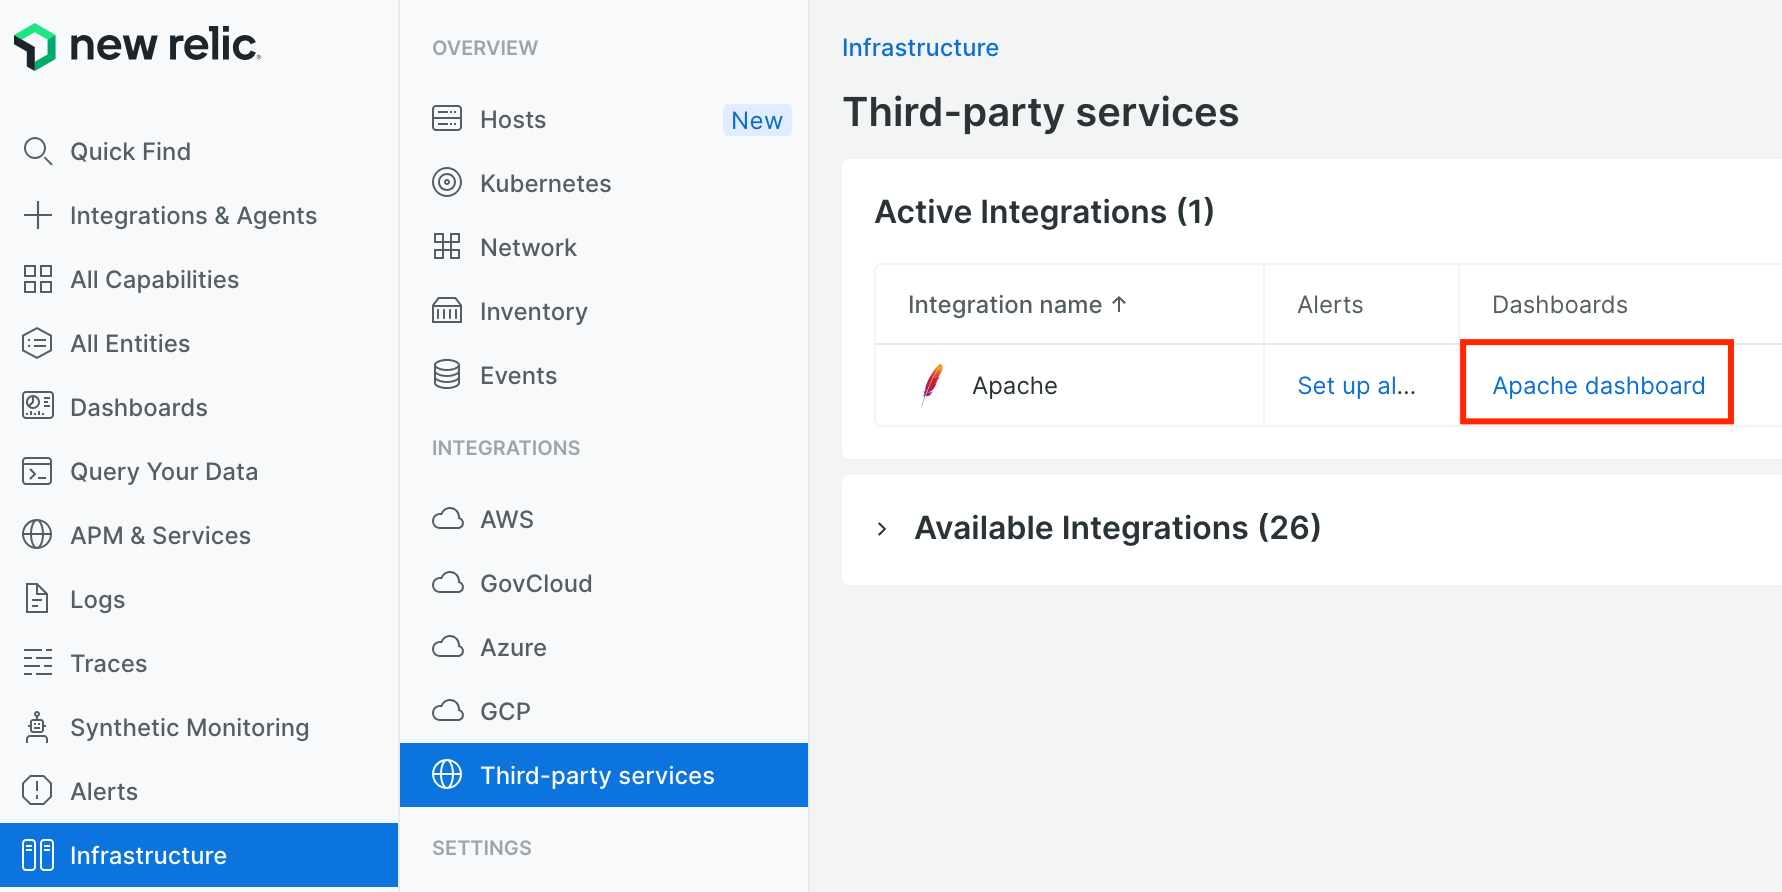
セットアップしたApacheのステータスをすぐに分析できるダッシュボードが表示されました。on-host Integrationsでセットアップしたデータはビルドインのダッシュボードですぐにデータが可視化されるので、セットアップ終えてすぐにダッシュボードを使ったカスタムデータの分析ができるようになっています。
本記事ではon-host Integrationsを使ってApacheのステータスをNew Relicに送って、可視化するまでの流れを紹介しました。Webアプリケーションの運用ではインフラやアプリケーションの監視だけでなく、Webサーバーのソフトウエア(Apache、Nginxなど)のステータスを監視するのもWebアプリケーションのパフォーマンスや稼働状況を確認するうえで重要になります。簡単にセットアップできますので、是非お試しください!
その他
New Relicでは、新しい機能やその活用方法について、QiitaやXで発信しています!
無料でアカウント作成も可能なのでぜひお試しください!
New Relic株式会社のX(旧Twitter) や Qiita OrganizationOrganizationでは、
新機能を含む活用方法を公開していますので、ぜひフォローをお願いします。
無料のアカウントで試してみよう!
New Relic フリープランで始めるオブザーバビリティ!