背景、動機
React NativeでiOSアプリを環境ごとに共存させる
上記の記事に続いて、Androidでも同様にステージング環境を新たに作成し、各環境ごとのアプリを1つの端末に共存させるようにします。
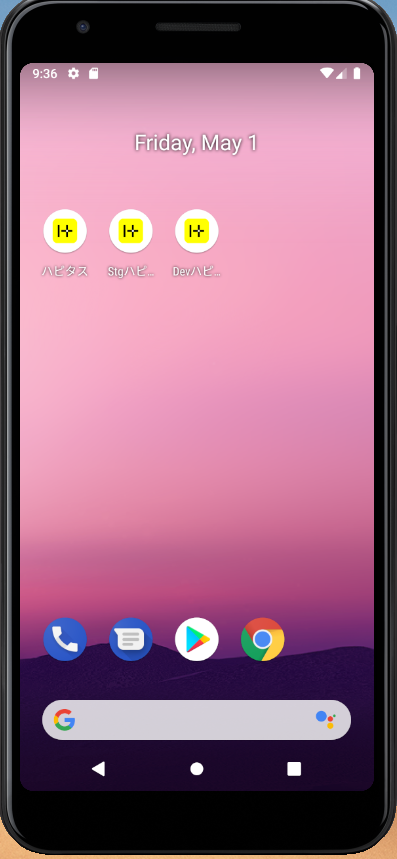
目指す姿
以下のように、1つの端末に各環境のアプリを別名で共存させます。
手順
-
app/build.gradleの buildTypes にstagingを追加。 -
debugとstagingのapp_nameを変更。
1. app/build.gradleの buildTypes にstagingを追加。
1-1. buildTypes にstagingを追加。
app/build.gradleファイルを開き、buildTypes にstagingを追加します。
端末にアプリを共存させるために、applicationIdSuffixをdebugにも追加してください。
// app/build.gradle

    buildTypes {
        debug {
            signingConfig signingConfigs.debug
            applicationIdSuffix ".dev"         // 1. debugビルドを別名アプリにするため、suffixを追加する。
        }
        staging {                              // 2. ステージング環境用のbuildTypeを追加する。
            initWith release                   // 3. Releaseをベースにする。
            signingConfig signingConfigs.debug // 4. signingConfigはdebugを指定する。
            matchingFallbacks = ['release']    // 5. React関連を含む外部ライブラリがreleaseのbuildTypeを使うように。
            applicationIdSuffix ".stg"         // 6. stagingビルドを別名アプリにするため、suffixを追加する。
        }
        release {
            ...
        }
    }
1-2. Reactのステージング用設定を追加
project.ext.react = [
    bundleInStaging: true,      // 1. bundleInStagingをtrueに。
    devDisabledInStaging: true, // 2. devDisabledInStagingをtrueに。
    entryFile: "index.js",
    enableHermes: false,
]
1-3. Hermesの設定でstagingImplementationを追加
    if (enableHermes) {
        def hermesPath = "../../node_modules/hermes-engine/android/";
        debugImplementation files(hermesPath + "hermes-debug.aar")
        stagingImplementation files(hermesPath + "hermes-release.aar") // 1. stagingImplementationを追加
        releaseImplementation files(hermesPath + "hermes-release.aar")
    } else {
        implementation jscFlavor
    }
2. debugとstagingのapp_nameを変更
app/src/debugをコピーしてapp/src/stagingを作成します。
app/src/debug/res/values/strings.xmlと、
app/src/staging/res/values/strings.xmlを以下のように修正します。
<!-- // app/src/debug/res/values/strings.xml -->
<resources>
    <string name="app_name">Dev Your App Name</string>
</resources>
<!-- // app/src/staging/res/values/strings.xml -->
<resources>
    <string name="app_name">Stg Your App Name</string>
</resources>
端末にインストールする
- Android 端末を PC に接続し、Android Studio を起動します。
- [Build] -> [Select Build Variant...]を選択し表示されたウィンドウから
debugもしくはstagingを選択しビルドしてください。 -
debugを選択しビルドを実行するとアプリ名にDevが追加されたものが、stagingwp選択しビルドを実行するとStgが追加されたものがインストールされます。
releaseを選択した場合は今までと同じように、アプリ名に何も追加されずインストールできます。